English FAQ
Migareferencestats V2
Migastats v2 is a robust system crafted to collect and analyze the referrer’s statistics. The Side Menu Module is a powerful feature that delivers detailed insights into essential metrics like the total number of referrers, performance of referrer ratings of the referrers, reports submitted, no of deals, commission paid/pending, and success rate. This data is displayed through visually engaging graphs, Tables ensuring a user-friendly interface for efficient statistical analysis.
Users can download the report in the form of a PDF when click on![]() it.
it.

1. GENERAL STATS
The stats that explain the overall statistics analysis of the App like the number of Referrers
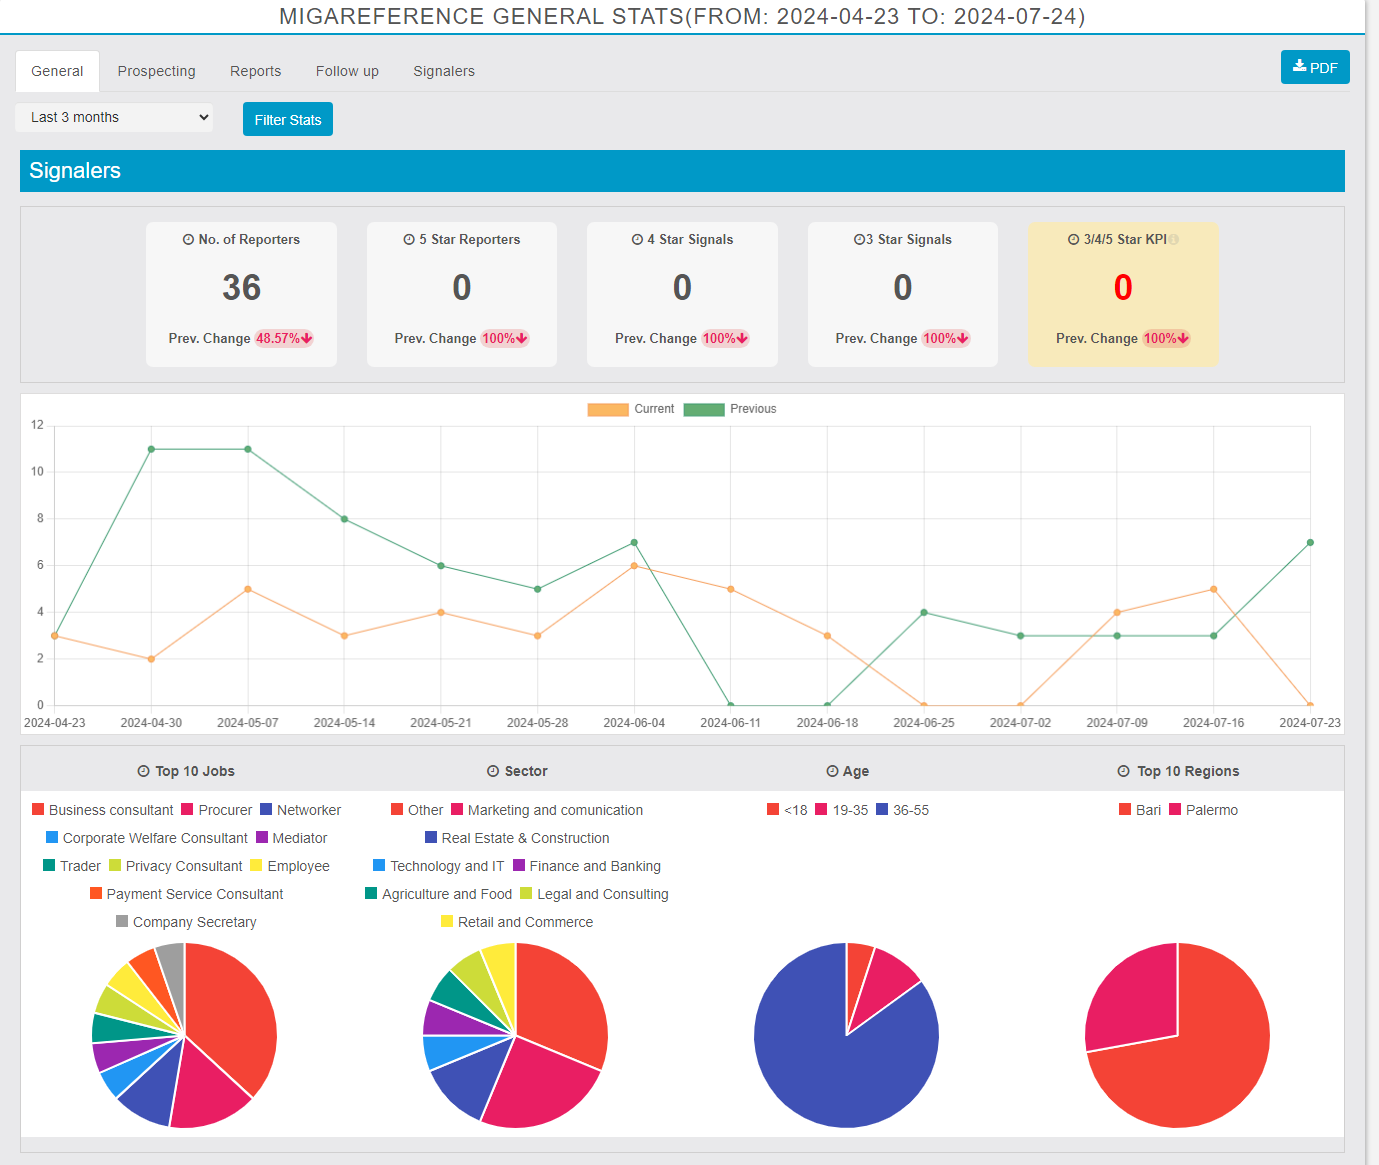
SIGNALERS
- Time Filter/custom Range: When we select a time range we filter the records by creation date. We also compare the records vs. the previously same period creation date. This
is valid on all charts. - Widget: Recruitment quality indicator. Good recruitment must produce at least 0.15 (15%) good Referrers if the value is below 0.15 mark it as red.
- Comparison chart (LINE & PI): We have Two lines: Current and Previous period. Variation in % is shown only if we select LAST 30 DAYS, PAST MONTH, PAST 3 MONTHS, PAST 6 MONTHS, and CURRENT YEAR. Variation is the difference in % between a given time range and the previously same time range (Ex. last 30 days vs last 60-30 days). Provide the statistics as a PI chart for fields like job, sector, age, and region with the percentage of specific field color.
REPORT PERFORMANCE OVERVIEW
The part of General stats that gives the statistical analysis of Report performance as shown in fig number of report, no of closed business, deal closed, and credits.
The indicator shows No. Deals = Number of Reports in status AGREEMENT SIGNED. If the value is less than 0.20 is in RED “Report quality indicator. If the conversion into
sales fall below 0.20 (20%) it means that the
Referrers are not referring target people.”

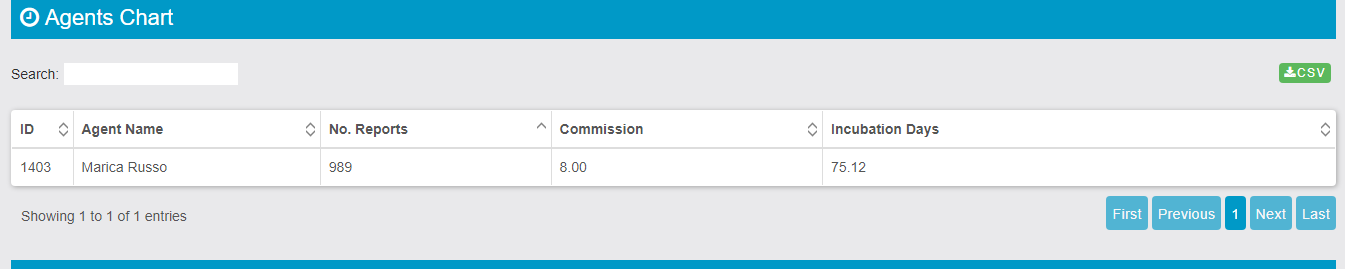
AGENT CHART
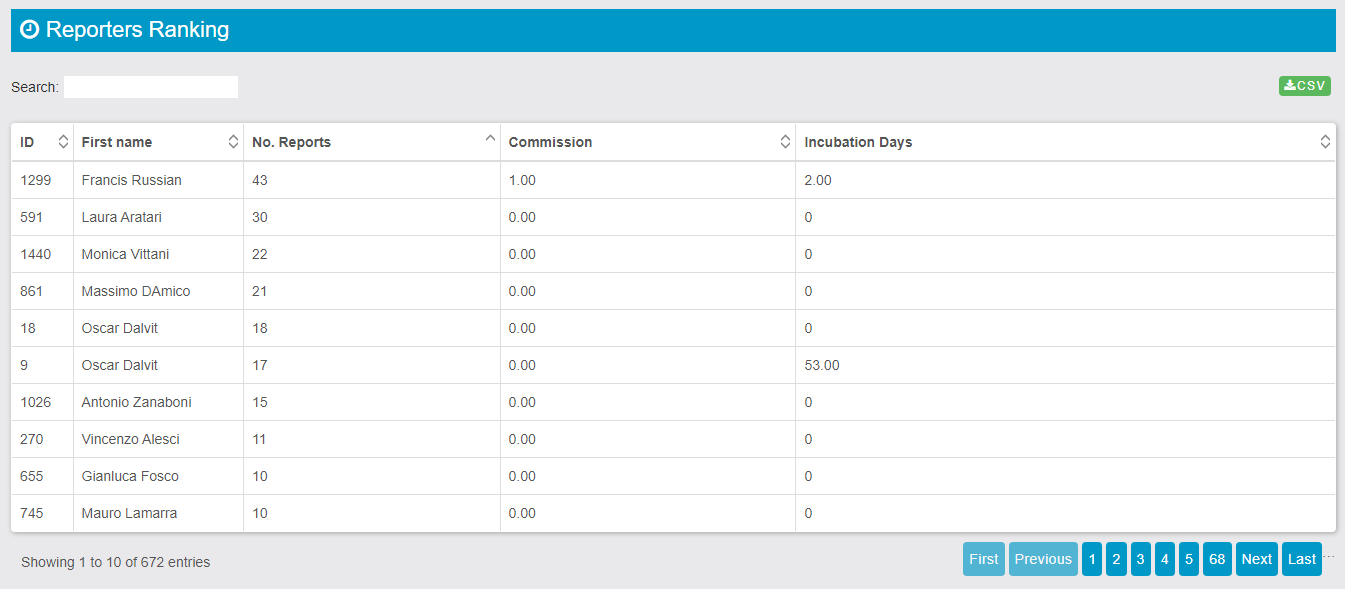
REPORTERS RANKING
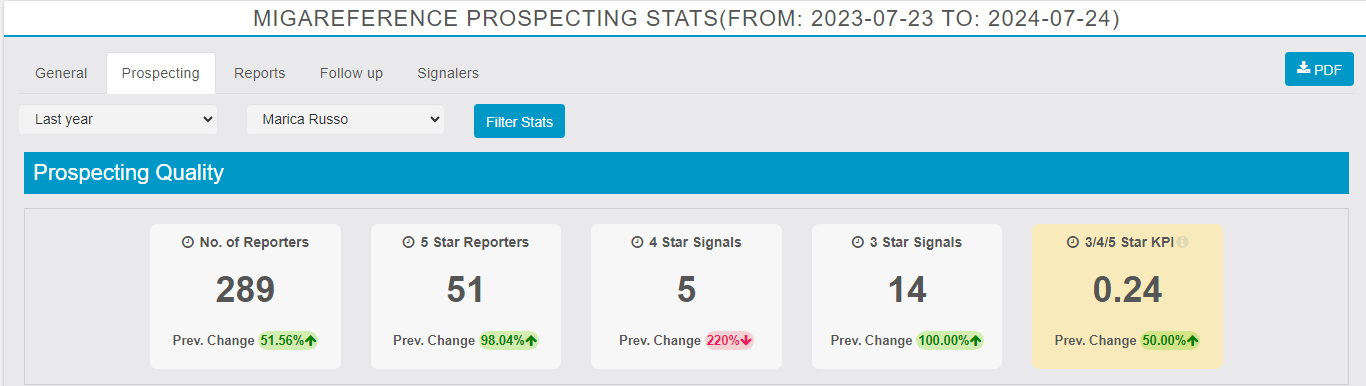
2. PROSPECTING
Prospecting is a vital activity to ensure a continuous flow of potential clients and contacts. It serves as the foundation for maintaining a robust network and fostering relationships that can lead to business growth.
When we select a time range we filter the records by creation date. And we compare the records vs the previously same period creation date. This is valid on all charts
Prospecting quality:
To measure the effectiveness of prospecting efforts, profiles are counted based on the following criteria (PROCESSED REFERRERS):
- A change in rating
- The first entry in the Relational Notes field
- The first entry in the Reciprocity Notes field
- 3-5 Stars KPI is TOTAL REFERRERS 3-4-5 STARS divided TOTAL REFERRERS If the value is less than 0.15 we show in RED the total
- Recruitment quality indicator. Good recruitment must produce at least 0.15 (15%) good referrer
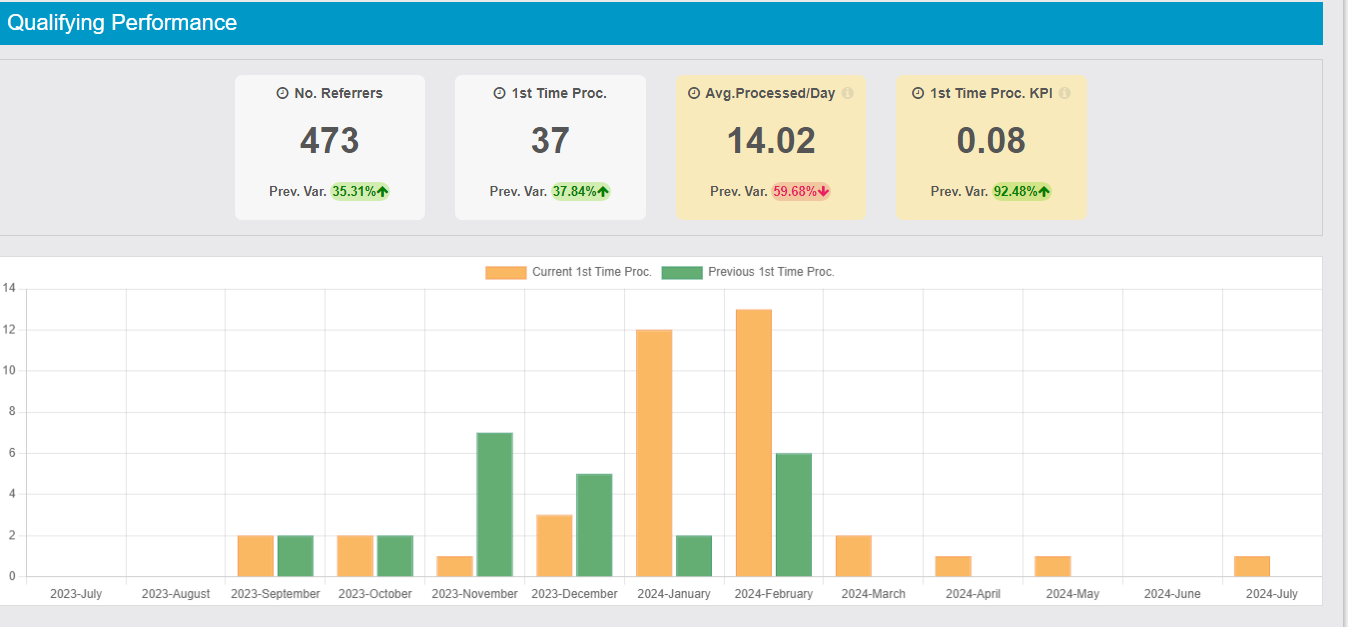
Qualifying Performance
Performance statistics show no referer performed, and the first time processed report the Widget explains that Qualifying and knowing potential referrers is very important. The minimum average daily number must not fall below 2. Knowing and qualifying your referrers is essential.
This KPI tells you how many people you managed to get to know and profile in your club.
- We have A Pills chart for the Current and Previous periods with all the daily results for the given time range.
- One Widget with TOTAL PROCESSED.
- One Widget with AVG./DAY (working days, look on general settings)
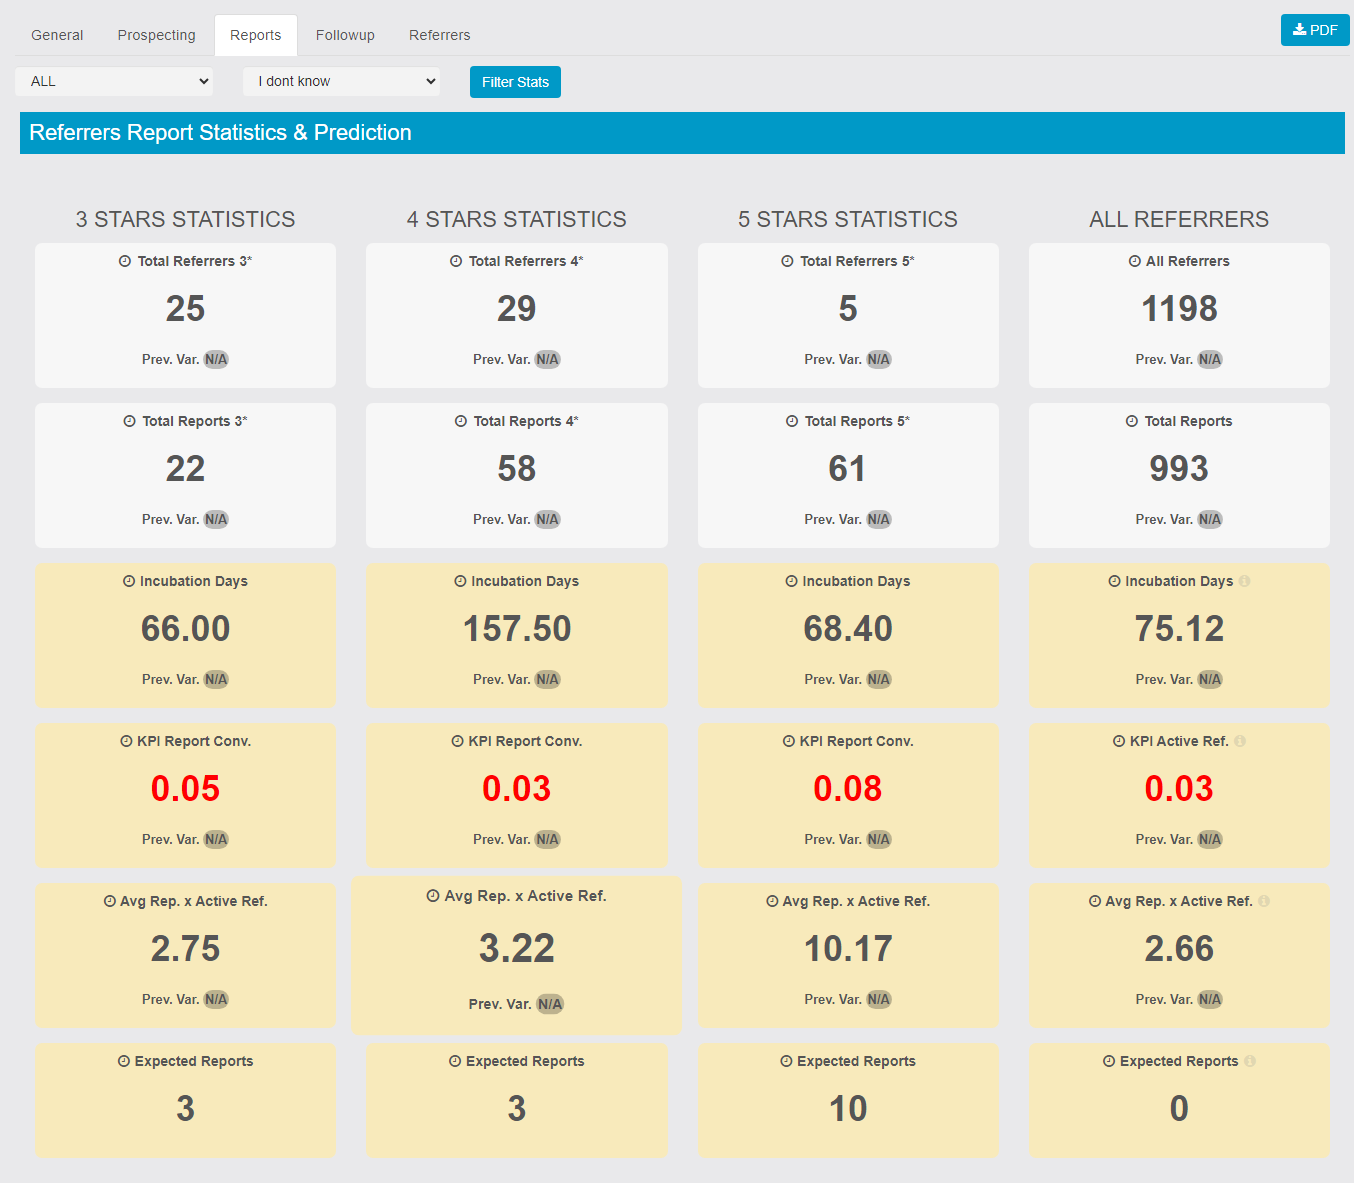
3. REPORTS
The stats provide the statistical information of all reports submitted, processed, incubation days, KPIs widgets, and expected reports.
- Incubation days is the average number of days between the registration of a Referrer and the sending of the first report. This KPI measures the e! effectiveness of training and the quality of the Referrer.
- KPI measures how many of our Referrers make a first-time report. The value should always be greater than 0.15. This KPI measures the effectiveness of training and the quality of Referrers.
- Avg Rep. x Active Ref This KPI measures the total number of reports received from referrers
in the same group, divided by the total number of reporters who have made at least one report. The KPI measures how active the reporters are over time and therefore the effectiveness of the follow-up. - Expected Reports is the KPI that tries to predict how many reports we will owe in the near future. The calculation takes into consideration the percentage of Referrers that will be activated, therefore Total Referrers not yet active x the KPI Active Referrers. The calculation only takes into account alerts created between today and twice the average incubation time
Report Performances Statistics
Rating-based performance stats of reports also explain the statistical info no of deals closed and commission paid.
- Rep. Succ./Total widget shows the report quality indicator. If the conversion into sales falls below 0.20 (20%) it means that the Referrers are not referring target people.
- The incubation time tells us how long on average a report takes to conclude with a sale.

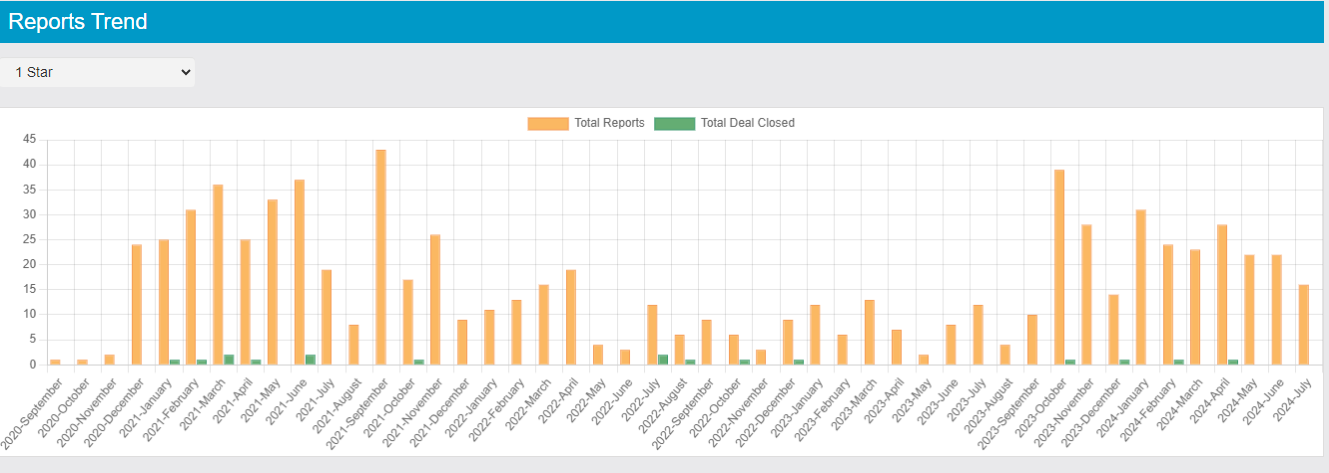
Reports Trend
Two pills per day/week/month, one is showing Total Reports (Orange) and one is showing Total Deal Closed (Green) (Mandate Acquired). Users can filter the pill chart rating-wise.
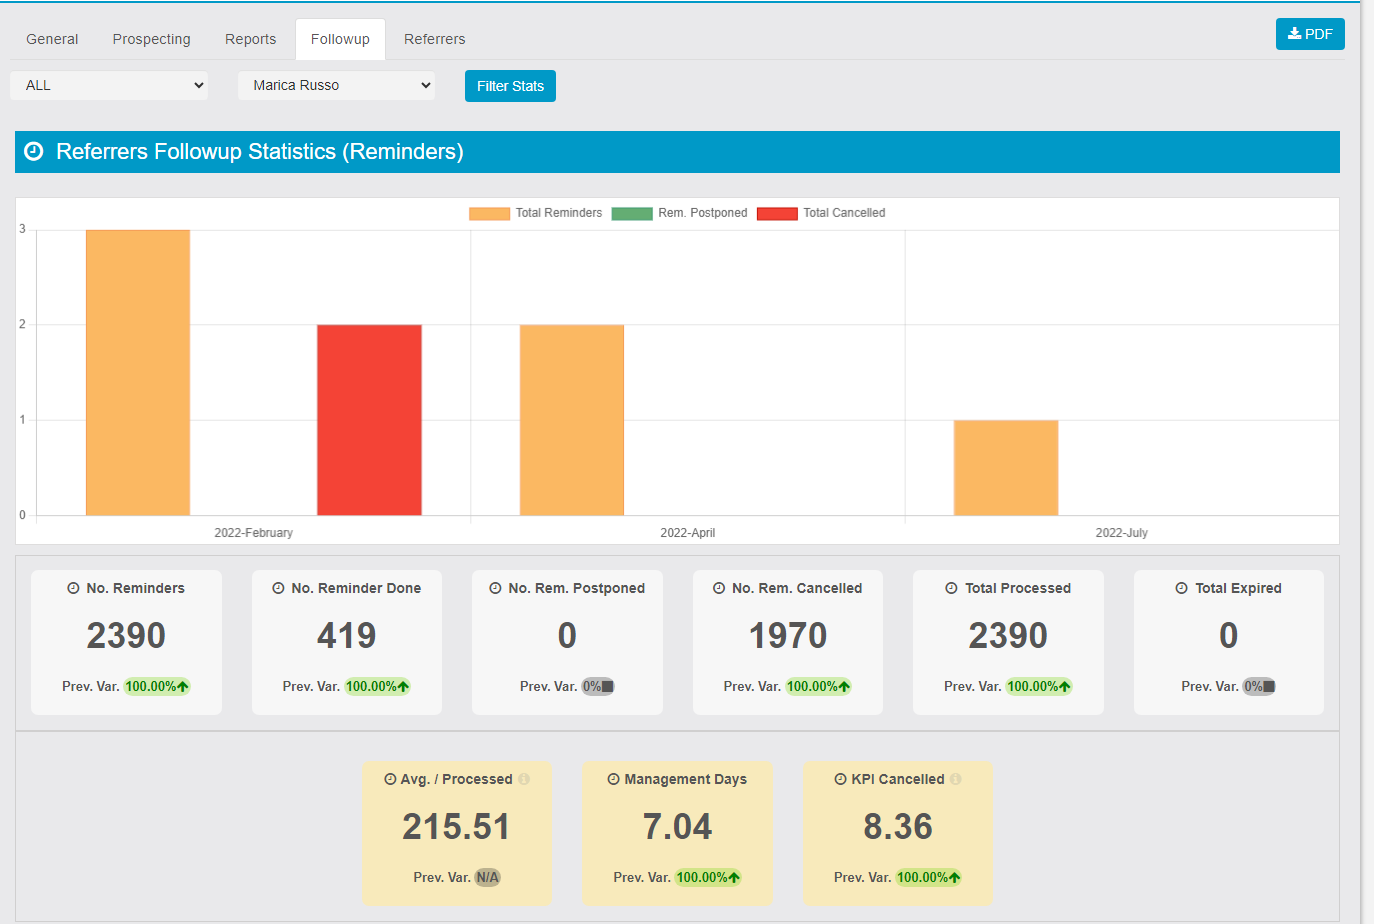
4. REFERRER FOLLOWUP STATISTICS (Reminders)
This tab explains the reminder statistics on how many no of reminders are delivered, pending reminders, and canceled.
- the pill chart has 3 pills per day/week/month, one is showing Total Reminders (Yellow), one is showing Total Reminder Postponed (Orange) and one is showing Total Reminders Cancelled (Red).
- Avg / Processed is the total reminders handled in the period per working day.
- KPI Cancelled is the indicator that allows us to understand how many reminders have been discarded and not worked on. The KPI should be as close to 0 as possible.
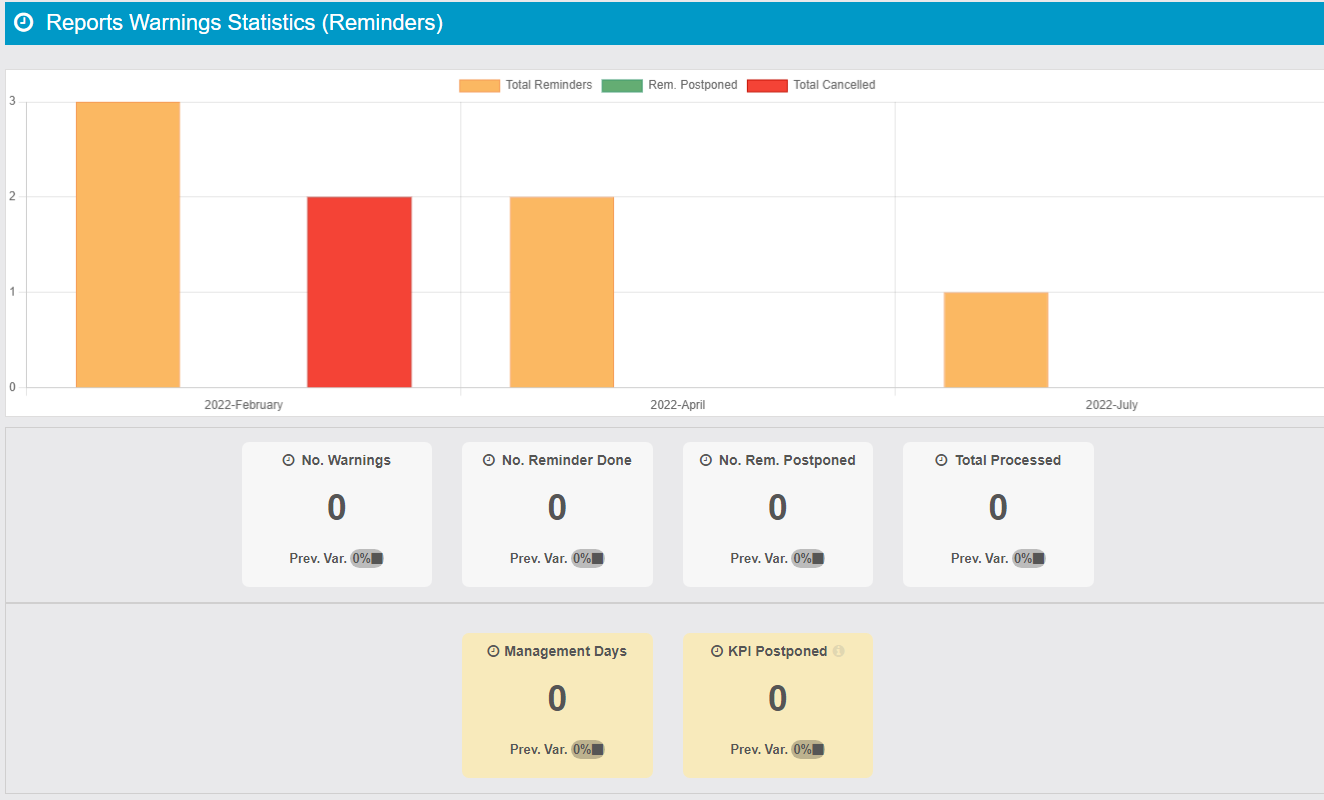
Reports Warnings Statistics (Reminders)
- 3 pills per day/week/month, one is showing Total Reminders (Yellow), one is showing Total Deal Postponed (Orange) and one is showing Total Reminders Cancelled (Red).
- This KPI measures total issue reminders on Snoozed References divided by total issues. This KPI should be close to 0
link: https://support.migastone.com/en/hrf_faq/migastats-v2/
Appointment Pro
The Appointment Pro module will allow you to quickly add a simple and powerful appointment booking system to your app. The App owner will be able to create multiple stores, categories, services and suppliers with categorization into services or classes. Appointment pro comes with advanced payment management features, with the ability to set options and payment gateways for each company location. Thanks to the new implementation you will be able to show the distance of your business branches from the user’s current position.
Click to see demo module (sign up to access)
LINK: https://support.migastone.com/en/hrf_faq/appointment-pro-2/
App Migastone Statistics
As from today 25th April 2016 we have the please to introduce to our customers an important statistics panel which allows you to get information:
- Assigned Coupons
- Points used
- Orders from your shop
- Registered users
- Users connection log
Principle:The system displays all the statistics App which has the registered email and are currently connected in the MAB (Mobile App Builder) or the control panel of your APP.THEN USE TO REGISTER THE FIRST TIME THE SAME EMAIL MAB!Generally a Migastone customer has access to one single APP, and you will see the statistics of connected APP.An agent or installer will instead see ALL statistics apps linked to your account (for example, the APP of their customers). There is a column APPLICATION that allows you to filter the results as you wishREGISTERED USERS (Customers) On this screen you can check the registered customer database.You can export the data in various formats and data filtering as per menuLOYALTY CARD POINTS DATABASE (LOYALTY STAMPS)
 On this screen you can see the history of each individual point validated of every loyalty card, you will know who has received it, who has validated it (the employee’s name), date and time.This report is exportable as well to process more interesting charts of customers’ loyalty and analyze the data in detail.LOYALTY CARD CLASSIFICATION (Loyalty Award)
 Interesting ranking of users who are collecting more loyalty points. Again filtered to various criteria and exportable reports in various formats.COUPONS / DISCOUNT
 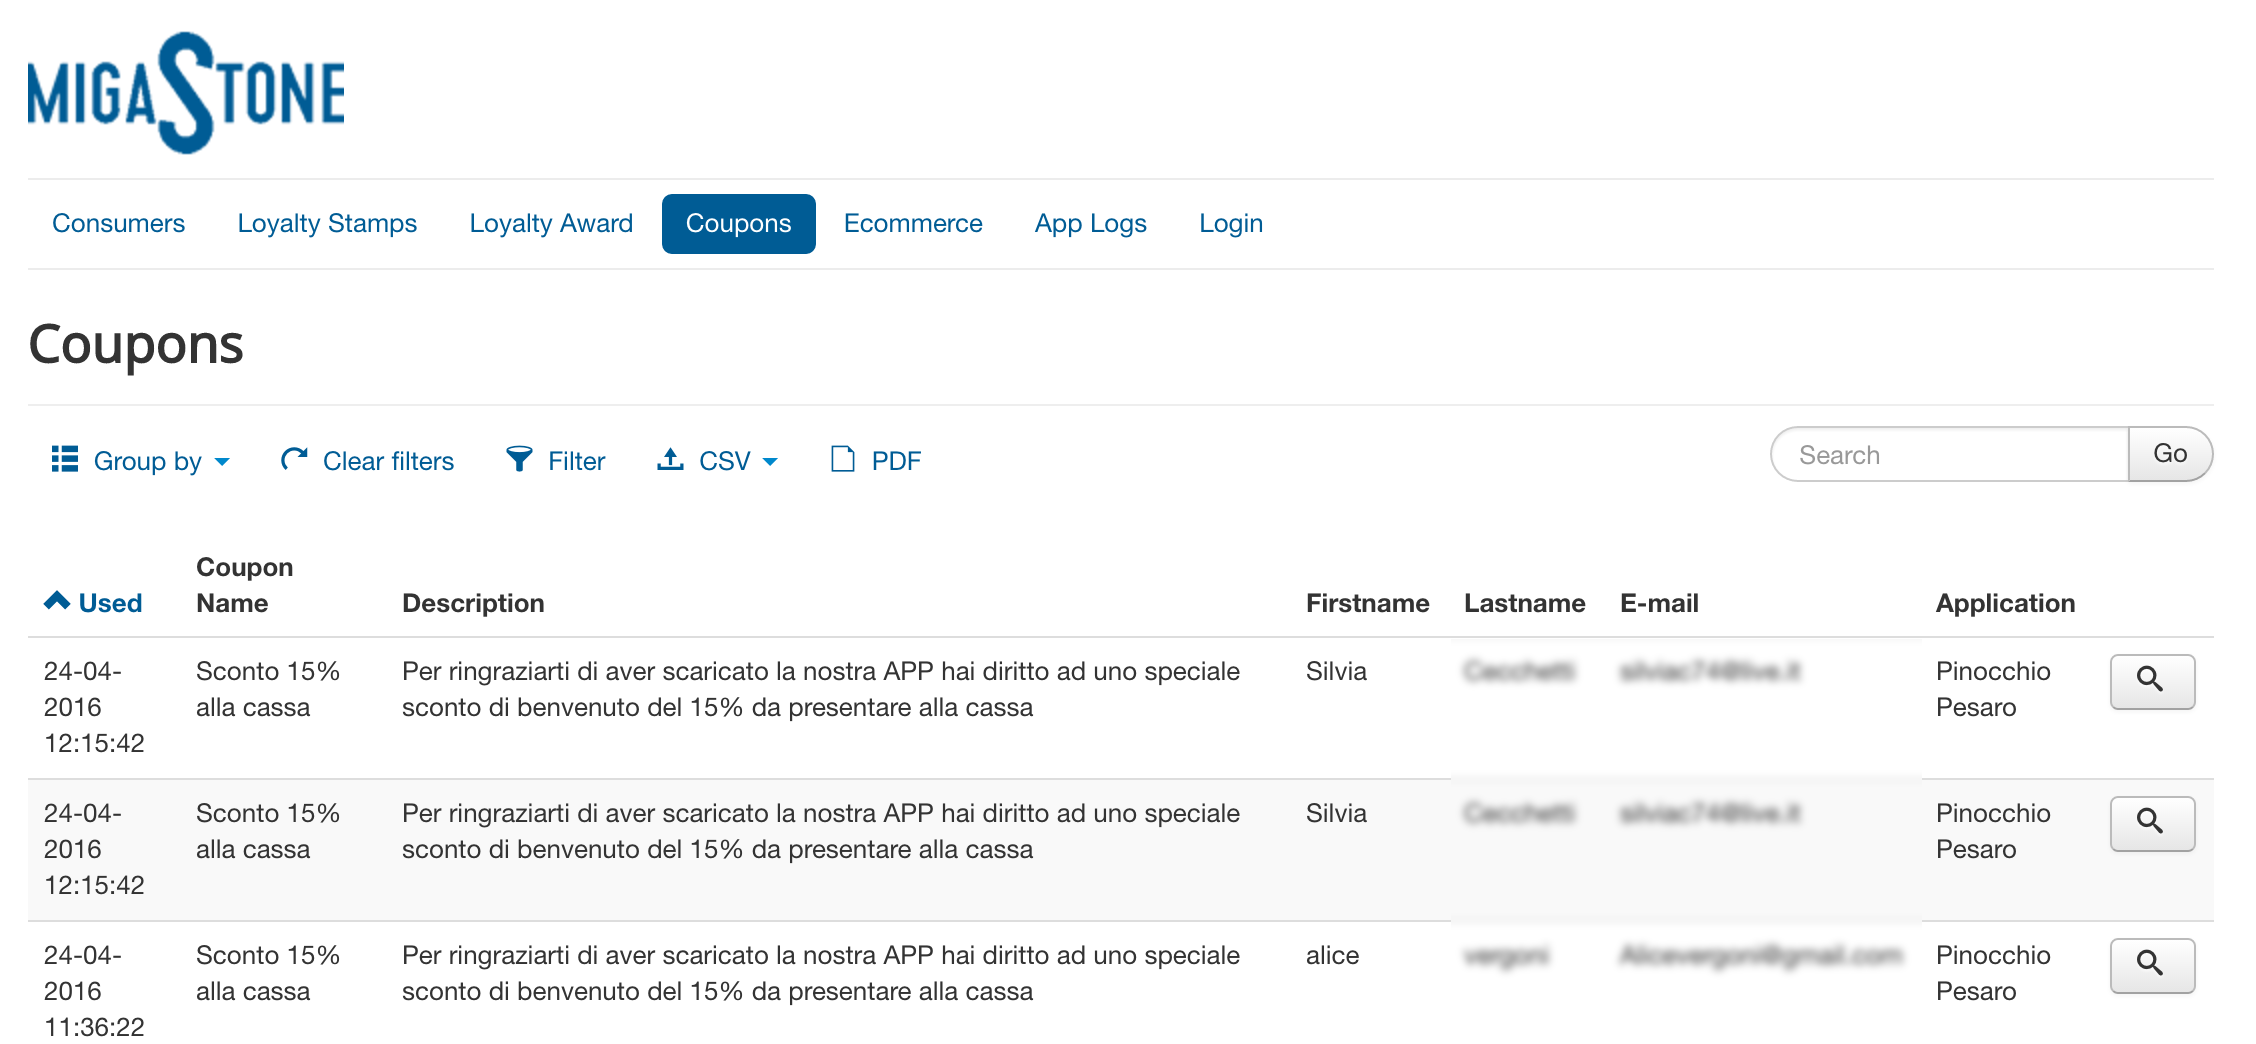 This screen includes a list of discount coupons used by type, date and time and the customer who has used them.Exportable reports in various formats and to which we can apply different filters. MOBILE COMMERCE ORDERS (ECOMMERCE)
 Each order recorded in our shop can be accessed from this screen allowing you to filter the order, view their details and export orders listing in various formats.APP LOGS
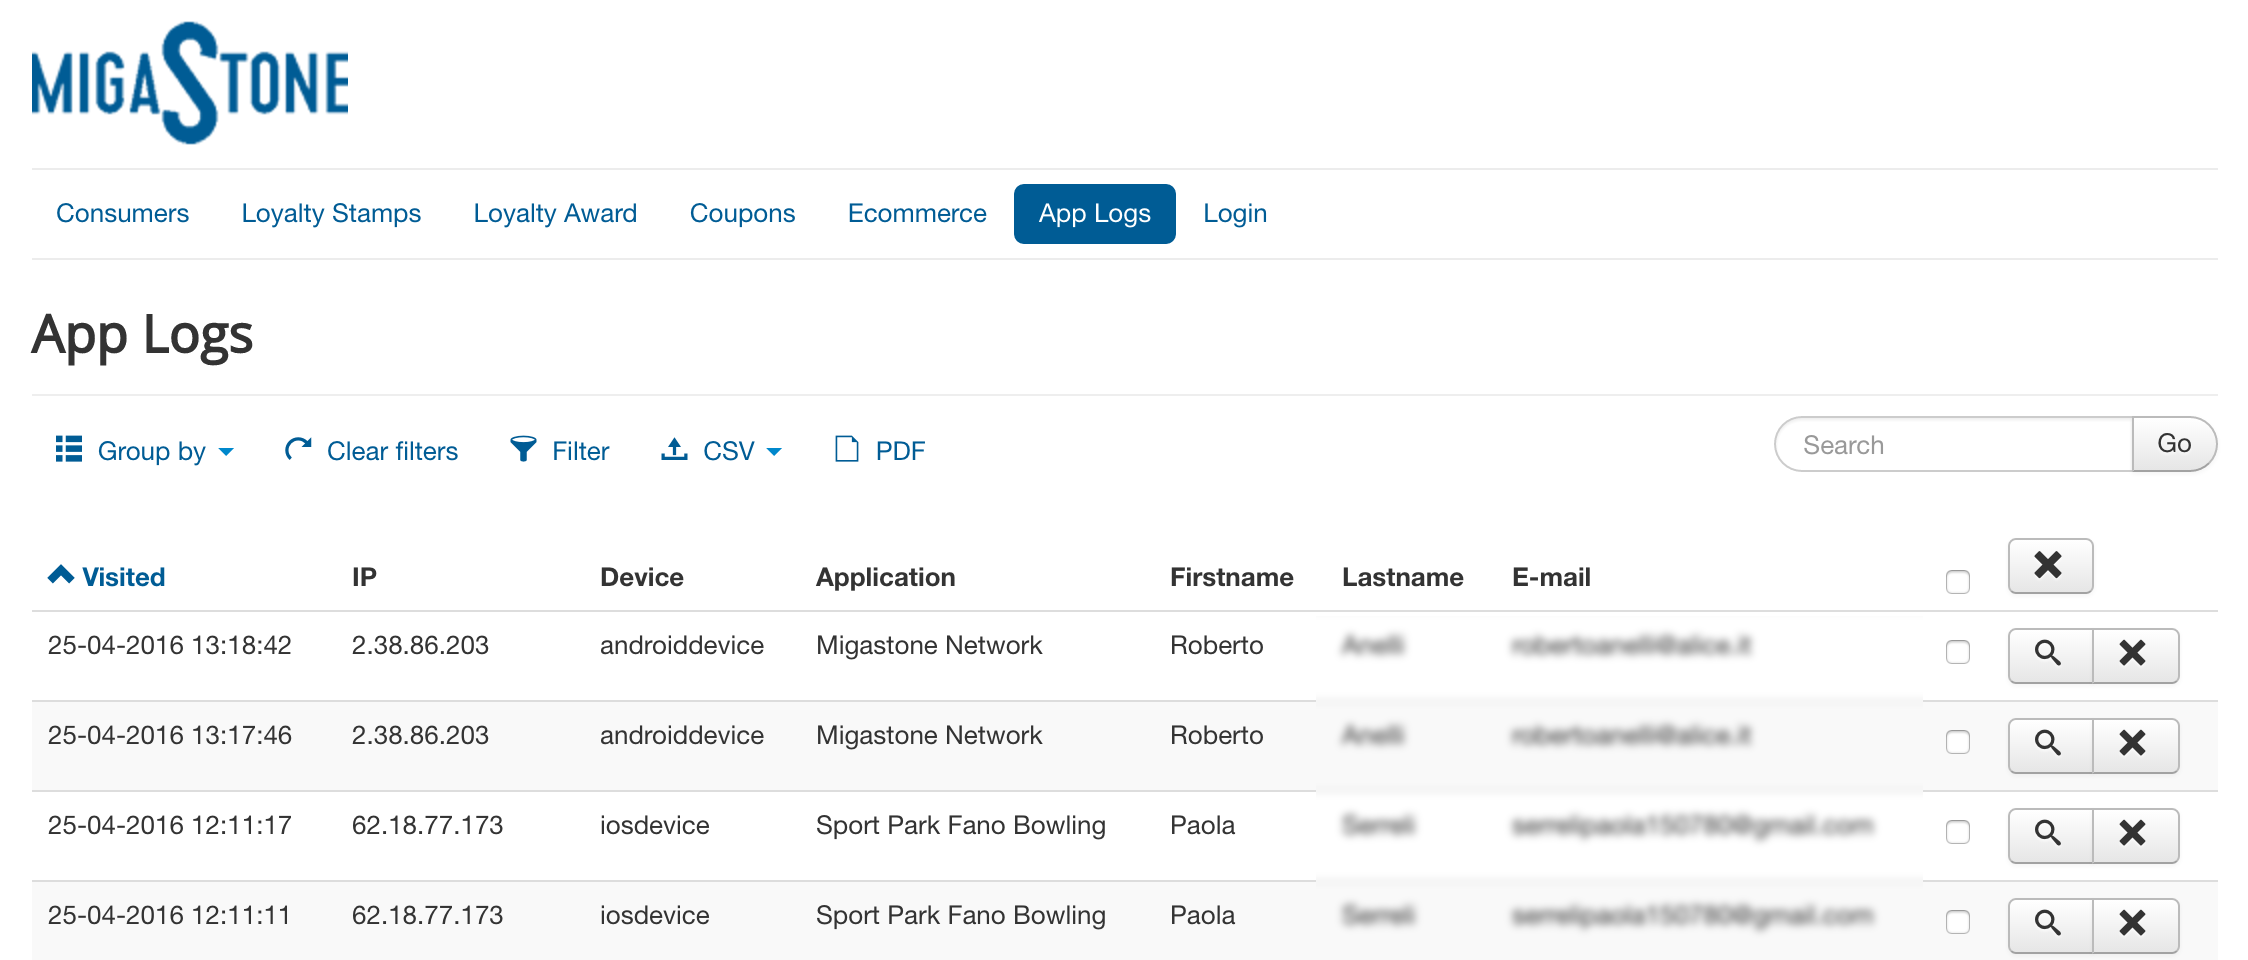 Total control over the log in your APP, each client that uses the APP and logged in, is monitored in this list indicating also the type of device used.Listing Exportable and can be filtered as usualThe Access to statistics area can be done in two different ways:1. Using the following URL http://appstats.migastone.com/2. Through the ANALYTICS section of your MAB high as below:
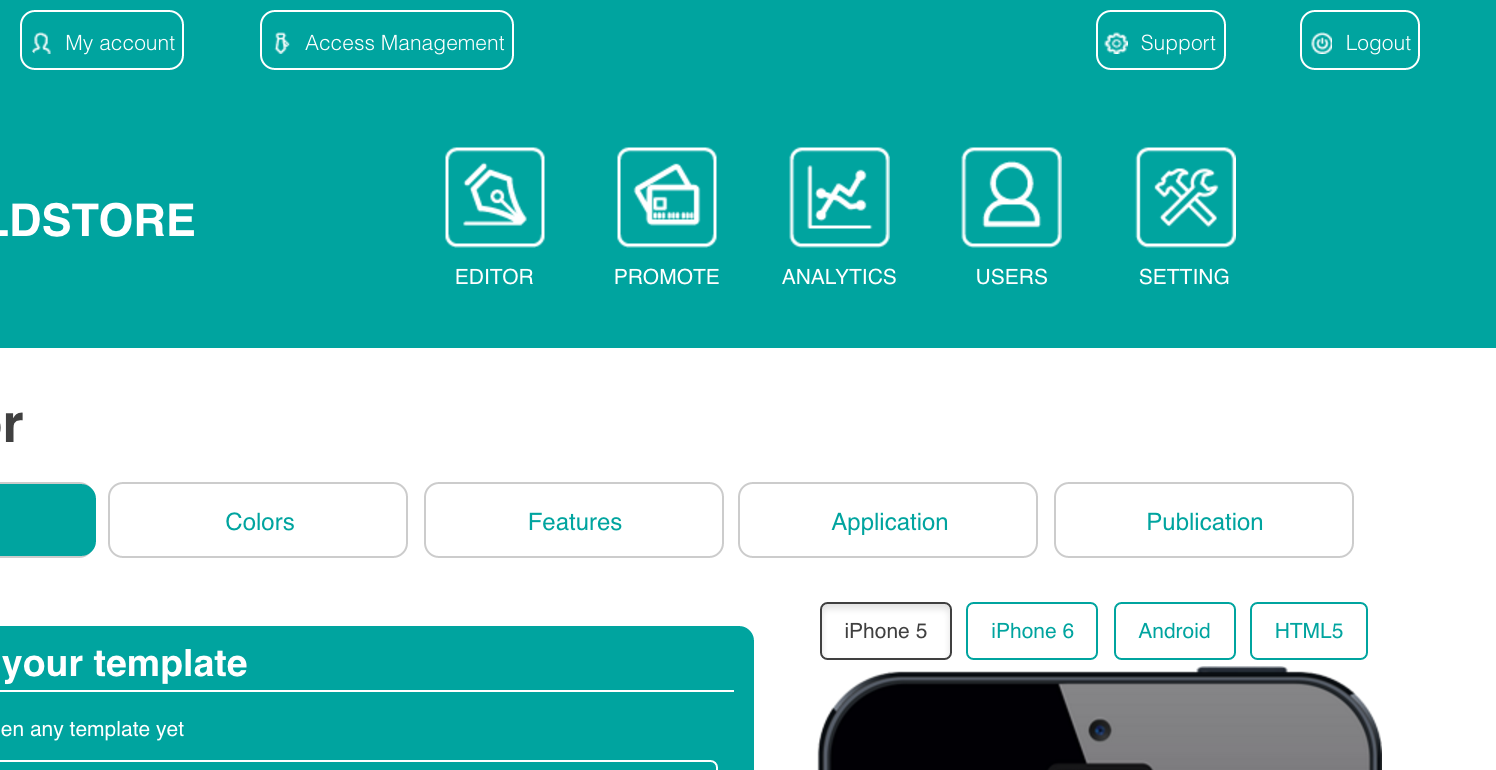
Appmetropolis V2 Module
APPMETROPOLIS V2 is a very powerful Siberian cms module. It is more than a module. It is a strategy that allows for selling more apps and with a higher price.
Basically, the concept is to create a MARKET PLACE that is more balanced between customer’s interests and merchant’s interests.
Normally a marketplace is not the best choice for merchants. They usually need to fight in a single place with price and offers to beat the competitors that are just one click faar from there.
APPMETROPOLIS V2 is a module that allows to find the offers inside the APPS near you.
The fact that people should download one app and keep it active to be able to use an offer excludes precisely the customers that nobody wants. I mean the customers that go around businesses just to redeem offers.
APPMETROPOLIS V2 is a module that allows replicating the concept you can see in this video trailer:
With APPMETROPOLIS you can:
- Create a place where you list all your APPs on a geolocation basis
- Change the name of the module as you want with a complete WHITE LABEL module.
- Create a place where you list all the active coupons in your Apps on a geolocation basis
- Integrate this view in your MAIN “Appmetropolis” like app that you can call as you want. You can create your marketplace with your name
- You can also integrate this view inside the Apps of your customers that like to participate in the network. So inside the APP of each merchant, the user can find other offers and promotions.
- (not ready yet) the module very soon will be able to connect to our main worldwide database of appmetropolis.com server. This module allows you to sync the local Apps with the main database and show inside the systems APPS that doesn’t belong to you. The advantage is to start immediately with a populated database.
- APPMETROPOLIS also allows you to generate co-marketing strategies, and you can easily promote collaborations with complementary merchants of the same circuit. Imagine a Gym that sends out an offer with push notification regarding a “massage offer” of the Beauty Center near them, and vice versa the Beauty Center that will promote a ZUMBA course of the Gym. This kind of collaboration can be potent.
- The new feature adds support for MASTER and SLAVE modules within our system and enables connectivity between the APP and an external platform. This feature is designed to enhance the functionality of APPMETROPOLIS by centralizing data management across various platforms. to understand more about the MASTER/SLAVE feature of APPMETROPOLICE please Click here
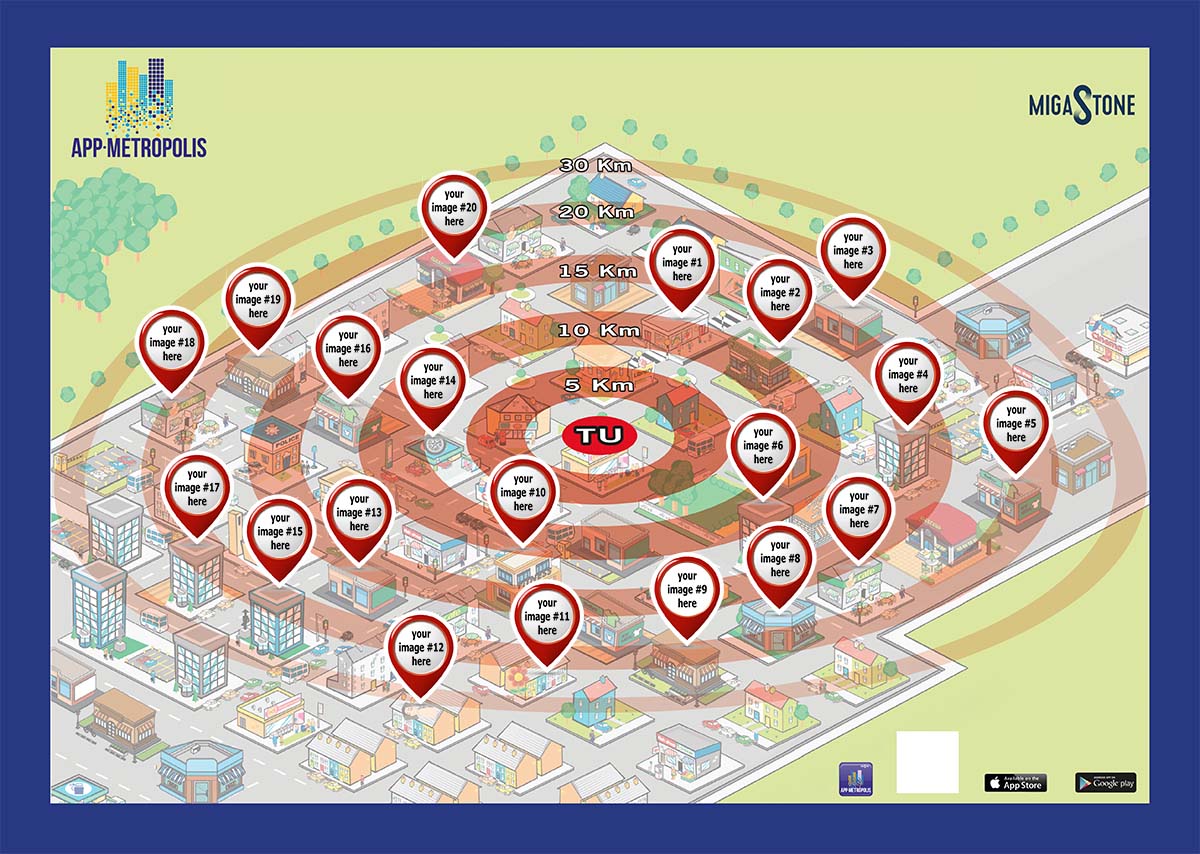
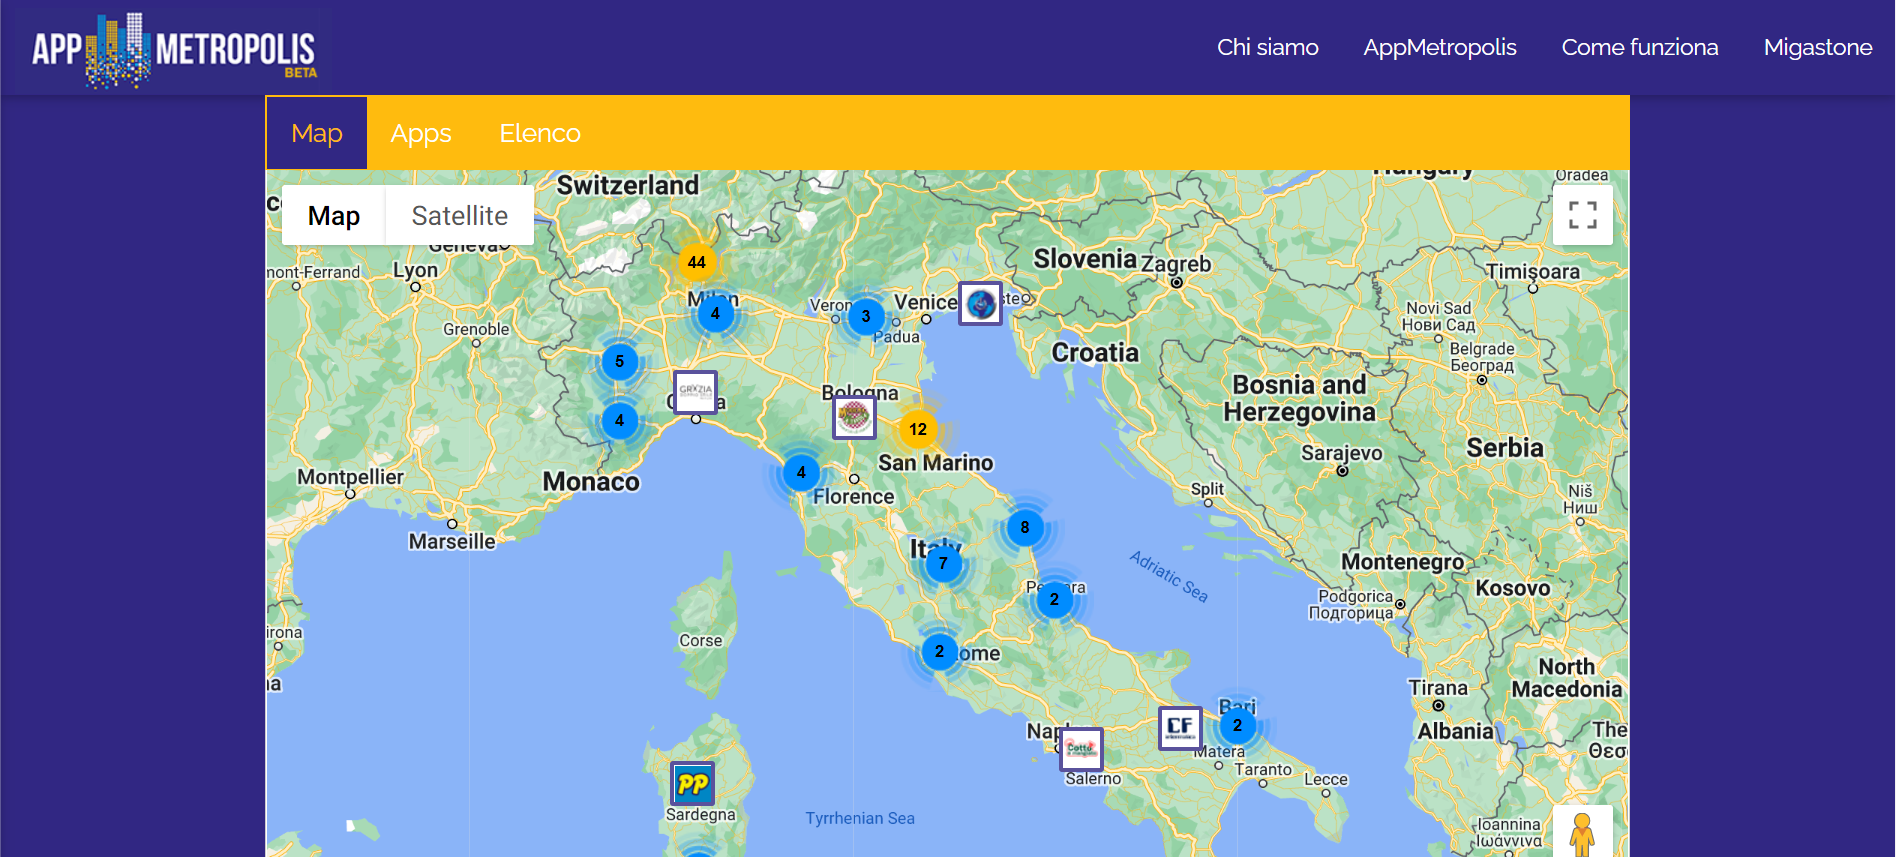
Here you can see the typical MAP of a local circuit based on the Appmetropolis Concept.
(we offer a lot of marketing material inside our Mobile Marketing Expert training track, go and take all the information on www.migastoneacademy.com)
USER MANUAL
The ADMIN PANEL
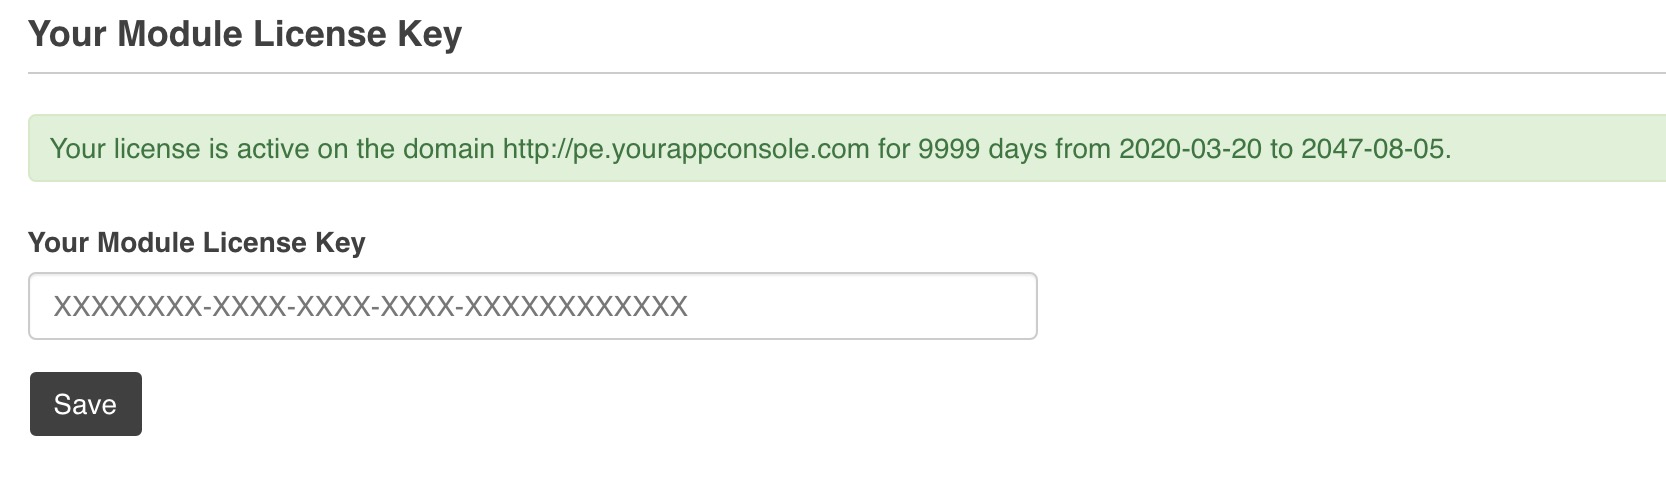
The first thing you should do is to activate the license of your module. If you purchased the module on www.migamodules.com you got by email the activation code.
You can check also always if a new version of the module is available on this link https://licenses.migastone.com/my-modules (you need to enter your license code to get the download link of the last version of your module).
If you didn’t get the license code, please open a ticket HERE
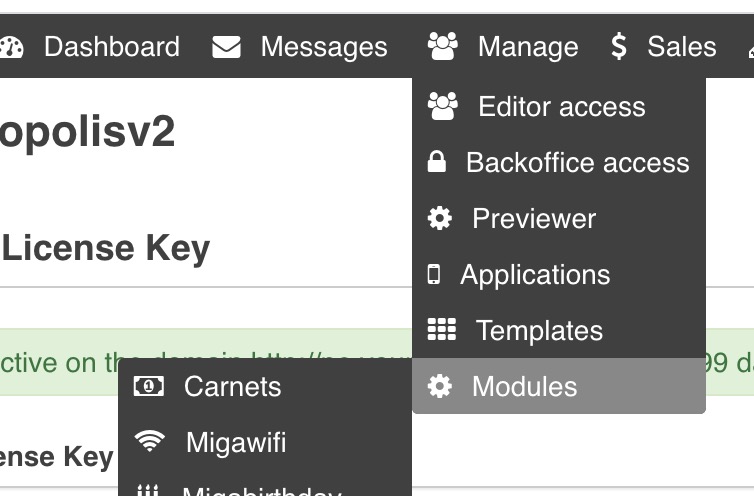
To proceed to activate your module for unlimited apps on your App Builder, go to SIBERIAN ADMIN INTERFACE (www.yourdomain.com/backoffice), select MANAGE many and MODULES. (Don’t use the Front End License interface that is reserved for “per app” licenses that aren’t supported yet)
Enter the license here, refresh the page and you should read on top YOUR LICENSE IS ACTIVE
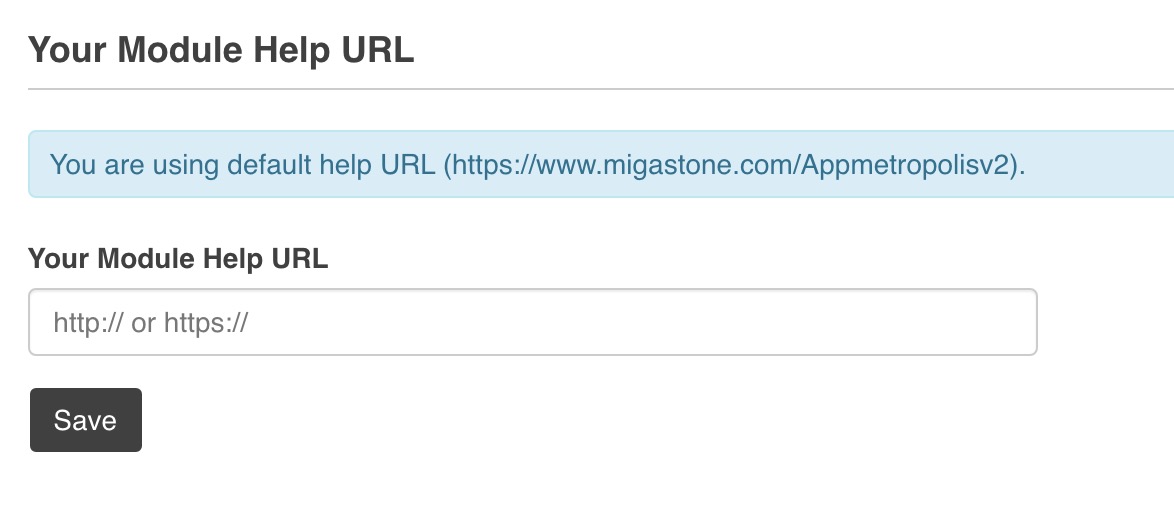
You can set your own user manual URL link to the module on this section.
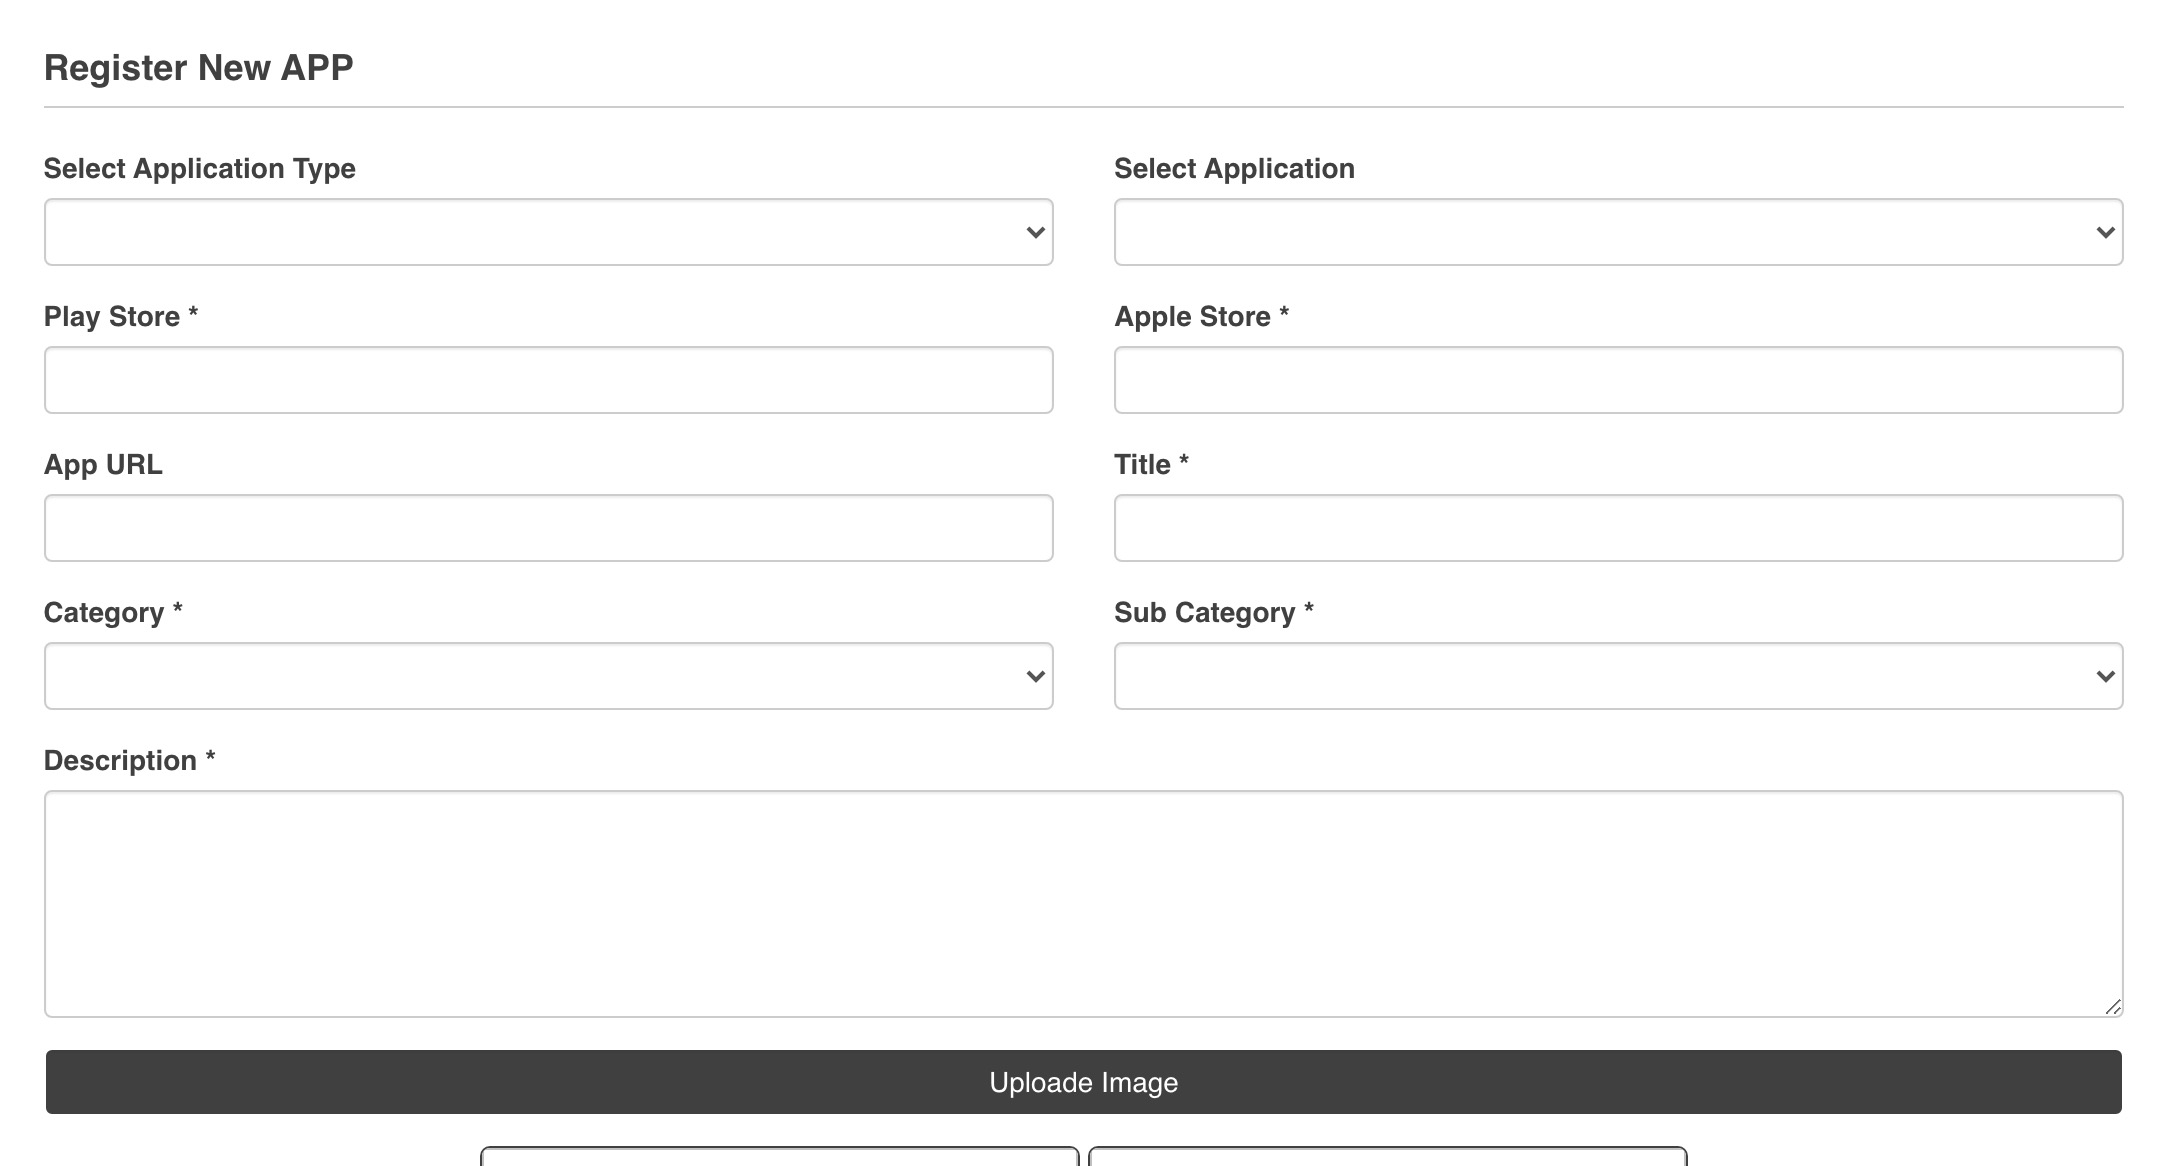
From the ADMIN control panel you are able to add to your “appmetropolis” module any 3rd party APP or any app on your platform.
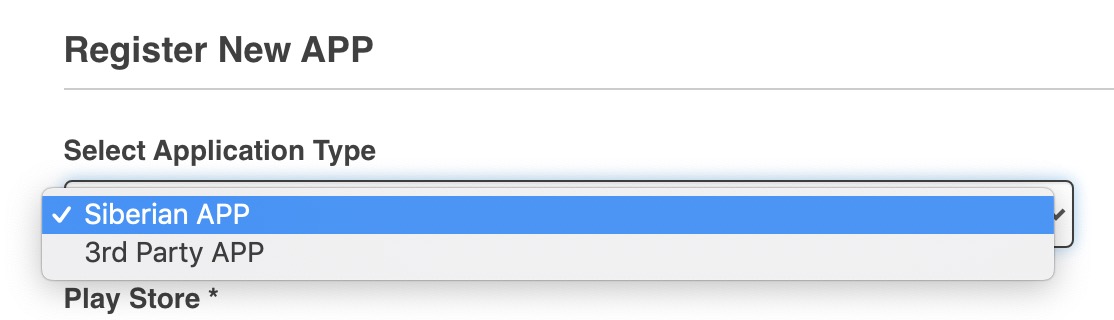
If you select from drop down menu SIBERIAN APP, you are able to enable a specific APP existant on your platform, if you select 3rd party APP you are able to add another APP that doesn’t belong to your platform.
Of course if you add an external APP system cannot show any coupon inside this 3rd party app.
Fill than all mandatory fields and you will find the APP created and enabled on the list below. You can also disable an APP from APPMETROPOLIS.

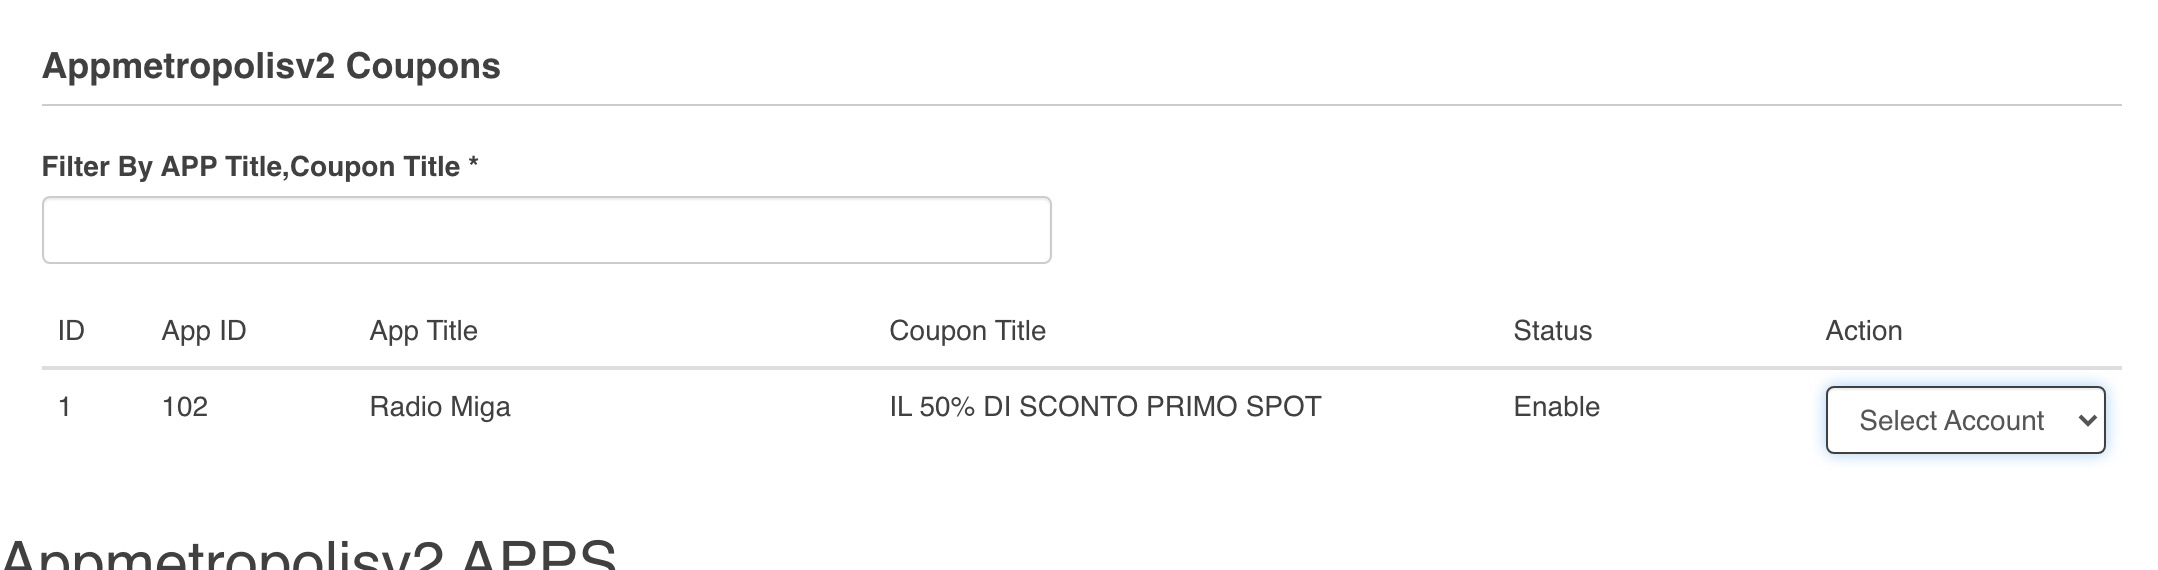
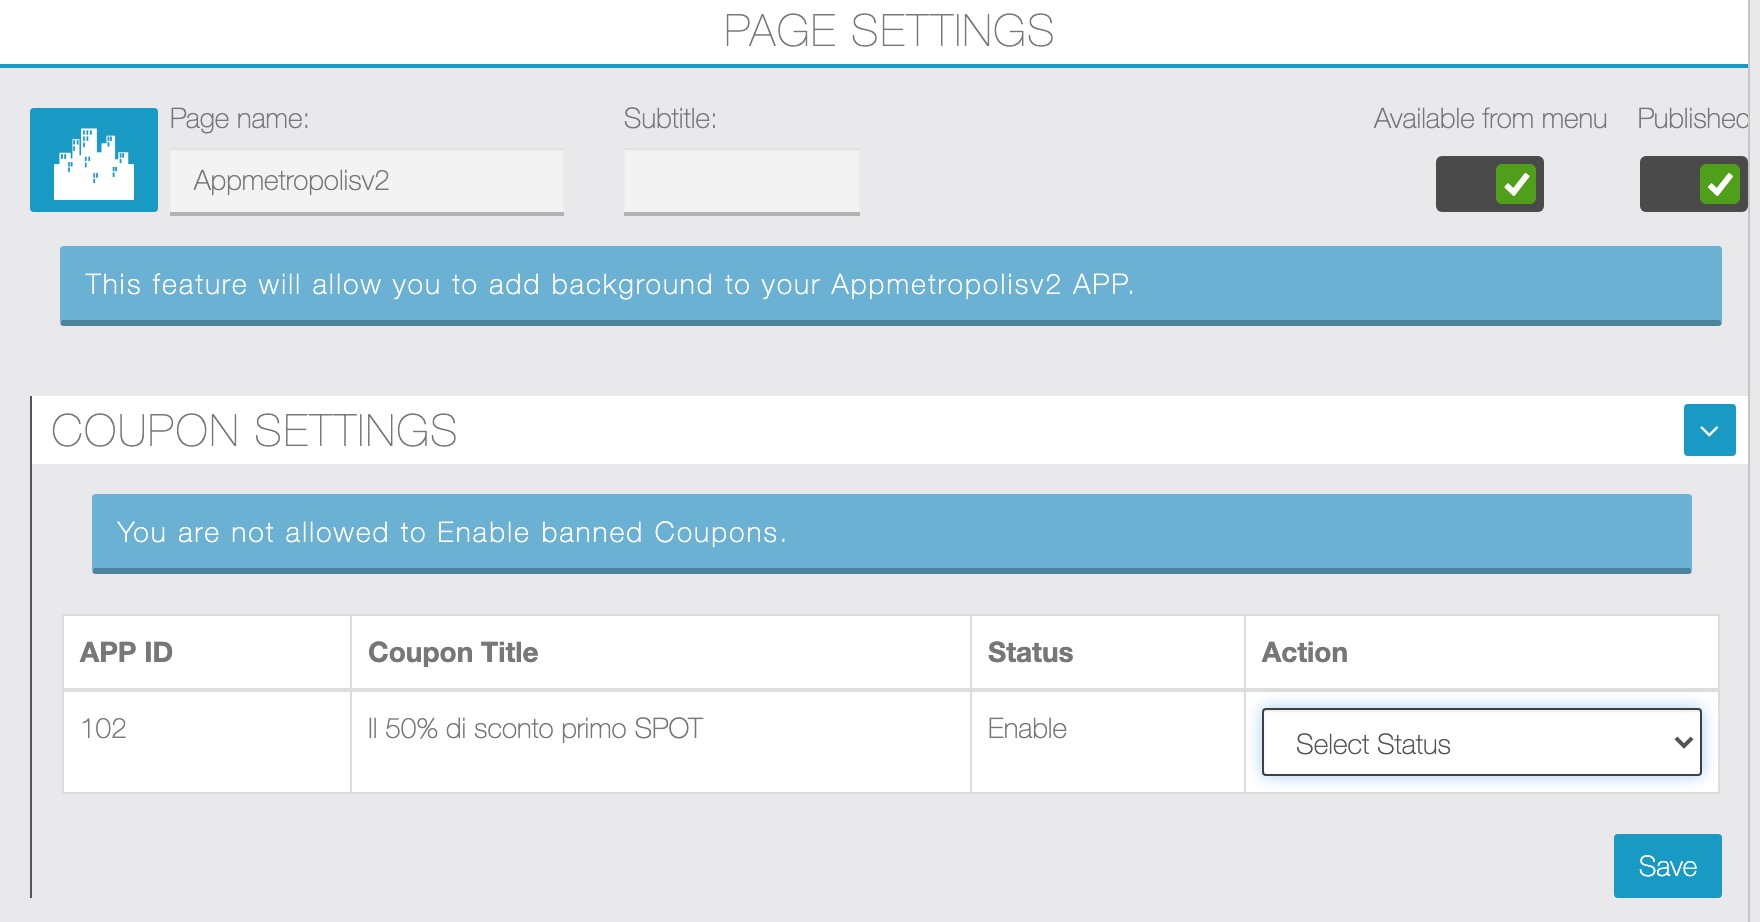
If the APP has a coupon inside you can manage this coupon on this section below. You can disable a specific coupon or also ban this app to publish any future coupon. This allows to give you a complete compliance system to prevent abuses from your App customers.
TRANSLATIONS OF THE MODULE are available in the backoffice admin under SETTINGS >> TRANSLATIONS. This is very important because you can change also the name of the module and make it so 100% white lable.
THE FRONTEND SIDE MENU
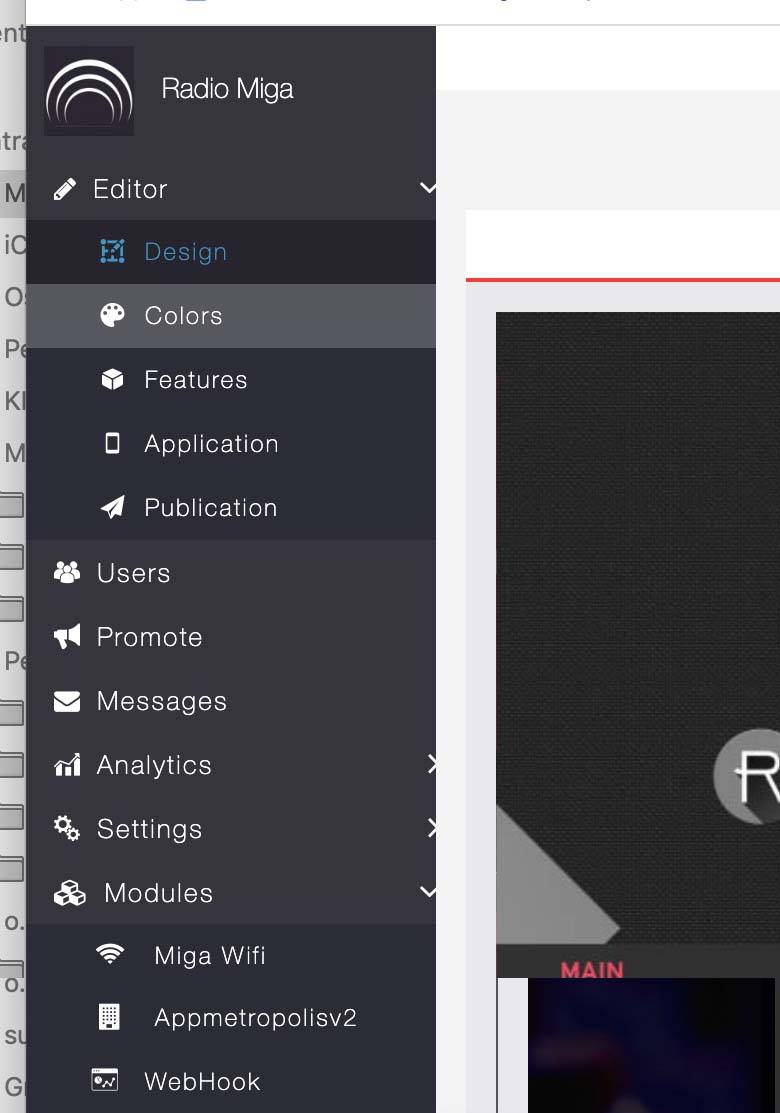
The module on the frontend of your APP builder is available on the SIDE MENU on the left, just under the MODULES section.
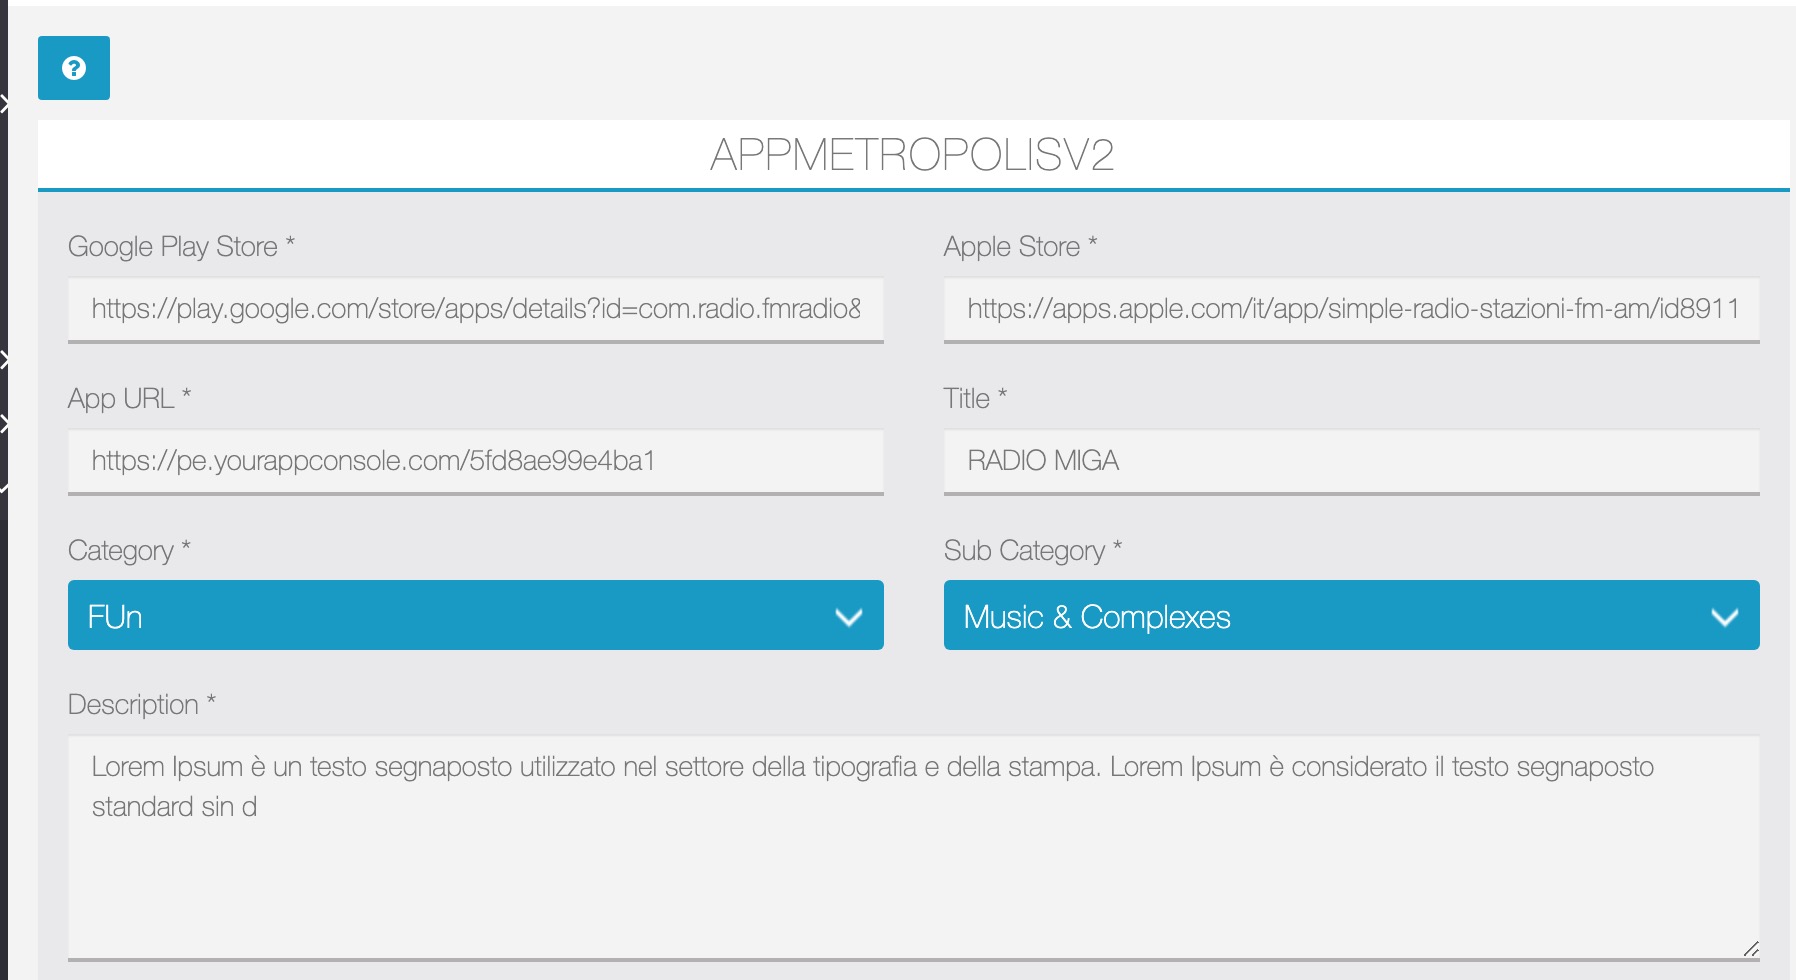
The first time you load the module the details of your APP are empty. If you want that your app is listed on the system it is mandatory to fill all the details and especially the geolocation.
You should start to fill:
- Apple store and Google Play URL of the APP (by default the module is taking this value from Siberian data base if it is present, you can change it as you want)
- The APP URL is automatically taken from Siberian CMS, you can change it as you want
- CATEGORY and SUB CATEGORY are not customizable, you can manage translations from backoffice admin >> settings >> translations
In the second section of your APP page you can see some optional parameters that you can add to the APP details.
What you cannot miss is the ADDRESS with GEOLOCATION, this is very important because Appmetropolis module uses them to generate the list on front end module.
If you miss to setup the address the APP results not active in the Appmetropolis system.
FEATURES: MASter AND SLAVE
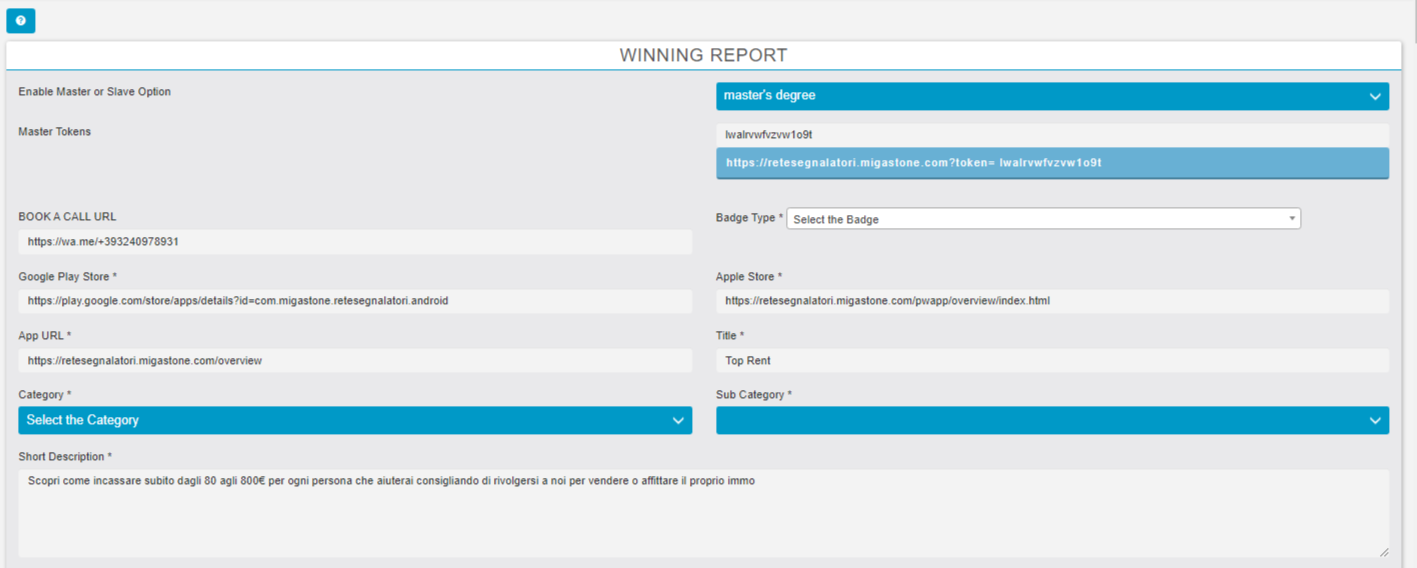
We are introducing a new feature that adds support for MASTER and SLAVE modules within our system and enables connectivity between the APP and an external platform. This feature is designed to enhance the functionality of APPMETROPOLIS by centralizing data management across various platforms.
Overview
In the new setup, we will have:
- MASTER Module: This module will reside on the main platform, which can either be a SAE (Service Application Environment) or a MAE (Main Application Environment).
- SLAVE Module: One or more SLAVE modules will be connected to the MASTER module. These SLAVE modules are configured to send their data to the MASTER module.
Implementation in APPMETROPOLIS
Each app within the APPMETROPOLIS framework will adopt this new setting:
- MASTER Setting: When an app is designated as a MASTER, it acts as the central hub for collecting data from SLAVE modules.
- SLAVE Setting: When an app is set as a SLAVE, it requires the URL of the MASTER installation of APPMETROPOLIS. The data from the SLAVE app is then directed to the MASTER APPMETROPOLIS.
Objectives
The primary goal of this feature is to create a centralized APPMETROPOLIS module that gathers data from all other apps on the same platform as well as from SLAVE apps on other platforms. This centralization facilitates a more streamlined and efficient data management process, ensuring that all relevant data is collected in one place for easier access and analysis.
FEATURES: MODULE SETUP (optional)
Appmetropolis module can also be added to any APP for different purposes.
To do that go to FEATURES TAB and add the module on YOUR PAGE SECTION
You can add it one time or more than one time in your app.
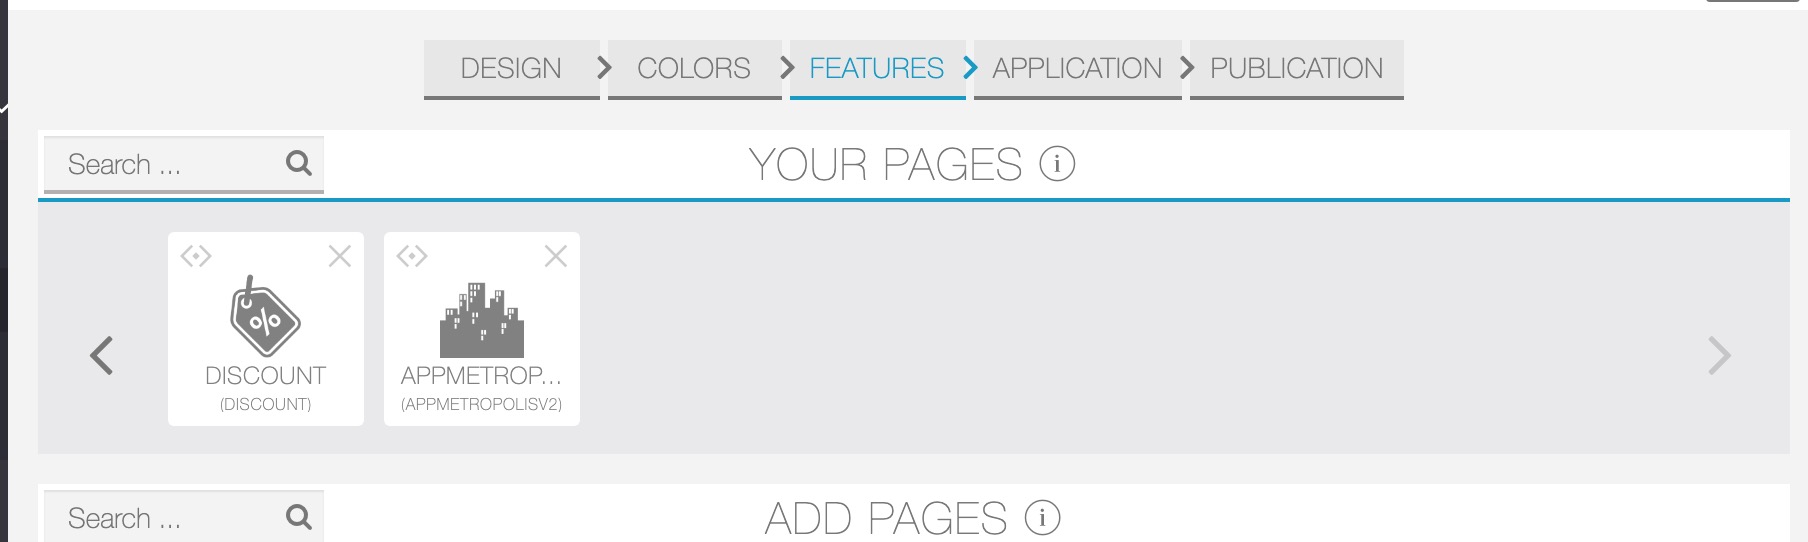
You can add the module more than one time because you can create different views, for example APP MARKETPLACE or COUPON MARKETPLACES or all together. But let’s follow first the first step configuration.
Select the name and icon of the feature
After that you can see all the coupons that the module is fetching from any function COUPON from Siberian. You can decide here if you want to list them all or disable one or more of them
The tab “App View Setting” is telling to Siberian how to show the Apps / Coupons in the App.
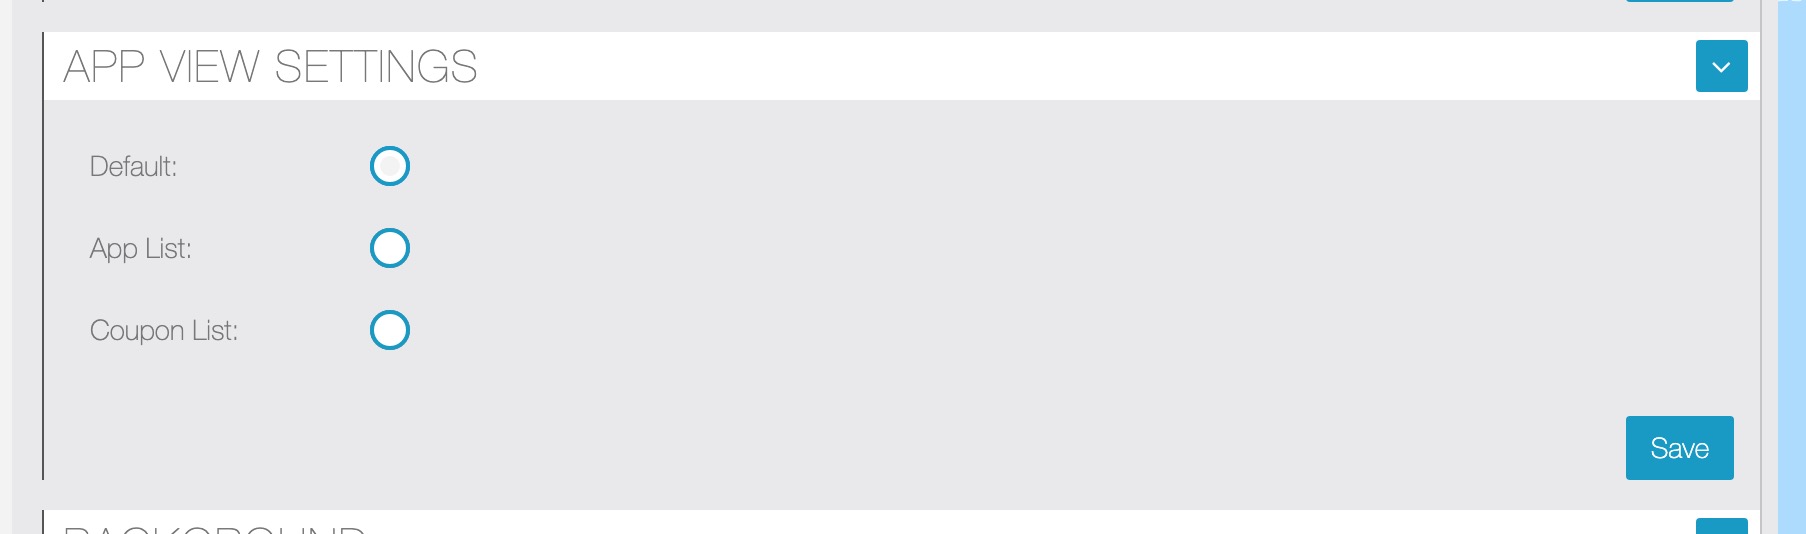
You have 3 possible choices:
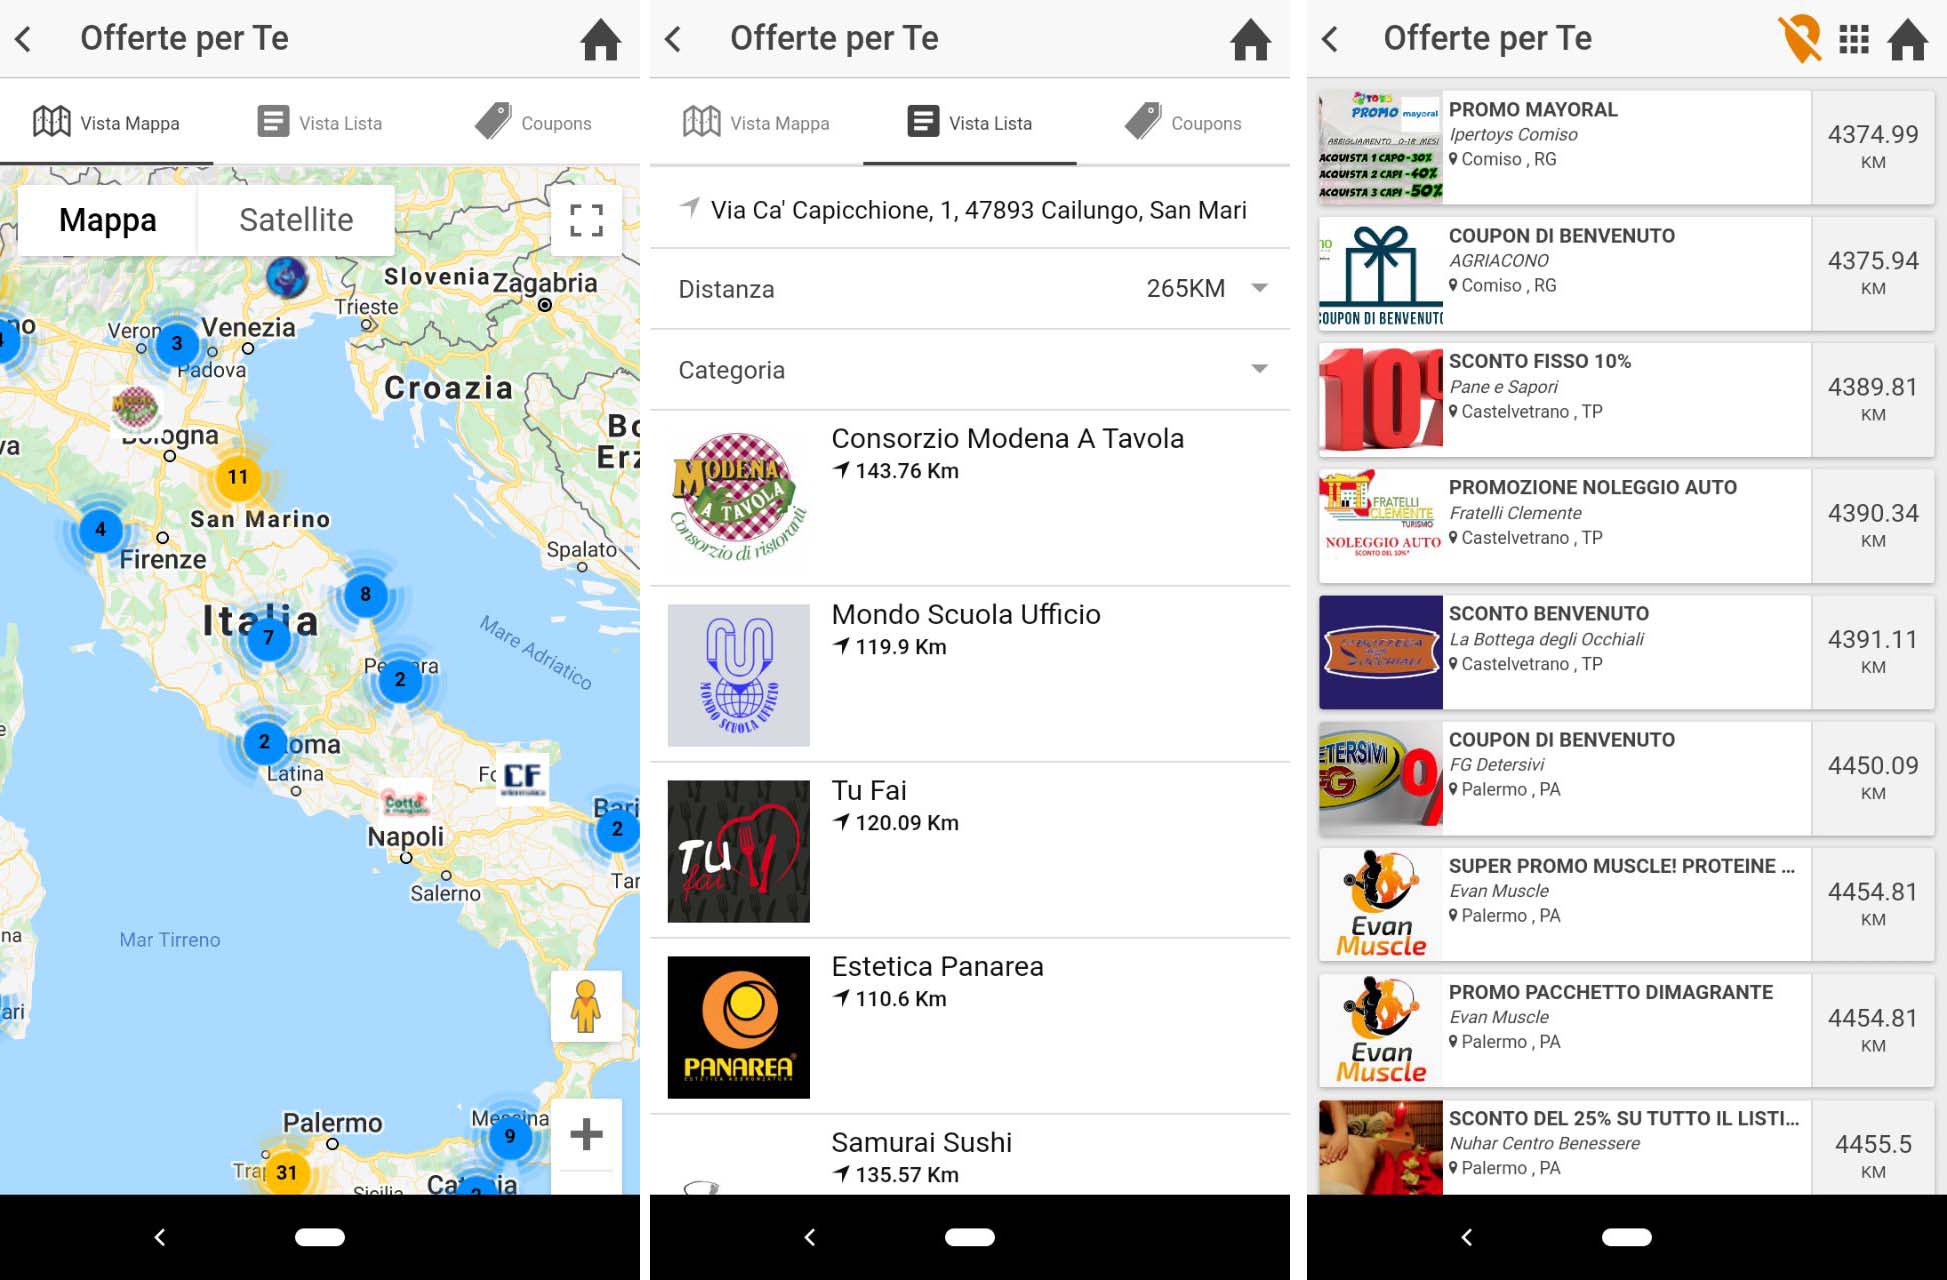
- DEFAULT is a view that starts with the MAP of APPS. If you type on the MAP the APP details is opened. Than you can see the APP list and finally the coupon list.

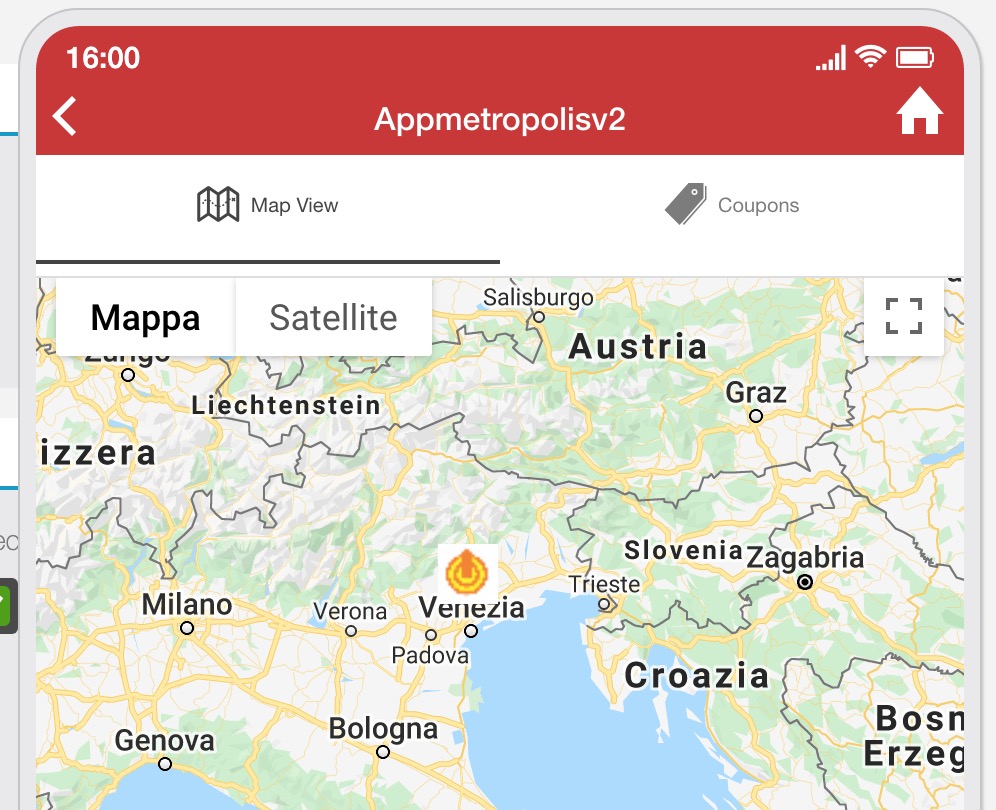
- APP LIST. This is a view that is showing only the MAP of APPS and the APP LIST
- COUPON LIST. The MAP is showing the COUPONS details and also the LIST has only the coupon near the position you are.


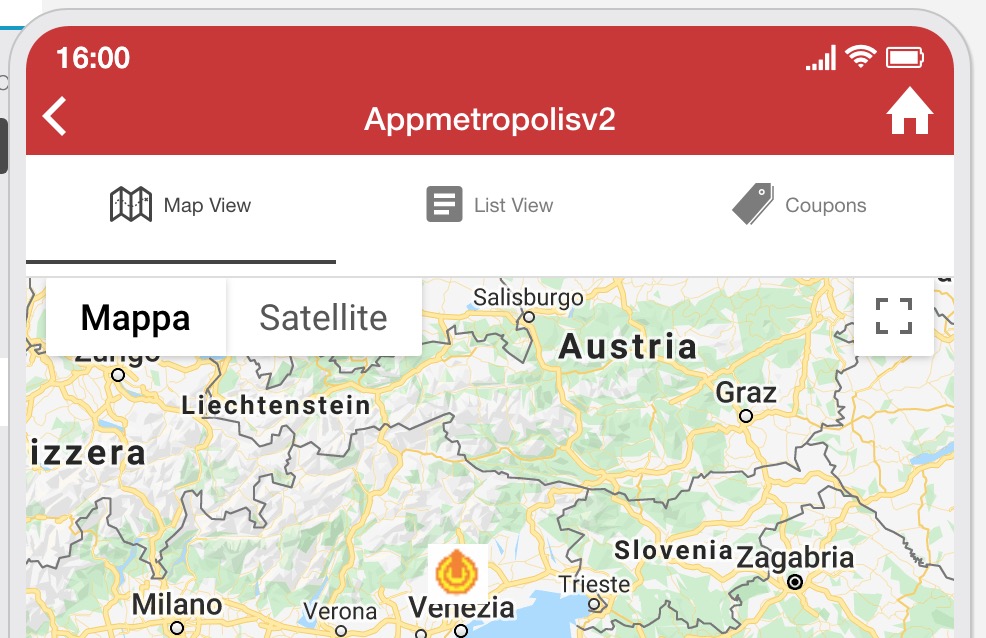
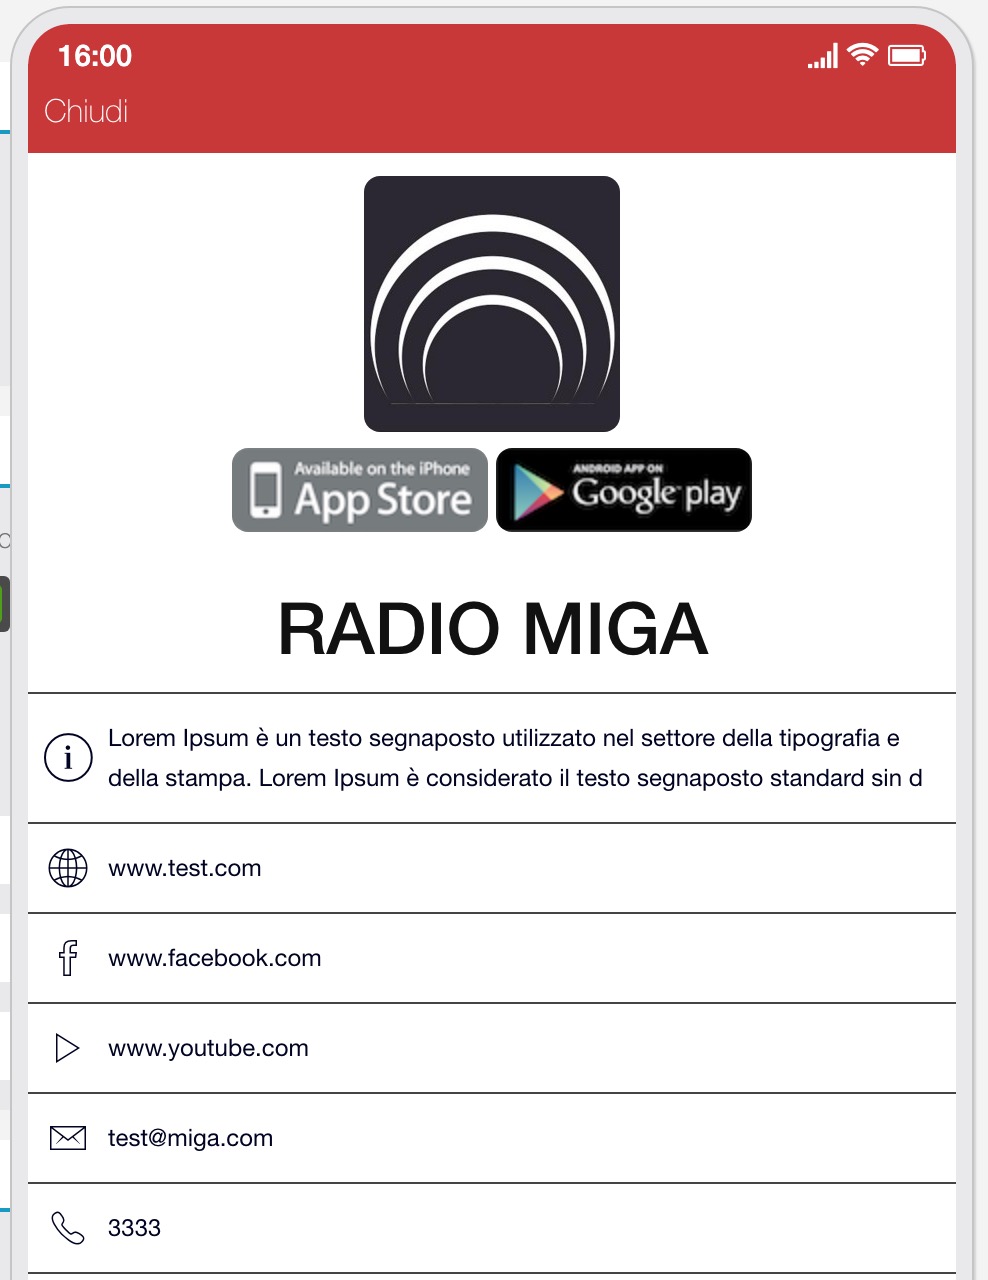
In APPMETROPOLIS APP for example I added two Appmetropolis buttons, one called FIND THE APP NEAR YOU and another FIND THE OFFERS NEAR YOU.
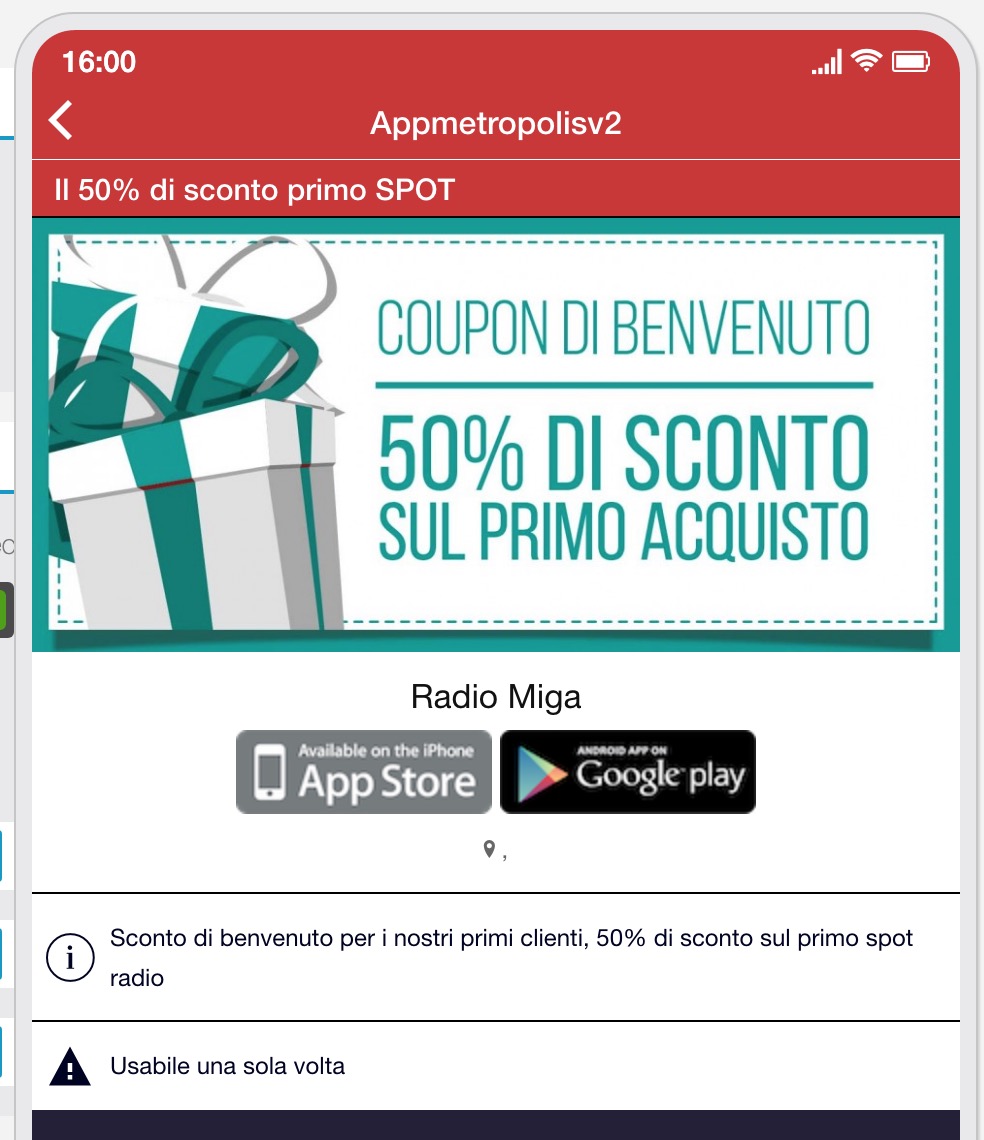
As you see the COUPON DETAILS and the APP DETAILS have always the button to download the APP from APPLE STORE or GOOGLE PLAY (on App you will see only the button of the platform you are, for example on an Iphone you will see only the APP STORE button).
The concept is that to access the discounts or discover one APP it is mandatory to download the APP. This is crucial to prevent “coupon hunters” and be more “merchants friendly”
I know that is hard to think from a merchant perspective than a customer perspective, but if you think differently and you are more near the needs of your customers you will appear different than tons of your competitors.
Web Portal
Now you can add a web portal with some steps configured to install the Web portal on WP or a blank HTML page.
Blank HTML page configuration are these steps follows.
- Click on the windows icon.
- Search for NOTEPAD.
- Open NOTEPAD.
- Goto module of OwnerEnd copy the EMBEDDABLE LINK and paste an empty HTML page like this.
- The next step in the process of creating a blank HTML page is saving this file. Notepad will usually try to save your documents with a .txt extension, but to save an HTML file you need to save your file with a .html extension. So, type the name of your file and add a .html extension to it. Even .htm works well.
- Click on the Save button. That’s it, there you go, you have your new HTML page absolutely ready.
WP Configuration are these steps follows.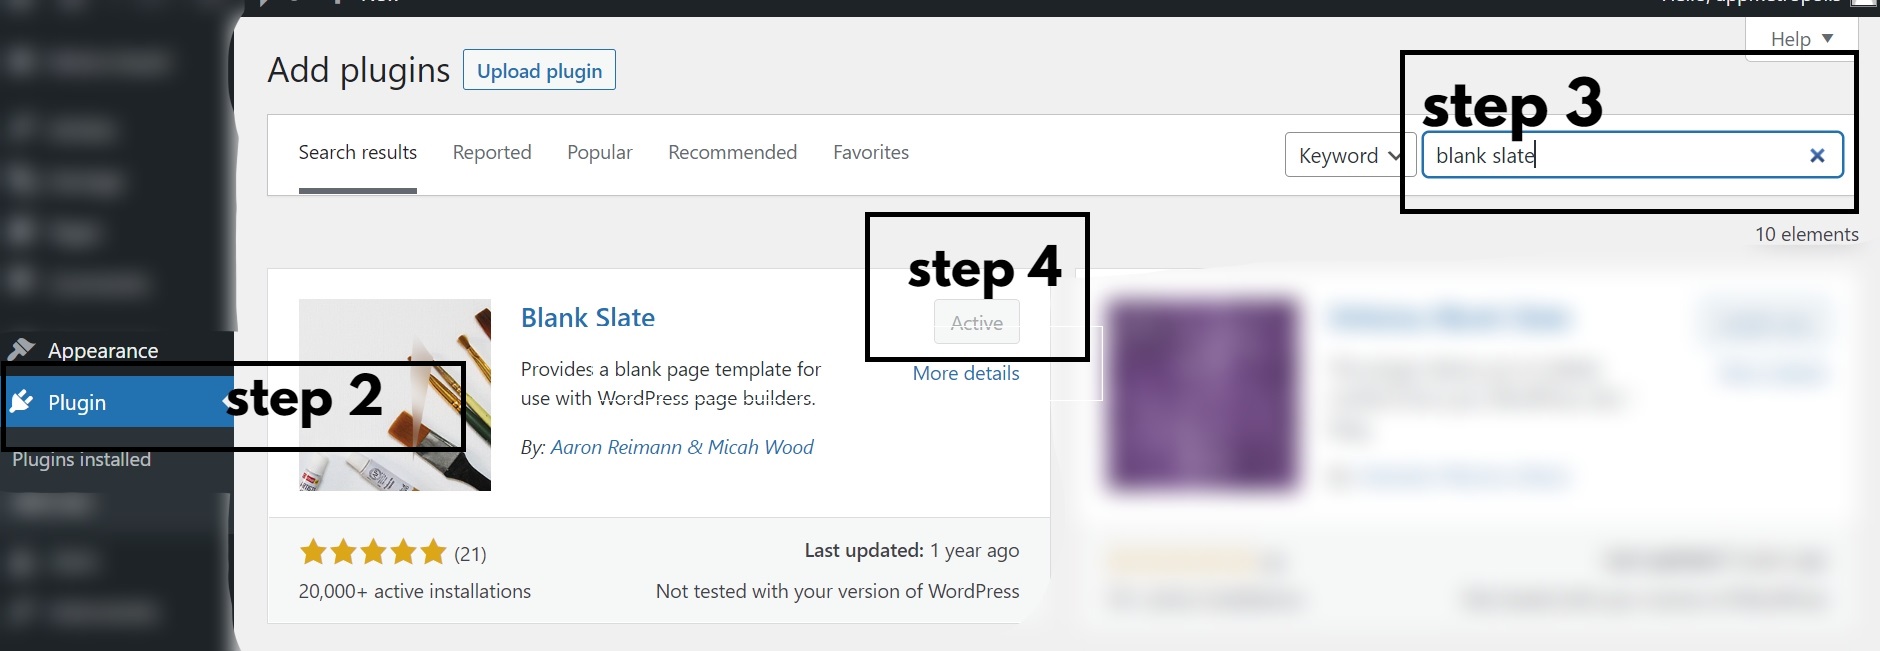
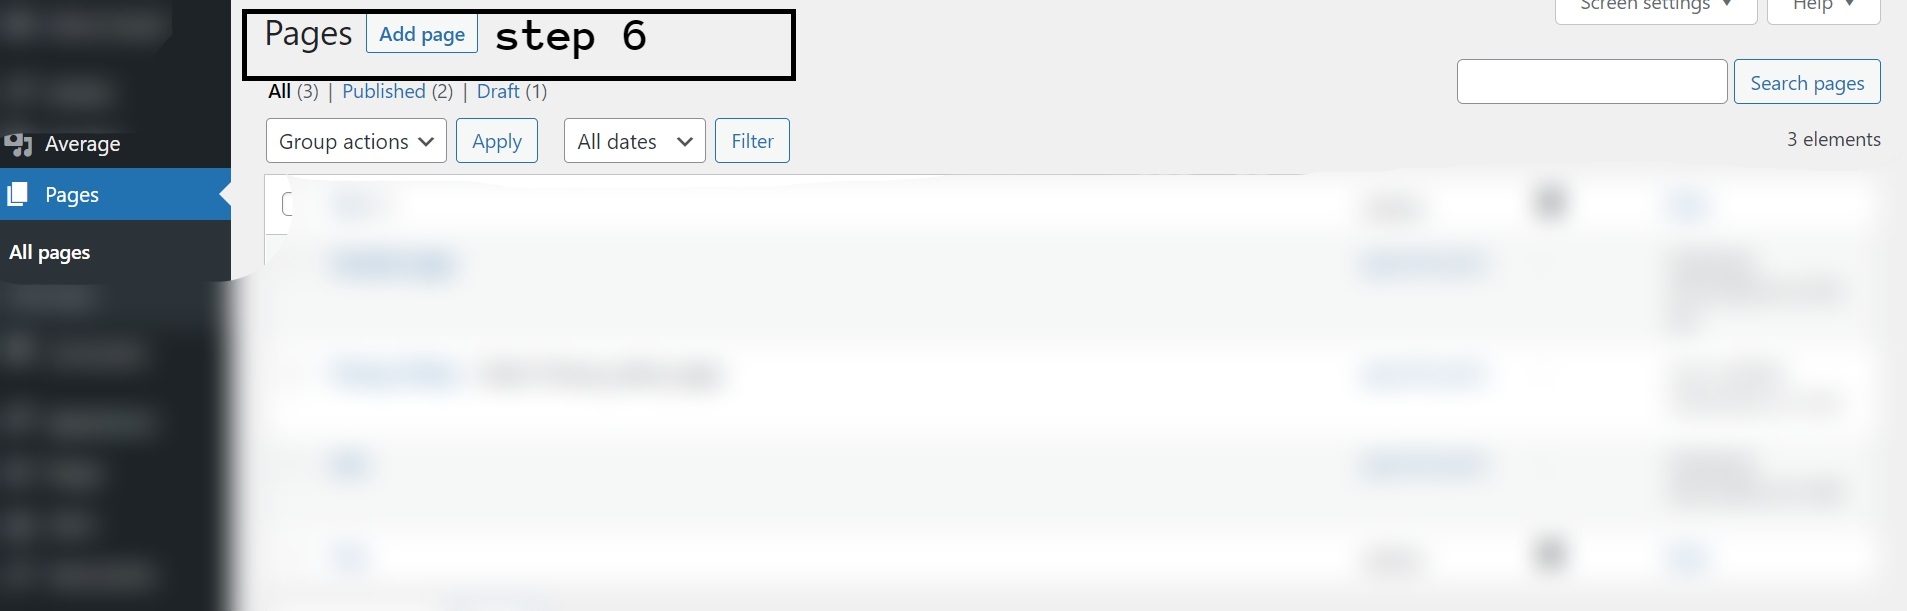
- Go to WordPress dashboard
- Click on add a new plugin section.
- Search BLANK SLATE plugin.
- Install the BLANK SLATE plugin and also active after installation.
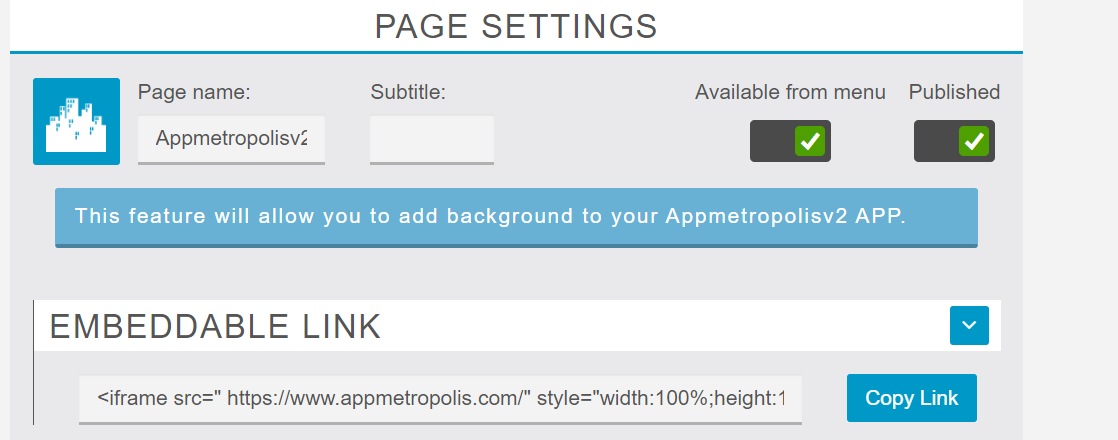
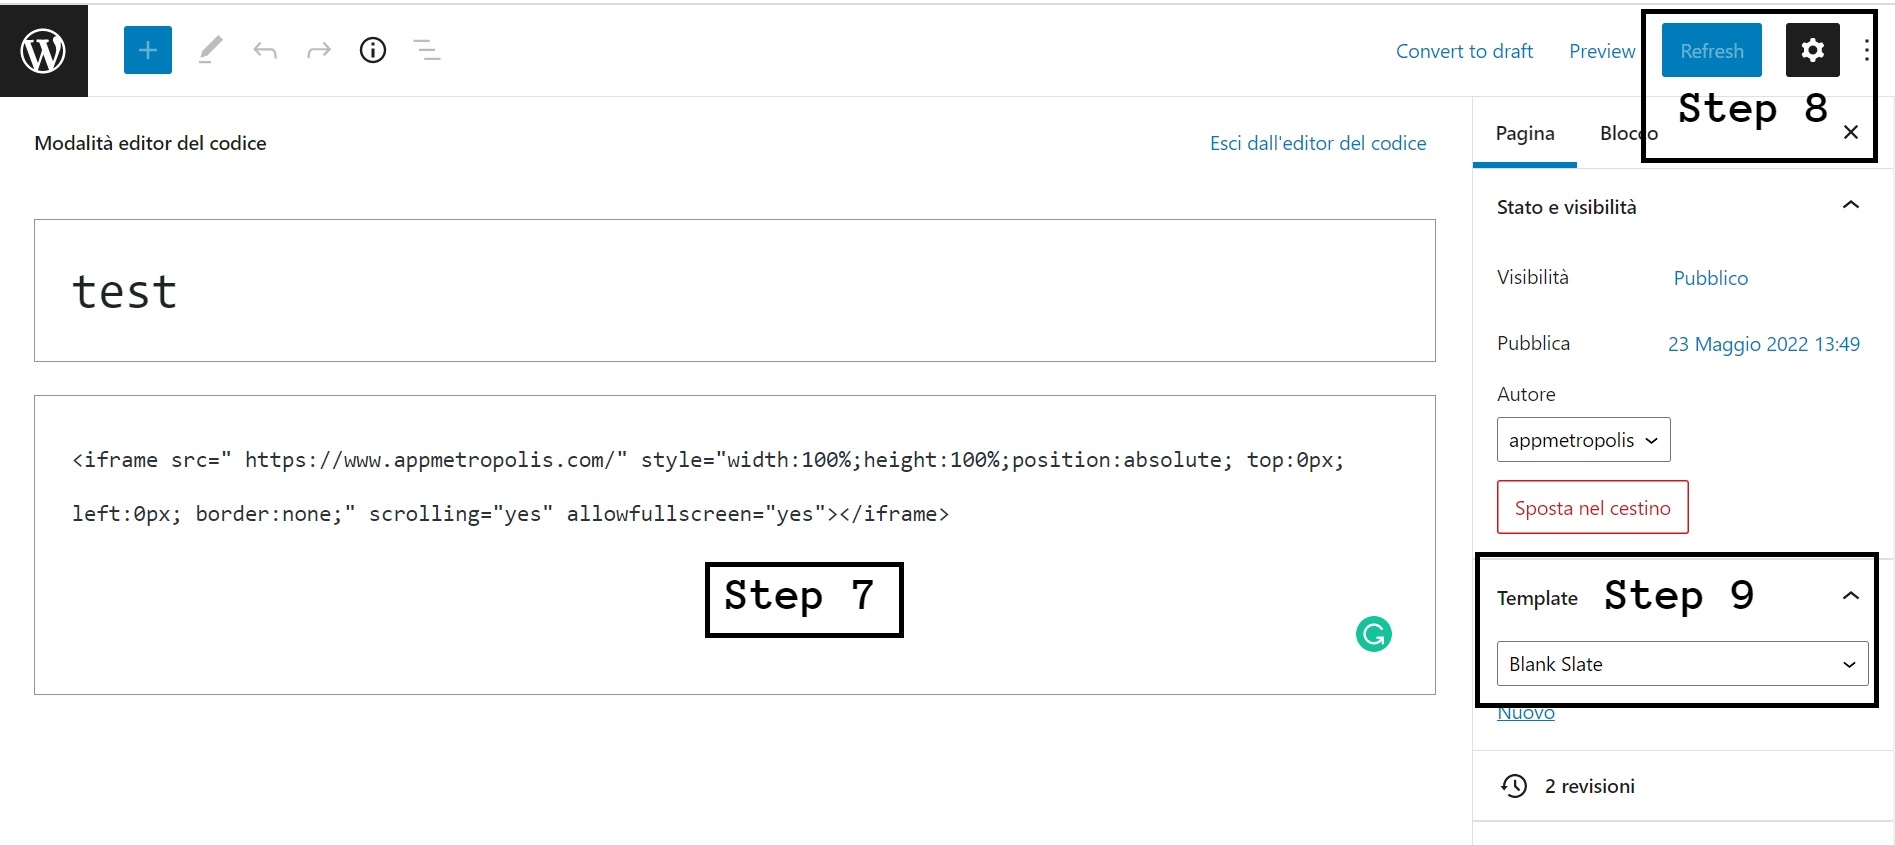
- Go to a module of OwnerEnd and copy the EMBEDDABLE LINK.
- Click on add new page section
- Paste EMBEDDABLE LINK.
- Now click on page settings.
- Click on the template dropdown select the BLANK SLATE option and click on the save or publish button.
APPMETROPOLIS is UNIQUE for this reason.
Buy this module on www.migamodules.com
To link this user manual page use this link https://support.migastone.com/en/hrf_faq/appmetropolis-v2-module/
Booking
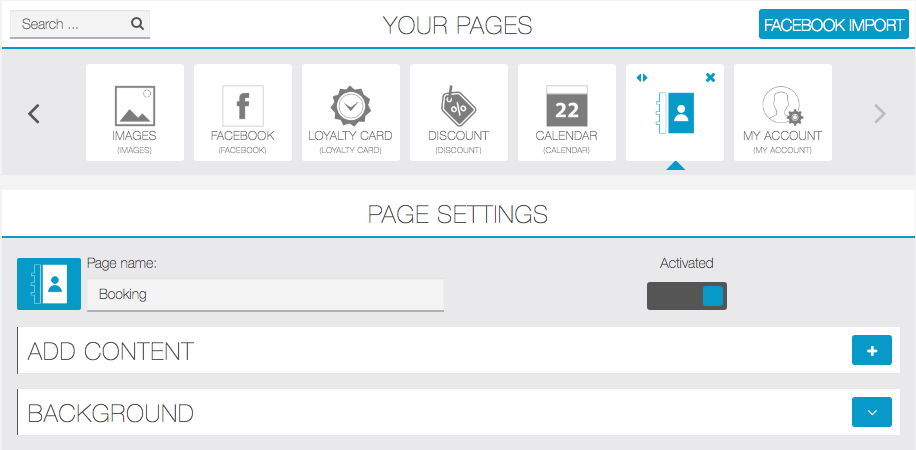
Thanks to this feature, your customers can schedule an appointment at your business(es).If you want to add this feature to your application, that is very easy.
First of all, you have to click on  :
:
Then, you have to click on ![]() and enter the location of your business and the email address of the manager:
and enter the location of your business and the email address of the manager:
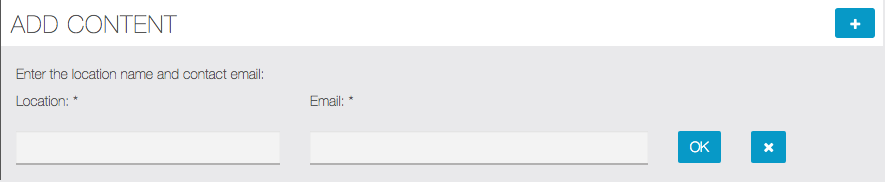
If you have several businesses, you can add these businesses to your Booking feature.To do that, you only have to click again on ![]() . You can do this process, as many time as you want in order to reference all your businesses.
. You can do this process, as many time as you want in order to reference all your businesses.
Why these information ? The location of your business(es) is important for your customers, so that they know exactly where they schedule their appointments.
Thanks to the email address of your manager, the application will send him an email to validate the appointment.
And the result:

Calendar
The Calendar feature will enable you to share with your users the place and date of your events and the ones you will be present to.
To create a Calendar feature, click on  in the add pages part.
Click on ![]() to add a calendar. You have 2 options:
to add a calendar. You have 2 options:

iCal
If you click on iCal, this appears:

- Then you have to go on Google Calendar

- Create your event on Google Calendar

- Find the agenda’s URL. To do this click on “Share this calendar”

- Click on “Calendar Details”

- Click on “ICAL” in the Calendar Address

- Copy this address and paste it in the “Calendar’s URL ” field
 Finally click on OK to validate your event.
Custom
If you click on Custom Page, this appears:

Enter the name of your Calendar and then click on ![]() . This appears:
. This appears:
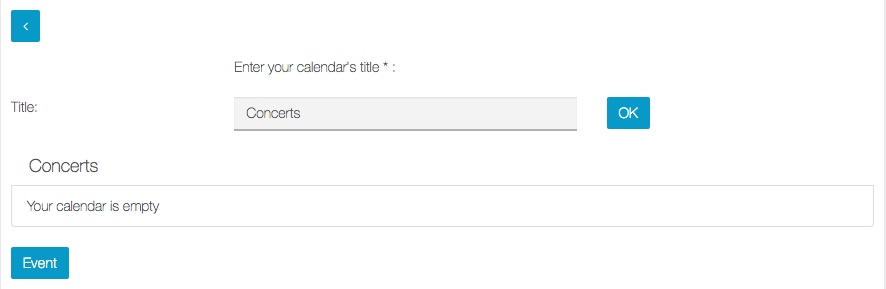
To create a new event click on ![]() . This appears:
. This appears:
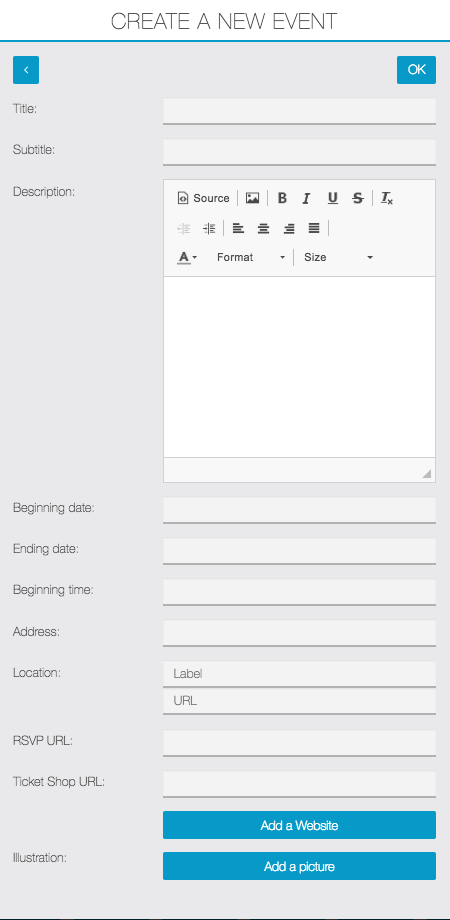
Thus, you have to enter all the required information for your event. Optionally you can add an image, a link to website, a link to RSVP page (for exemple if a reservation is required) or to buy a ticket.
To add another event just click again on ![]() and repeat the process.
and repeat the process.
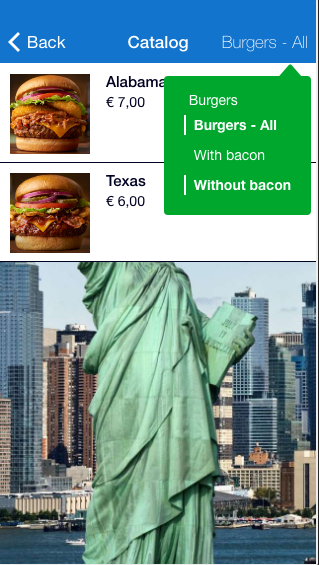
Catalog
This features allows you to create a complete catalog.NOTE: if you have menus, don’t create them with this feature but use the SET MEAL feature instead which is more appropriate.
Categories
Click on ![]() and you see this:
and you see this:

Insert category name. Repeat this last step (![]() and insert category name) for all the main categories you need.
and insert category name) for all the main categories you need.
Products
Once you have created all the categories, you can create the product by clicking on the icon ![]() in the category you want.
in the category you want.

Then fill all the fields required and click on ![]() button.
button.
NOTES:
- The categories appear in the same order they will be created.
- You can create all you categories first, then your products.
- You can drag and drop to change order of categories, subcategories and products by clicking on
 .
.
You can obtain this on your app:
Commerce
With the Commerce feature you will be able to sell your products from one or several points of sale. Users will be able to pay online via Paypal, or to pay at your point of sale or when they are delivered.Let’s go!
1. Create a point of sale
After adding the Commerce feature to your app, click on ![]() to add a point of sale :
to add a point of sale :

Then fill out with your store info:

Then add your delivery options. You can choose from:
“For here”: meaning that people should come to eat/drink/whatever in the store
“Carry out”: meaning that people should come to the store to get the product and then leave the store with the product
“Delivery”: meaning that you are able to deliver themIf you choose “Delivery”, some other options are displayed:

“Delivery fees”: the cost of the delivery
“Tax”: indicate your tax in percentage, if zero write “0”, if 10% write “10”.
“Free delivery starting from”: if you want the delivery to be free when the order reaches a certain amount
“Delivery radius”: indicate the area you deliver from your store address, in radius. (WARNING: it is necessary to set Google Maps API from the Settings Menu> MAB API. Please refer to the Migastone support).
“Minimum order”: if an order has a minimum amount for you to deliver a client
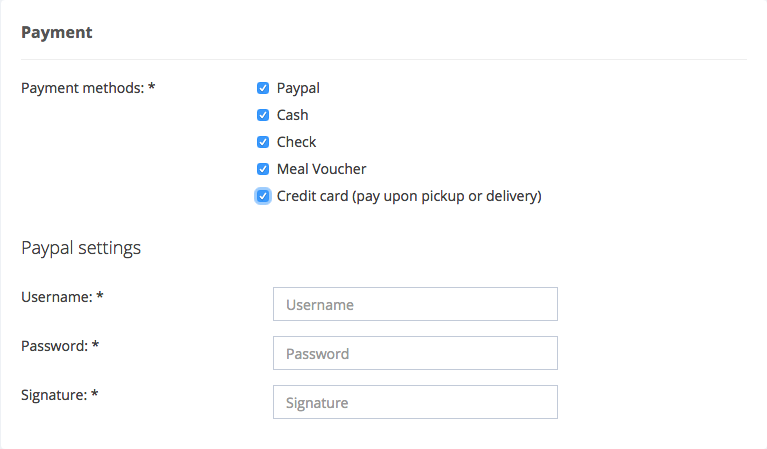
Then add your payment options. Enable one or more options from the following:
OFF LINE payment options
- Cash
- Check
- Meal Voucher
- Credit card (pay upon pickup or delivery)
ON LINE payment options
- PayPal – You must have a PayPal account to accept this type of payment.
- Credit card (online payment) – You need to have a Stripe account in order to enable this payment option.
- Satispay – Info in this page.

Save by clicking on ![]() .
.
2. Create categories for your products
Then go in “Catalog” and click on “Categories”:

Click on ![]() to add your categories.
to add your categories.
After categories, you can also add subcategories. To do this clic on the category in which you want to insert the subcategory until you see this icon on the right ![]() . Now you can clic
. Now you can clic ![]() to add a subcategory, repeat to add as many subcategories as you need.
to add a subcategory, repeat to add as many subcategories as you need.

3. Create products
Then click on “products” from the main menu in “Catalog”.

Click on ![]() to add a product. And fill out with your new product info. Add as many photos as you wish.
to add a product. And fill out with your new product info. Add as many photos as you wish.

You can some sizes to your product. Switch on Product Formats and then fill out sizes information of your product, with a price for each size. Note that if you activate this function, you won’t be able to change the price of your product in the main menu as you did just before. The price displayed in the app will be the smallest one (“from 3€” for example).

You can also add some options to this product. By options we mean sauces, complementary products, etc.
Here is an exemple with some sauces.
First, create a new options group:

If you check “at least one option is required” the user will have to choose from the sauces you offer when he orders the product. He will not be able to order without choosing one of these options (that’s useful when you have many sizes for a product, as we will see next).
Then, in the “Add it options” section, click on “+” to add options to this group of options.

Click on ![]() to save. Now, in your product details page you can see your options below.
to save. Now, in your product details page you can see your options below.

Then check the categories for your product:

And click on ![]() to save your product.
to save your product.
You can also duplicate a product if you want to create a new product that doesn’t have many differences from another one.

If you have many products in the feature, it can be difficult to scroll to find the one you are looking for. That’s why we implemented a search bar, where you can type its name and find it easily.

4. Manage
In the “Orders” menu, you will be able to see and manage the orders you receive.
In the “Settings” menu, you will able to manage the fields required during the order. You can either choose to make a field mandatory, hidden, or simply hide it from the form.

You can enable the search field on your category pages:

You will also be able to link, for each store, a connected printer to your app to print orders when they arrive:

and also to manage your tax rates if you have several:

You’re done!
Contact Page
This feature allows you to create a contact page for your business. Just complete the fields to automatically create a one-touch-call button, a geolocation button and a contact form.
You can obtain this:


Contest
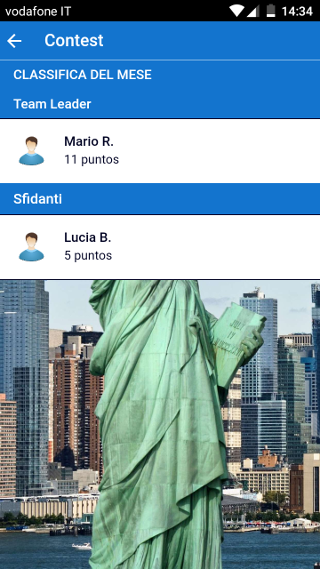
With this feature, business owners will be able to increase the pruchasing frequency of their clients by giving them their ranking based on their loyalty. This feature is working only if a loyalty card is integrated in the application. The more a user gets loyalty points, the higher his level in the ranking will be. All users see their positions in the ranking and the business owner can offer a gift to the leader. The more the gift is important the more the challenger users will come back to dethrone the leader, and the more the leader will come back to consolidate his rank.
The ranking will be visible to all users. The customer’s firstname will be shown only if the user check the corresponding flag in the registration/login screen:

Here is an example of the contest ranking displayed in the app:
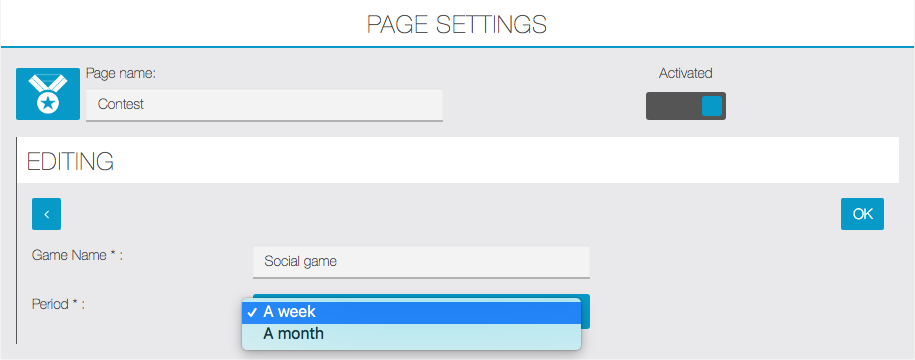
The period of a game could be a month or a week. After this period the game will restart with counters reset to zero. For a first game, we advise to choose a monthly period as the user base isn’t important. When more and more users have downloaded the application on their mobile, the period can be set to a week.
Give a name to a new social gaming. It’s just for you and won’t appear on the mobile application:
Custom Page
Migistone offers you a wide choice of features to put your products and activity forward.
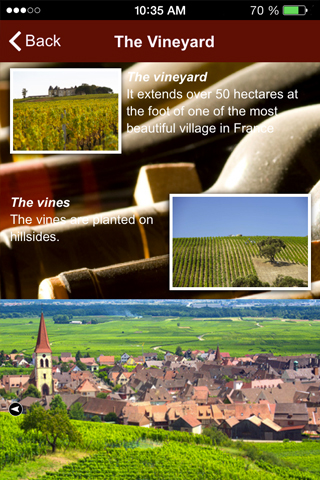
Custom page allows you to enlighten your business by numerous ways. You can write an article with a picture or not, you can publish a photo gallery and you can publish a video directly on this page.For instance, custom page gives you the opportunity to create pages like these ones:
Let’s see how to create a page such as these ones. First, you need to create a new Custom page:
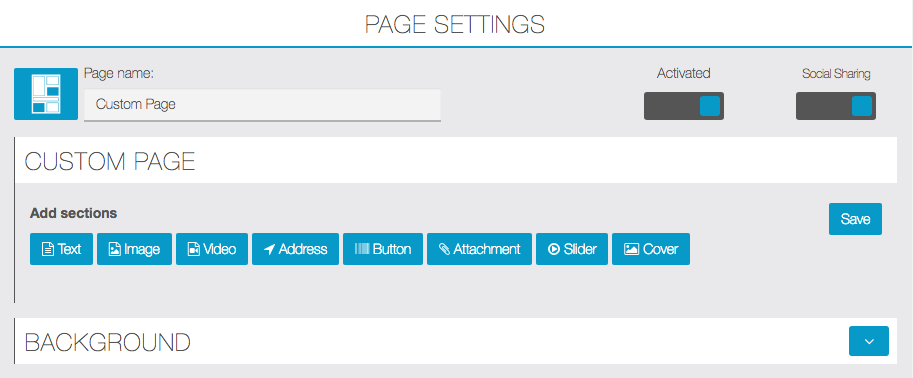
Then you must name your new page.A custom page is made up of independent blocks. Thus you can realize as many blocks as you want in the same page.
1. Text Sections:
Click on ![]() .
.
A new text document appears and you can write your article in it:
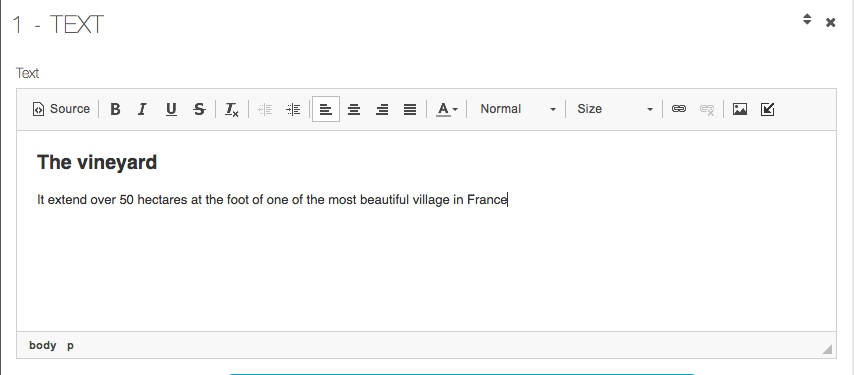
You can also insert images in this section. To do that, click on the icon ![]() on the toolbar.
on the toolbar.
This icon appears ![]() and allows you to insert your picture.When it has been inserted, you can act on its alignment and its size:
and allows you to insert your picture.When it has been inserted, you can act on its alignment and its size:
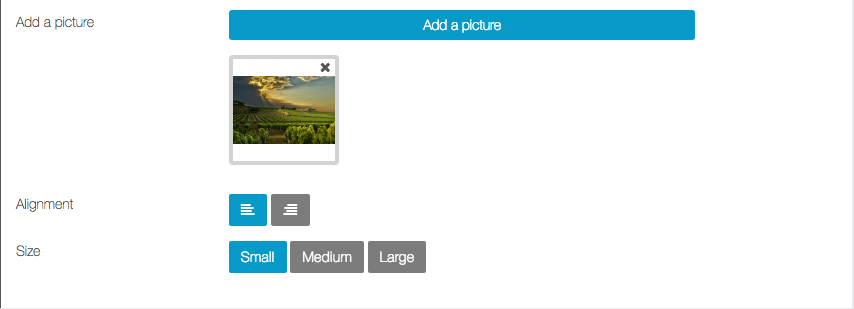
Thus you obtain this result:

To add other text blocks, click again on ![]() and follow the process we have seen.
and follow the process we have seen.
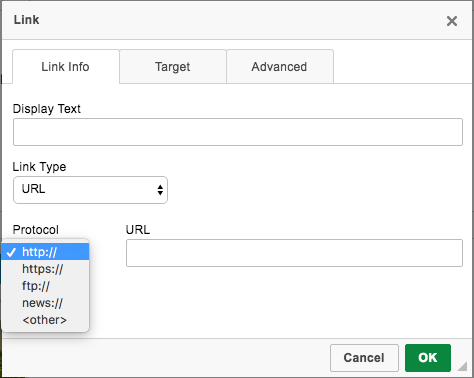
Links:
There are two ways to add links to your Custom Page.
First, you can add link in your text element. To do this, click the icon on the toolbar.
This appears:
2. Picture sections
Creating a photo gallery is as easy as realizing a text section.
To do that, click on ![]() and then on
and then on ![]() on the following window:
on the following window:

You obtain this:

Here again you can realize as many sections as you want, you just have to click on ![]() .
.
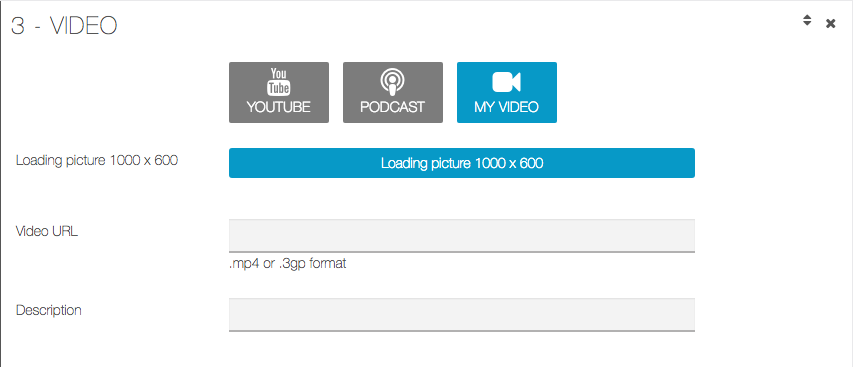
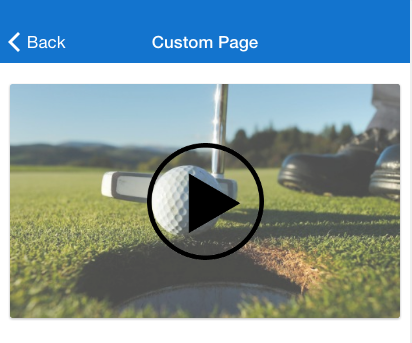
3. Video Sections
Click on ![]() and this appears:
and this appears:
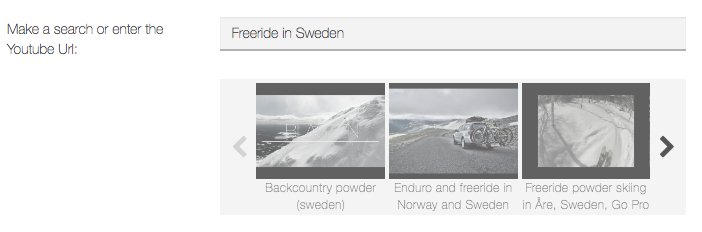
YouTube:
Click on  and this appears:

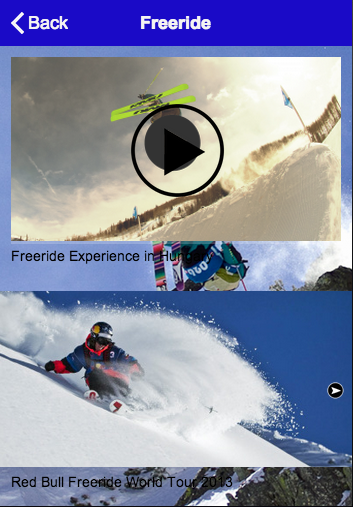
Enter your research or your YouTube URL in the field. For example, here I entered “Freeride in Sweden”.
Then click on OK. This appears:
Select the video you want to integrate and then click on ![]() to save your video.
to save your video.
Podcast:
Click on and  this appears:

My video:
Click on  and this appears:
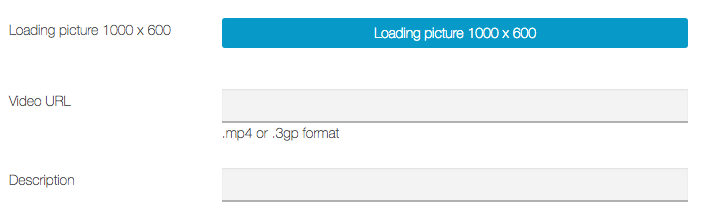
Once you have written the URL address of your video, you can write a little description of it and add a loading picture.You obtain this:
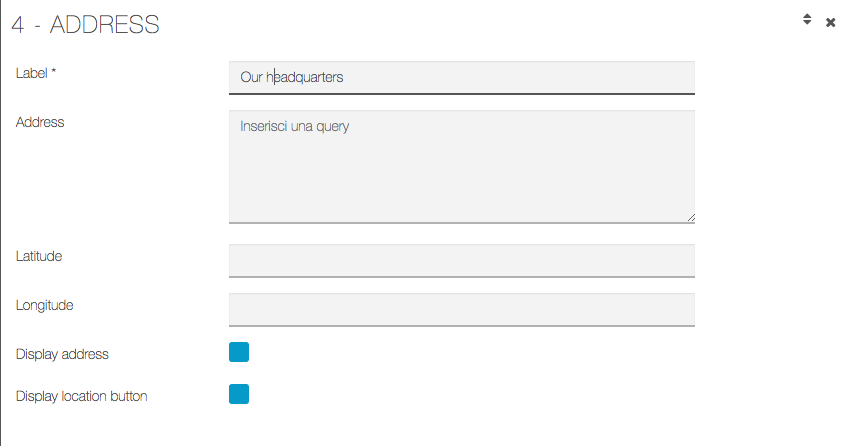
4. Address Sections
Thanks to this section you can add a button to locate any place from the user device.
5. Button Sections
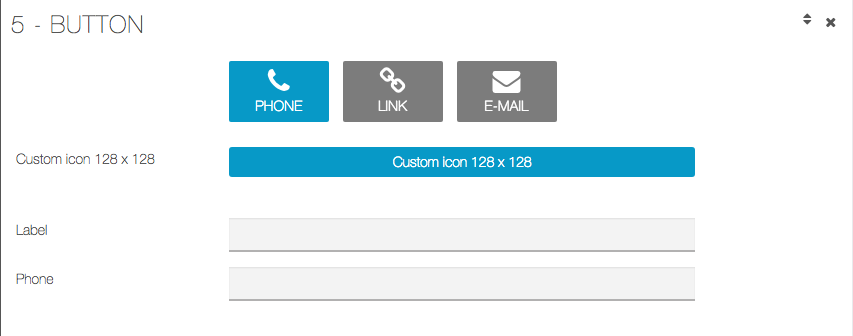
You can add a button to make a call, or a button to open a website.
6. Attachment Sections
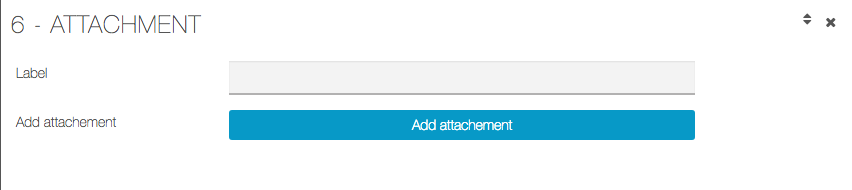
Use this section to attach documents such as PDF files.
7. Slider Sections
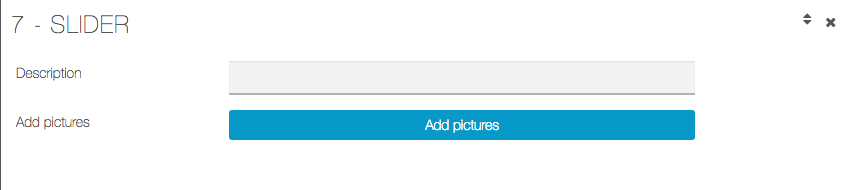
This section, like “Image” section, allows you to add images in your page. In this case the images will be displayed in rotation with a layout “full-width”. You can also load a single image.
8. Cover Sections

This section allows you to add images in your page. In this case the images all-screen size.
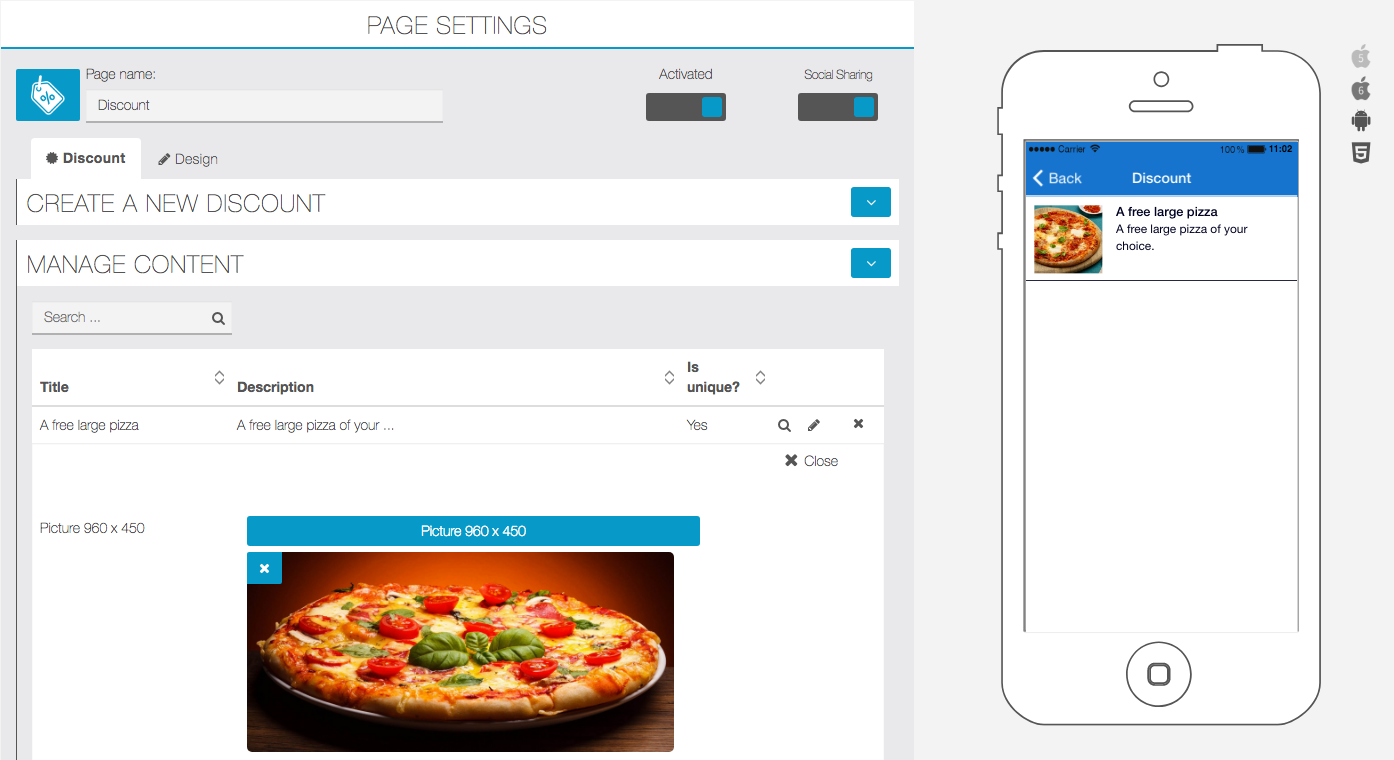
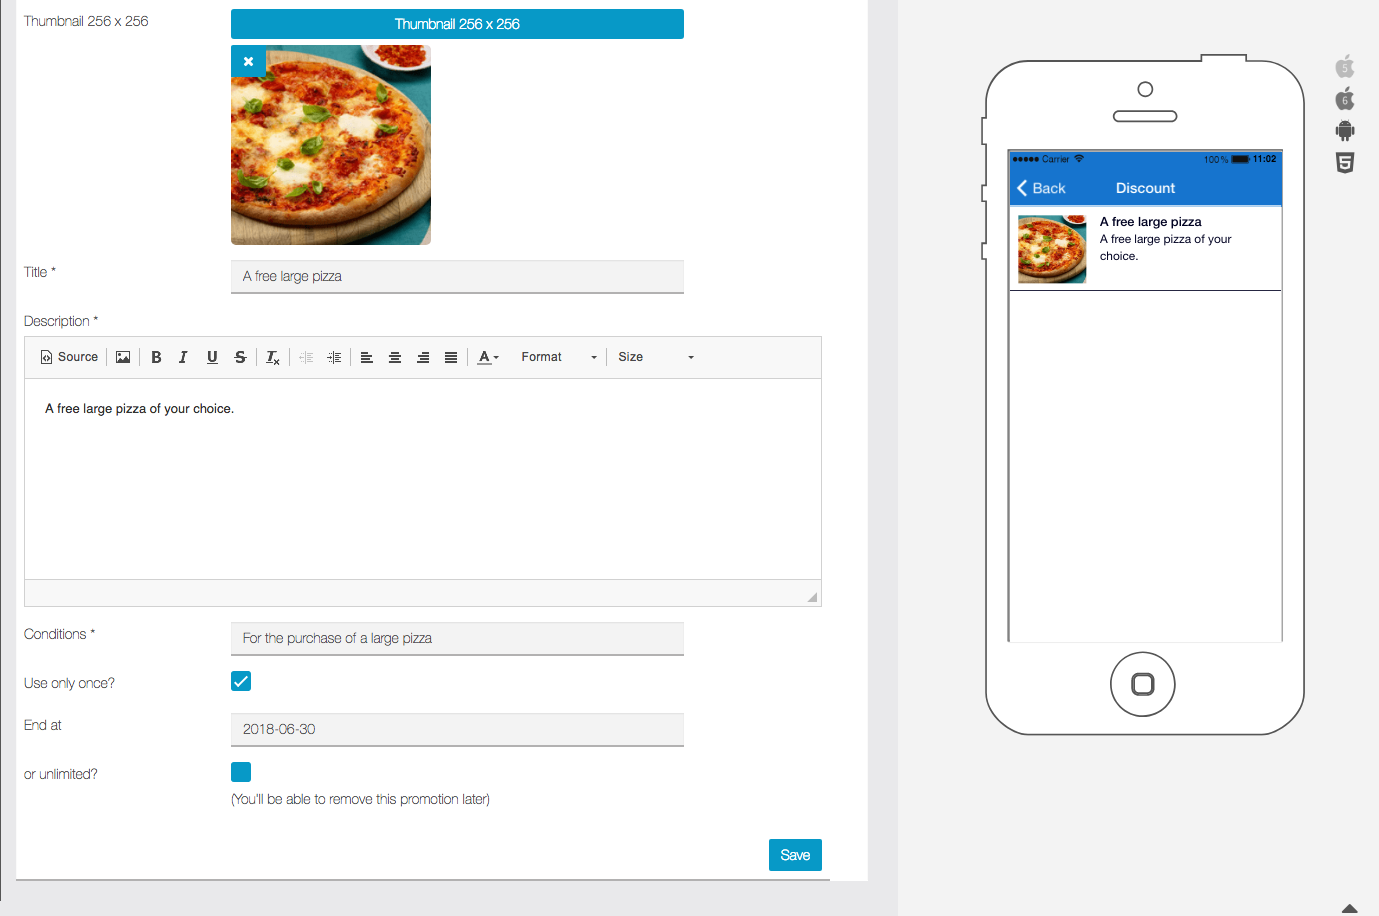
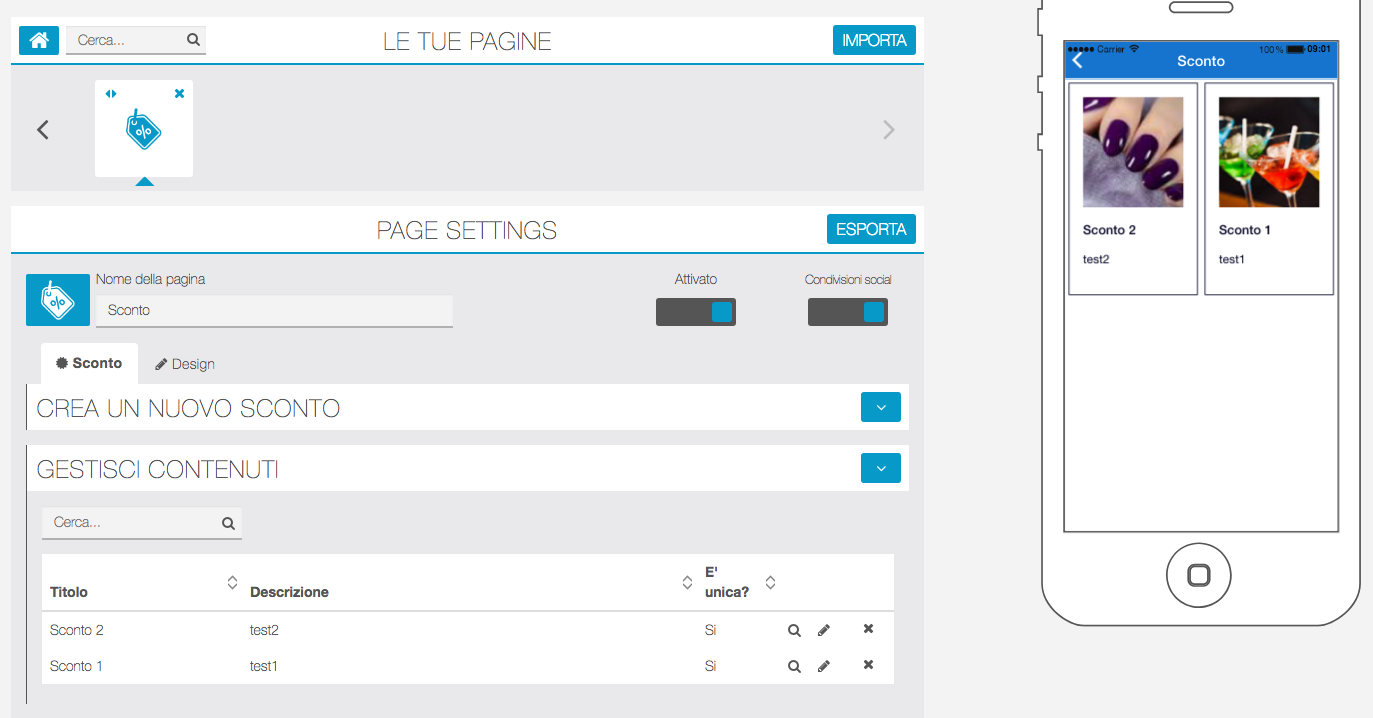
Discounts
With the discount feature you’ll be able to create as many discounts as you want and display them in the application.Here are the various parts of a discount:
- Title: for example ”One free coffee”, keep it short and simple
- Description: for example : “One free coffee among classical L and XL coffees”
- Conditions: for example : “Available for a $10 order”
- Can only be used once: check this box if you want the discount to be available for the client only once. A “use this discount” button will appear in the application and the client will have to press it to use the discount.
- End date or unlimited: choose if you want your discount to have a due date or if you want it to be unlimited and to stop it when you want.
Here is what it looks like:
To enter a new discount, click on ![]() and repeat the process.
and repeat the process.
Facebook Page
We are going to see how to use the Facebook feature to integrate a Facebook Page into your app.
First you have to add a Facebook page in your app by clicking 
Then just enter the ID of your Facebook Fan Page, for example for our Facebook Page: https://www.facebook.com/mypage, it will be “mypage”:

Then press “OK” and that’s it!
PROBLEMS WITH IDENTIFICATION OF THE PAGE NAME? LET’S USE THE PAGE ID
How to find out the PAGE ID?
- Go to the Facebook Page you want (be sure it is a Facebook Page and not a personal account)
- Click on any image of the page, for example, the header or the profile picture
- Now look at the URL at the top, in your browser’s address bar: the first long number after www.facebook.com is the PAGE ID. Copy and paste that code in the MAB and you’re done
Implement Facebook Page using Facebook Plugin
PROS: Very well integrated as layout and functionality
CONS: If the user clicks on an external link on the IOS, he can’t go back.
To implement FACEBOOK using PLUGIN FACEBOOK provided by the social platform. Find out how to create this code and paste it into the “Source Code” feature of your APP on this page https://developers.facebook.com/docs/plugins/page-plugin
The html tag must be IFRAME.
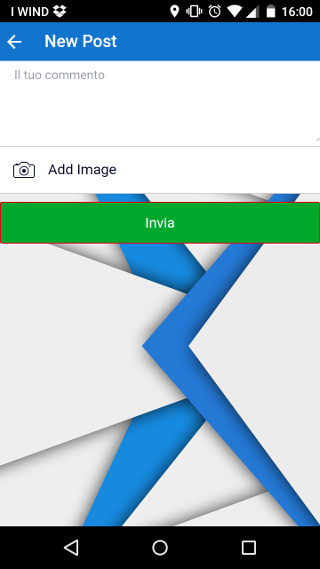
Fan Wall
With the Fan Wall feature, users of your application will be able to post comments and/or photos and to discuss among themselves.
1. Add a Fan Wall
When you add the Fan Wall feature to your application, you can set the “Near me” settings. It will allow a user to display on the Fan Wall only comments/photos from users around him, in the radius you have determined.

2. Add messages
You can add messages directly from the Editor by clicking on ![]() button and then type your text and/or upload an image.
button and then type your text and/or upload an image.
Or you and the users of the app can add messages on the Fan Wall through the application. Just click on “New post”.
![]()
Then create an account or log in (if you already have an account). And then type your message and/or upload a picture.
3. Display possibilities
Let’s see how it looks on the Fan Wall. You can choose “Near me” to display messages posted from a close position to you (determined by the “Near Me” radius), or “Recent” to display recent messages.
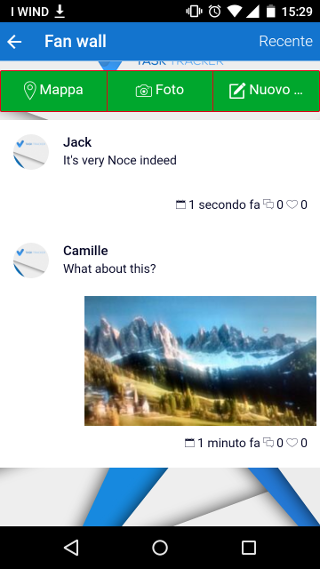
You can also click on “Photos” to display a gallery with all pictures that were uploaded to the Fan Wall.
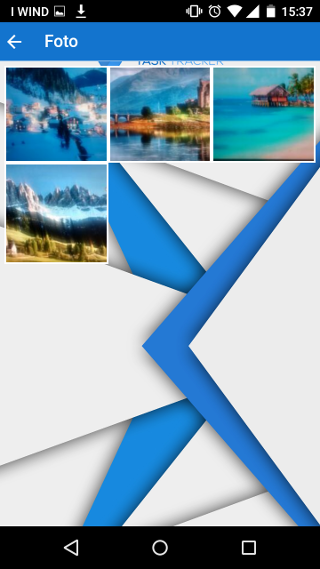
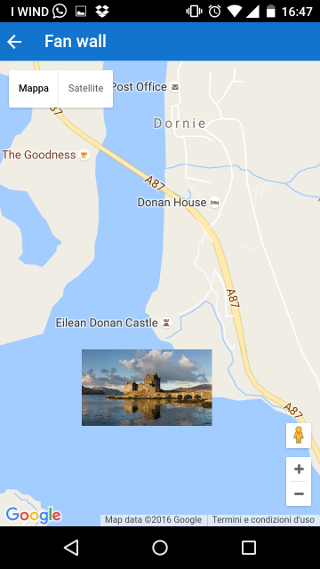
And you can finally click on “Map” to display a map and to display the pictures geographical position.
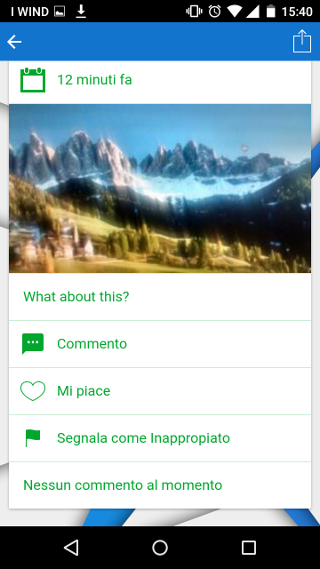
Of course, the Fan Wall page allows your users to like and comment content that was posted, so that they can interact.
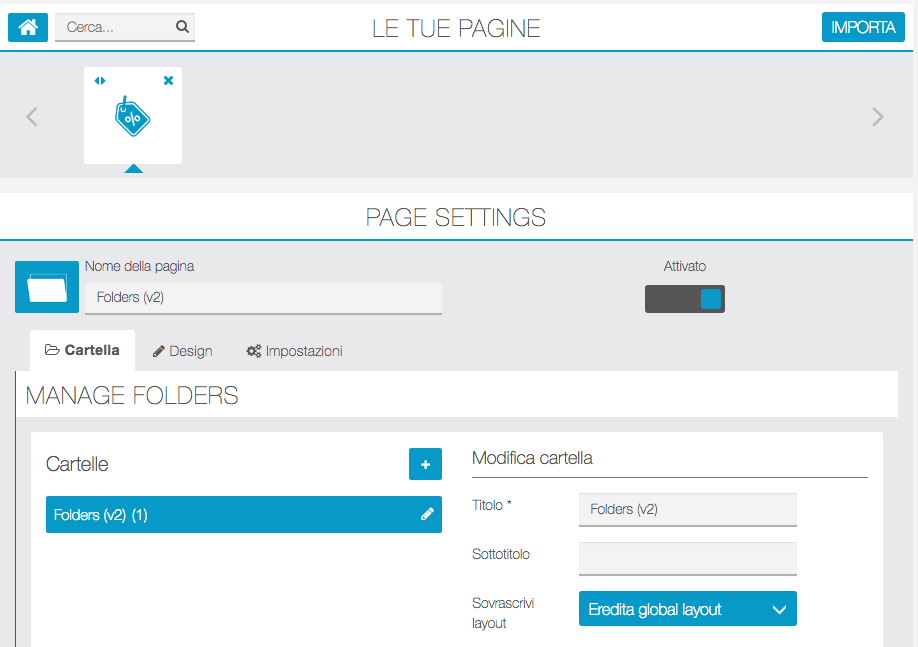
Folder
The Folders feature allows to create an arborescence inside your app.
The creation of a Folder
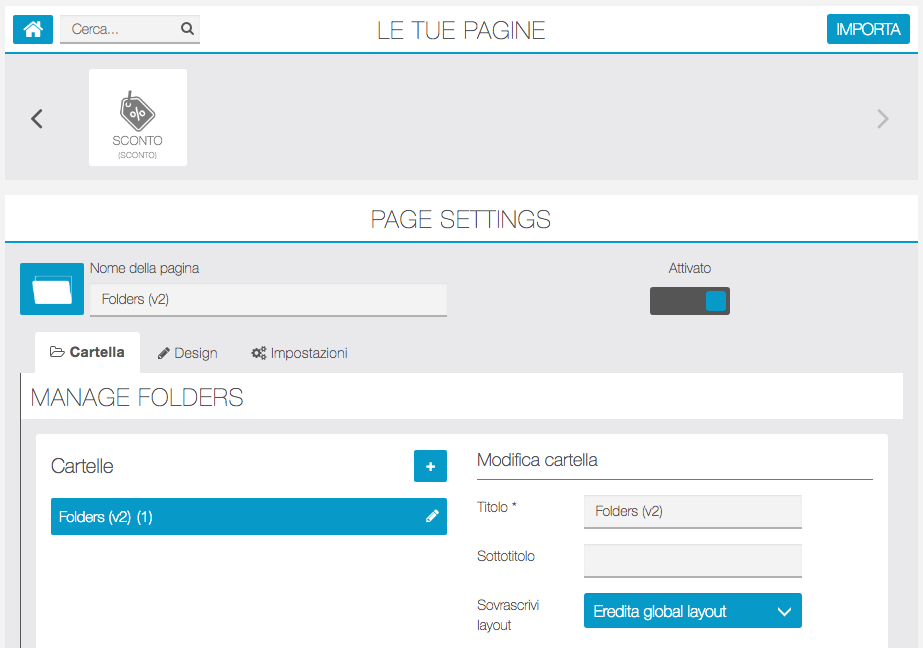
To create a folder, click on  in the “YOUR PAGE” section. This appears:
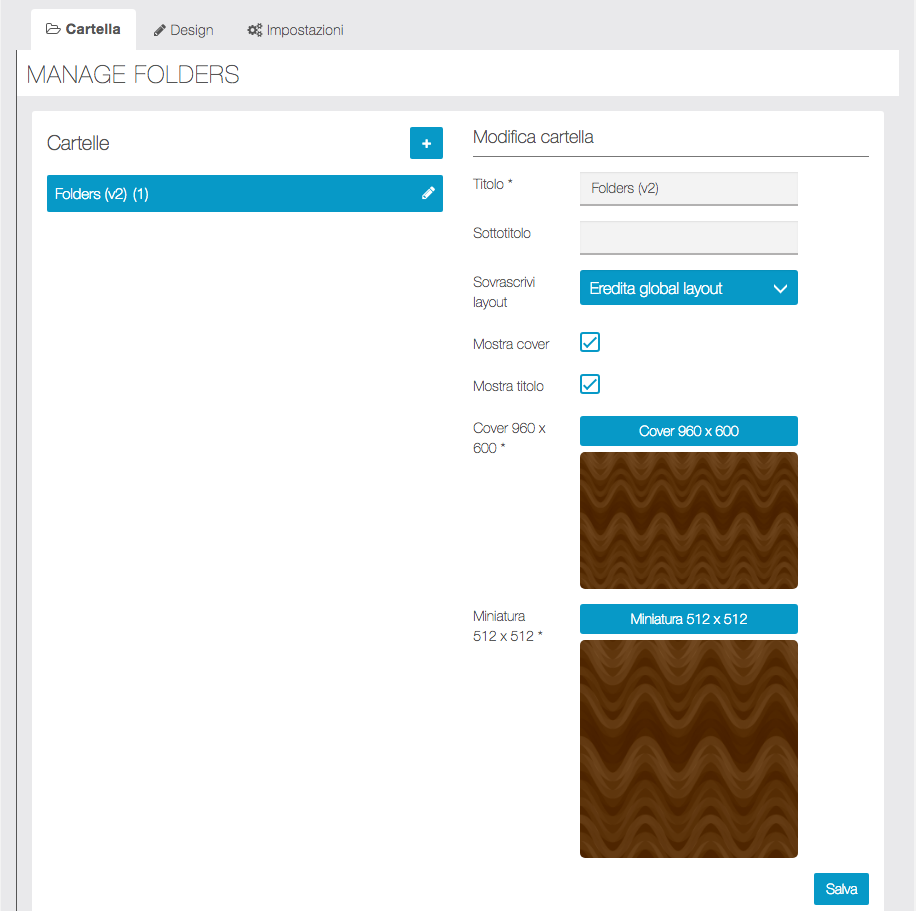
First you need to assign a name to the root folder by typing the desired name in the “Title” field. It is possible to add a subtitle, a cover image and a thumbnail image.
To create a subfolder, click on “+” and fill in all the necessary fields (name of the folder, possibly add subtitle, image, etc …). Perform the same procedure for each new subfolder. To change the name, subtitle or photo, select the folder (or subfolder) and click on ![]() icon.
icon.
Add pages to your Folders
NOTE: you need to create a page before adding it to a folder. The page will be created in the main slider and only later will it be “moved” to the desired folder. It is very easy to add a page in a folder:
- Select the folder or subfolder on which the page should be added
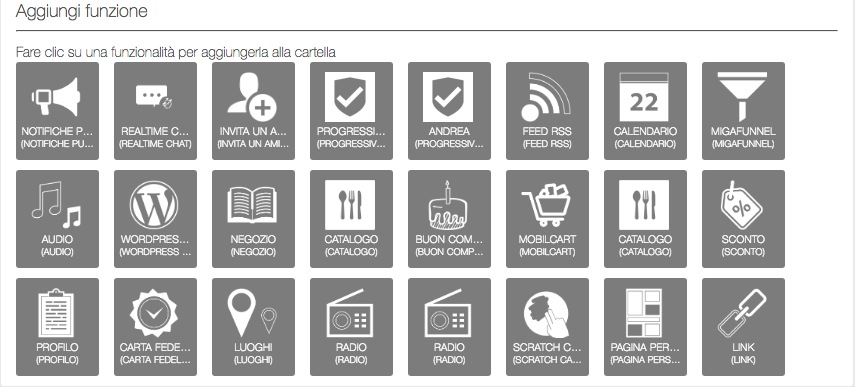
- Click on the page to be inserted in the folder in the “Add function” section shown by the following image:
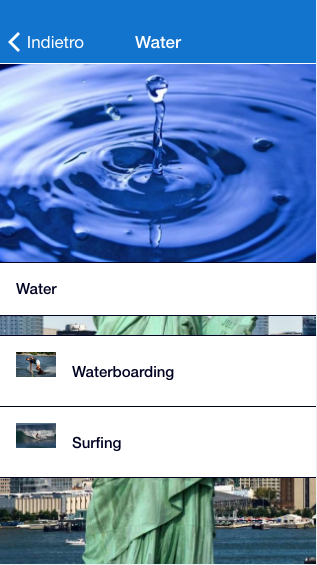
Here we are. We have added our first page to a folder. Do the same for each page you want to add. Here is an example of what you can create :
Editing your pages
You will see that, once you have added a page to a folder, this page will not appear anymore in the main feature slider. To manage the pages you have added on some folders, you have to open the Folders page. To do this, follow this process:- In the main feature slider click on the root folders icon you built:
– Select the folder or the subfolder in which the page you want to manage is. – Click on the page you want to edit.
– Once you have clicked on the page you want to edit, This appears and you can edit the page content:
– To go back to the root folder, click on the icon of the page you have just edited.

– If you want to go back to the main feature slider, click on ![]() icon.
icon.
Removing a page from a Folder
Once you have classified a page into a folder, you still have the possibility to remove it from the folder. To do this just move the mouse over the page icon and click on X:
NOTE: With this operation, the page will be removed from the folder but NOT deleted. The page will only be “moved” in the main menu. Now If you want to delete it permanently, mouse over the icon and click again on X.
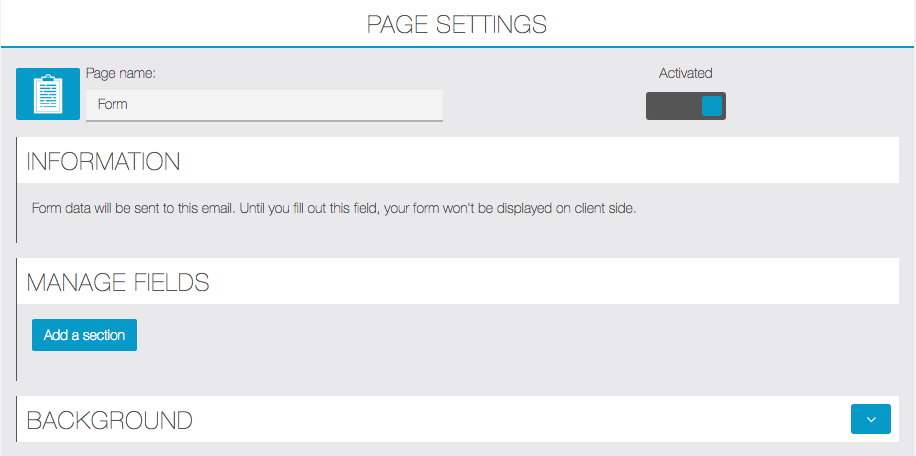
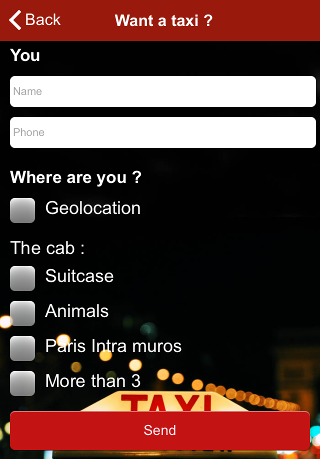
Form Feature
The form feature allows you to do plenty of things like giving your clients the opportunity to ask you questions, to order products, send a photo or to join an event… To sum up, this feature will adapt to your expectation about form. So let’s see how to create a form page.
Step 1:
To create a form click on  in the “Add pages” part. This appears:
Step 2:
To create a first section click on ![]() . Give a name to this section. Here we will add only one to show you what is possible to do with this feature.
. Give a name to this section. Here we will add only one to show you what is possible to do with this feature.
You can create as many fields as you want in a section. But we recommend you to organize your form clearly to be easy to fill by the user.
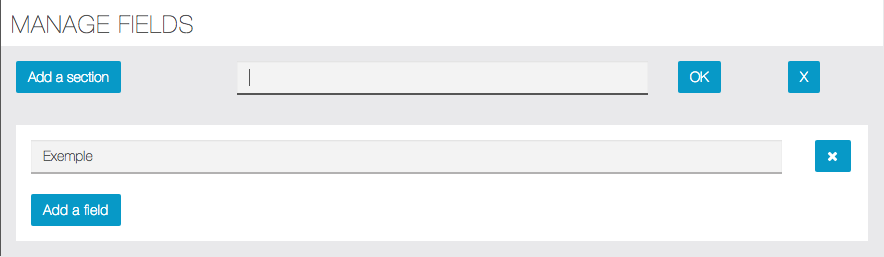
To add a field click on ![]() . This window appears:
. This window appears:
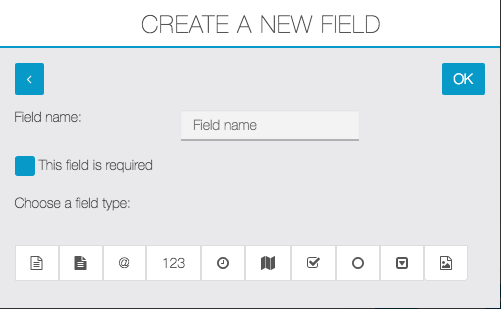
Every times you enter a new field, you have the possibility to make this field mandatory. It means that the user cannot send the form if this field is empty. Then you can choose the field type.
Let me introduce the different fields:
![]() : this field enables the user to write a short text (ex: his name…)
: this field enables the user to write a short text (ex: his name…)

![]() : this field enables the user to write a long text on several lines (ex: a client can write his answer here)
: this field enables the user to write a long text on several lines (ex: a client can write his answer here)

![]() : this field enables the user to write his email address to contact him.
: this field enables the user to write his email address to contact him.

![]() : this field enables the user to write a number (ex: the number of people for a reservation)
: this field enables the user to write a number (ex: the number of people for a reservation)

![]() : this field enables the user to write the date and hour (ex: the hour he wants to pick up what he orders)
: this field enables the user to write the date and hour (ex: the hour he wants to pick up what he orders)
![]() : this field enables the user to indicate his GPS position when he sends the form.
: this field enables the user to indicate his GPS position when he sends the form.

![]() : this field enables the user to select several options
: this field enables the user to select several options
![]() : this field enables the user to only select one option between the ones submitted.
: this field enables the user to only select one option between the ones submitted.

![]() : this field enables the user to select the option they want.
: this field enables the user to select the option they want.
Once you have entered all the fields you want to set up, you only have to indicate the email address of the manager in the appropriate box.

Some Examples:
LINK: https://support.migastone.com/en/hrf_faq/form-feature/
How to configure Paypal for the M-commerce feature?
In this tutorial we are going to see how to set up your Paypal account to enable online payments in the M-Commerce feature and receive payments on your Paypal account.FIRST, If you don’t have a Paypal account, you need to create one. Please go to paypal.com and sign up for free.Your Paypal account must be “premium” or “business”.Here is what you need to set up Paypal in your mobile app:
- Paypal API username
- Paypal API password
- Paypal signature
The process is simple but need some requirements. First open paypal.com and log-in.Under your name make sure your status reads: Verified. If your account isn’t verified you have to verify it by Paypal.Then under the tabs click on “Profile” or “Preferences” and “More options”. Then click on “Settings” from the left menu, and if you have a Personal Account you have to upgrade to “Premier” or “Business” for free:

From the left menu click on “My Selling Tools”, and then on “Update” in the “API access” section:

Then click on “Request API credentials:

Then choose “Request API signature”, and click on “Agree and Submit”:

Then go to Migastone, in the store of your M-Commerce feature, after enabling Paypal for your payment methods, just enter the credentials you just got from Paypal:
That’s all! Your app is ready to receive payments with Paypal.
LINK: https://support.migastone.com/en/hrf_faq/how-to-configure-paypal-for-the-m-commerce-feature/
How to help your customer downloading YOUR App?
This is an external option which you can use to help your customers downloading your App in front of you and get a discount :
- Go to http://www.onelink.to
- Insert the App name in the search field and press Enter

- Click on the App Icon and both Apple fields and Google play will be filled automatically
- Click “Lock”

- Test it directly on the screen before choosing with format version you want to download
- Open a MS Word document and Insert the PNG o SVG file at the bottom of the document like below.


LINK: https://support.migastone.com/en/hrf_faq/how-to-help-your-customer-to-download-your-app-easily/
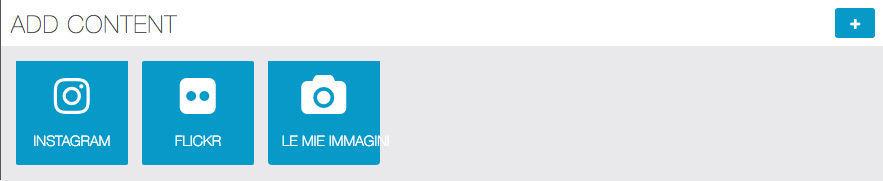
Image Galleries
This feature allows you to create image galleries. You’ve got those options:
- Create a gallery from Instagram
- Create a gallery from Flickr (not available)
- Create a gallery with your own photos
1. Create a gallery from Instagram
Enabling INSTAGRAM requires you to get two key parameters from the Instagram developer site:
THE CLIENT ID
IL TOKEN
The procedure is:
1. Go to https://www.instagram.com/developer
2. Log on with your Instagram credentials
3. Click the MANAGE CLIENTS button
4. Click REGISTER TO NEW CLIENT5. Fill in the fields by checking https://app.migastone.com (or the address where you normally log in to your APP manager) and fill out with this address the “Valid redirection URIs:” field
6. APP NAME fields indicate any fancy name in the DESCRIPTION field to describe in 2 rows as in the video something, Company Name Your Company Name, Website Address Your Website, Privacy Policy You Can Always Tell Your Site Internet and finally a support email.
7. Save
8. Return to the screen by clicking on the MANAGE button
9. Click on the Security option and make sure you deselect the “Disable implicit OAuth:” option
10. Now copy the CLIENT ID that you see above, we will need to build a URL (Internet address) capable of giving us a code (token) in response … in this address replace the CLIENT-ID word with the CLIENT ID code that You copied before:
https://api.instagram.com/oauth/authorize/?client_id=CLIENT-ID&redirect_uri=REDIRECT-URI&response_type=token
Then replace the word REDIRECT-URI with the address of your MAB that was “https://app.migastone.com”. Here is an example of compound link:
https://api.instagram.com/oauth/authorize/?client_id=sf293u939j93j93rj3&redirect_uri=https://app.migastone.com&response_type=token
11. Click AUTHORIZE on the page that INSTAGRAM proposes you.12. Receive a similar url in response to this:
https://app.migastone.com/#access_token=2100908341.1b935f1.80238877151a4a768774c2e4abd033c4
13. Copy the values after the symbol = and this will be your TOKEN
14. Log in to your MAB and enter the SETTINGS at the left of your APP in the INSTAGRAM section, indicating the CLIENT ID and the TOKEN.
15. BY THE “IMAGE GALLERIES” FUNCTION You can then install your INSTAGRAM photo gallery by indicating the user name of your instagram account. (If you do not have the IMAGE feature send an email to the support. The result will be as follows:
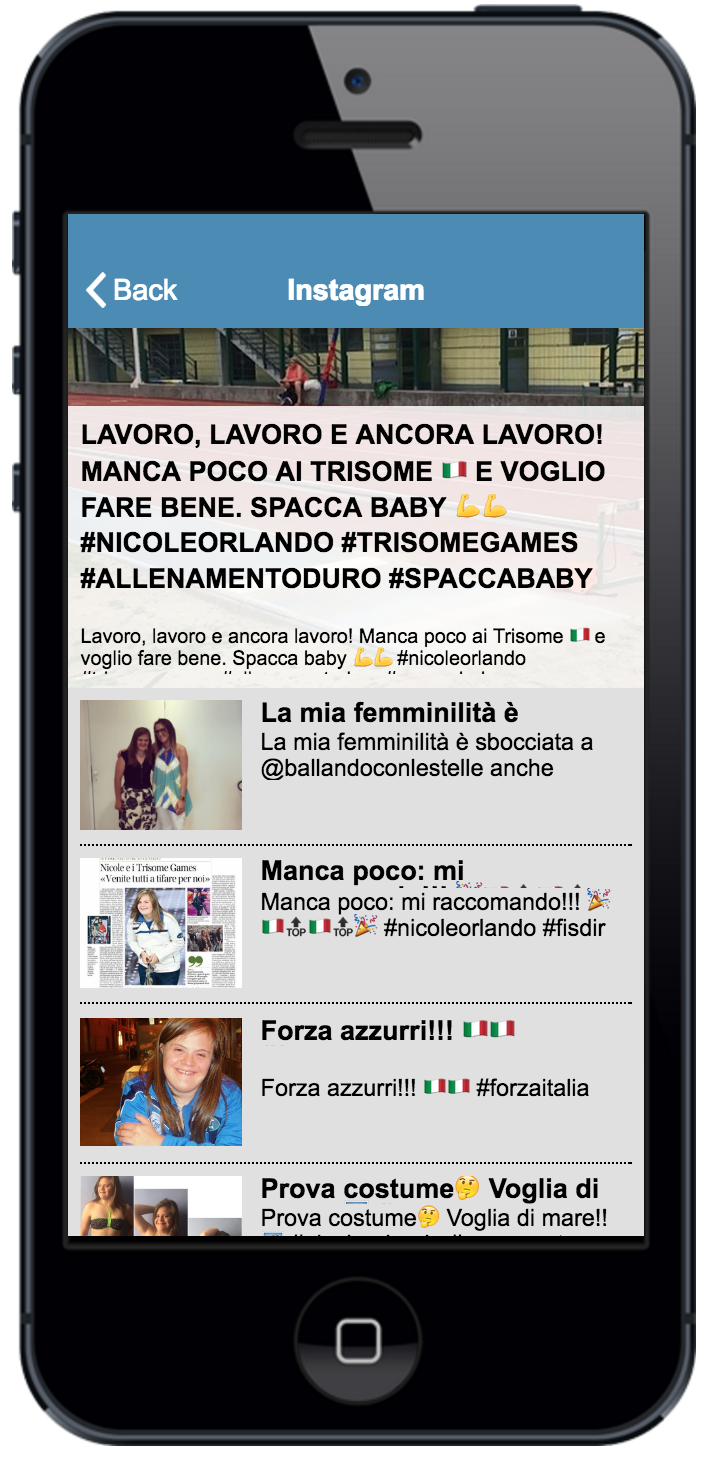
WARNING: take care that the INSTAGRAM profile is PUBLIC, if it isn’t you have to start the INSTAGRAM APP on your smartphone and enable the PUBLIC profile. See screenshot below:
2. Create a gallery from Flickr
not available yet
3. Create a gallery with your own photos (My Images)

Name your gallery, and click on ![]() to upload photos from your computer. You can upload several photos in the same time, just select from one folder all the photos you want to upload.
to upload photos from your computer. You can upload several photos in the same time, just select from one folder all the photos you want to upload.
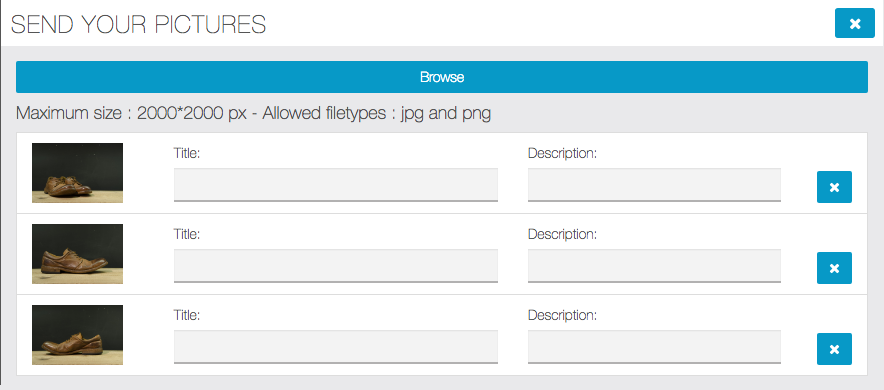
It’s not mandatory, but you can enter a title and a description for all your photos.Click on “Ok” to save your gallery. To create a new gallery, click on ![]() and repeat the above process.
and repeat the above process.
To add images to an existing gallery, open the “Manage” section and click the green button that has the number of images, at the gallery you want to edit:

From the window that will open, use the “Browse” button to load more images. To clear, click the X icon at the image you want to delete.
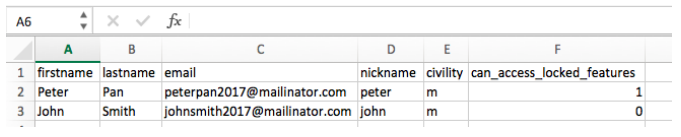
Import/export users
The Import/Export module will allow you to import an existing database of users and
generate a welcome email. The module currently supports the import of two file formats: csv and xlsx.
This module will also allow you to export your application’s users. Open the module’s page from your MAB menu Modules > Import/Export users:

Importing
Please make sure you download a sample of the structure of the file before you attempt to
import your file. Your user database needs to be properly formatted, namely some fields will
have to be added, so that the import can occur successfully. The column order and number need
to be respected.
When you import your existing user database, you can choose to send an invitation email to your
users. If you choose this option, you’ll be able to create an email informing your users that an
account has been created for them, letting them know their password and providing the
download links to the App. You’ll be able to dynamically insert the fields that follow to populate
your email Subject and Body: [firstname], [last-name], [app-name], [password], [email].
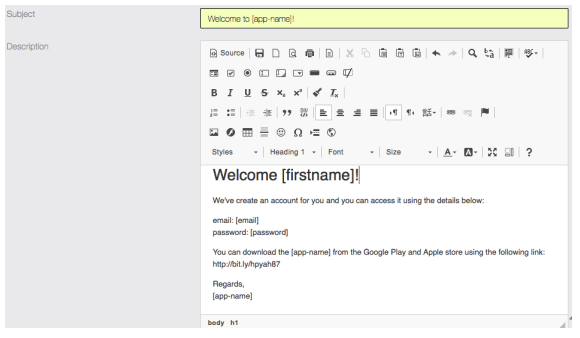
An invitation email using will be automatically send to your users. The text is
completely customizable as seen above. As the user database is being imported,
emails are being dynamically created and the variable fields populate the email. This is the
perfect way to create an account and invite existing users to the App.
Exporting
Exporting your application’s user database is quite simple. You’ll only need to press the export
button and a csv file with be generated with all the user information.
LINK: https://support.migastone.com/en/hrf_faq/import-export-users/
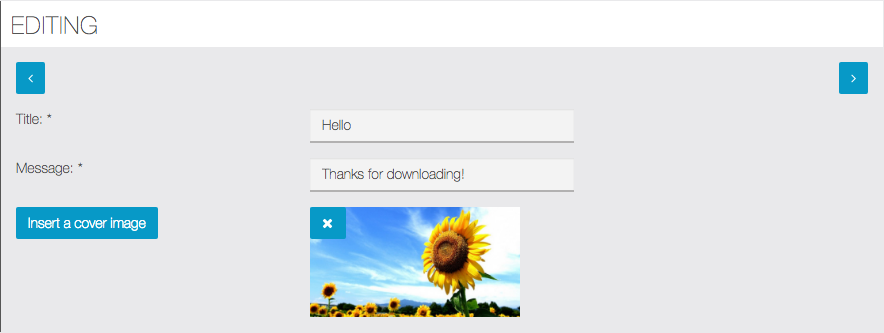
In-App Message
This feature allows you to display a message to users that are currently using your application.
First, you have to click on the ![]() to create a new message. This will appear:
to create a new message. This will appear:
Now, choose your message an click on ![]() . Once you have clicked, this will appear:
. Once you have clicked, this will appear:
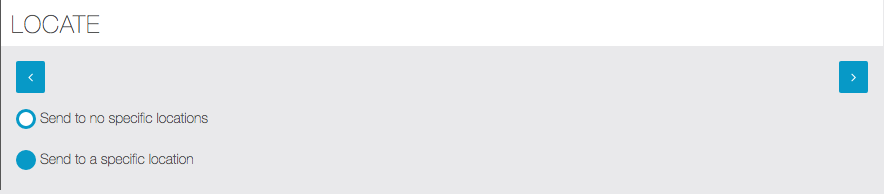
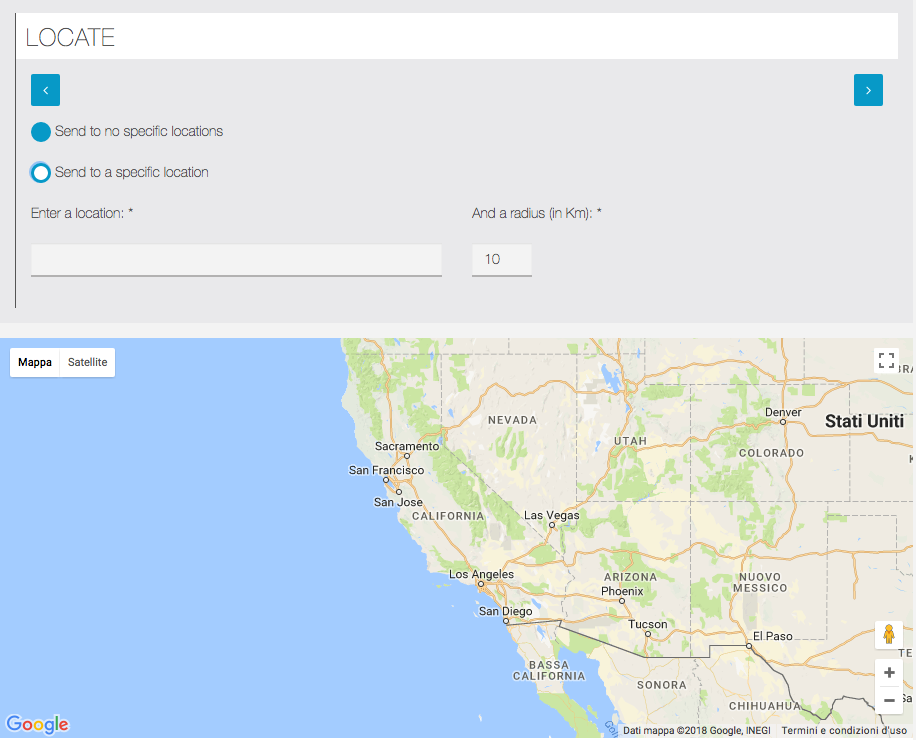
Usually you have to choose the first Option “Send to no specific location”. In some specific cases you can choose “send to a specific location” to send only on a geographic area, by setting the location and a radius (in Km) to determine the area of interest:
Now click on ![]() . Once you have clicked, this will appear:
. Once you have clicked, this will appear:
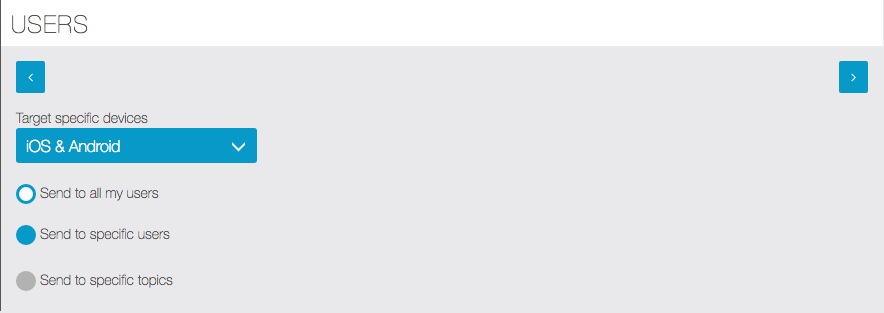
This option allows you to choose if you want to send your message to all your users or only Android/iOS users, specific users or only to those who have subscribed to specific topics (this option is active only in combination with “Topics” feature).
Now click on ![]() . Once you have clicked, this will appear:
. Once you have clicked, this will appear:
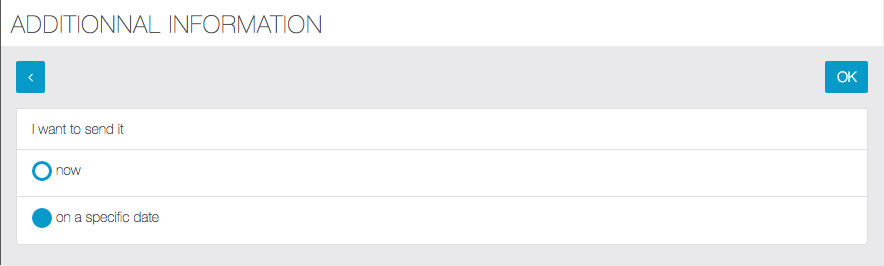
It enables you to choose if you want to send your message now or on a specific date. If you choose “now”, you only have to click on ![]() to send your message.
to send your message.
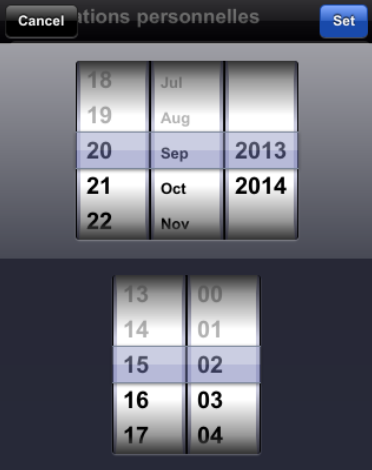
But if you want to send your message on a specific date, this calendar appears:

Choose in the calendar the day and hour you want your message to be sent. Then click on “Done” to validate your choice.
Finally click on ![]() to validate your message. Your in-app message will be sent at the moment you choose.
to validate your message. Your in-app message will be sent at the moment you choose.
Case 1: Send in-app message to all users
If you want to send message to all user of your app, just click on “Send to all my users” when request and then click on ![]() to proceed to next steps and complete the process.
to proceed to next steps and complete the process.
Case 2: Send in-app message to specific users
You can also send a message to one or more specific users. This is possible ONLY if the user is registered in the app by his own device.
If the user has an account created manually in the MAB or for any reason the recording could not connect your phone to your account, the name in the user list will appear with an X and you can’t select it to send the message to specific users.
The cases in which users can be marked with an X in the list to send the message to specific users are:
1. The user account was created by the MAB (Management APP).
2. The user has logged out from his account.
In-app messages sent to ALL USERS still arriving regularly.
Case 3: Send in-app message to users with specific topics
This option is active only in combination with “Topics” feature: see the specific page.
LINK: https://support.migastone.com/en/hrf_faq/in-app-message/
Invite A Friend
This feature introduces a mechanism in Migastone apps that allows users to invite friends to get points, through interaction with the Card Progressive Loyalty Card. In addition, the function will automatically generate a reference code that will be sent correctly with which you can redeem points of advantage after downloading the app. The function is available for iOS and Android, allows you to send the message via Facebook, Whatsapp, email, etc.
After adding the feature to the app, click on  to open the settings panel:

Content
Click on ![]() :
:
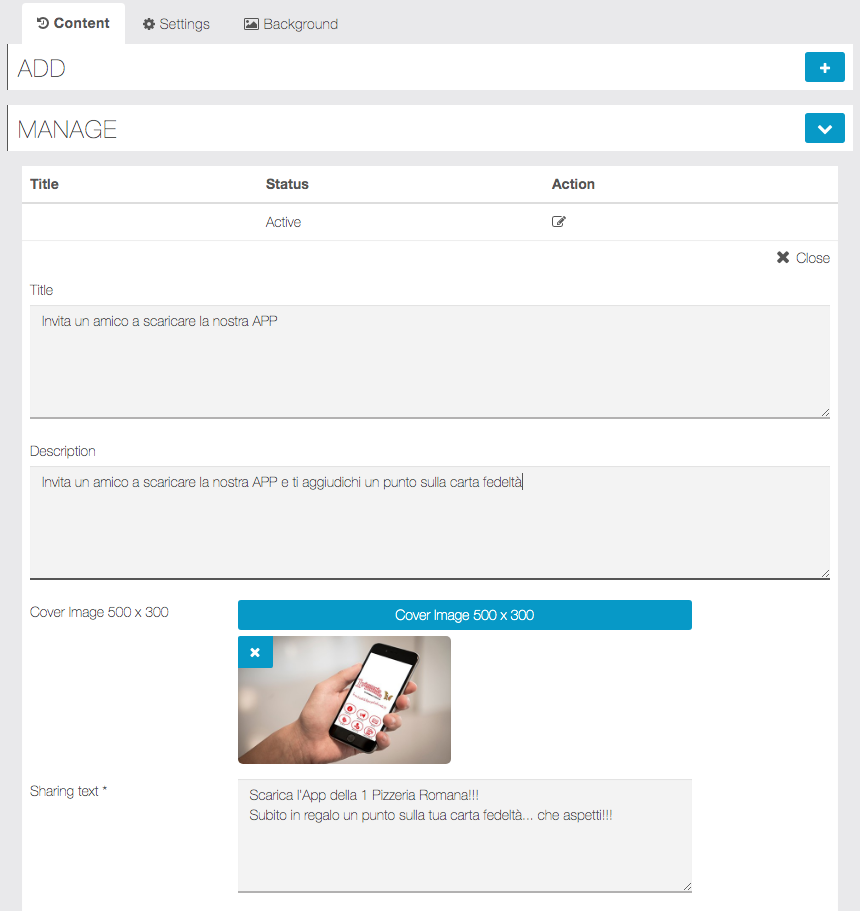
In particular, it will be necessary to insert
- A title, a description and an image to illustrate the page on the app
- The message to be shared with invited users
Also:
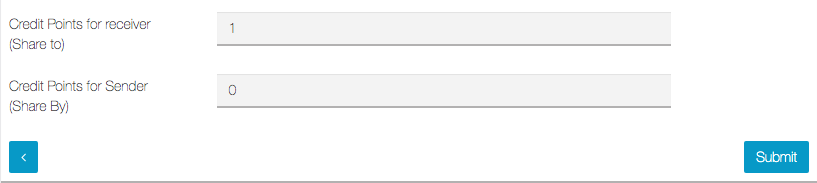
- The number of points that will be assigned to receiver
- The number of points that will be assigned to receiver
Settings
Pay attention to the settings page to define the desired behavior.
First you need to make some graphic and sharing choices:
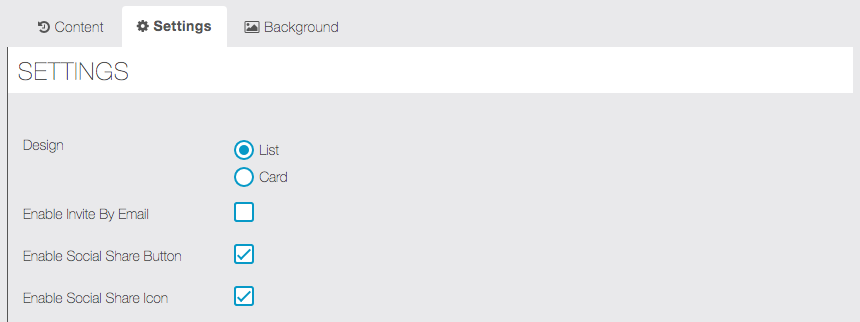
- List or card style display
- Enable or disable sharing via email
- Enable or disable the display of buttons and / or social icons
Here are the settings relating to the allocation of points:
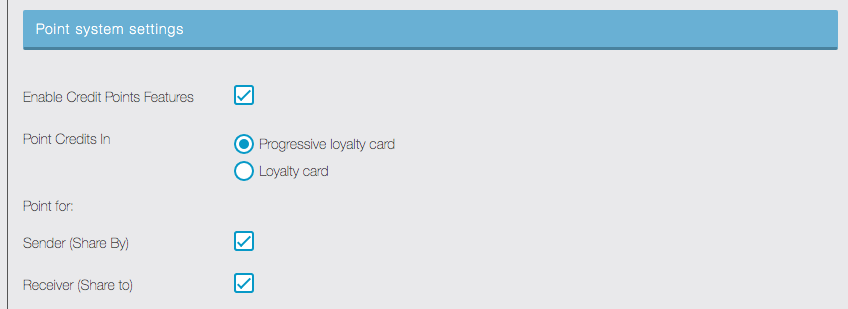
- Enable the point assignment function (enable to automatically assign points)
- Choose which function the points will be awarded on
- Choose whether the points will be awarded to the sender, the recipient or both
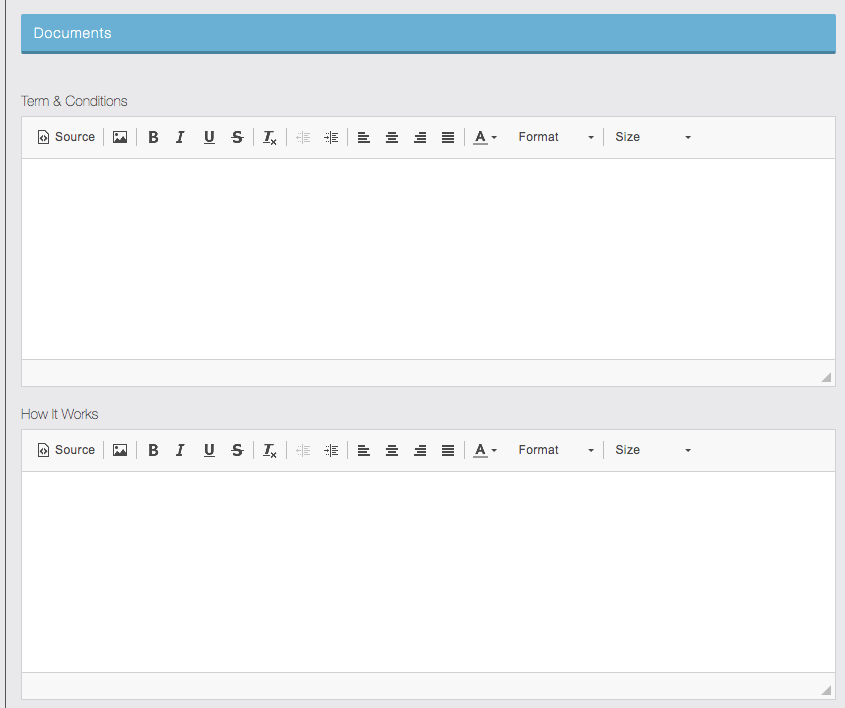
Here are the text fields for Terms and Conditions and How it Works:
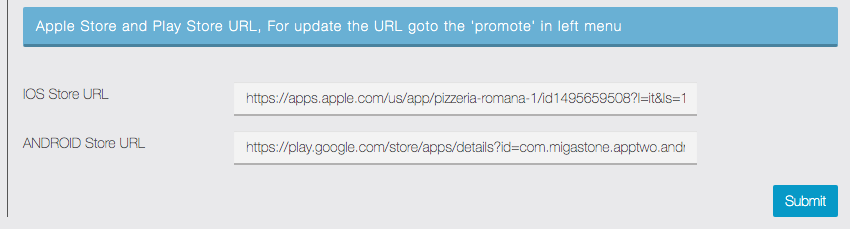
Finally, the links to download the app from the stores:
NB: in order to be able to automatically assign the points, the Progressive Loyalty function must be inserted and configured in the app.
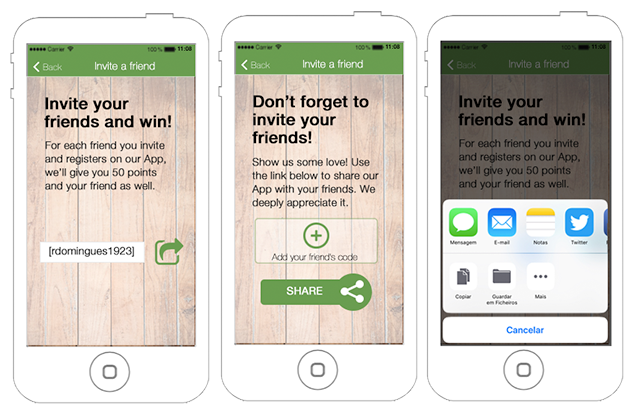
How to send invitation and redeem points
The user will send invitations to friends by accessing the “Invite a Friend” page in their app by clicking on the “Share” button.
The user who receives the invitation message, after downloading the app, must enter the code by clicking the “Enter your friend’s invitation code” button, which is always on the “Invite A Friend” page of the app. In this way both users will redeem the points of the Progressive Loyalty Card.
LINK: https://support.migastone.com/en/hrf_faq/invite-a-friend/
Job (job offers feature)
With this feature, you will be able to create a list of job offers.
1. To use “Job” click on  in the “Add pages” part. This appears:
(Please note that the tab “Positions” is available after you have created one company at least)

In “General” you can manage general settings for the Job feature:
– Display search: display the search bar on the main page of the feature
– Display position icon: display the logo of the company next to the job offer
– Display income: display the position’s income on the job offer page
– Display contact: you can select which type of contact you want to display on the position page

2. Companies
In this section you can add the companies which offer positions.

Complete the company information.


Note: Administrator(s) is a user(s) who can manage the job offers and the company’s info directly from the app.
3. Positions
In this section you can add the job offers.

Complete the position information and choose the company that offer this job from the list of the companies you have created.


4. Categories
In this section you can create categories for the positions offered.


These categories can be selected during the creation of the job offer.
5. The feature in the application
The job offers are displayed on the main page of the feature.

On the position page, you can see the localisation of the position, contact the company and look at the company’s info.

On the company page you can see a description of the company and all the positions offered by this company.

Important: if the user has admin access, he will be able to edit the job offer by clicking on ![]() on the position page-
on the position page-
He can also edit the company info by clicking on ![]() and create a job offer by clicking on
and create a job offer by clicking on ![]() .
.
LINK: https://support.migastone.com/en/hrf_faq/job-offers-feature/
Links
The “Links” feature allows you to share information linked to your business with your clients.
In addition to the “Links” feature, if you want to make a single direct link to an external page, you can use the “Link” feature.
NOTE: All pages linked from the apps must be available in safe mode (https)
For example, you can create pages like this one with this feature:

If you want to create a Links page, click on  . It opens this window:
First of all, you have to work on the content, then you can work on the design.
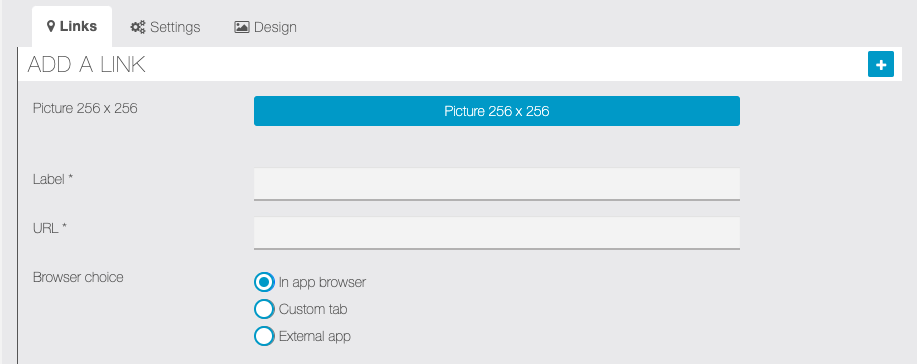
1. Link / Links
You have to chose a label for the link that will be displayed in the app, then insert the URL to your external page.
If using “Links” feature you can choose a picture for the single link button (see screenshot of the app page above).
Also, you can choose three different method to open the link:
- In app browser: the link will be opened in the app and you can choose different display options for Android and iOS
- Custom tab: the link will be opened in the app but in a custom tab of the device browser (ex: Chrome, Safari, etc…)
- External app: the link will be opened in the device browser (ex: Chrome, Safari, etc…)
Click on ![]() button.
button.
For “Links” feature, you can click on ![]() to add nore links to the app page.
to add nore links to the app page.
This way, you obtain this link:
You can create as many links as you want, you just have to do this process again.
2. Settings
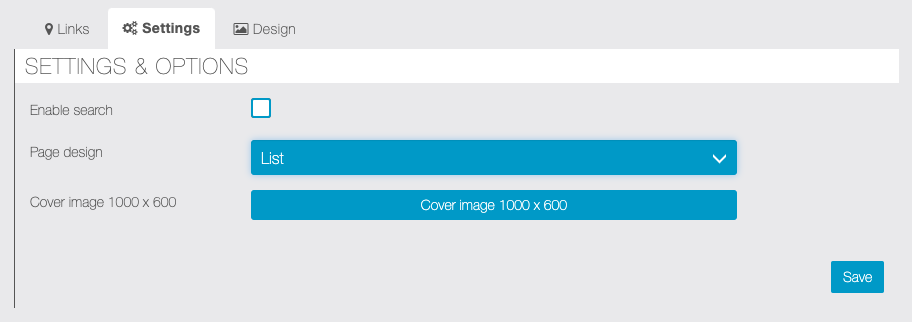
In order to make this page unique, you can insert a cover photo. You can also choose two different page design.
If you have many links on the page, you can enable the search field.
4. Design
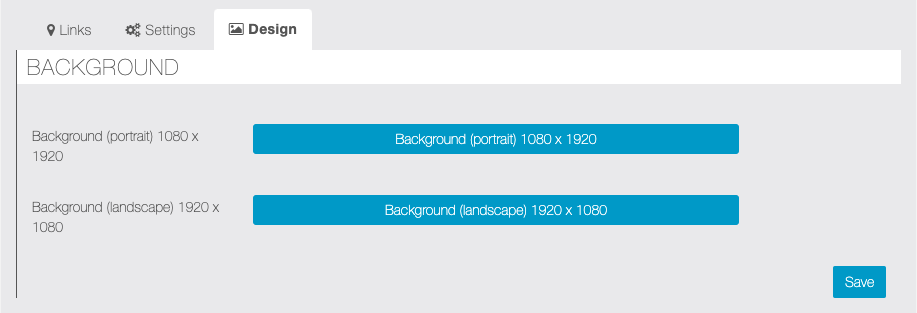
You can customize the background of the Links page. Once you made it, then click on ![]() button.
button.
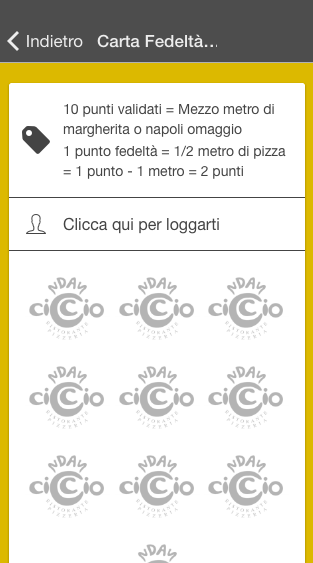
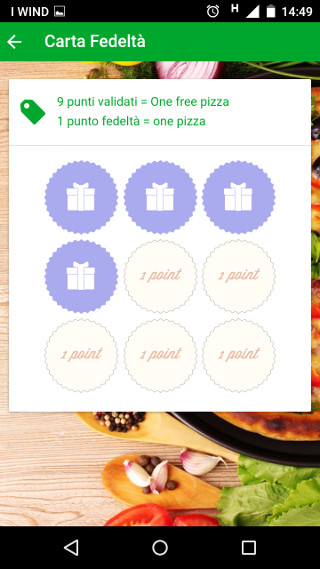
Loyalty Card
With the Loyalty feature you’ll be able to create a loyalty’s punch or stamp card. It means there will be a reward after a number of purchases. For example “one burger for ten bought”.
To validate a loyalty point the business owner will have to enter a four-digit password. As with loyalty stamp card, the client has to show his card to the retailer for stamping it, with our digital loyalty card, the client has to show his smartphone and the retailer has to enter his four-digit password to validate a point.
Loyalty card creation
Here are the things required to create a loyalty card:
- the total number of points
- the reward
- what’s the condition to validate a point
Here is an example:
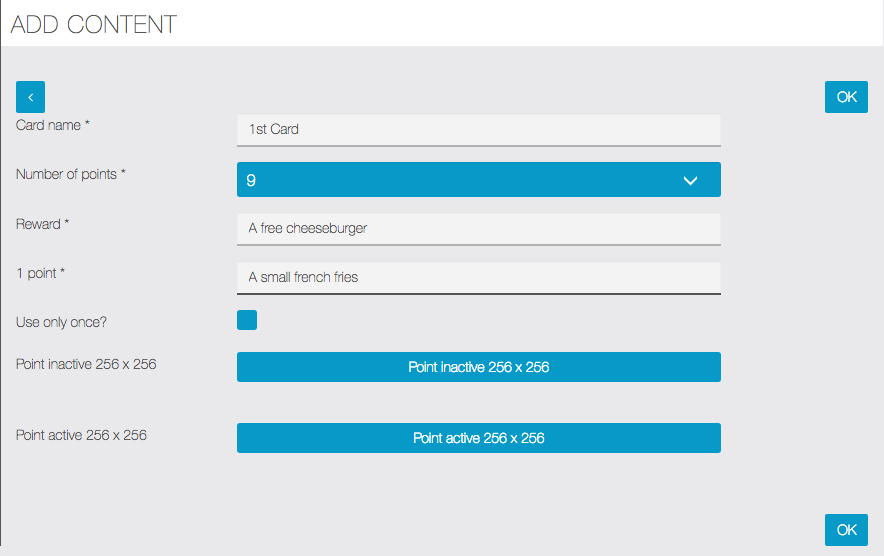
NOTE:You can limit the use of the Loyalty Card to only once per customer. In that case, remember to select the appropriate option.
You can customize the appearance of points on your card, with a small logo of your business or image that best suits your needs. You can use an image corresponding to the active point (validated) and another image corresponding to the inactive point. Click the “Point active” or “Point inactive” button and follow the steps to upload the image. Here’s an example in app:
Four-digit passwords creation
It is possible to create a password for each employee. Like this it will be more easy to verify who validates what.
To create a password, you just have to click on ![]() and fill the required fields:
and fill the required fields:

The loyalty card in the application
To validate a point, the client “touches” a point and shows his smartphone to the retailer:
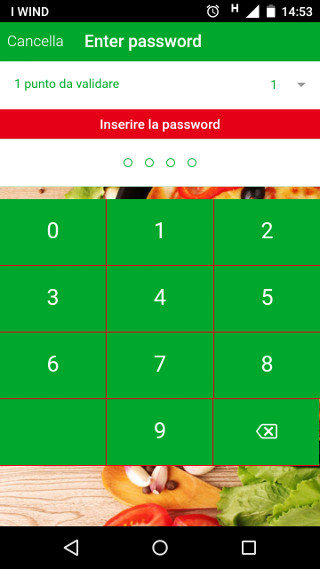
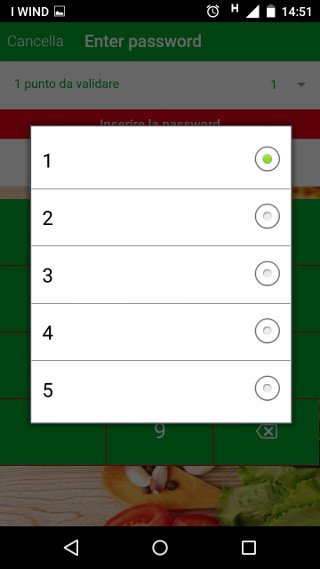
The retailer chooses the number of points and enters his password :
NOTE:It is not possible to edit or delete a loyalty card. Why? Because it works like a real punch card, when a user gets a punch card with a particular offer and begins to validate some points on it, it can’t be changed (meaning that it would be too easy to attract customers with a big offer and then to change it for a lower one while they already have some points validated on it).
But it’s possible to create a new card with a new offer. All the customers who have already validated points on the old card, will keep using this card until it is completely validated, and then they will get the new card. The customers who haven’t validated points yet on the old card, will get the new one instead.
MigaAppManager
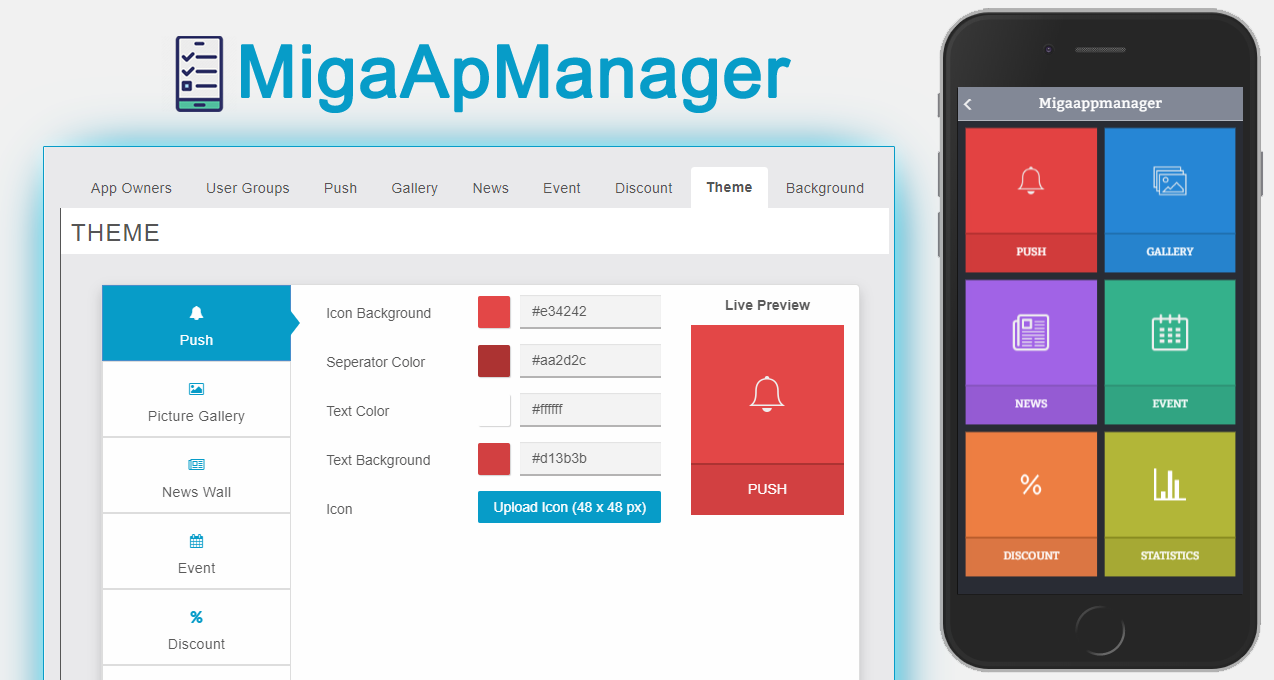
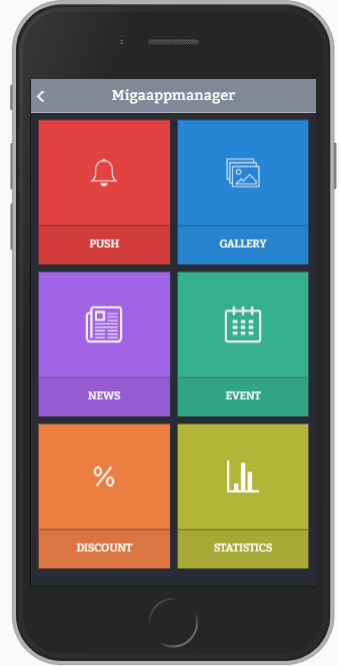
Orientation
This feature is a blessing for application owners as they can easily be able to manage almost all popular features from one single spot. This feature is an app itself which will help the owners to create a Push, Gallery, News, Event, Discount, Appointment, and also been able to view the app statistics. So now owners don’t have to go to the owner end to manage these features, all they need is a mobile application with MigaAppManager feature added to it.
Below is the list of each of our feature modules and respected actual features:
Push = Push Notifications
Gallery = Images (My Images only)
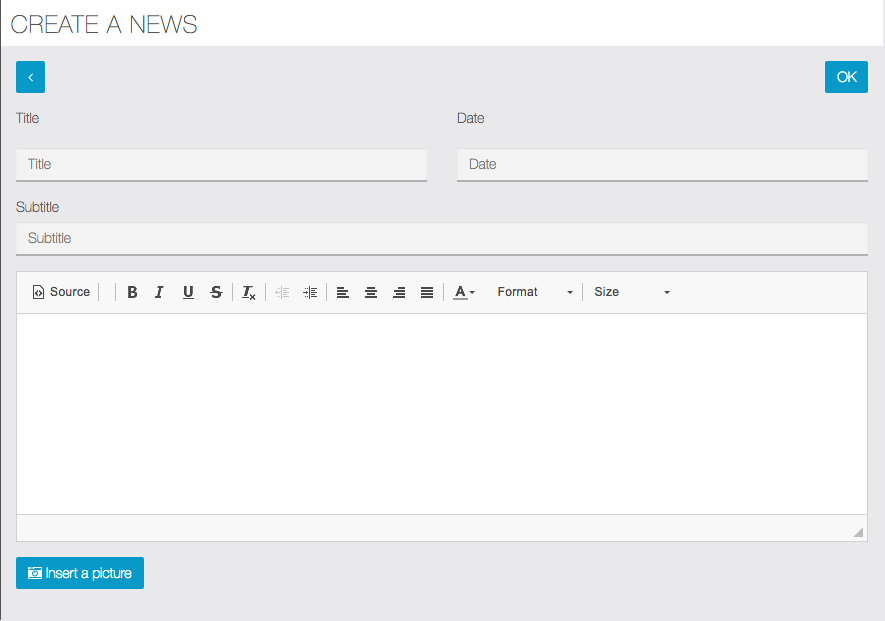
News = Social Wall
Event = Calendar (Custom Page only)
Discount = Discount
Statistics = It’s a general-purpose module for displaying stats [NEW]
Appointment = This will load all the appointments from appointment module [NEW]
NB: every single module that can be managed from this feature has to be added into the app from the features section, otherwise you will not be able to use the respected feature from the mobile end. For example, if you want to use News than you must add a Social Wall feature to your app once so that we can provide you with the management of that on the mobile end.
Settings
In the case of this feature, settings will let you mostly view the information rather than managing it completely. However, you can still be able to manage the App Owners, User Groups, Theme, and Background.
App Owners
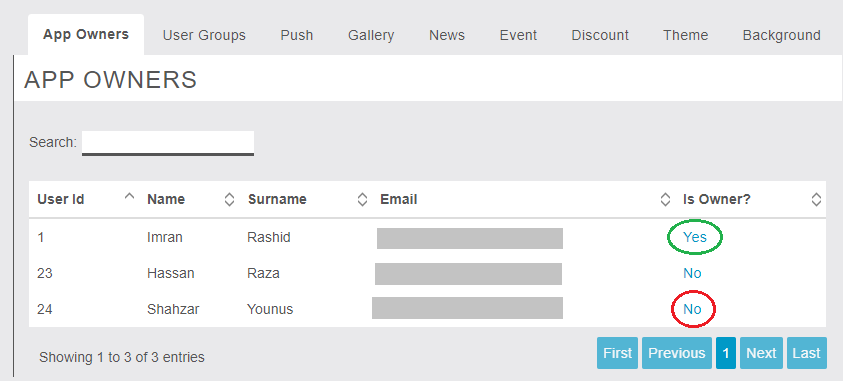
In this tab, you will be able to see the list of all the users or end-users which are registered to your app from mobile-end. In simple words, your customers. You have been given this interface with a link of Yes and No.
Yes = means that the user is an owner and can manage every single feature from mobile-end and clicking & confirming it will unset the user as an owner.
No = means that the user is not an owner and cannot open this feature at all and clicking & confirming it will set the user as an owner.
User Groups
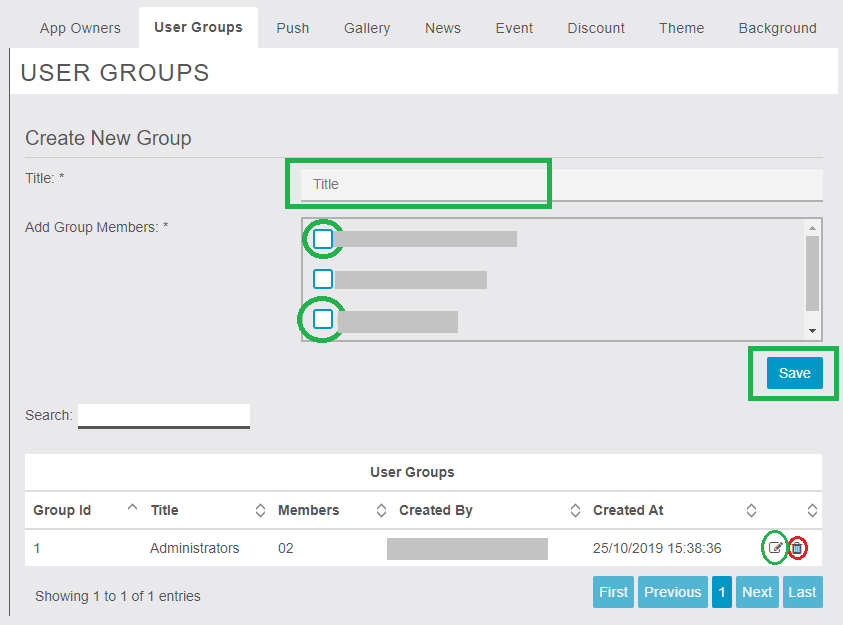
In this tab, you will be able to see two different sections. Create a new group is the first section that is represented by a form on the image above. From this section, you will be able to create groups of different users or customers. Those groups can then be viewed from the second section which is represented by a grid showing the list of all the groups that are already created. You can also Edit & Delete them from the grid.
NB: the only place where these groups are used is in the Push module on the mobile end. These groups will be converted to a user-friendly drop down on the mobile end so that the app owners can easily select a group from the list to target their list of customers instead of selecting one by one from a long list on a small screen.
Push

In the Push tab, you will not be able to see all the pushes. You will only see the pushes that are added by you or any other owner using MigaAppManager’s Push feature from the mobile end.
Gallery
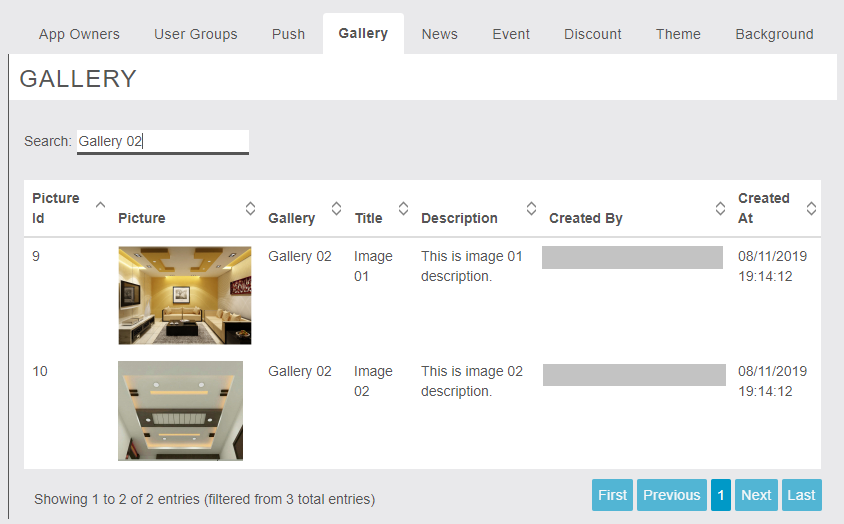
In the Gallery tab, you will not be able to see all the images. You will only see the images that are added by you or any other owner using MigaAppManager’s Gallery feature from the mobile end.
News
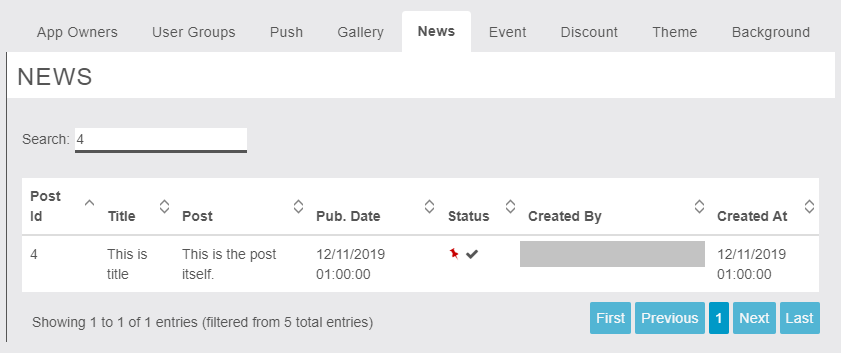
In the News tab, you will not be able to see all the news listening. You will only see the news listenings that are added by you or any other owner using MigaAppManager’s News feature from the mobile end.
Event
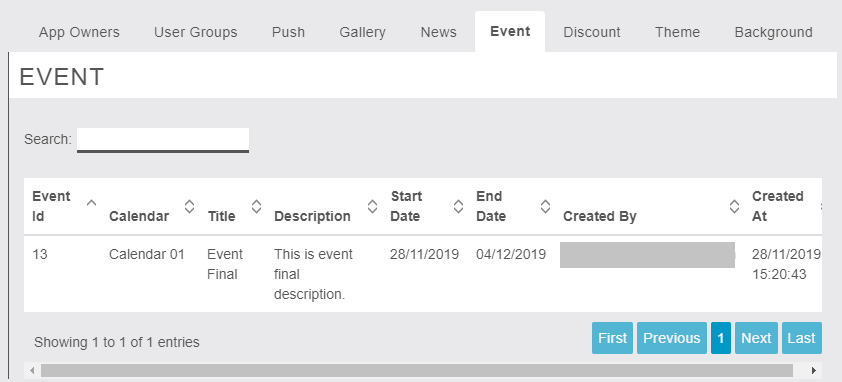
In the Event tab, you will not be able to see all the events. You will only see the events that are added by you or any other owner using MigaAppManager’s Event feature from the mobile end.
Discount
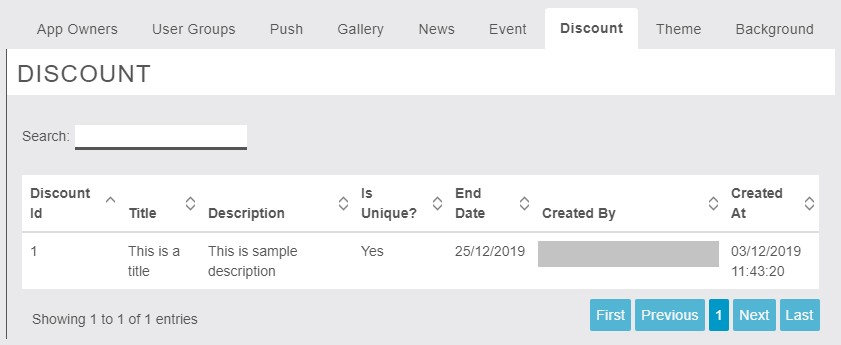
In the Discount tab, you will not be able to see all the discounts. You will only see the discounts that are added by you or any other owner using MigaAppManager’s Discount feature from the mobile end.
NB: tabs like Push, Gallery, News, Event, and Discount are read-only. You can only see the respected listening here but cannot modify it. In order to perform certain actions on these listenings, you have to move to the actual feature.
Theme
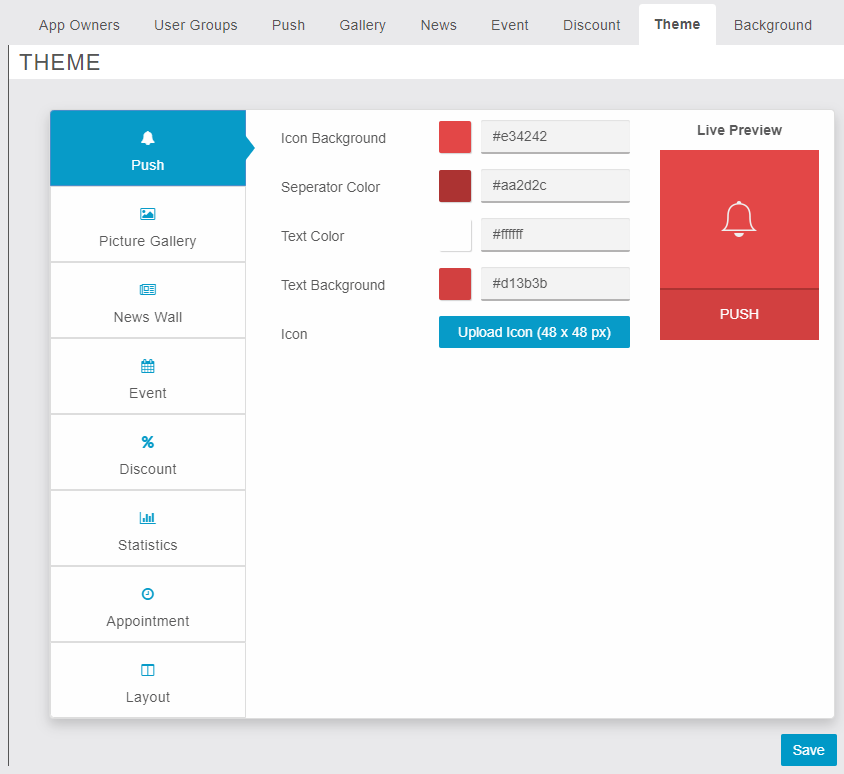
In the Theme tab, you updated the theme of all six modules by updating their Icon Background, Separator Color, Text Color, Text Background, and Icon of the module as well. Also, an instant preview is available to quickly see how it will look on the mobile end.
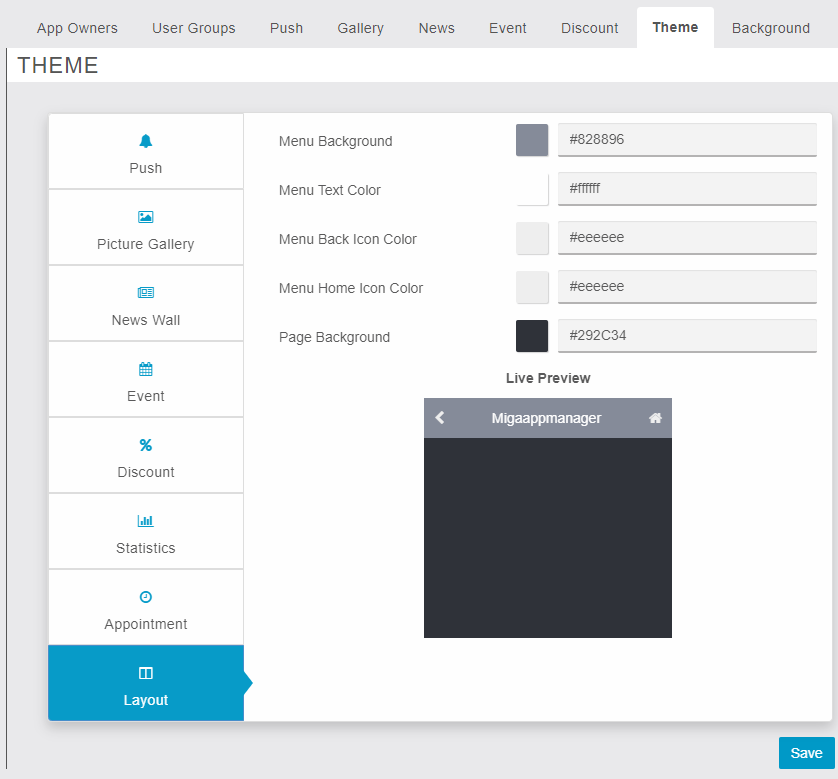
You can not only update the theme of the modules but also you can control the colour of the page from layout tab (subtab of Theme tab) as well which includes Menu Background, Menu Text Color, Menu Back Icon Color, Menu Home Icon Color, and Page Background. Also, an instant preview is available to quickly see how it will look on the mobile end.
NB: make sure you choose colours which look elegant over each other and text is visible.
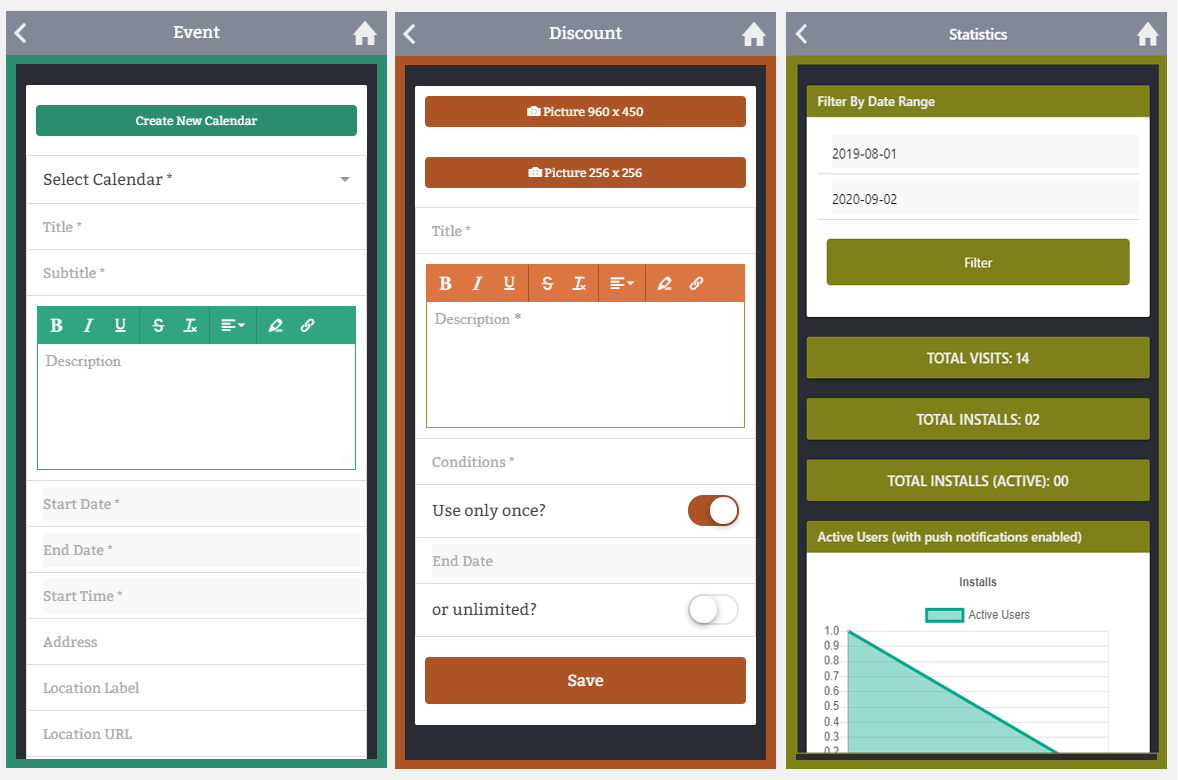
Mobile/App Area
Mobile-end is the main area where an app owner can add/post in all five features except Statistics because it’s only to view the stats. All 6 features which include Push, Gallery, News, Event, Discount, and Appointment will provide you with almost a clone of the actual feature in terms of interface and functionality. For the confirmation of submission, you can either check the MigaAppManager owner end which is discussed in the Settings section above or you can confirm it from the actual respected feature.
NB: make sure you are logged in and the actual features are added at least once to your app.
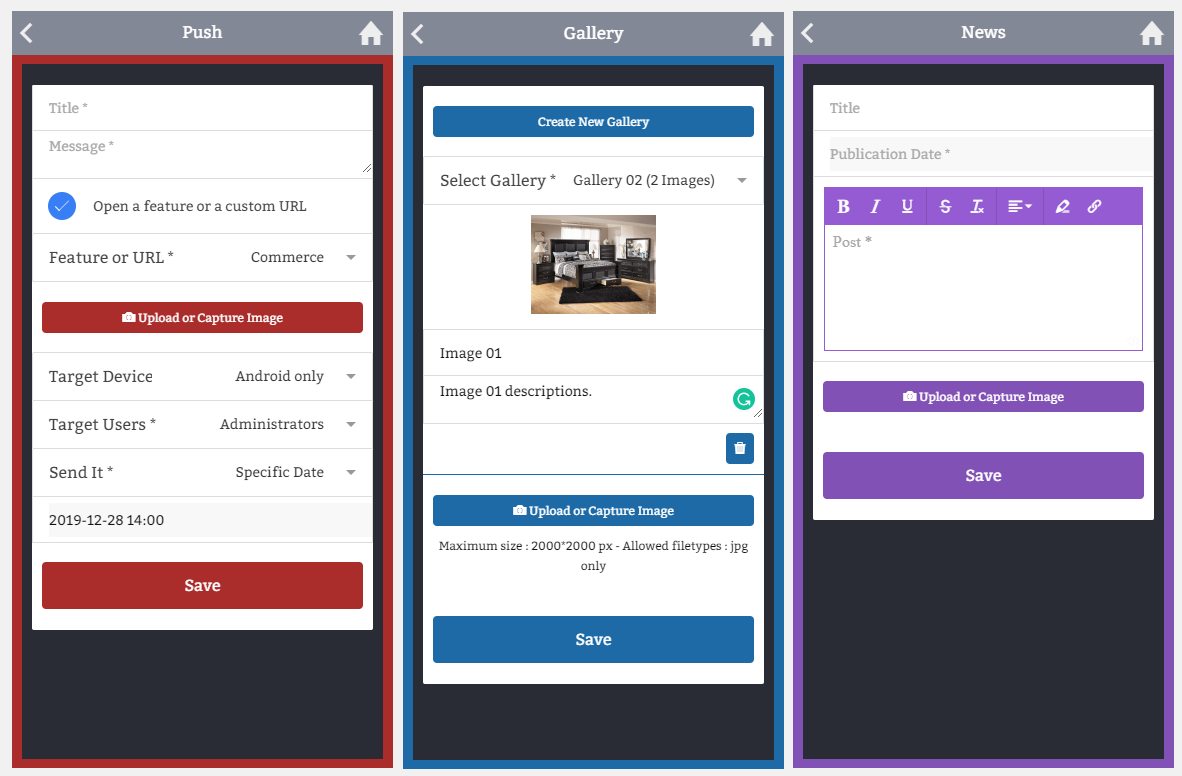

Every single feature will reflect the exact theme that you have set in the Settings section under the Theme tab of the owner end.
LINK: https://support.migastone.com/en/hrf_faq/miga-app-manager-feature/
MigaArchive
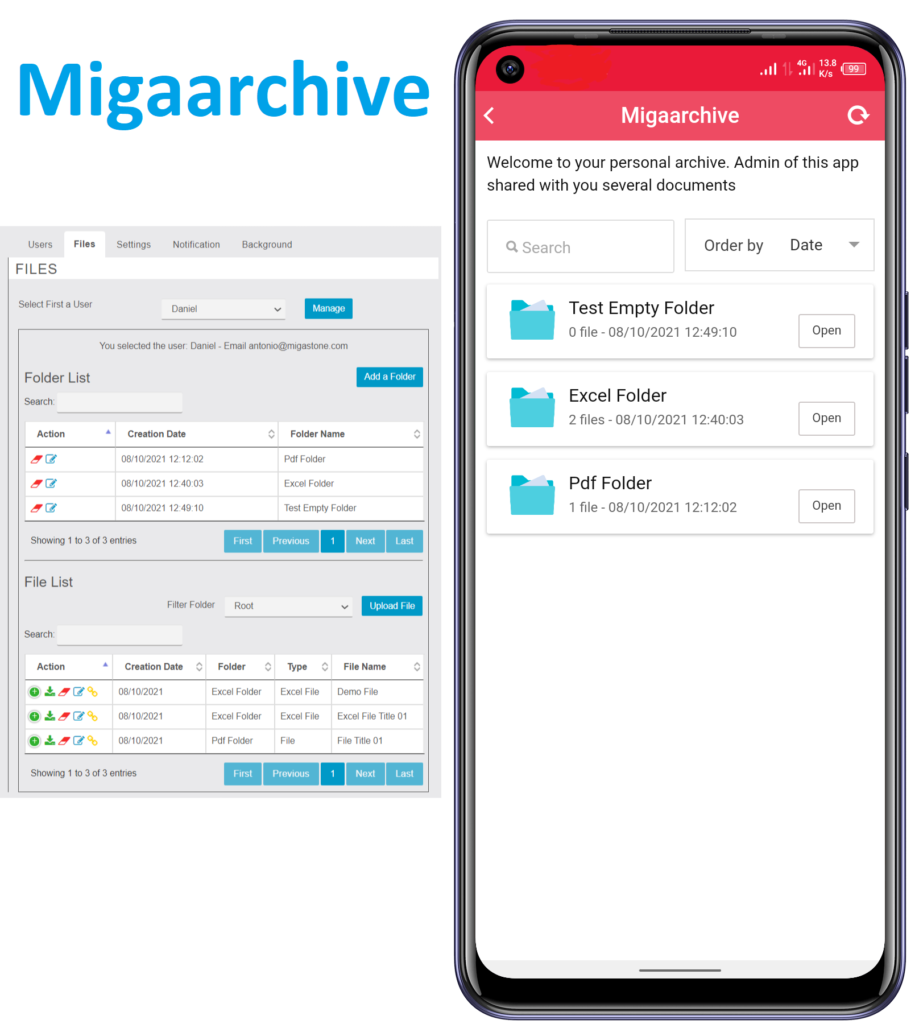
Orientation
This feature is specially designed for admin to share folders and files for users. Admin shares files with a specific user. Admin has access to enable or disable the user. If the admin disables the user then the user can’t access the files. When Admin creates a file for a specific user then the user gets a notification via email or app-end notification and then the user sees the new file fastly.
Users

In this tab, you will be able to see the list of all the end-users which are registered to your app from mobile-end. In simple words, your customers.
Status Functionality
Enable = means that the user can access the feature’s functionality.
Disable = means that the user can’t access the feature’s functionality.
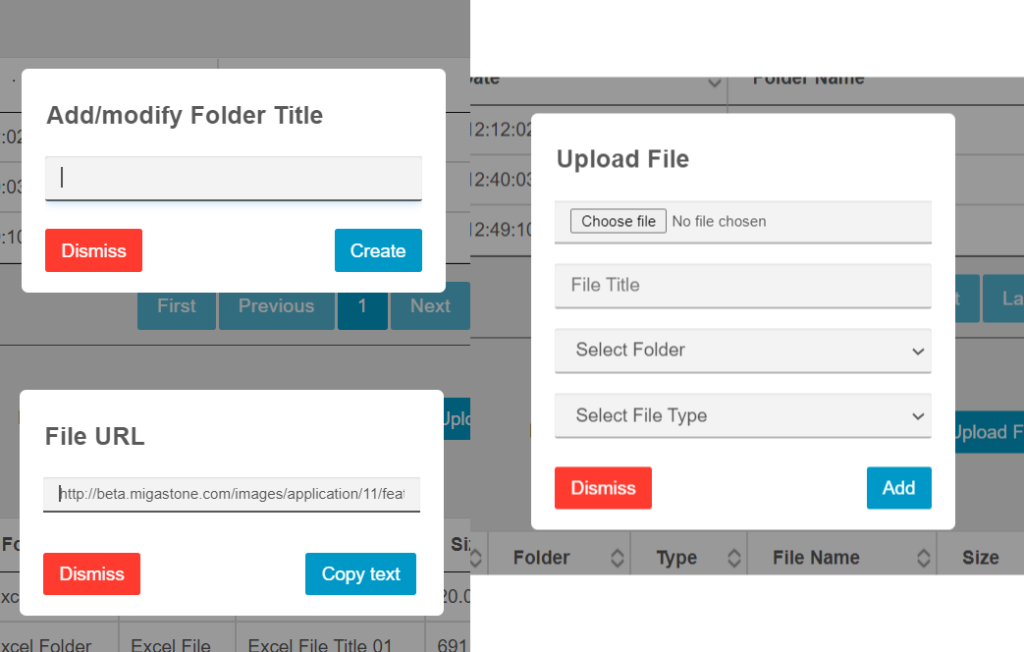
Files
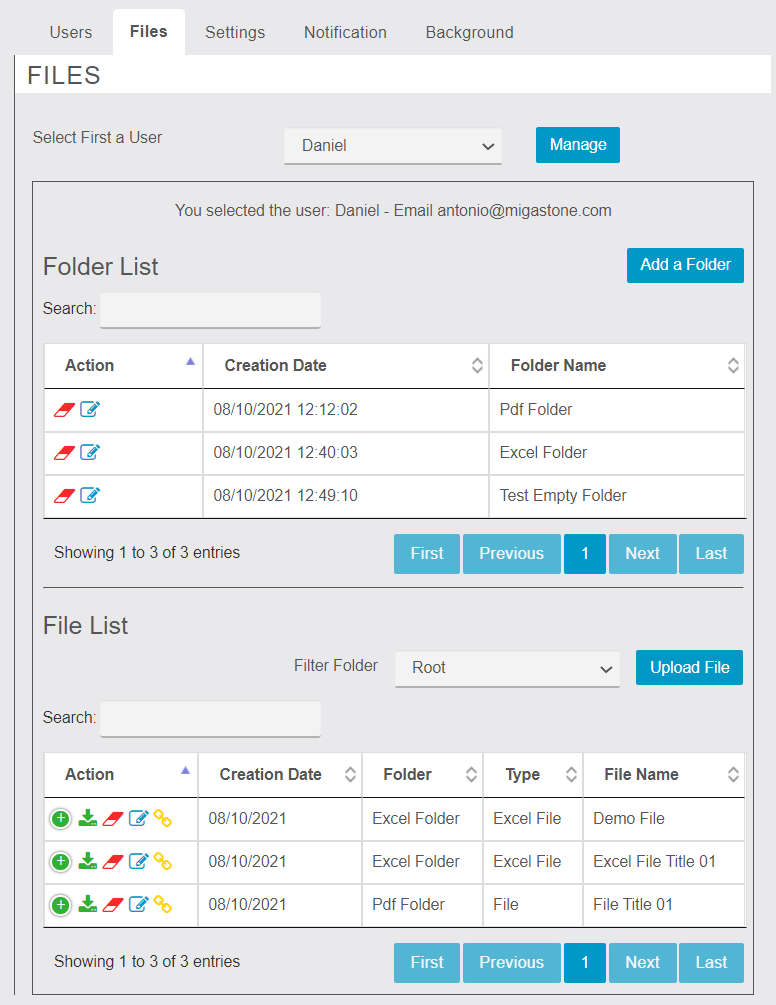
In this tab, you will be able to see the list of all the folders and files of a specific user. You can create a folder and file for a specific user. You can download the file. You can edit the folder name or file easily and also you can delete the file and folder. You can copy the file URL.
Settings

In this tab, you will be able to see two different sections. One for you can set auto-enable user settings simple word when new user register then defaults setting set NO means user status to disable.
Yes = means that the user status automatically enable.
No = means that the user status automatically disable.
In the second section, you will be able to see the list of all the file types and also create and edit the file type settings.
Notifications
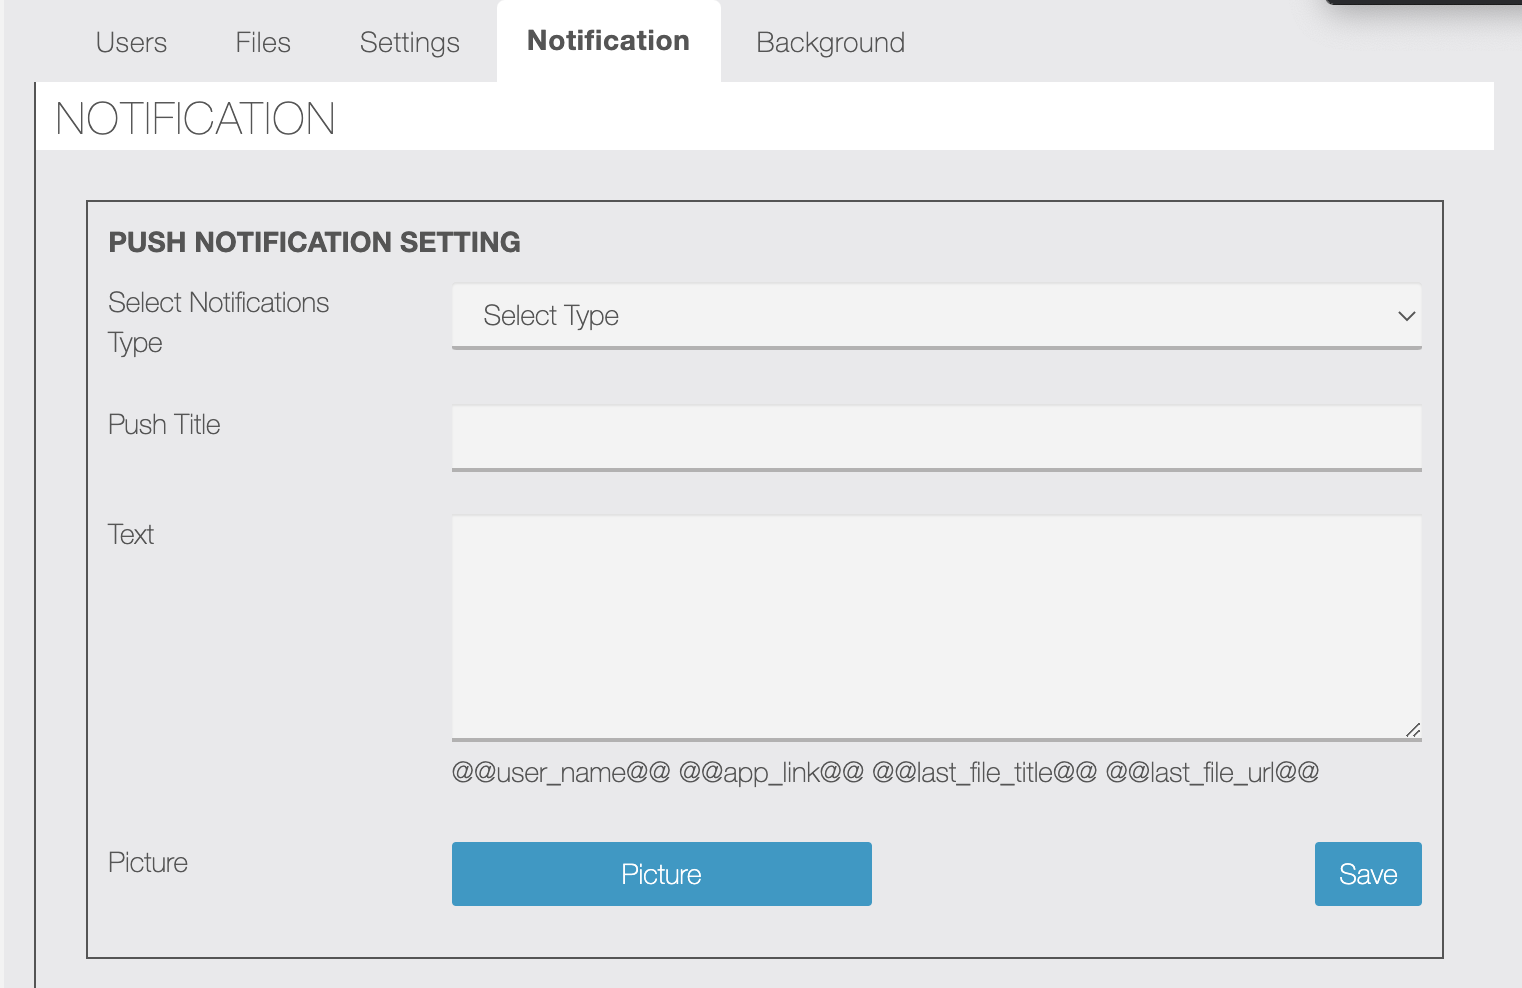
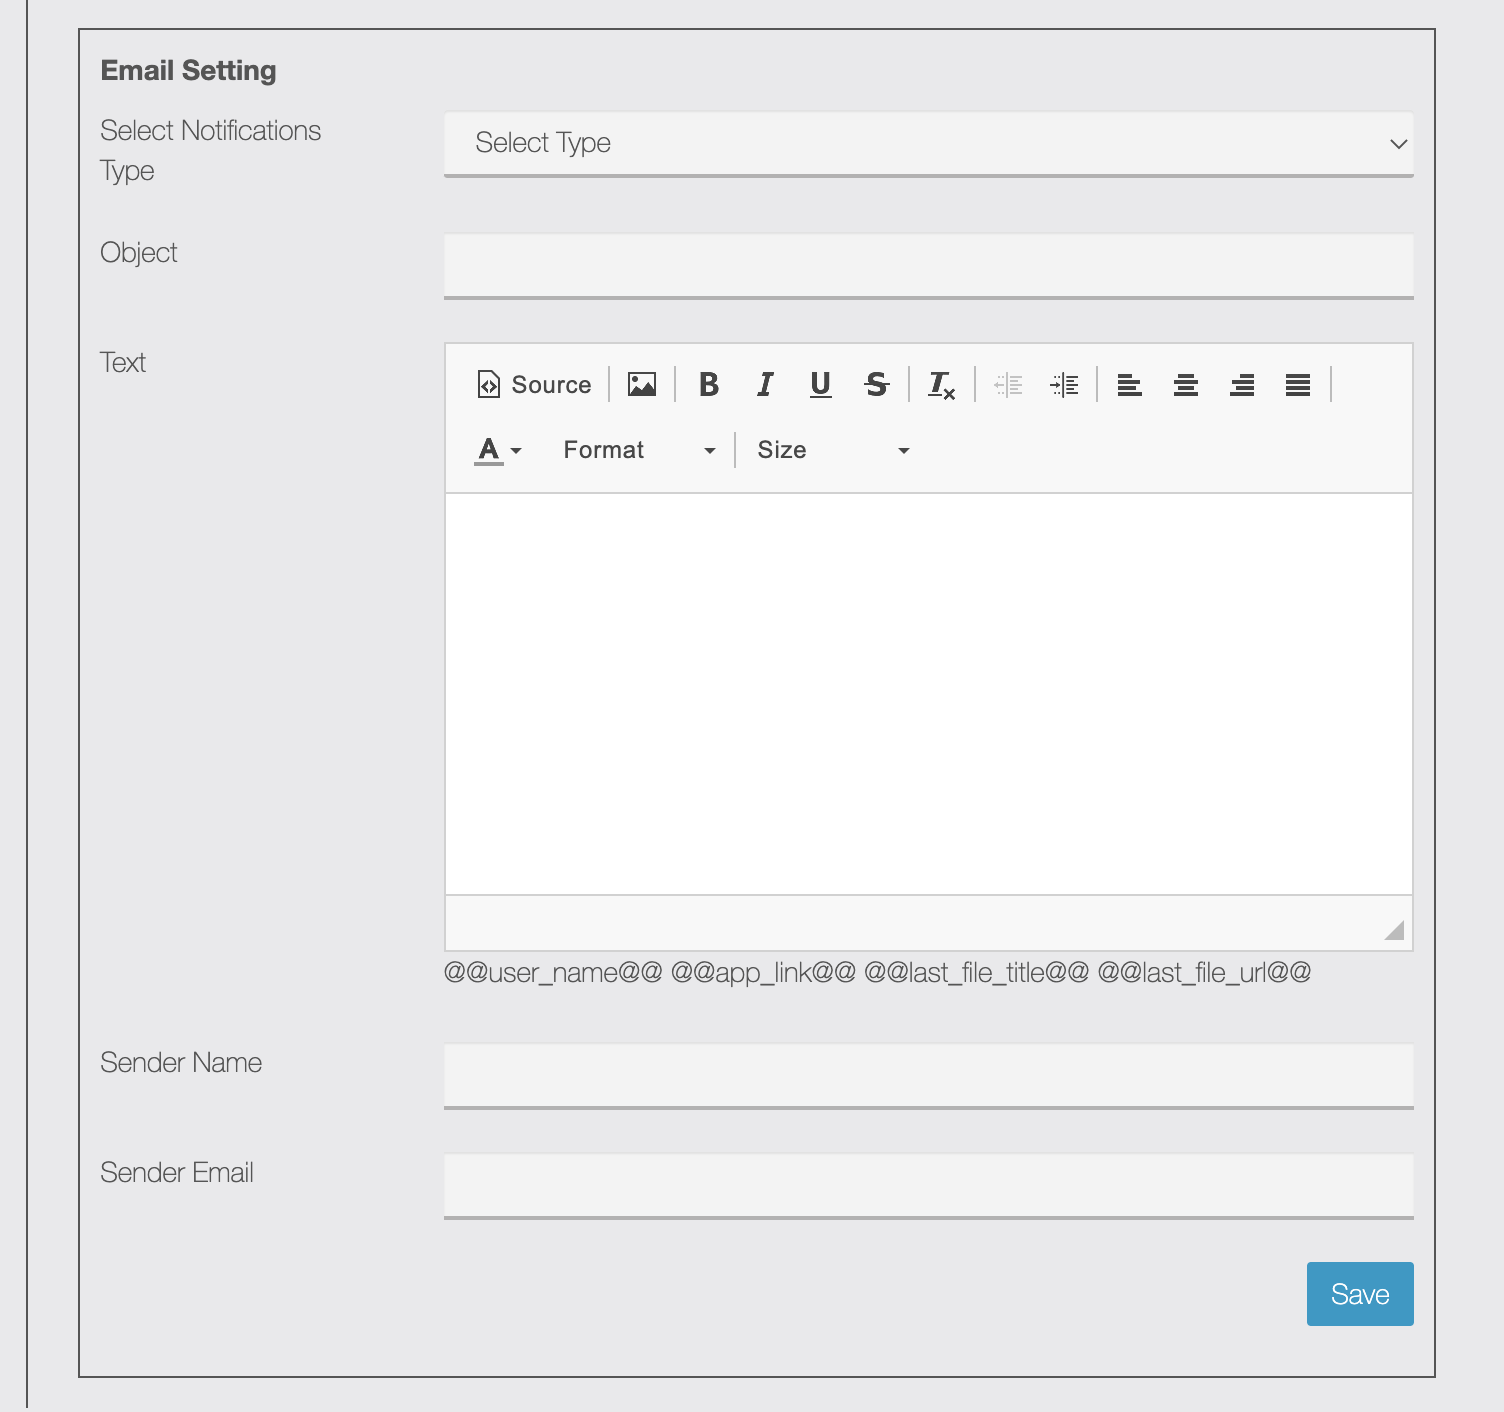
In this tab, you will be able to see two different sections. One for you can set push notification setting and in the other section, you can set email settings. These are the notifications that will be sent to the user when a new file is created and shared for him.
Note that it is now possible to customize the Name and Email of the Sender.
Mobile / App Area
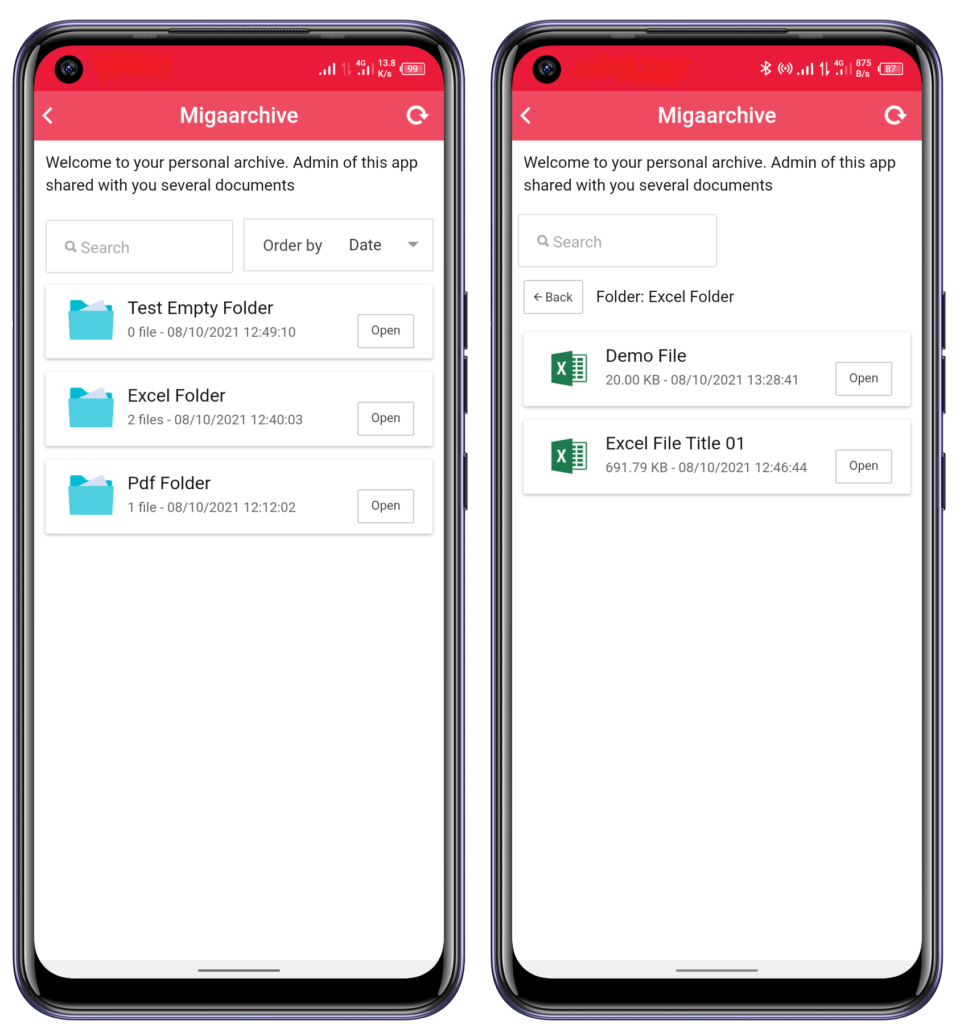
Mobile-end is the main area where an app owner can show all folders and files and the app-end user can access the folders and files. Users can only see the folder and files that the app owner allowed and users can download files. If user status is disabled then show a warning message in the mobile area. Users can filter data by date or name.
Miga Birth Day
Making your customers feel truly important is the key to encouraging their purchases in the medium and long term. The HAPPY BIRTHDAY function sends a personalized message to the customer on the day most dear to him, this message can only be a sincere wish for a happy birthday or it is possible to set a special gift reserved for the customer.
Please proceed as follow to configure MigaBirthDay feature
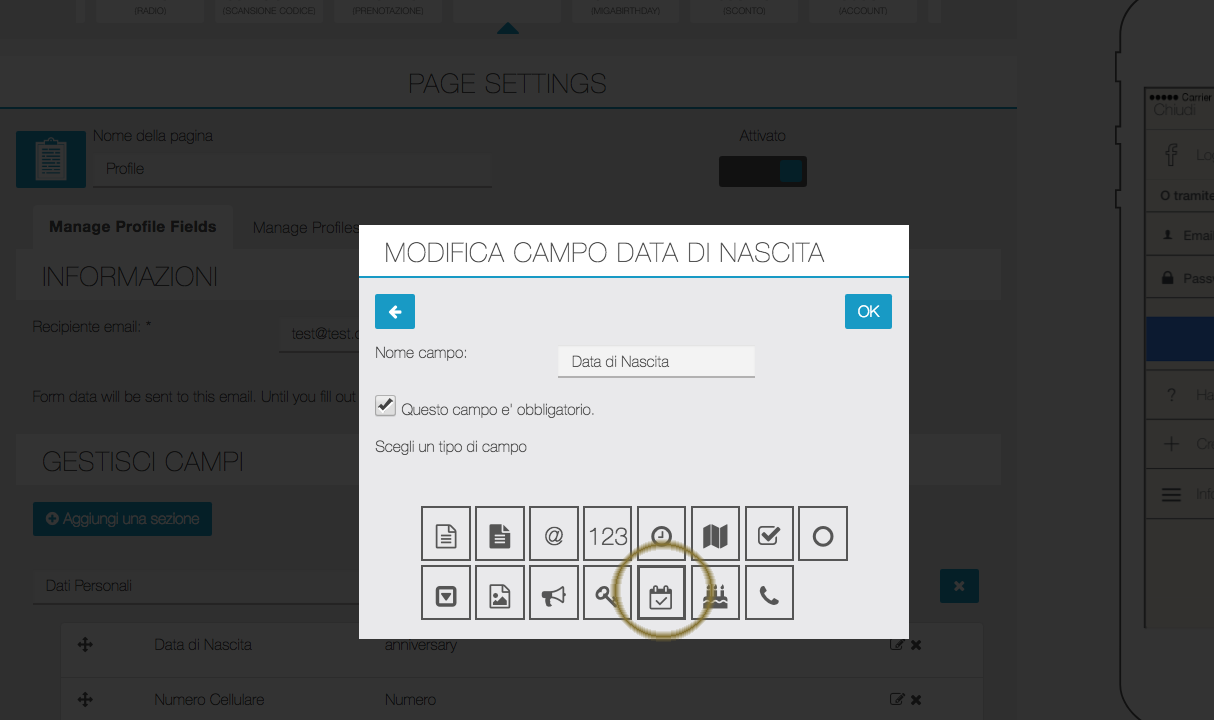
- MigaBirthday can interact with Profile feature, if you use Profile feature in your app please configure that first by set a mandatory BIRTHDAY field as “DATE” field type (refer to Profile feature documentation for further details on how to correctly create a Birth Date field)

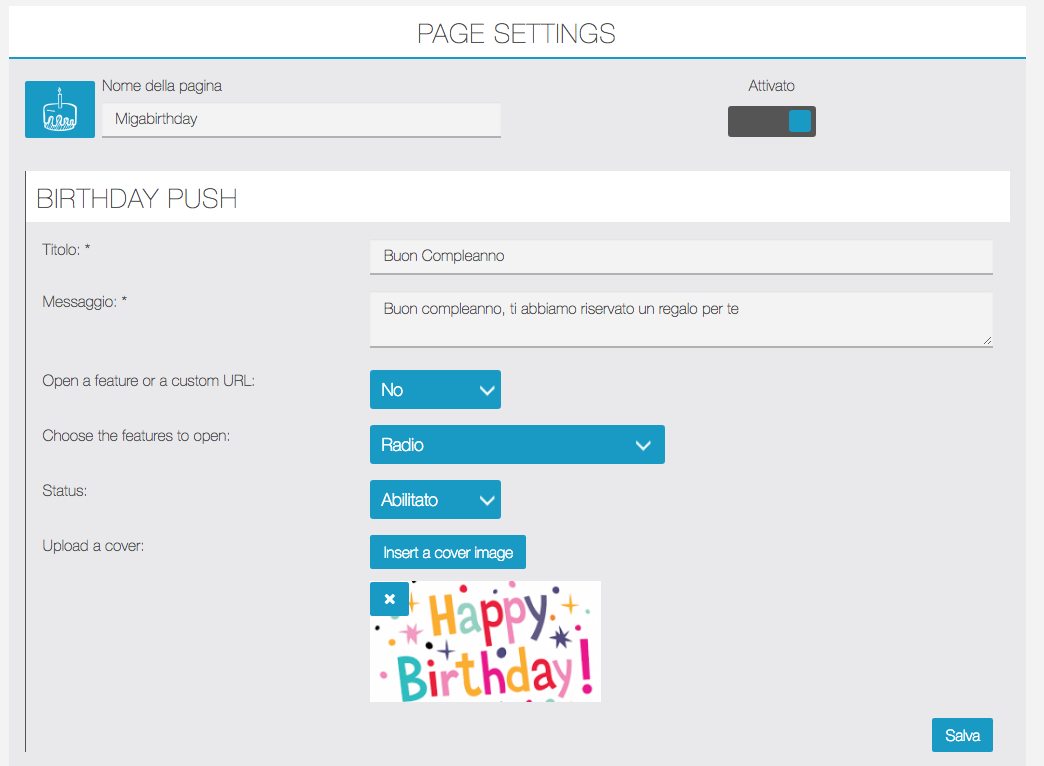
- Installare la funzione MIGABIRTHDAY e impostare i dettagli della notifica push di BUON COMPLEANNO.
You have to set- A Title
- A Body of the message
- optionally, an external web link or a internal link to another feature in the app
- The status enabled/disabed of this message
- An image for the push notification NB: It is possible to link a feature in our APP which is DISABLED. The result is that it will only be accessible via notification link itself. This configuration allows you to use, for example, a COUPON feature that will only be displayed via the HAPPY BIRTHDAY notification!

- INVITATION PUSH
If for any reason the date of birth was not entered, the system invites the user to enter it, the number and the frequency of the push reminder can be changed in the Settings (point 4 below). We recommend linking this notification to MigaBirthDay or Profile feature where the user can enter the date of birth:
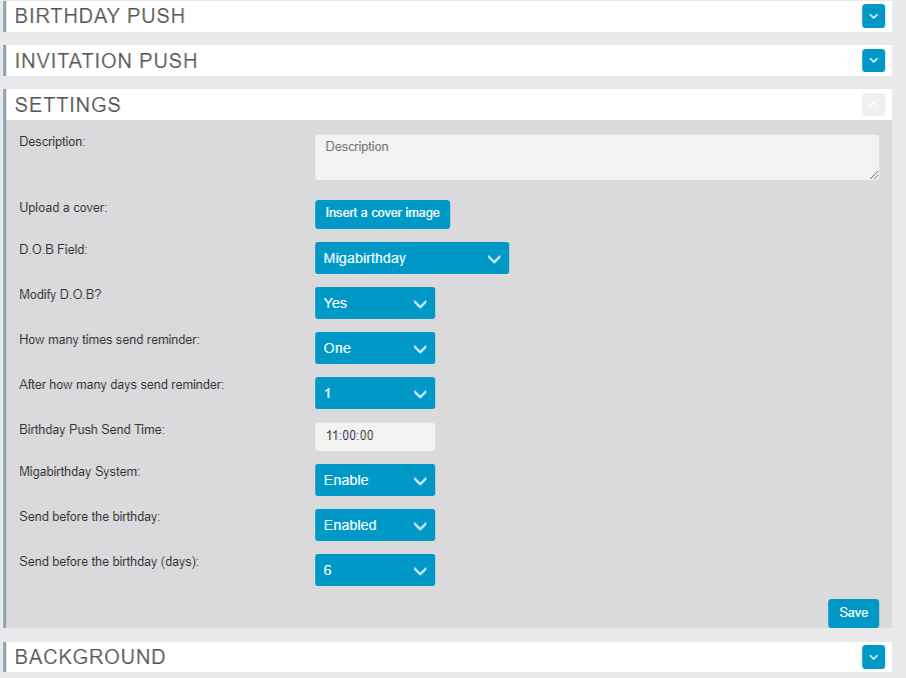
- SETTINGS
In Settings you can set the message visible in MigaBirthDay feature page within the APP. It is also possible to select how the user enters the date of birth: select Profile if you have Profile feature in the app, otherwise select Migabirthday.
It is also possible to set whether the date of birth will be editable by the user after the first insertion. We recommend leaving the date modifiable BUT indicate in the description of the Happy Birthday feature page the fact that a document will be required in order to collect the prize / voucher. Also, from the Settings we can choose the number and frequency of the reminder, in addition you can set the time for automatic push notifications sent by Migabirthday. Finally, you can set MigaBirthDay system Enabled/disabled. - The new Option to shift a certain number of days BEFORE the notification EMAIL and PUSH that is sent for HAPPY BIRTHDAY. The drop-down menu to select the number of days before

NB: Se la funzione PROFILO non è presente nella APP verrà utilizzata la data di nascita inserita nella funzione BUON COMPLEANNO.
Se la funzione PROFILO è presente sarà utilizzato il data base della funzione profilo come data di nascita.
Direct link: https://support.migastone.com/en/hrf_faq/miga-birth-day/
Migabot
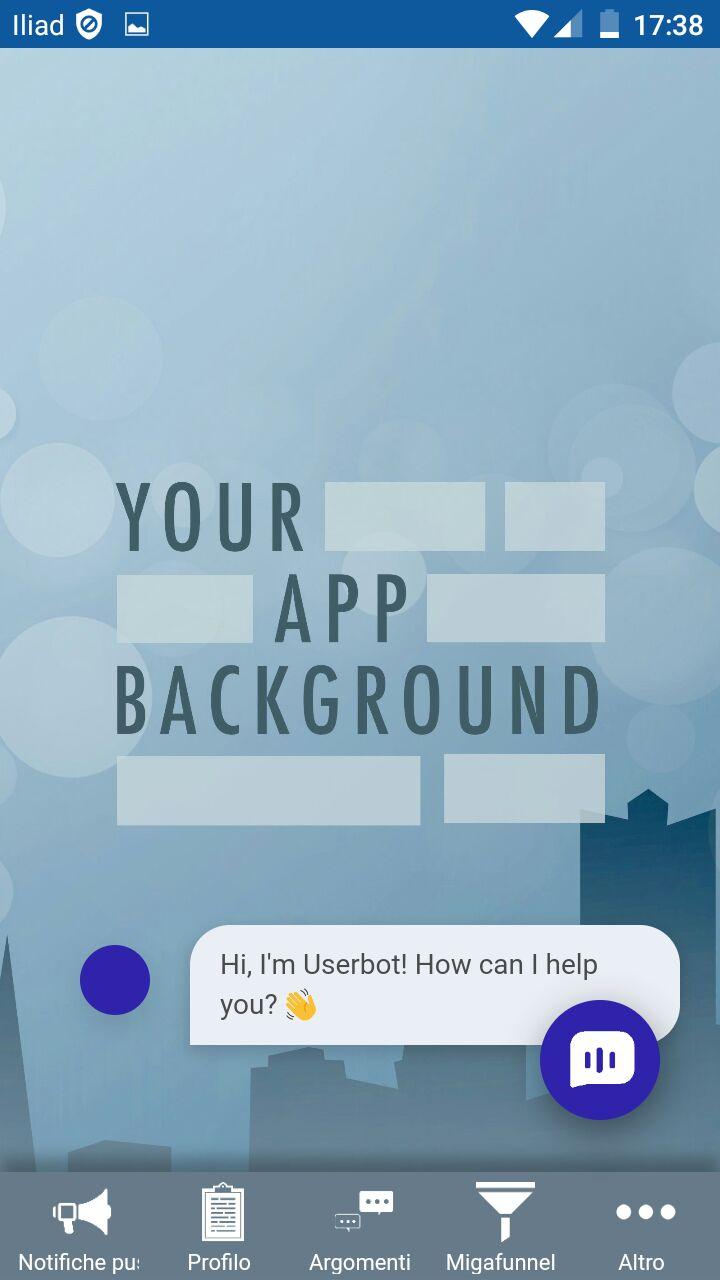
With Migabot you can integrate automated conversations with the users of your app!
First register for free (or by choosing the paid plan that best suits your needs) to this service: https://userbot.ai/
Once registered with Userbot, complete the setup by following the quick and easy wizard. Click on the ?, watch the short video and follow the steps indicated. A series of informative popups will help you along the way.
API Settings
As soon as you have created and configured your Bot, click on “Integrations” in the menu:
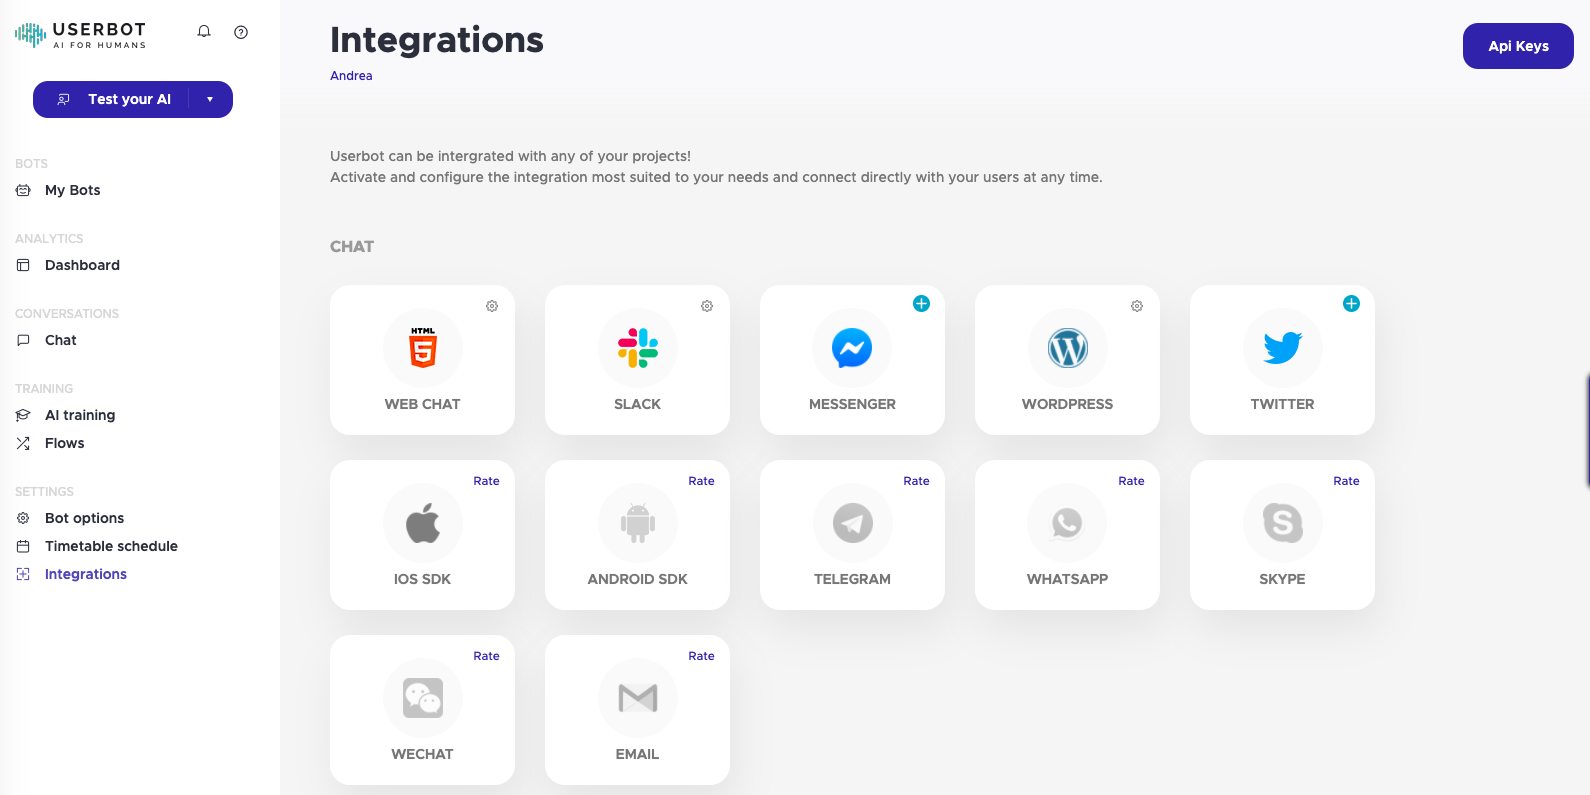
Then on the “Api Keys” button at the top right:
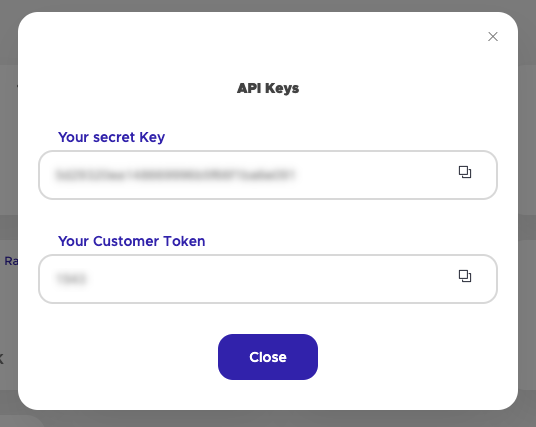
Copy and paste both the Secret Key and the Token in the Control Panel of your app> Migabot (from the vertical menu on the left):
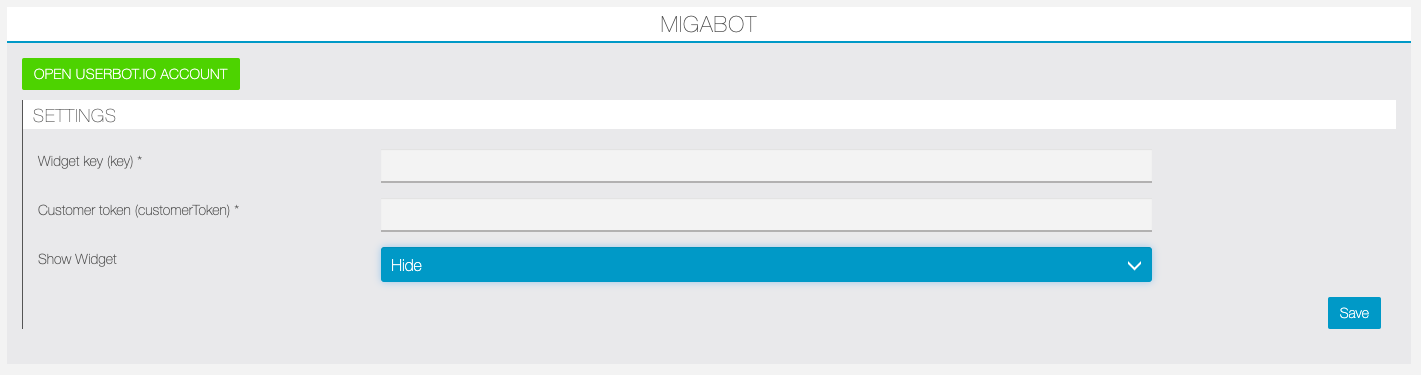
From this screen you can also activate / deactivate the widget via the drop-down menu. Save the setting.
Chat / Widget customization
Still from the Integrations screen, click on “WEB CHAT”:
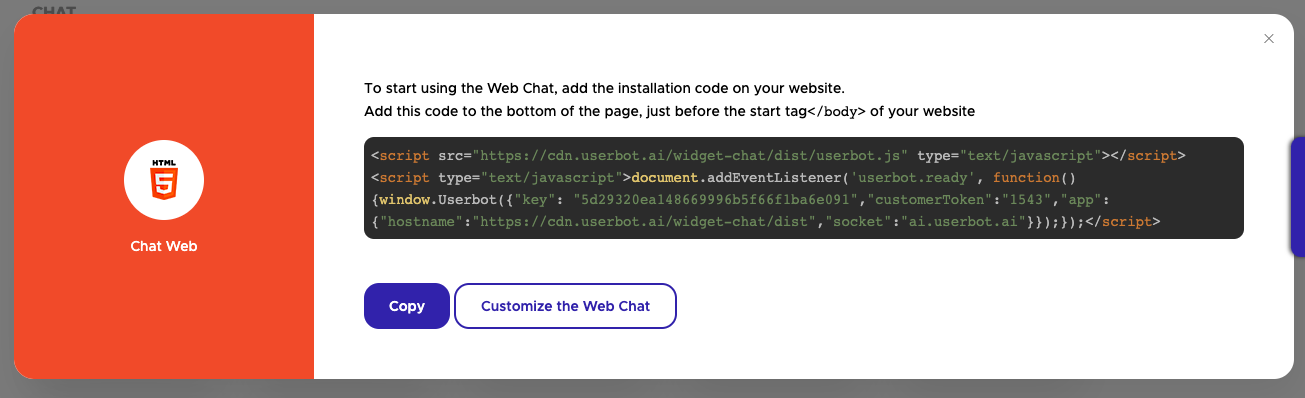
Then on “Customize the Web Chat:
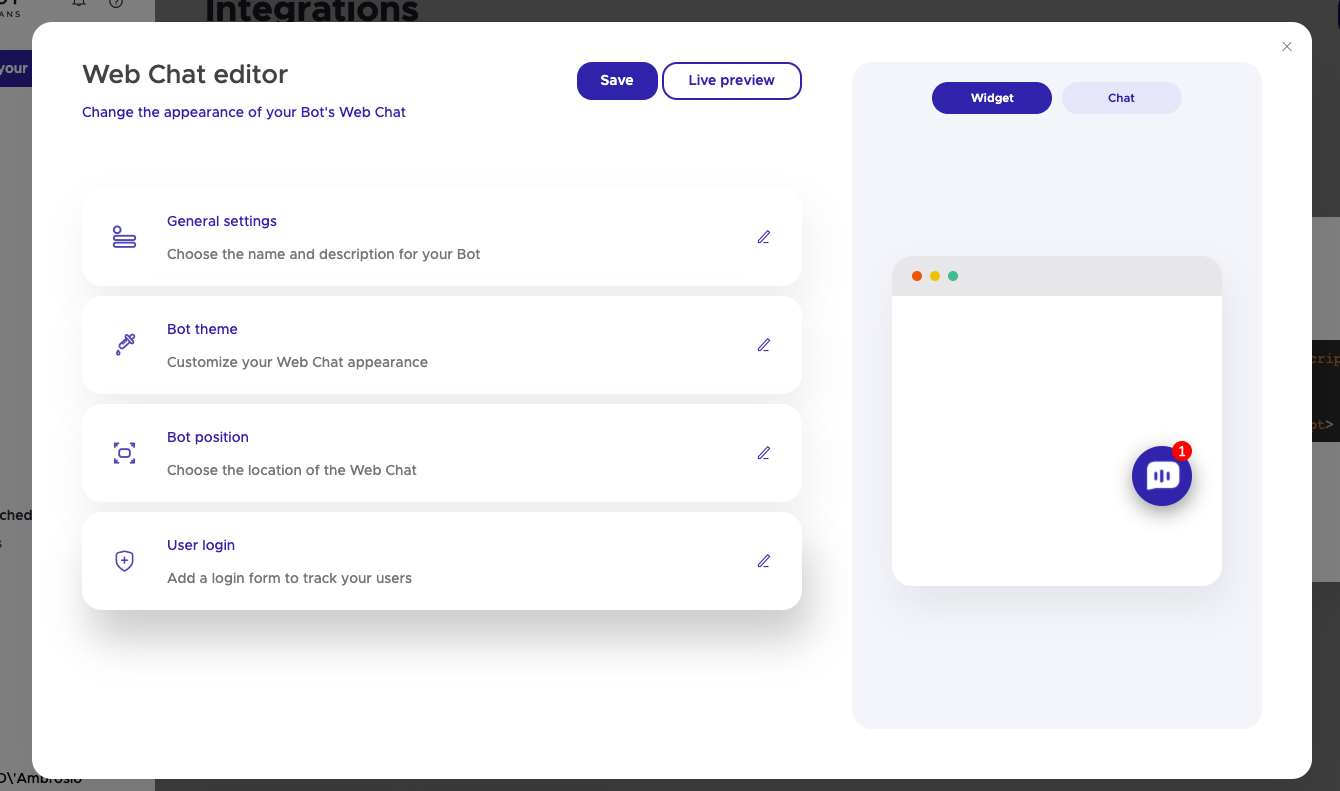
From this window you can customice the widget that will be integrated into your app. On the right you can see a preview of the result.
When you are satisfied click “Save”.
Note: you will not have to copy any code, any changes are automatically reflected in the app.
The Bot is now ready to respond to your app users!>
Direct link: https://support.migastone.com/en/hrf_faq/migabot-2/
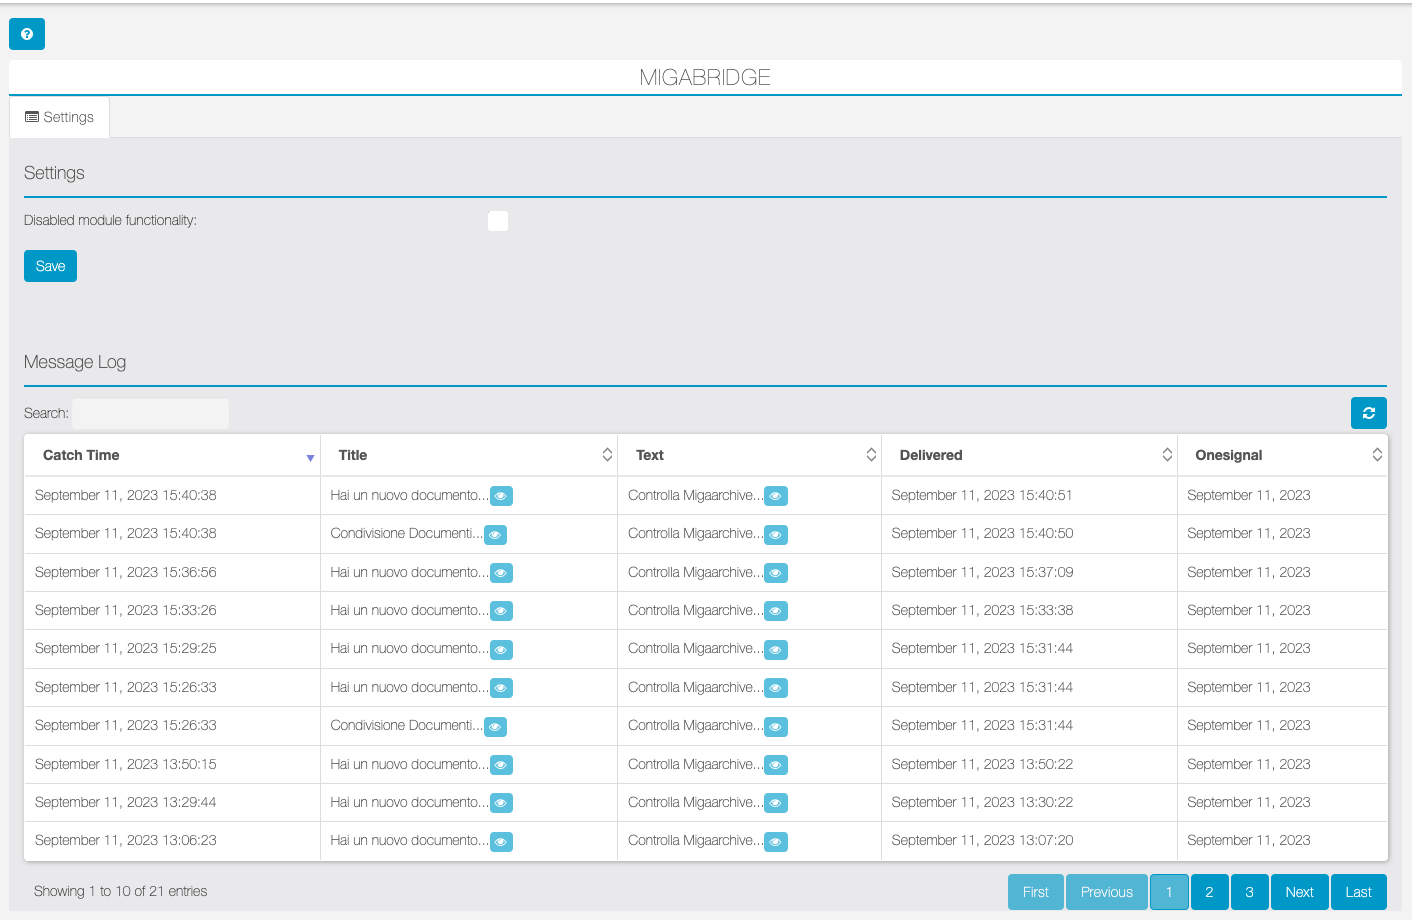
MigaBridge
The MigaBridge module intercepts any attempt to send an individual notification by any module for Siberian that uses the Push Notifications system in use up to version 4.20.44 of Siberian and sends it via the new system implemented by version 5.x.
The module therefore allows the use with version 5.x of Siberian of all those modules that do not yet natively implement the new system for push notifications based on the interface with OneSignal.
NB: the module compatible only with Siberian 5.x. To make push notifications work with Siberian 5.x it is necessary to correctly configure the app on the OneSignal panel and copy/paste the relevant API keys into the frontend of the app on Siberian app builder. It is recommended to refer to the Siberian and OneSignal guides. Operation of the module also requires the installation of Siberian’s Individual Push2 module.
The MigaBridge control panel is accessible from the Siberian Frontend sidebar and is very simple, it allows you to deactivate the functionality when needed and to view all the individual push notifications intercepted and sent by the module.
LINK: https://support.migastone.com/en/hrf_faq/migabridge-module/
MigaCarnet
With this feature it is possible to buy pre-paid coupons packages for any type of service, offered at a promotional price (for example: 10 dinners with standard price of 200 euros, at a discounted price of 150 euros).
Payments Settings
First of all, in order to receive prepaid booklets, you need to add the “Enterprise Payment” feature in your app. From the configuration page of that feature you can currently activate the following payment methods:
- Cash – payment in cash
- PayPal – to enable this type of payment you must first configure the parameters of the PayPal account to which you will receive payments.
WARNING: the payment options “Bank Transfer” and “Stripe” are not available at the moment. They will be usable soon.
In order to Enterprise Payments works properly with Carnet Coupons, On Settings tab:
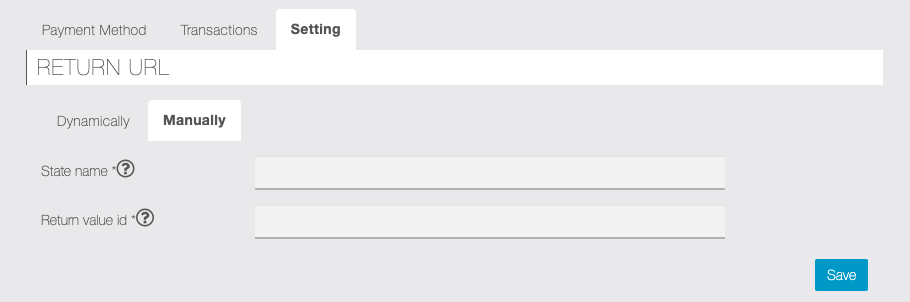
- click on “+” button to add a return link
- open the “manually” tab
- make sure to select “No Link” from dropdown menu
- On State Name type this: carnet-payment-response
- On Return value ID type this: 5742
It is recommended to keep the “Enterprise Payment” disabled: payments will still be available but in this way you will not have a superfluous item in the menu.
Carnet Settings
Once the “Enterprise Payment” feature (appropriately configured as indicated in the previous paragraph) and the “Carnet Copupons” function are present in the app, we can proceed to insert the carnets that users can purchase.

Carnets Management
Simply click on ![]() icon at the “Carnets Management” section for the first entry. For the subsequent ones, click on the
icon at the “Carnets Management” section for the first entry. For the subsequent ones, click on the ![]() button in this section.
button in this section.

Fill in all the required fields to configure the carnet:

In addition to Name, Description, Image, it is recommended to pay attention to the following options:
- Standard Price / Discounted Price – The first is the whole reference price to show to customers, while the second is the promotional price that will be required to purchase the carnet
- Number of coupons included – The number of coupons (services / inputs / etc) that the customer will purchase through the prepaid carnet
- Carnet expiration – possible end date of the offer (can also be unlimited)
- Coupons expiration – any date by which the coupons will be usable (can also be unlimited)
- Status – the carnet can be enabled or disabled even temporarily according to the needs
Purchased Carnets
From this section it is possible to check the carnet purchased by the customers and confirm the payments.
If the user makes the online payment (PayPal, Stripe) the purchase status is automatically set as “Paid”. If payment is made in cash, the manager must confirm the payment, either from the app directly on the customer’s smartphone or in this section.

Click on “Change to Paid” (green icon on Action column) to confirm payment. Vice versa, if the status is “Paid” you can change the status by click on “Change to Pending” (yellow icon on Action column).
You can also assign the status “Void” to cancel in payment (red icon with X). From this status it will be possible to restore the “Paid” or “Pending” status.
PIN Management
In order to use carnet coupons it is necessary that the manager (or an operator in charge) insert his pin from the client’s smartphone. In this section it is possible to define the operators involved in the validation and enter the corresponding passwords.

NB: the PIN number of the employee will also be required to put the carnet in the “Paid” status in the event that this operation is carried out directly on the customer’s smartphone.
Settings
In this section you can enter Terms and Conditions and set the automatic messages sent by the Carnet Coupons feature.

To customize the messages already set by default, select the type of message desired from the drop-down menu and edit the corresponding text field. Use the Tags available for the parameterized fields (Name, Surname, Title of the carnet, etc.).
It is possible to enable the sending of the CC messages to your email address. Finally, customize the icons that illustrate the purchased, availables and pending parnets on the page of the app.
Carnet Coupons feature in the app
Here is an example of how the main page of the Carnets appears in the app:
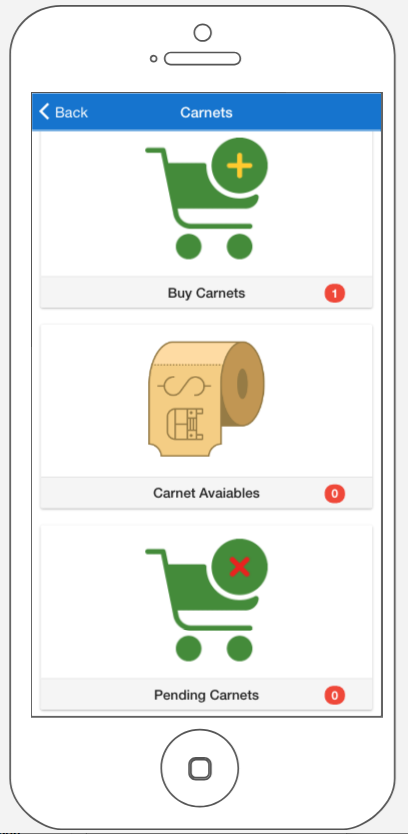
- Buy Carnet – shows the carnets that the user can buy
- Carnet Availables – shows the carnet purchased by the user. This page will show only the carnet that are paid.
- Pending Carnets – shows the carnet purchased by the user but whose payment is not yet confirmed.
NB: if the user makes an online payment (PayPal, Stripe) that is successful, the carnet will automatically be in “Paid” status. If the user makes a cash payment or bank transfer, the manager of the app will change the status to “Paid” as explained in the previous paragraph.
LINK: //support.migastone.com/en/hrf_faq/carnet-coupons-feature/
Miga Car Review
The ideal feature for Car Review Centers, garages and tire repairer with which users can receive a convenient reminder via push notifications or via email for car review, car service or anything else related to their car.
Also, thanks to the integration – optional – with the MMB YAP software (https://www.mmbsoftware.it/) your customers will be able to have the reminders automatically set for AUTO REVIEW and CAR SERVICE, simply by entering the license plate of their car / motorcycle in the app.
The module settings in your app
VEHICLEs DATA BASE
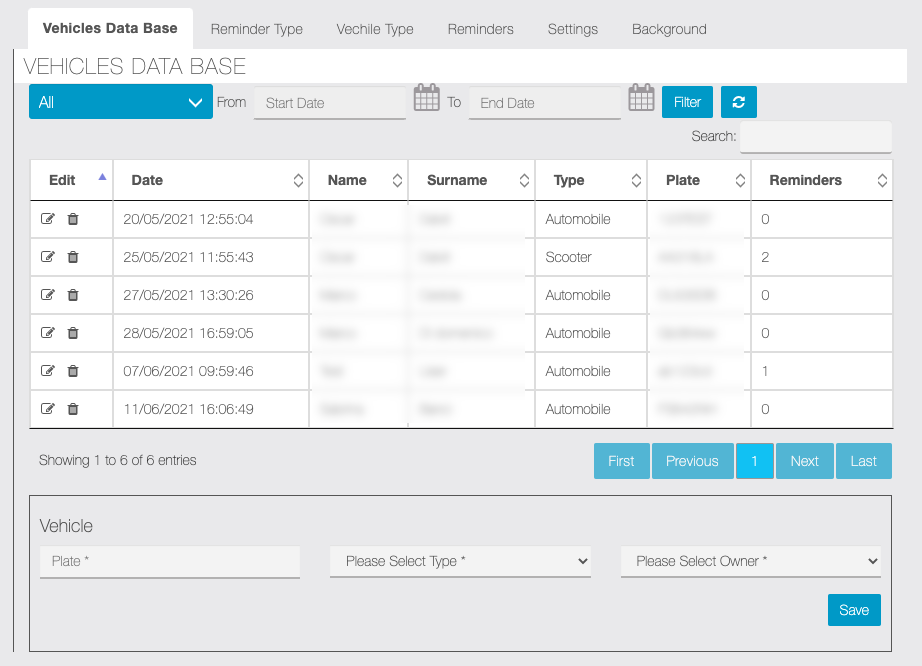
The page that opens upon entering the fueature panel shows the vehicles that users have registered by entering their license plate in the app.
From this page you can also insert or modify an already inserted record.
REMINDER Type
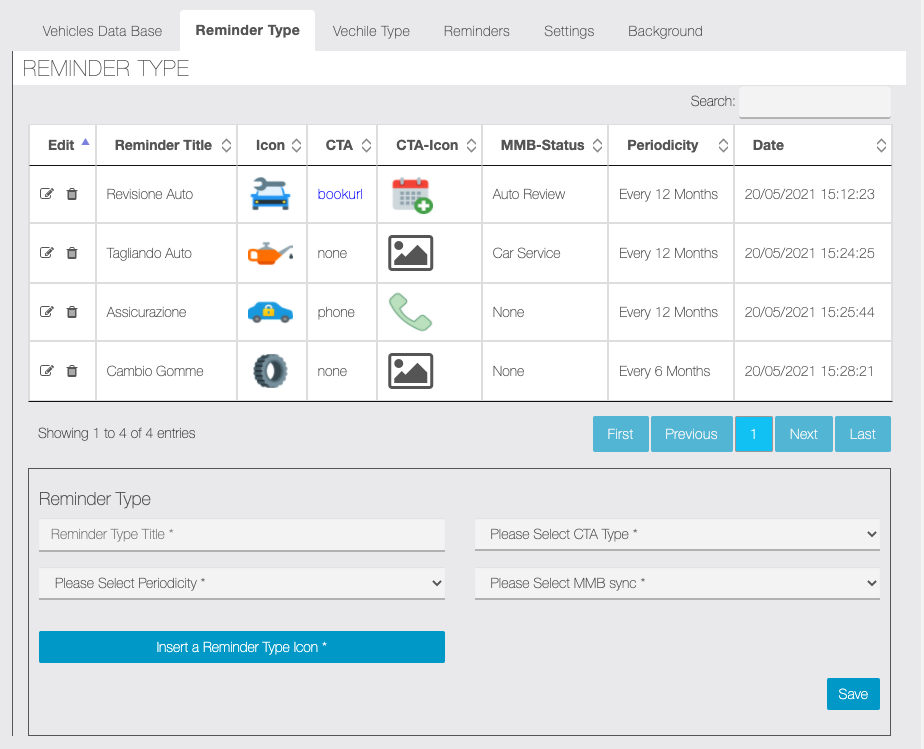
In this screen we define the types of reminders we want to manage with the app.
By entering the data for integration with the MMB software in the Settings, which we will show later in this guide, we will be able to automatically obtain the reminders for REVIEW and COUPON, let’s see them specifically:
Auto Review
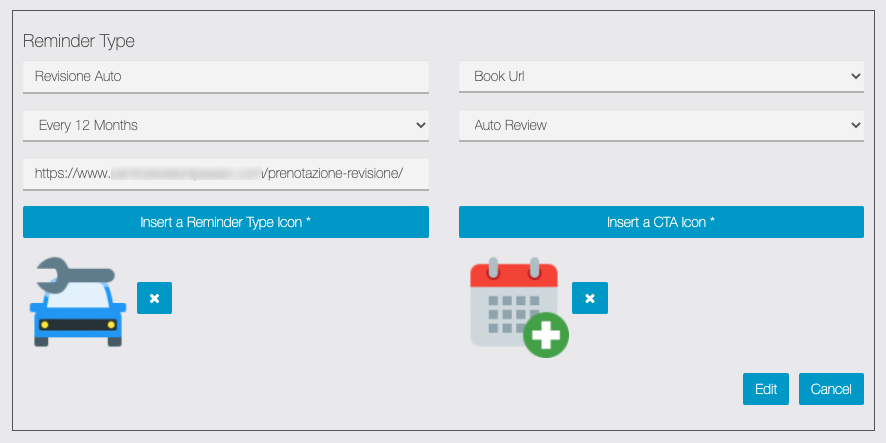
First we indicate a title for the reminder. In this case we will select “Booking Url” as Call to action so that you can enter the url of the page of your website in the appropriate field where you have entered the booking form of the REVISIONLINE.COM portal integrated with your MMB YAP software.
We then set the appropriate deadline for this service and the MMB Sync, in this case of course “Auto Review”.
We can graphically complete the reminder type settings by inserting an icon for the reminder and call to action.
Car Service

As in the previous case, we first indicate a title for the reminder. In this case we have no call to action, we simply indicate the suitable deadline for this service and the MMB Sync, in this case of course “Car Service”.
We can graphically complete the reminder type settings by inserting an icon for the reminder.
Other types of reminders
As previously written, AUTO REVIEW and CAR SERVICE are the two types of reminders that we can synchronize with the MMB software and automatically get the reminders setting. However, we can insert types of reminders for other services, as seen in the first image of this paragraph (Insurance, Tire change, etc.). In this case, the reminder can be set directly by the customer from their app, or you can enter / edit it manually from the control panel of the function as we will see later in this guide.
If you don’t use the software already integrated you can insert all types of reminders anyway, including car review and car service, to insert manually the reminders. Or we can also evaluate your custom requests to integrate others software.
When the user enters a reminder in his app, he can also select “Phone” as a call to action. In this way, you can enter the number to call if necessary, for example that of your own Insurance Agency.
VEHICLE TYPE
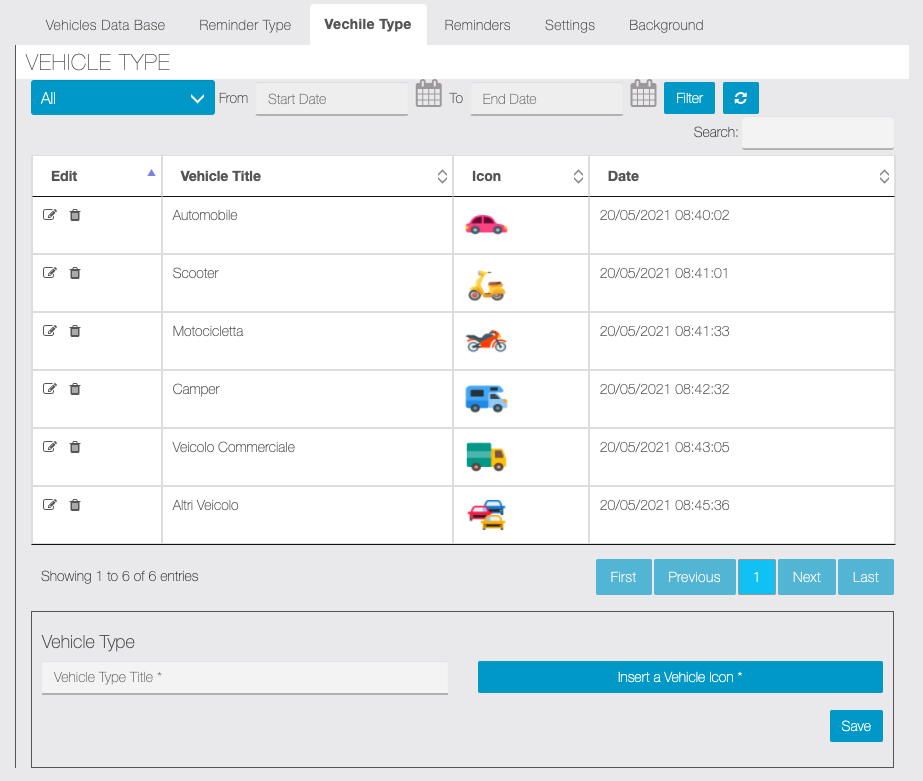
In this screen you can enter the vehicle types managed in a simple and intuitive way. Just enter a name and an icon.
REMINDER
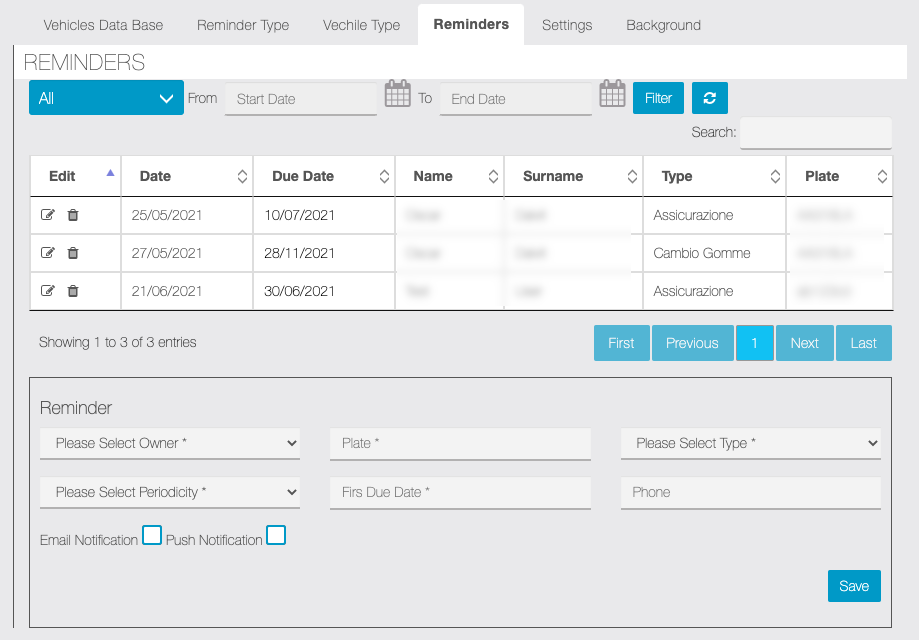
On this screen you will be able to view reminders entered manually by customers. You can also enter new reminders for your customers or edit the records already entered.
Settings
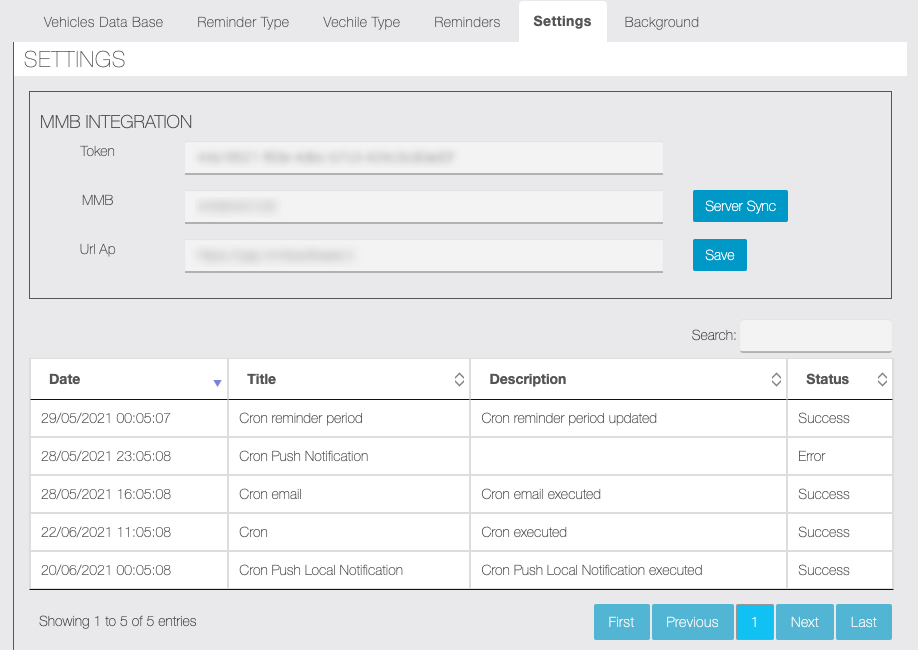
In this screen you will have to enter the data for the MMB software integration, these are the API credentials that you can request through their assistance service.
Below are the sections to set the reminders that users will receive, respectively:
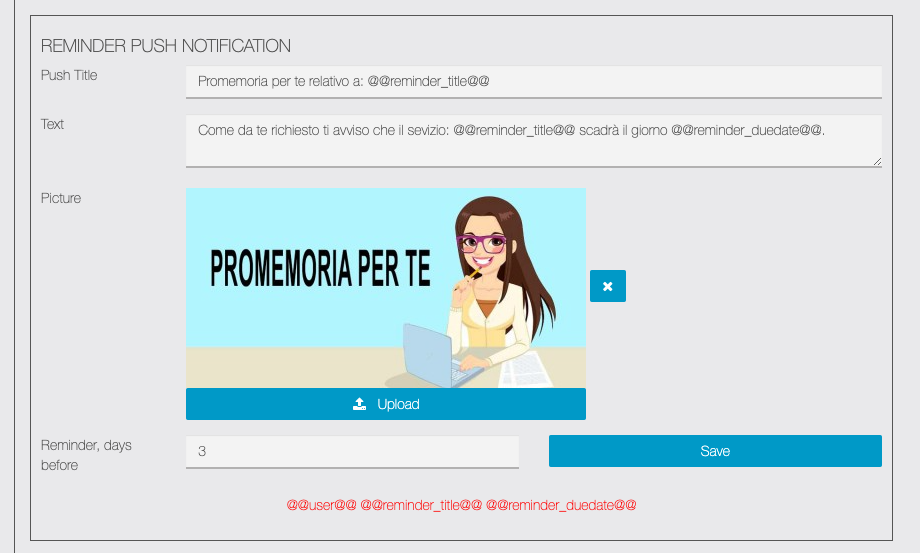
The reminder sent for services via push notification;
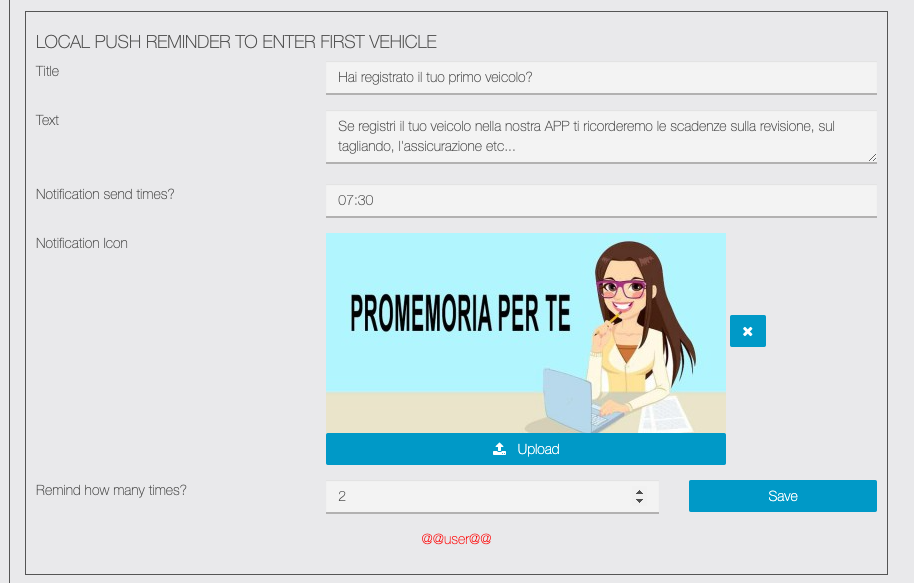
The reminder that will be sent via push notification to remind the user who has not yet done so to enter the license plate of his vehicle;
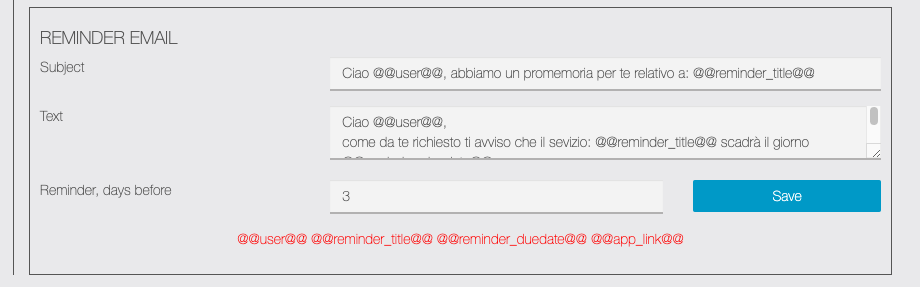
The reminder message to be sent by email.
Miga Car Review feature in the app
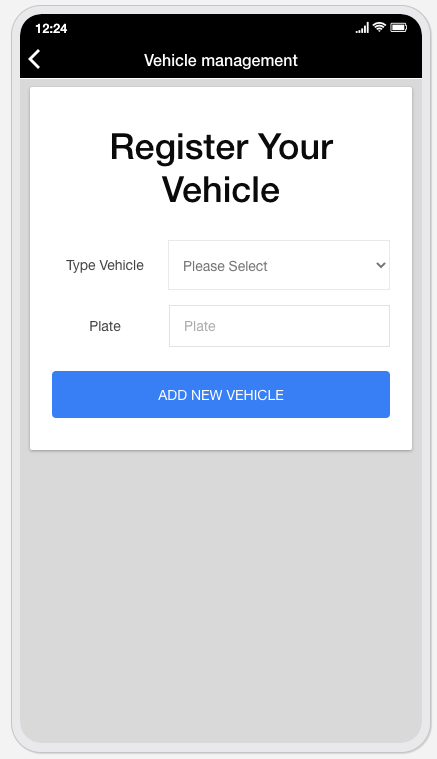
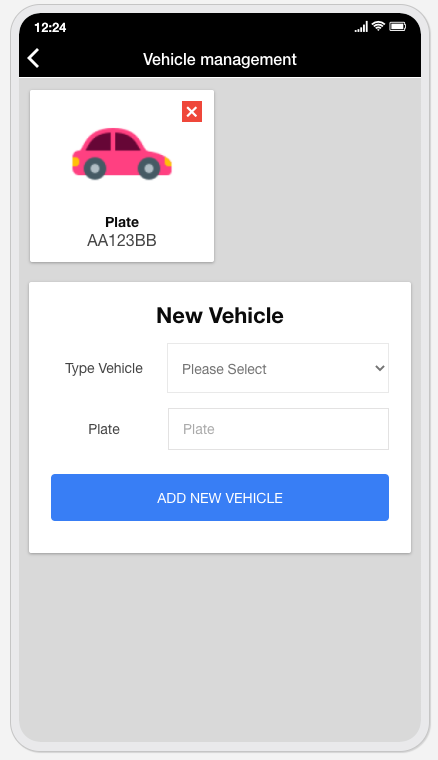
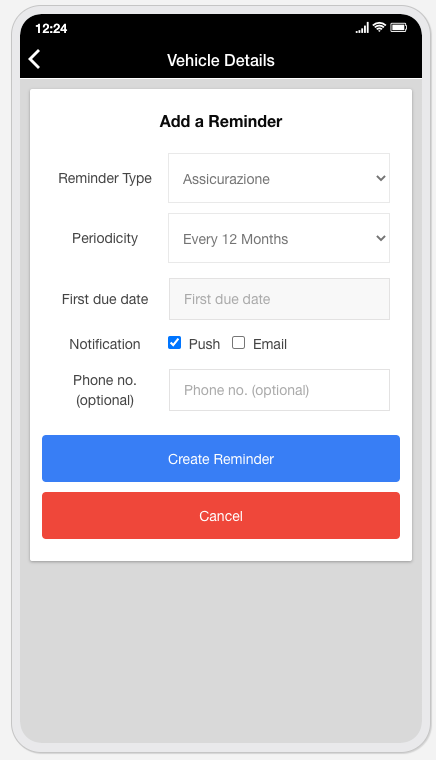
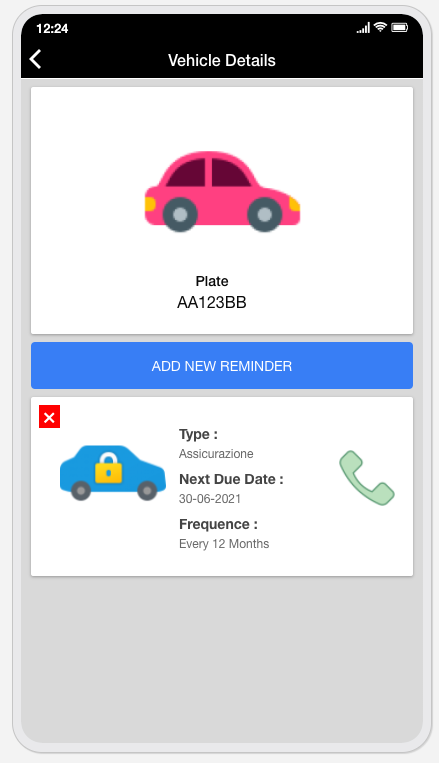
LINK: https://support.migastone.com/en/hrf_faq/miga-car-review-2/
MigaCouponPro
With the Migacoupon feature, you’ll be able to create as many discounts as you want and display them in the application same as the discounts feature. And also you can validate the coupon usage via the Employee’s password. Here are the various parts of a discount:
Add new discounts
- Title: for example ”One free coffee”, keep it short and simple
- Description: for example : “One free coffee among classical L and XL coffees”
- Conditions: for example : “Available for a $10 order”
- Can only be used once: check this box if you want the discount to be available for the client only once. A “use this discount” button will appear in the application and the client will have to press it to use the discount.In case the box is unchecked the user is able to set the number of times the coupon can be used
- Recursive Coupon: The ability that allows the user to use coupons recursively in order of the different weeks, month, years days. For example, let’s say you have a coupon for a free meal at a restaurant, but it is only valid on Wednesdays. This means you can only use the coupon to get a free meal on Wednesdays and not on any other day of the week.
- Start/End date or unlimited: choose if you want your discount to have a due date or if you want it to be unlimited and to stop it when you want.
- Unlock by QR Code: The coupon can be used by both PIN and QR code
- If coupon validity expires shows on the App side: Allow the user to expired Coupons on the App side
- Here is what it looks like:


View / Update / Delete the discount
- To see details of a discount, click on
 icon.
icon. - To update the details of a discount, click on
 icon.
icon. - To delete a discount click on
 icon.
icon. 
- To see details of a discount, click on

Employees
- It is possible to create a password and a QRCode for each employee. Through this, it will be easier to verify who validates what.
- To create a password, you just have to click on
 and fill in the required fields:
- After save you can dowload the QRCode.
See discount use logs
- To see logs open the Logs tab.
- Here are all logs displayed with the date range filter.
- Shows all the info related to coupon(used by, N time used…etc)
- To export a CSV file of filtered records, click on
 button
Admin users
- To make an application customer “application admin” open the Admin Users tab.
- Here all the customers are displayed.
- To make the customer admin, click on
 the button.
 - To remove the admin, click on
 button.
Use the discount on the application end
- Customers can choose any discount.

- The customer can see details of the discount he chose.

- To validate the discount Employee will enter his 4-digit code or scan QRCode.

App end discount use logs
- If the logged-in customer is marked as an admin then the user can see logs also on the application side.


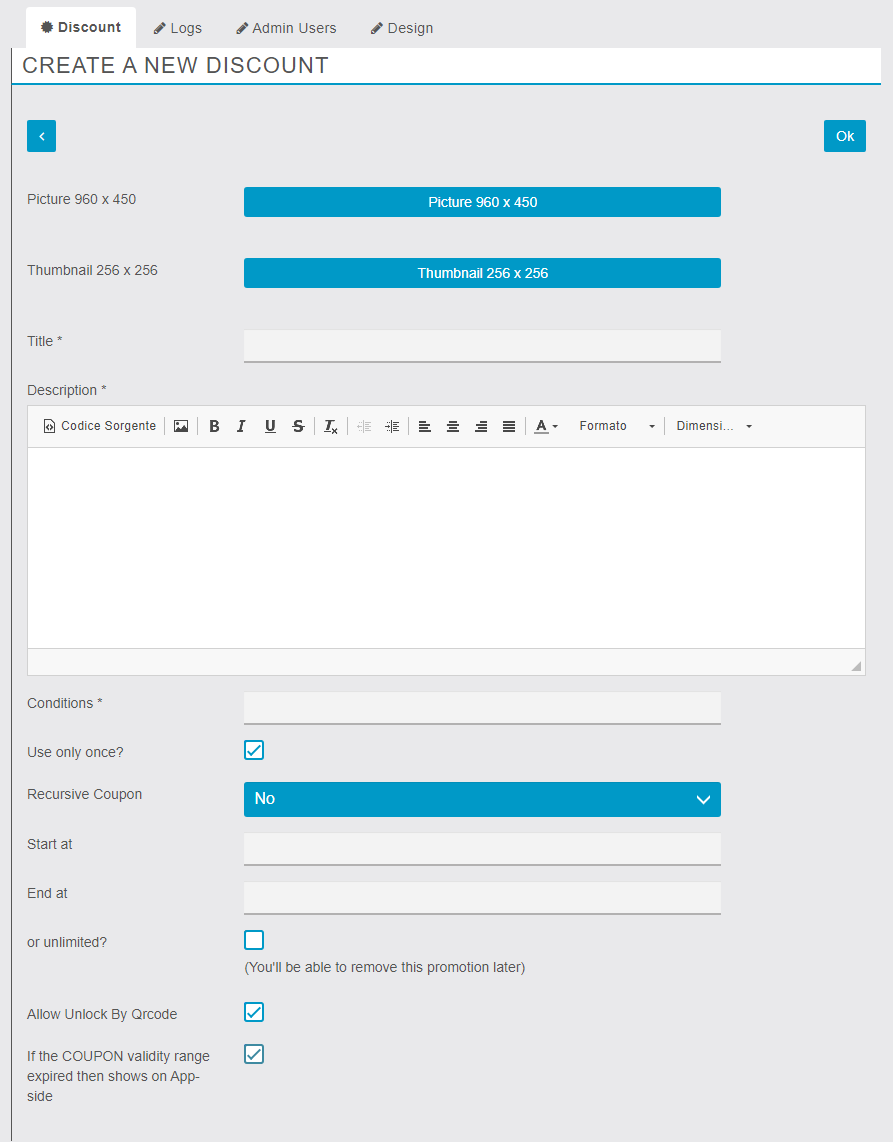
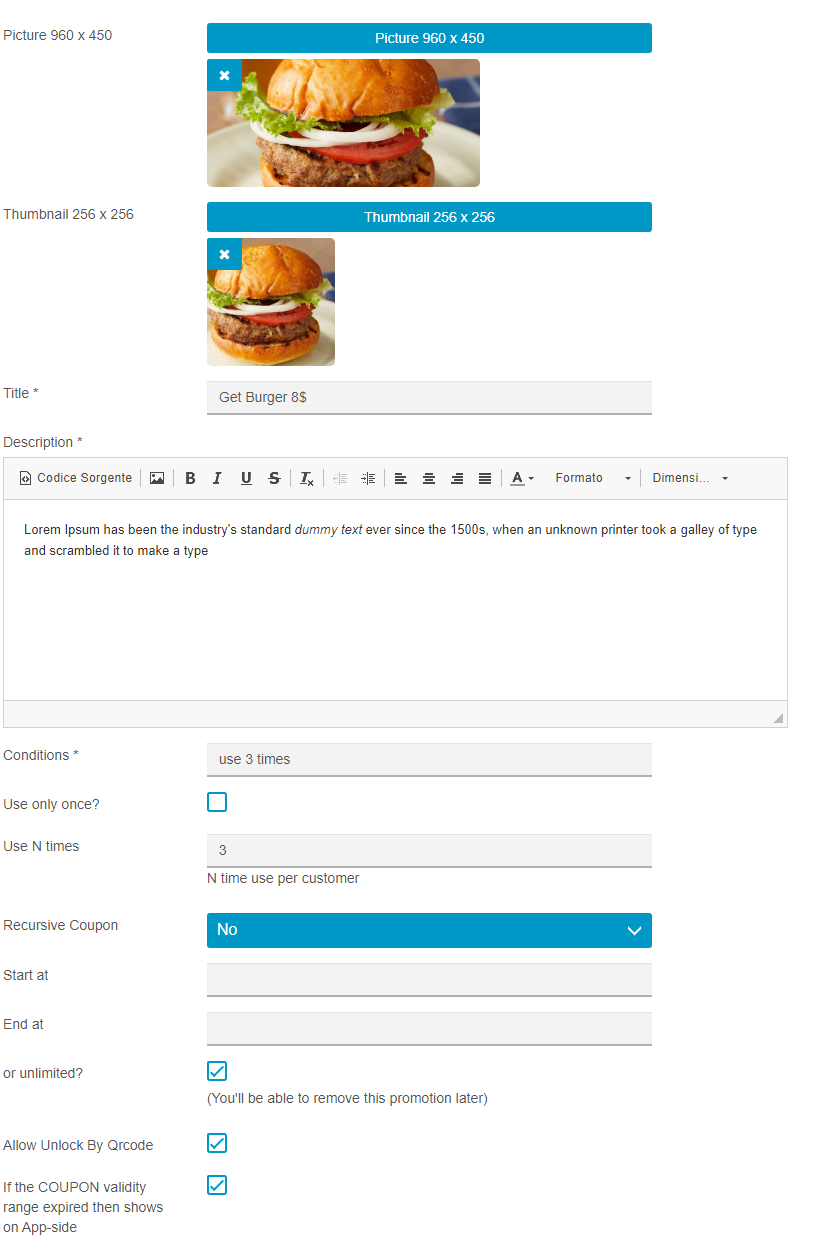

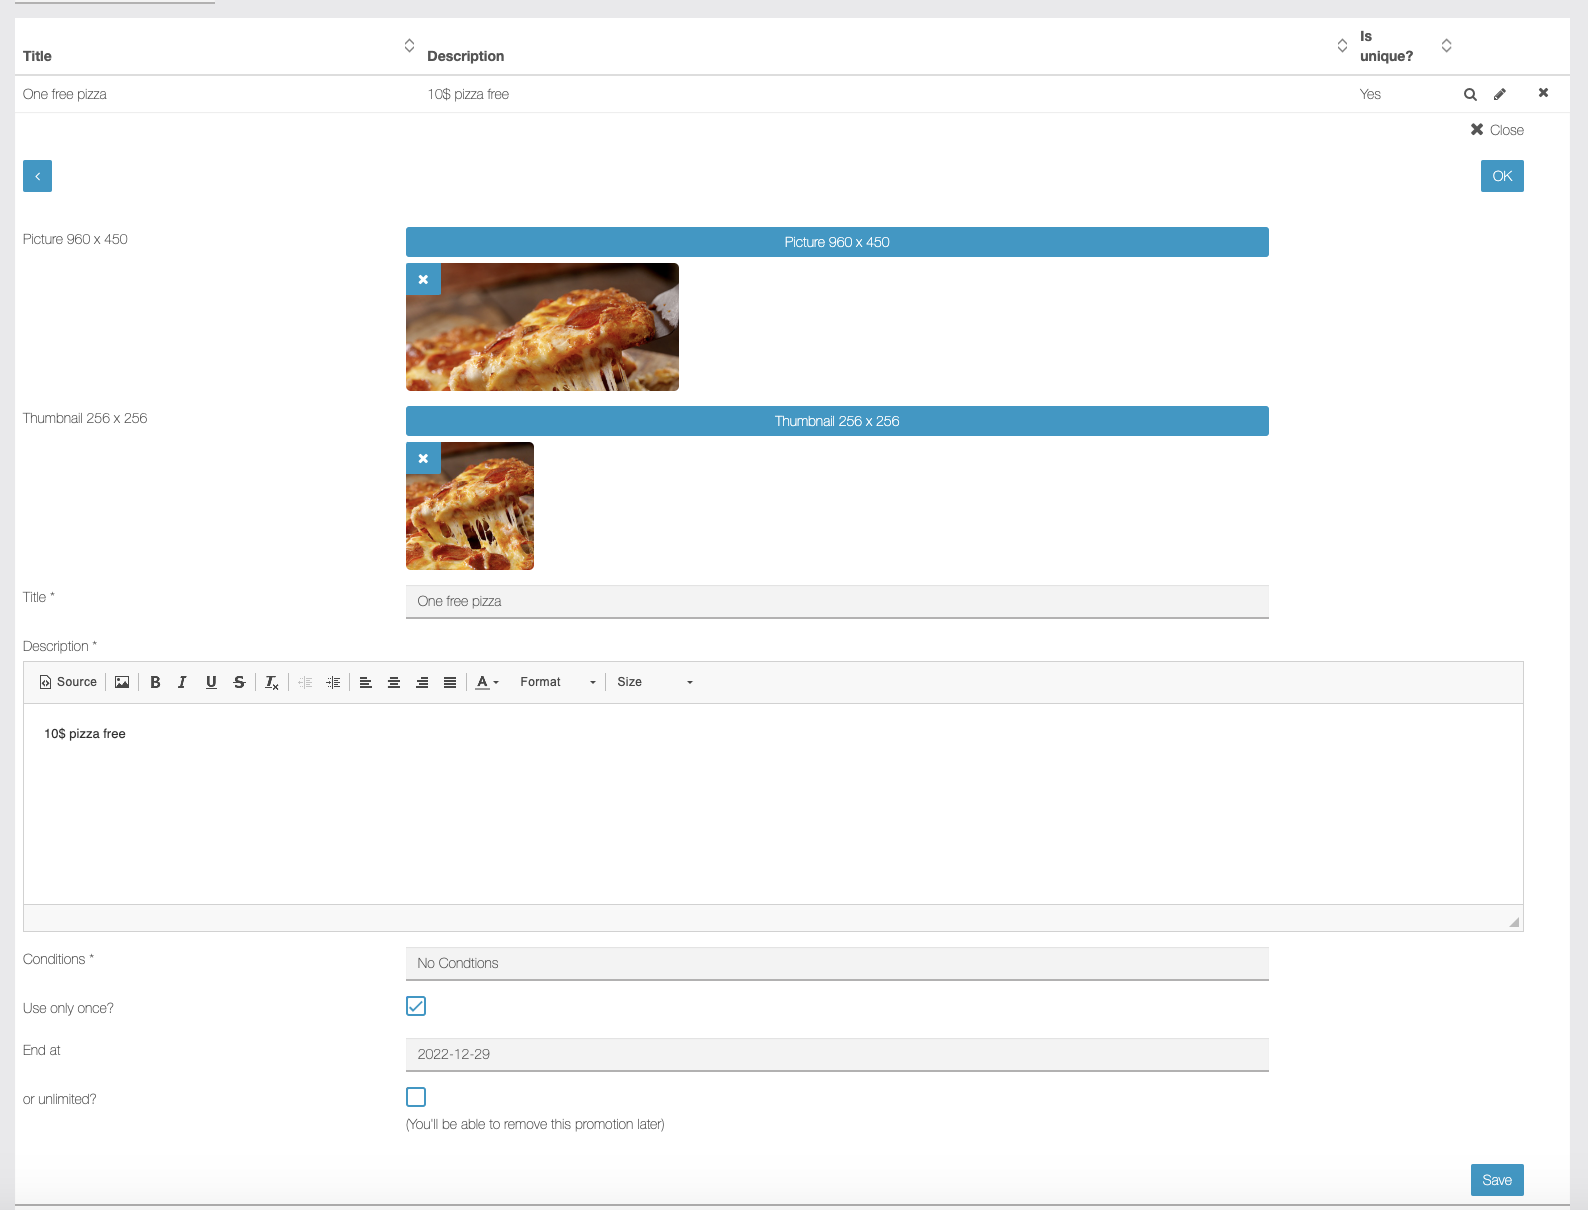
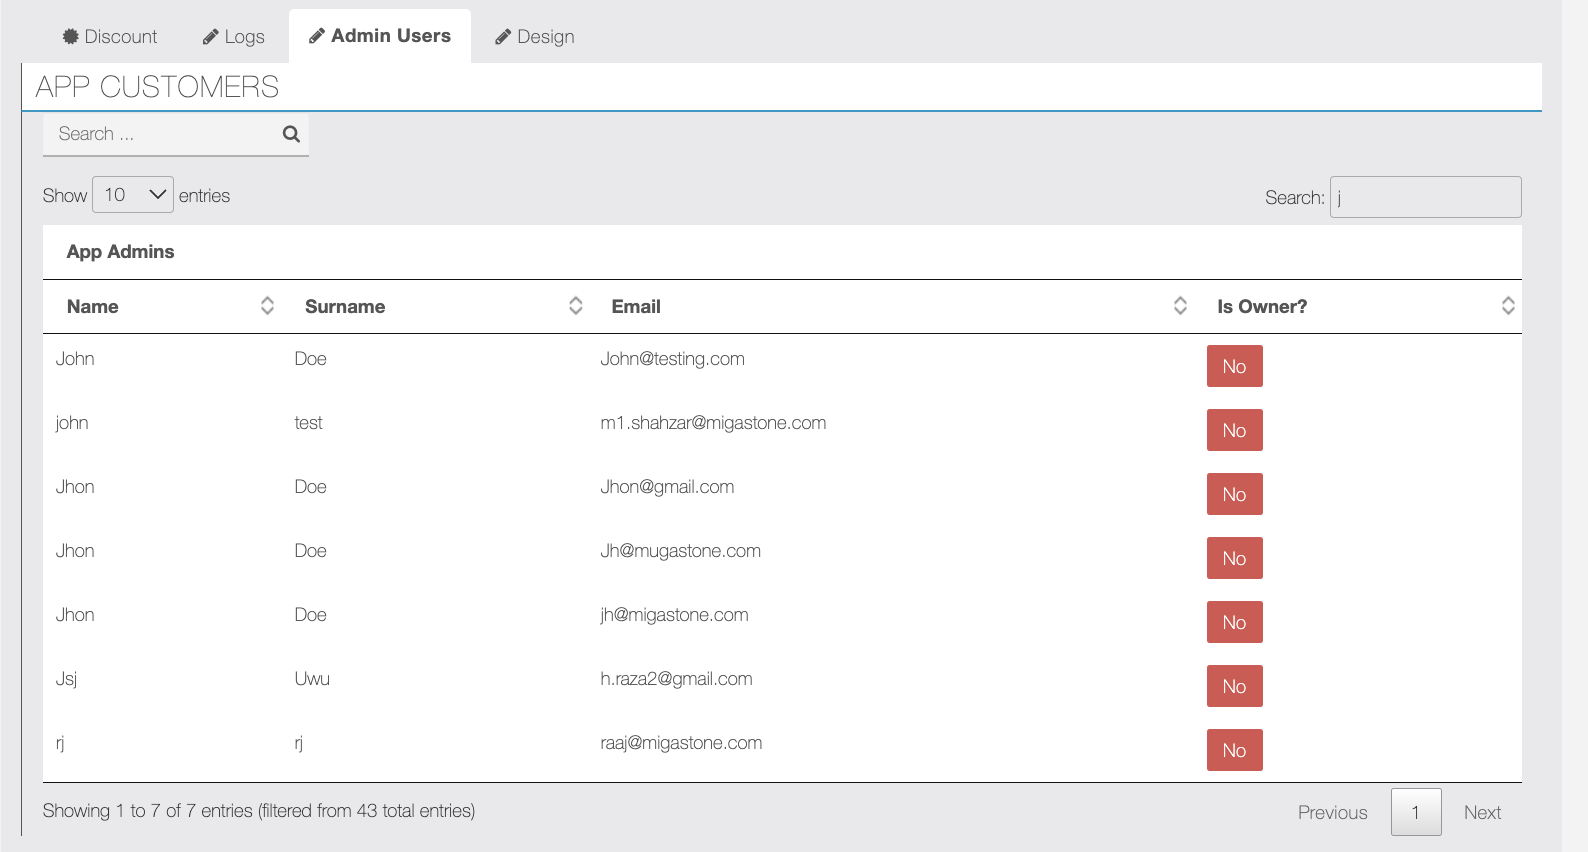
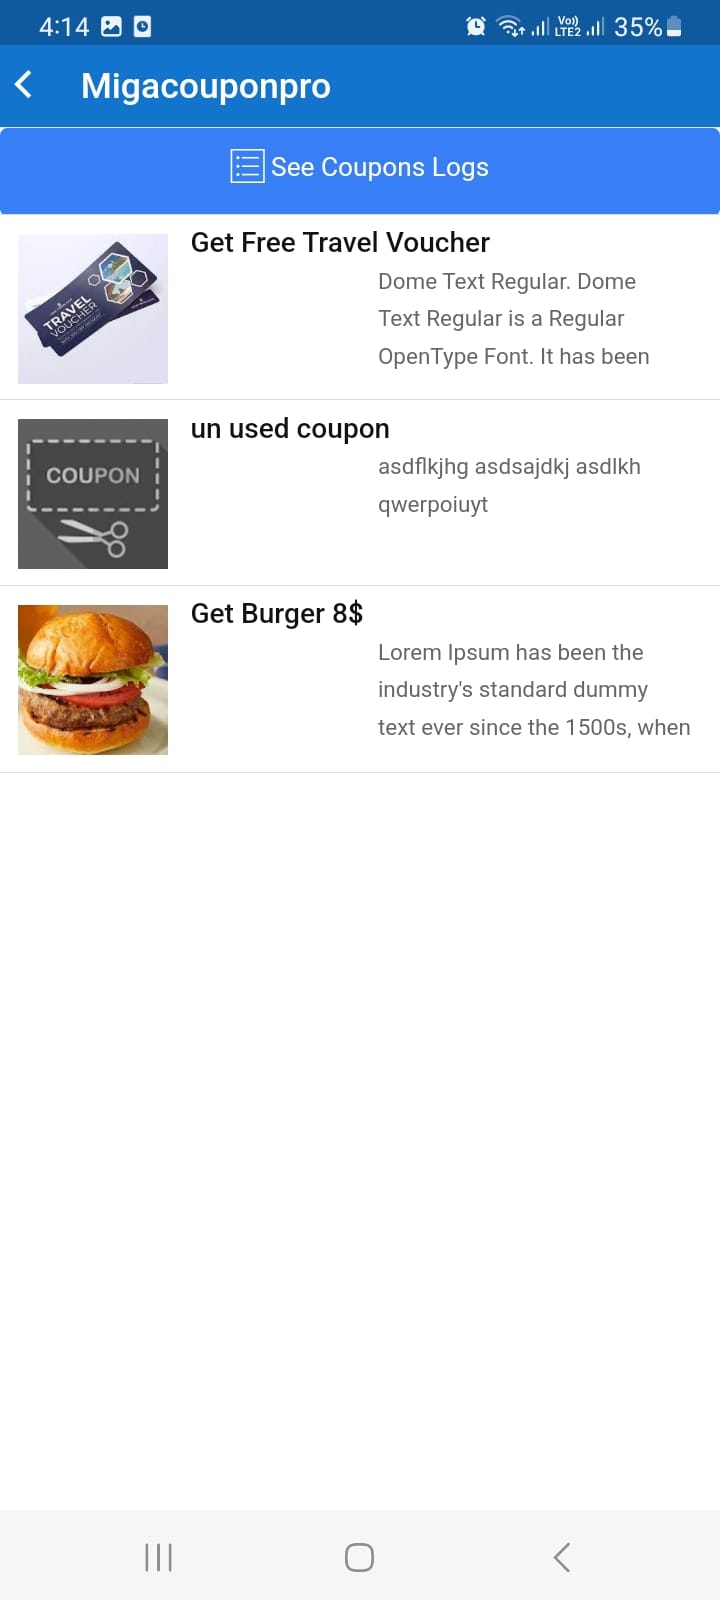

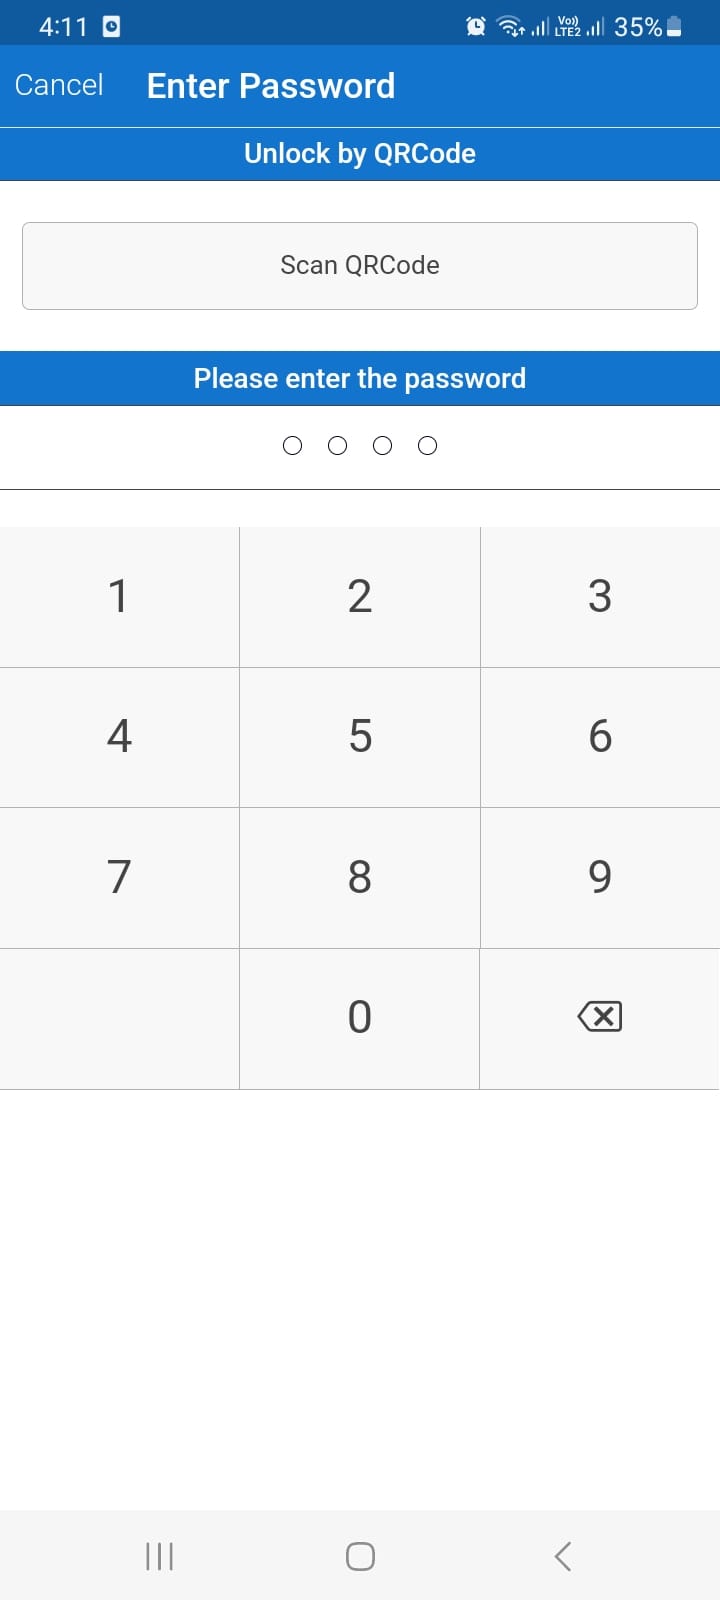
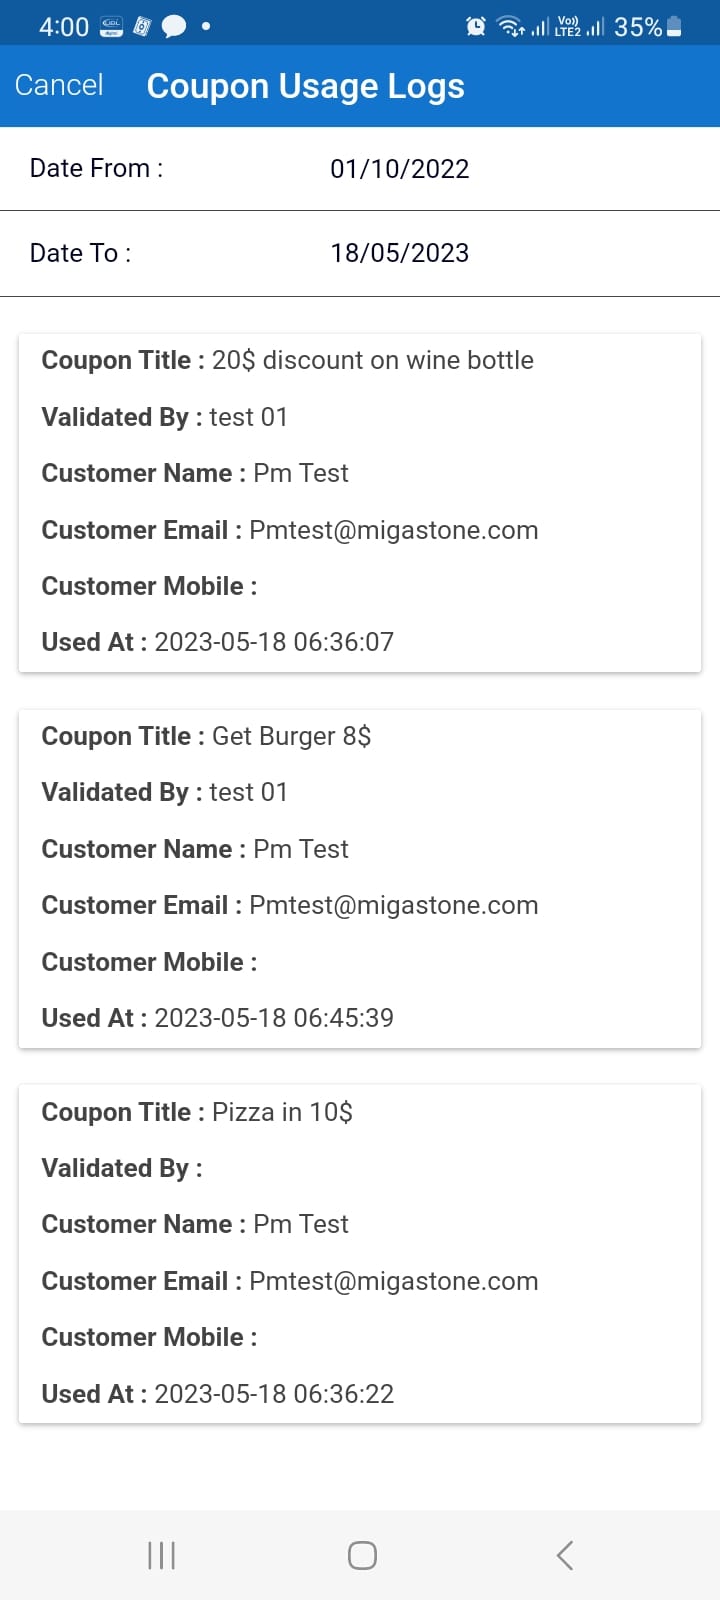
Demo
You can check functionality of the module on our demo platform https://demo.migastone.com/
LINK: https://support.migastone.com/en/hrf_faq/migacouponpro/
Migachat
Migachat User Manual
The Migachat module is a versatile AI assistant and integration tool designed to empower businesses to handle user interactions through AI. It serves various use cases, including chatbot development, AI-driven customer support, educational platforms, and more.
SETTINGS
For detailed API configuration, please refer to the documentation: Link to Documentation.
Backoffice settings
Duration to maintain the history of chats
- Here you can set the duration to maintain the history of chats. The chat history older than the duration will be deleted automatically.

OpenAI models tokens limit
- The OpenAI chat model’s token max limit is configured here. It is useful if in the future there are new models or changes in the limit of existing models.

MODULE CONFIGURATION
ChatGPT API Setup
- In the Module Operation, select the ChatGPT API.
- Add Organization ID: Obtain this from Organization Settings.
- Add Secret Key: Retrieve this from API Keys.
- History Tokens %: The tokens reserved for the history of messages are to be attached with API calls to preserve the context of the chat.
- Max messages in history: no of messages to include in history.
- System prompt tokens %: Token reserved for system prompt to be attached with the API call.
- After saving the form, the system will verify the entered credentials. Incorrect credentials will prevent saving.

Webhook & Web-Service Setup
- In the Module Operation, select the Webhook.
- Add a valid Webhook URL.
- Use the provided Auth Token in the web service request, which can be regenerated at any time.
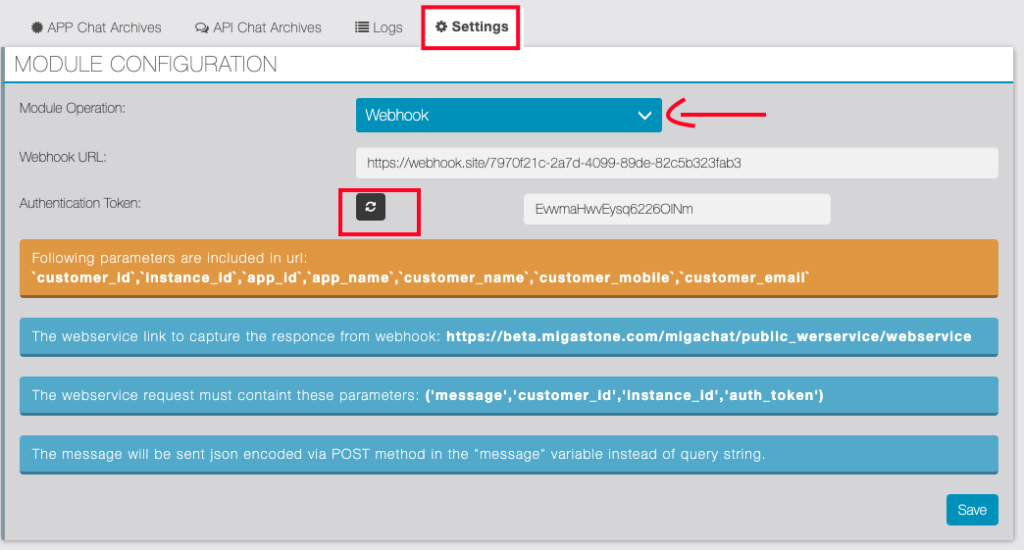
OpenAI Configuration (Only Available if ChatGPT API is selected)
- After setting up the module configuration, specify the AI model to use for your chatbot.
- Select Model: Choose the OPEN AI ChatGPT Model.

System Prompt for OpenAI ChatGPT Configuration
- Manage the system prompt by enabling or disabling it.
- Add the system prompt text.

- You can optimize the System prompt by clicking the “Optimize system prompt”.
- The ChatGPT API will optimize this.
- A popup model is displayed. Here you can keep the existing system prompt or save the new optimized system prompt
- You can translate the System prompt by clicking the “Translate the system prompt into English”.
- A popup model is displayed. Here you can keep the existing system prompt or save the new translated system prompt.
- Last saved tokens: The count of tokens after saving the system prompt is displayed plus the token reserved for the system prompt according to the set percentage and the Model’s total tokens.
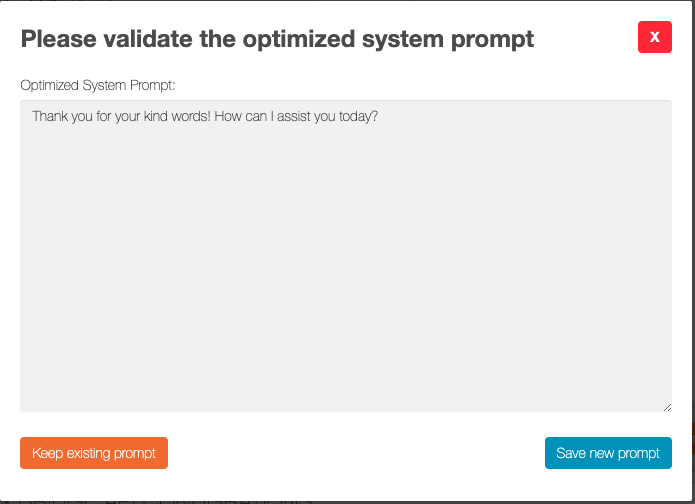
Bridge API Configurations (API for 3rd Parties)
- Configure security settings, including an authentication token and token limits for interactions.
- Authentication Token: An API authentication token for request authentication.
- Add Overall Duration for Tokens Limit: Set the duration for the token limit for all the CHAT IDs in an instance (default: 24 hours).
- Add Overall Tokens Limit: Define the token limit for all the CHAT IDs in an instance (default: 2,500,000 Tokens). An email will be sent to the admins of the application if this limit is reached.
- Select the Per Chat ID Tokens Limit Duration: Set the duration for the token limit of a single CHAT ID (default: 60 minutes).
- Add Per Chat ID Tokens Limit: Specify the token limit for a single CHAT ID (default: 100,000 Tokens). An email will be sent to the admins of the application if this limit is reached.
- Add User Chat Limit Exceed Response: Configure the response when a single CHAT ID reaches the token limit, and it will be automatically translated into the language of the previous chat.
- Set the AI Answer Token Limit: Define the token limit for AI responses, which will be the same for all AI models.
- Enable or Disable the Bridge API functionality.

Tokens Limit For fine-tuned Models
- Here you can set the total tokens limit of custom fine-tuned openAi models.

GDPR Settings (only for bridge API)
In this module with GDPR privacy enabled, when a user sends a message via the bridge API, the system prompts the user for GDPR privacy consent. If consent is granted, the system may then ask for commercial consent if that feature is enabled. If a user declines GDPR consent, their data is flagged for deletion after a specified Reset Duration.
In the case of an agent initializing a new chat with a new chat ID, the system does not ask for GDPR consent from the user, and the consent is marked as external. This approach ensures compliance with GDPR principles by obtaining explicit user consent for data processing and respecting user preferences regarding commercial interactions.
- Configure the GDPR settings.
- GDPR privacy Enabled?: To enable or disable the GDPR consent from bridge API users.
- GDPR privacy link: Privacy link to redirect the user if the user wants to read the privacy statement.
- GDPR welcome text: Text to send the user for the first time to collect the GDPR consent.
- GDPR accepts text: Text to be sent when the user accepts the GDPR Privacy consent.
- GDPR denied text: Text to be sent when the user denies the GDPR Privacy consent.
- Reset duration: Time in minutes to remove the user’s personal information and ask for the GDPR consent again.
- COMMERCIAL CONSENT Enabled?: To enable/disable the COMMERCIAL consent from bridge API users.
- COMMERCIAL welcome text: Text to send the user for the first time to collect the COMMERCIAL consent.
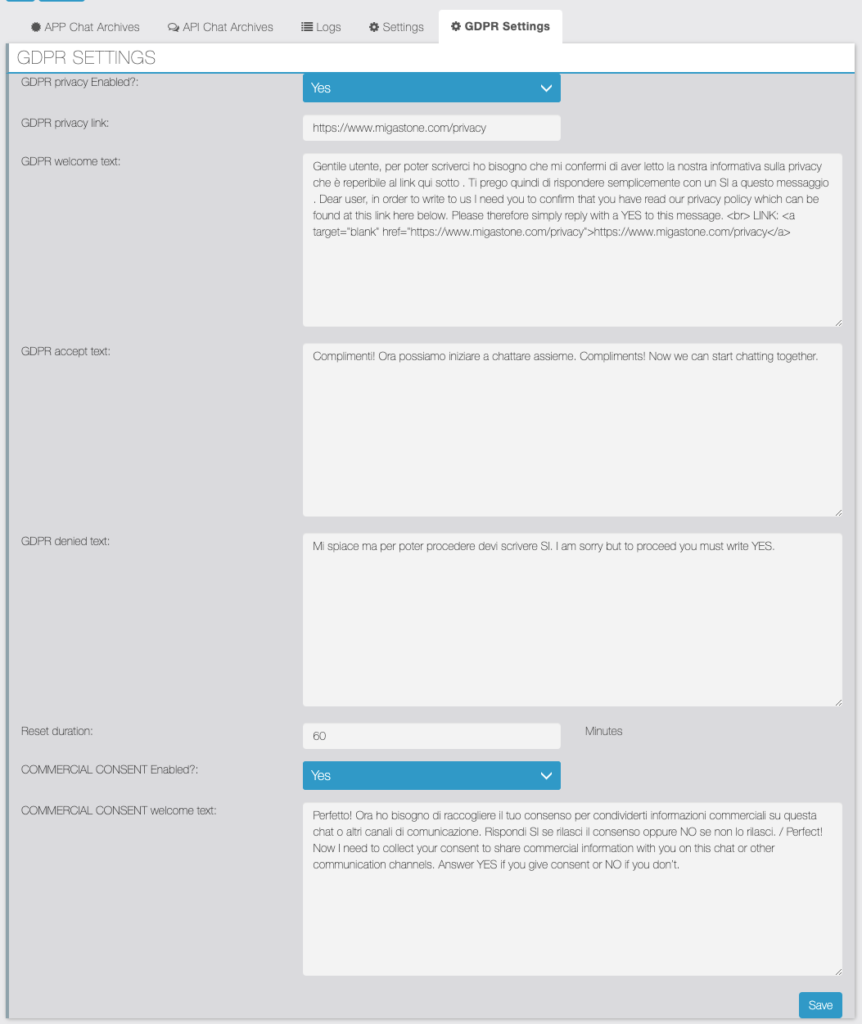
GDPR LOGS
- You can check the GDPR consent USERS.
- You can Force the Privacy consent for All CHAT IDS

App Chat Archive
In this section, you can access application statistics, view reports, and explore customer chat logs.
- Retrieve application chat stats and download CSV with stats such as Total Active customers, Total prompt tokens, and Total Completion Tokens.
- Export a complete chat of active customers within a specified date range.
- Get customer chat for a given date range, view chat history, and token usage. You can delete the complete chat history for a selected customer and download CSV for the date range and customer.
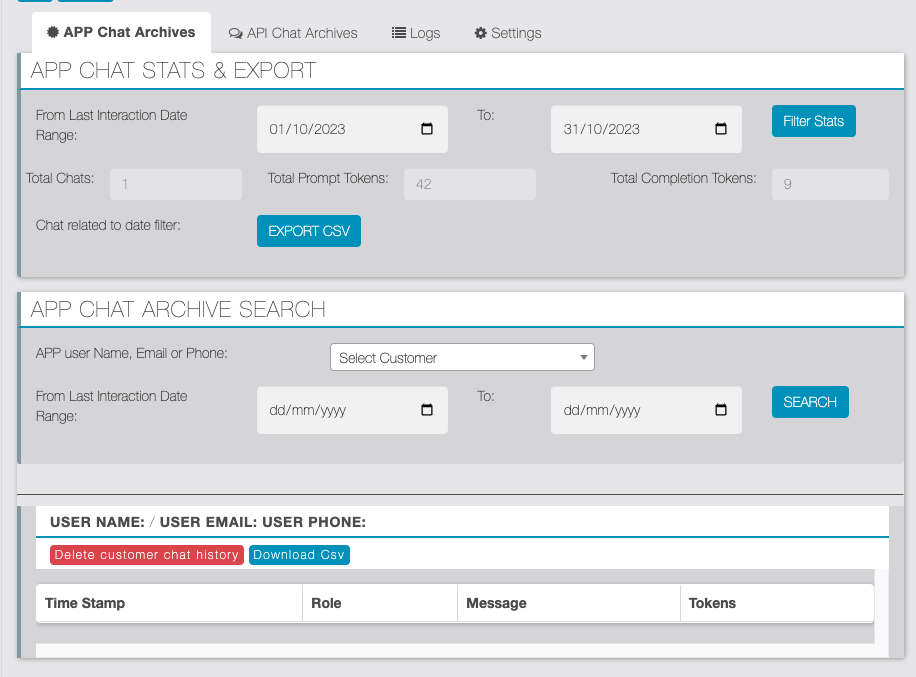
API Chat Archive (BridgeAPI)
In this section, you can access bridge API statistics, view reports, and explore CHAT ID chat logs.
- Get BridgeAPI chat stats and download CSV, including Total Active CHAT IDs, Total prompt tokens, and Total Completion Tokens.
- Export complete chat of active CHAT IDs within a specified date range.
- Access customer chat for a given date range, view chat history, and token usage, and delete complete chat history for a selected customer.
- You can delete the complete chat logs of API for an instance of the module by clicking “Delete API chat history”
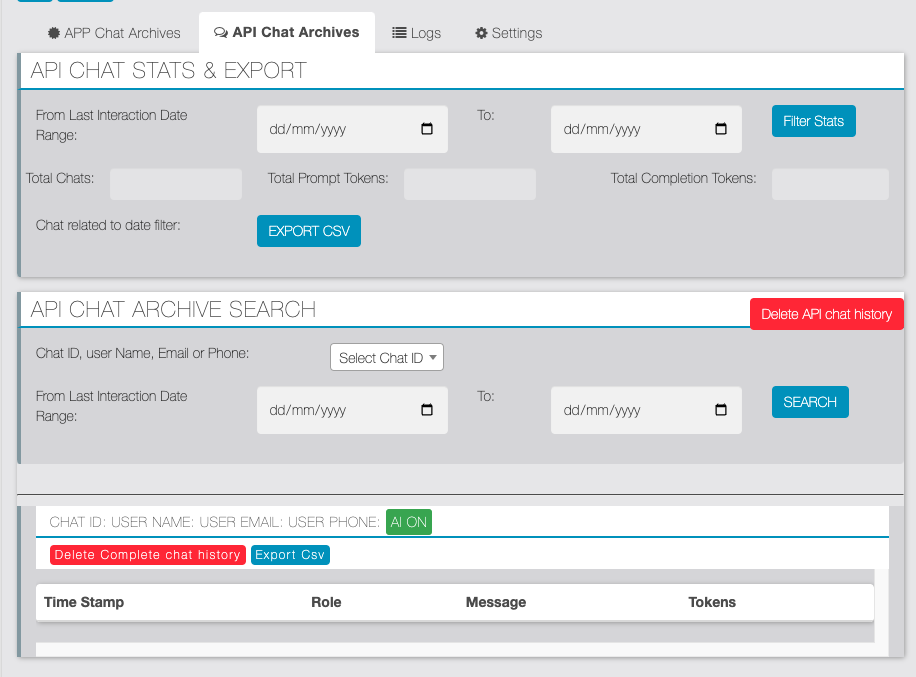
Logs
- The Logs section allows you to view logs for the last 30 chats across the system and see any errors encountered during interactions.
- New received Messages push notification logs.
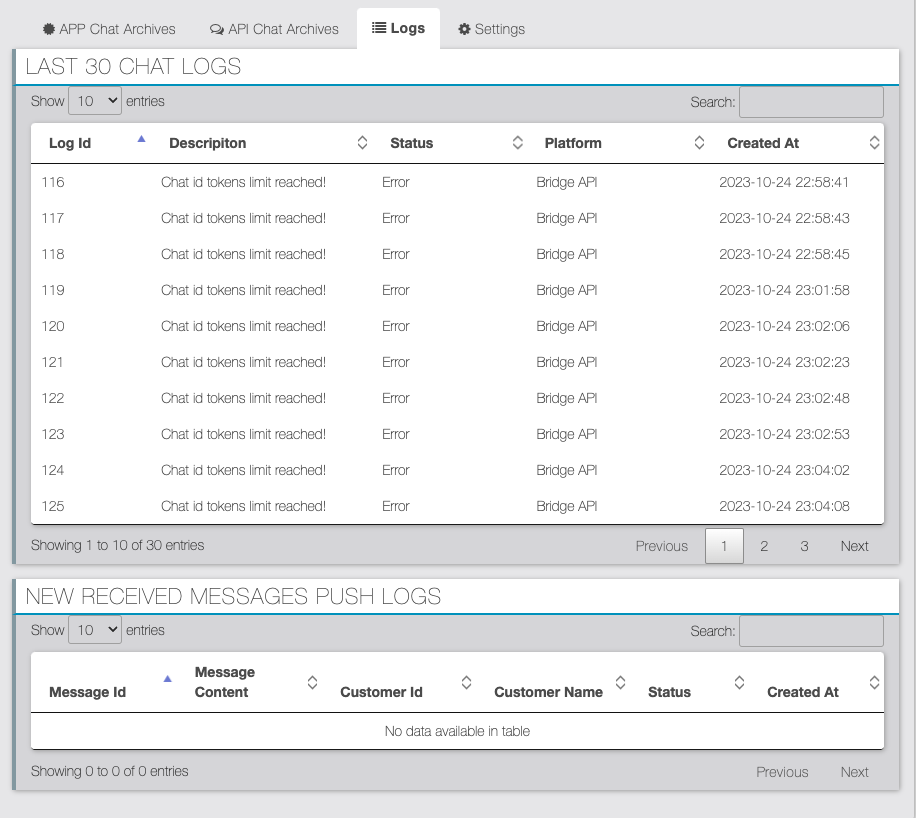
Operator Settings Documentation
Overview
The Operator Settings panel in the Migachat application allows you to configure various settings for operator interactions within the application, including enabling or disabling features for in-app and bridge API chats, setting up webhooks, configuring prompts and responses for user interactions, and managing email notifications.
Settings Form
- In-App Chat
- Label: Enabled for In-App chat?
- Field Type: Dropdown (Yes/No)
- Description: Enable or disable operator settings for in-app chat.
- Bridge API Chat
- Label: Enabled for Bridge API chat?
- Field Type: Dropdown (Yes/No)
- Description: Enable or disable operator settings for bridge API chat.
Webhook URL
- Label: Webhook URL
- Field Type: Text Input
- Description: The URL to which webhook notifications will be sent. This webhook must accept POST requests. The POST request will contain the following parameters:
– `chat_type` (in_app, api)
– `user_id`
– `app_id`
– `app_name`
– `instance_id`
– `operator_request_id`
– `user_email`
– `user_mobile`
– `date_time`
– `last_five_history`
System Prompt
- Label: System Prompt to check if user asked for operator to contact
- Field Type: Textarea
- Description: Custom prompt to analyze user input and determine if they want to speak to an operator. Default prompt: `Analyze this text string that a user wrote on our support chat (user prompt), reply with 1 if it is sufficiently probable that it means that the user wants to speak to an operator. If it is not clear enough and in all other cases reply with a 0.`
Ask for Call from Operator Message
- Label: Ask for call from operator text
- Field Type: Textarea
- Description: Custom message to ask users if they want a call from an operator. Default message: `Do you want me to have one of our operators call you? (Type Yes or No)`
Confirm Call from Operator Message
- Label: Confirm call from operator response text
- Field Type: Textarea
- Description: Custom message to confirm that an operator will contact the user. Default message: `Perfect, I warned my colleagues, they will be in touch very soon. Now you can continue to ask me for information if you want.`
Decline Call from Operator Message
- Label: Decline call from operator response text
- Field Type: Textarea
- Description: Custom message if the user declines a call from an operator. Default message: `From what I understand you are not interested in a call from one of our operators. We can continue to chat about other things if you want.`
Additional Emails
- Label: Add comma-separated emails to send notification
- Field Type: Textarea
- Description: List of additional email addresses to send notifications to. By default, the email will be sent to admins.
Email Subject
- Label: Email Subject
- Field Type: Textarea
- Description: Subject line for notification emails. Default subject: `Customer asked to contact operator.`
Email Template
- Label: Email Template
- Field Type: Textarea
- Description: Template for notification emails. The template can contain the following placeholders:
- – `@@app_id@@`
- – `@@app_name@@`
- – `@@instance_id@@`
- – `@@user_name@@`
- – `@@user_email@@`
- – `@@user_mobile@@`
- – `@@chat_id@@`
- – `@@chat_type@@`
- – `@@operator_request_id@@`
- – `@@date_time@@`
- – `@@last_five_history@@`
Call from Operator Requests
This section displays a table of operator request data, including:
- – User Id
- – Name
- – Mobile
- – Date Time
- – Bot Type
- – Status
- – Action (e.g., accepting a pending request)
Handling User Prompts
- Initial Request: If the Bridge API is enabled and the user hasn’t already asked for an operator, analyze the user prompt using the configured system prompt. If the user likely wants to speak to an operator, set the `asked_for_operator` flag and prompt the user to confirm if they want a call from an operator.
- User Confirmation: If the user has already asked for an operator, analyze the user’s response to confirm if they want a call. If confirmed, save the request, send webhook notifications, and email notifications, then reset the `asked_for_operator` flag and notify the user that an operator will contact them soon. If declined, reset the flag and inform the user that the request was not made.
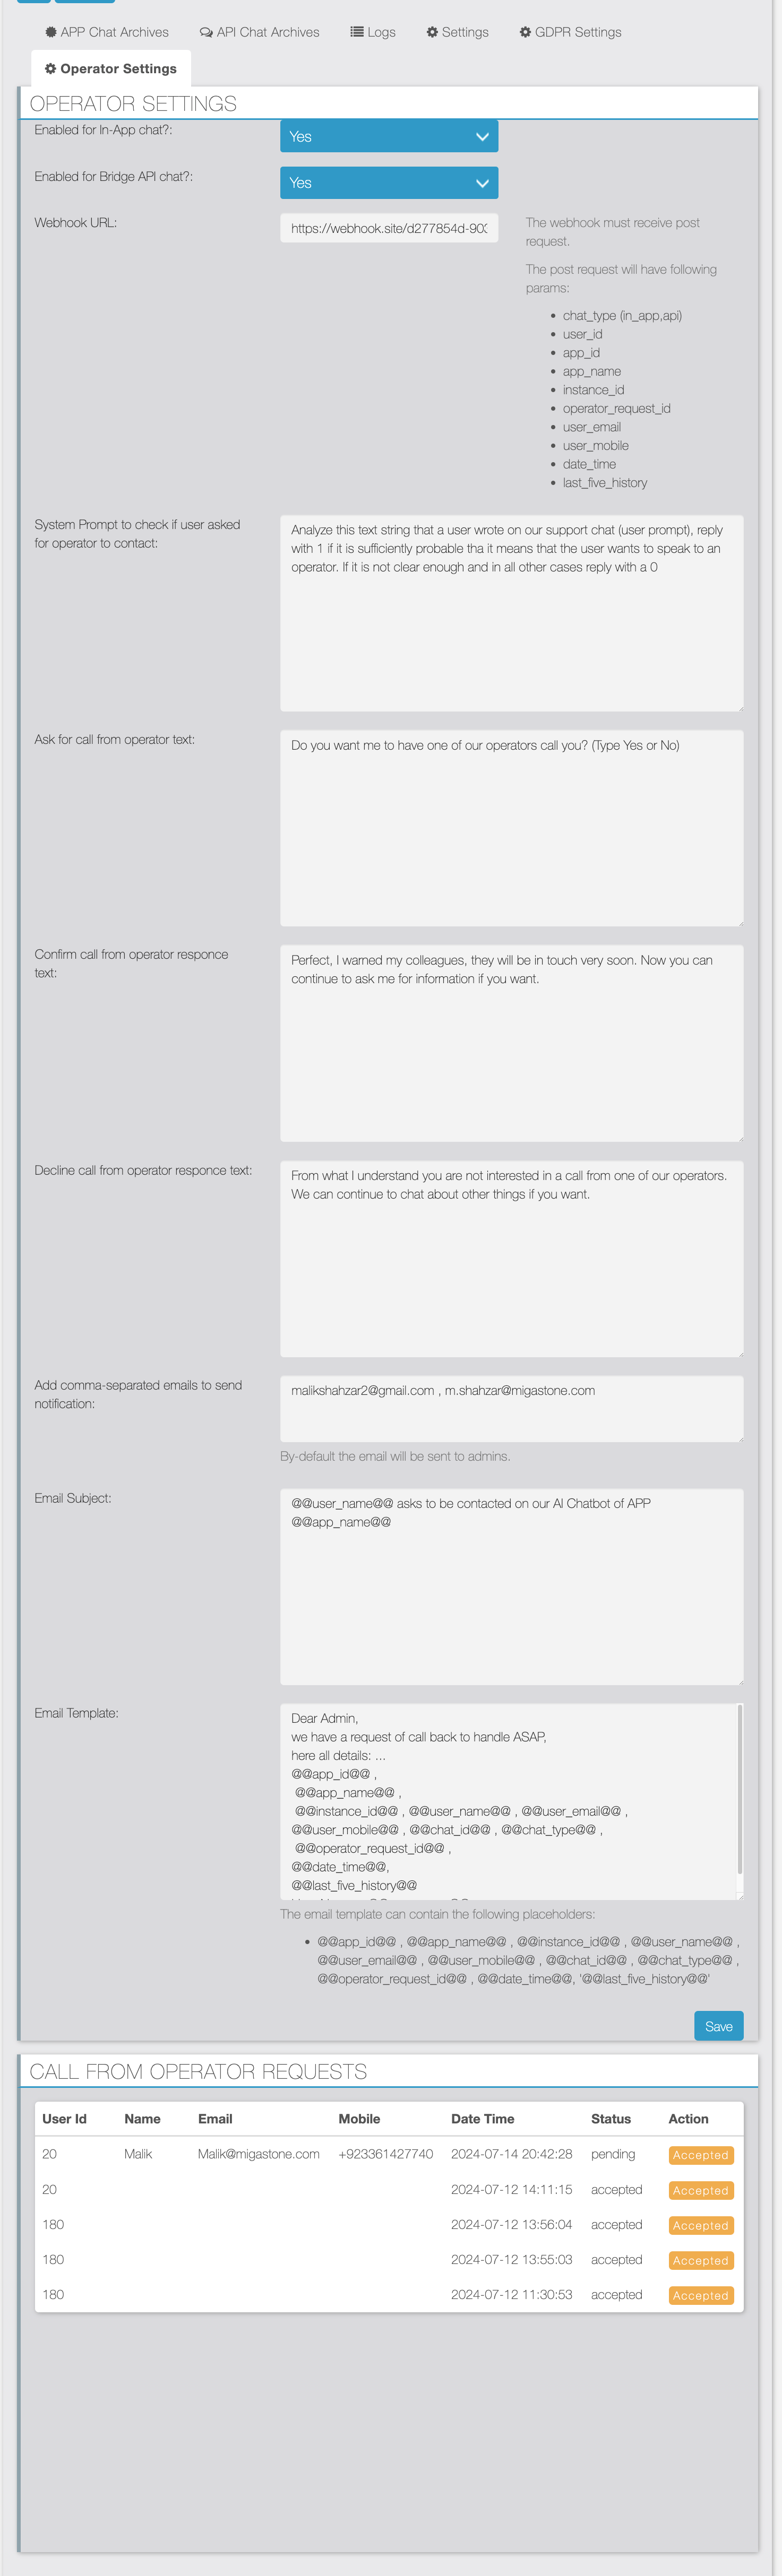
Application Interface
- The Application interface provides a user-friendly chatbot-like experience that you can access after logging in.
- You can copy the AI response by clicking the clipboard icon.

Migaexam V3
DESCRIPTION
Introducing a groundbreaking feature in MIGAEXAM – the ‘Performance Survey’ operational mode. Designed to revolutionize the assessment of training courses, this mode incorporates repeatable quizzes administered to users at the beginning and end of each training session. Through this, we aim to not only gauge individual trainee performance but also evaluate the effectiveness of trainers. Users will actively engage in self-assessment, responding to questions, with the system generating scores. Furthermore, the Migaexam V2 module empowers managers to seamlessly create and embed multiple-choice exams directly into the app. Administrators can add limitless instances of the Exams feature, each instance hosting a single exam with an unlimited number of questions. This flexibility enables managers to diversify offerings, presenting users with a range of exams for a comprehensive evaluation of their knowledge and skills. Elevate your training assessments with MIGAEXAM’s Performance Survey and the advanced capabilities of the V2 module.
1. Normal Exam
2. Performance Survey Mode (For Survey Mode User Manual click here)
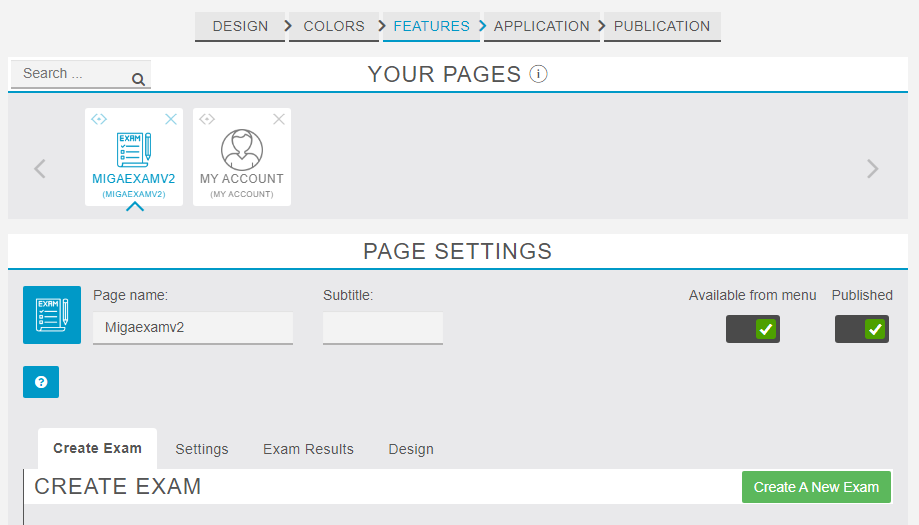
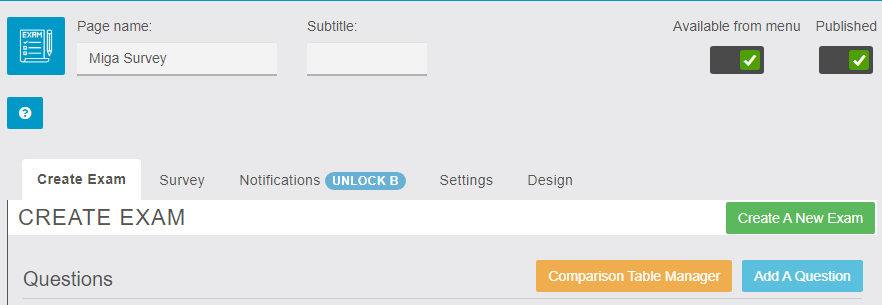
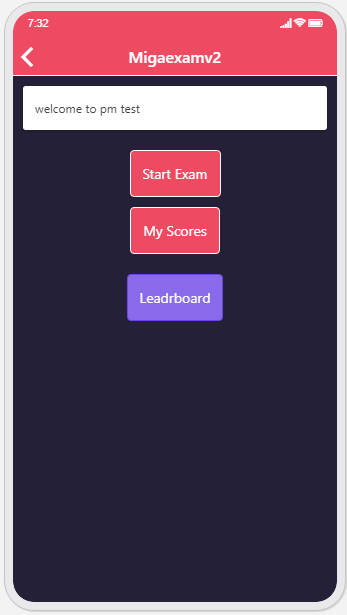
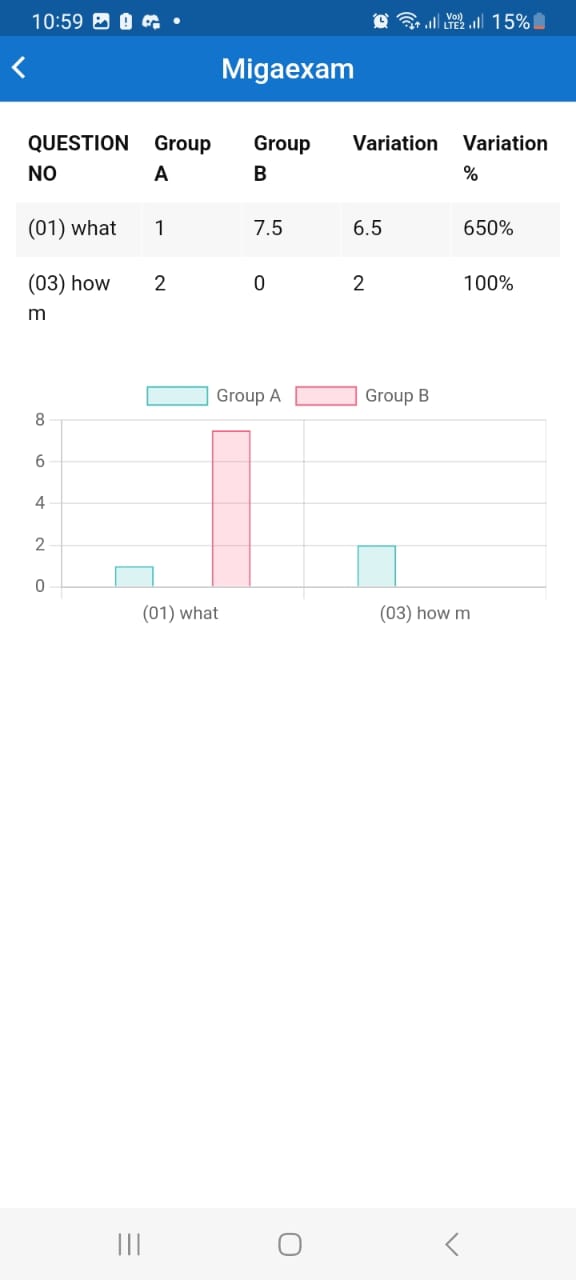
FEATURES
01- QUESTION TYPES
The App Admin will have the option of adding 3 types of questions to the Exam that they create.
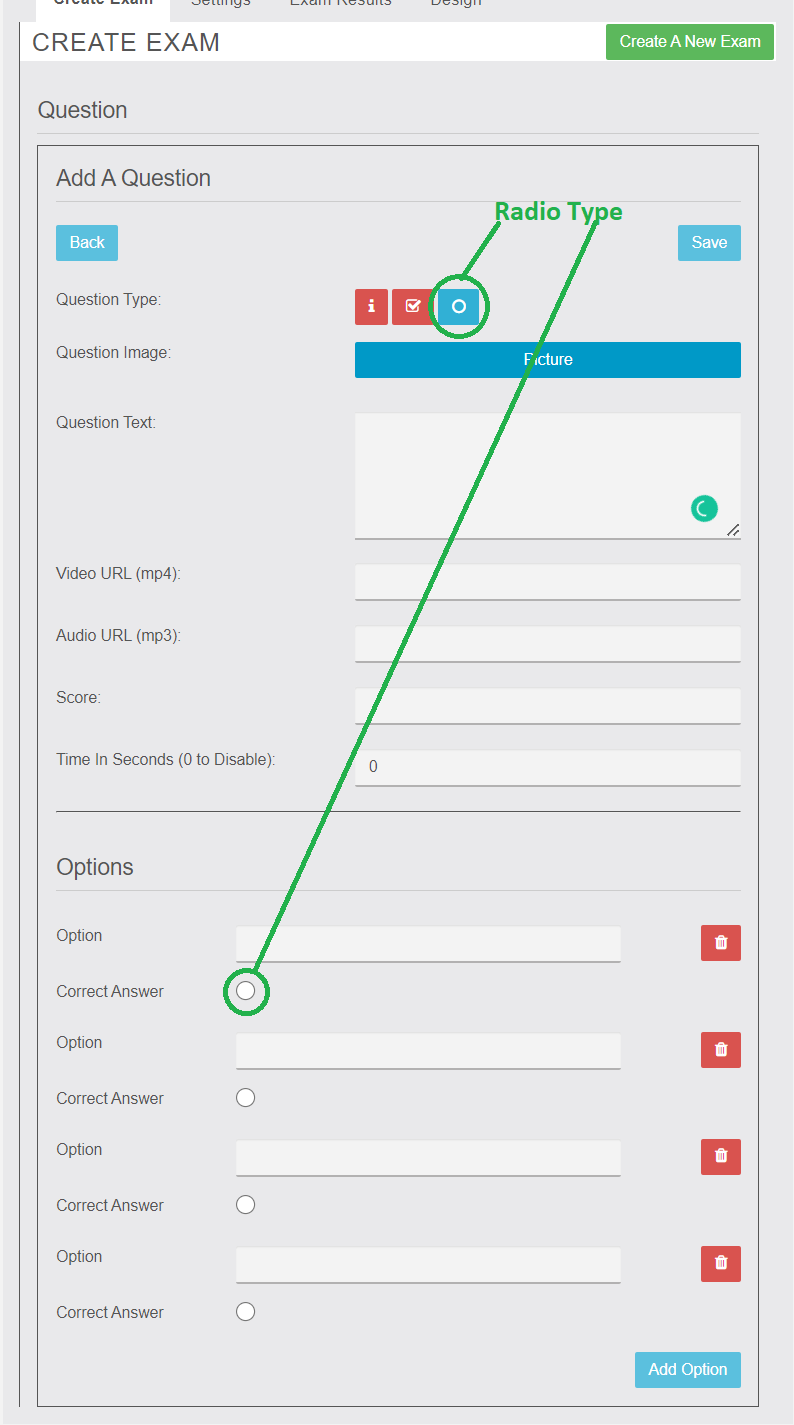
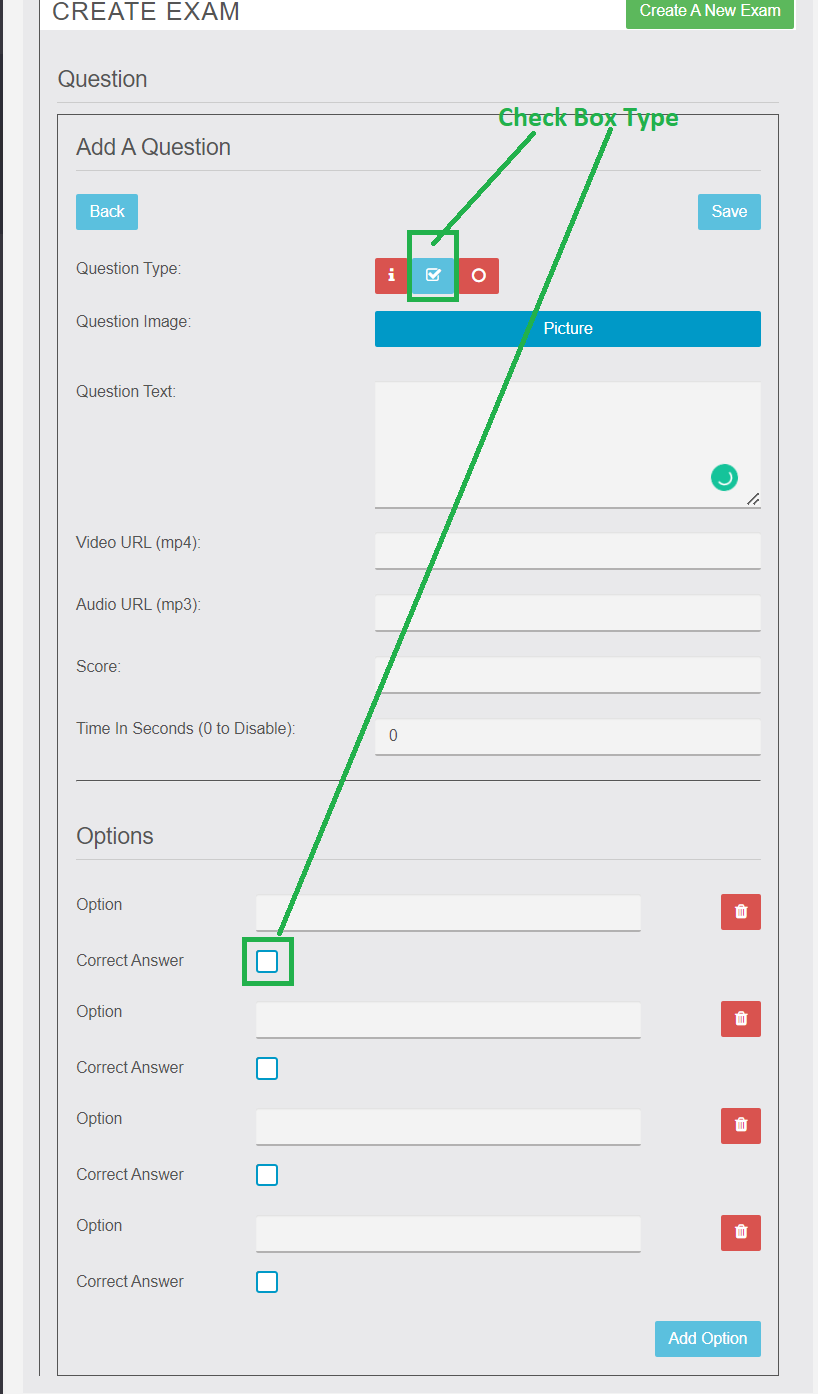
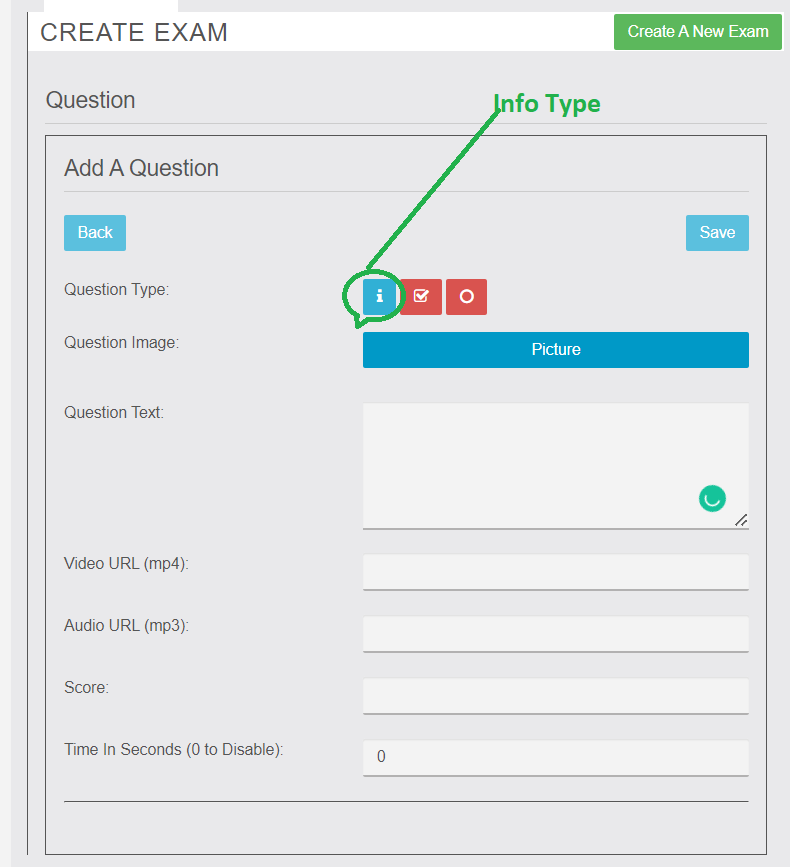
- Checkbox – The App User can select several correct answers.
- Radio – Only one selection can be the correct answer to the question.
- Information – Allows the App Admin to provide instructions to the App User.
02- MEDIA WITH QUESTIONS
Media Options – The ability for App Admins to add a Video (mp4), Audio (mp3), and/or Image (jpg/png) to a question. The media will be added via URL. In the app, the media will display in a player (not show the URL). App Admins can add more than one media type to a question
PDF MEDIA TYPE: In addition to the ability to use images, mp4, and/or mp3, the App Admin will have the ability to add a URL to a pdf file to questions.
( The PDF is opened externally from the APP, the only way to be 100% compatible)
- Hint(Add hint when enabled)
- Explanation(add an explanation to the question when enabled)
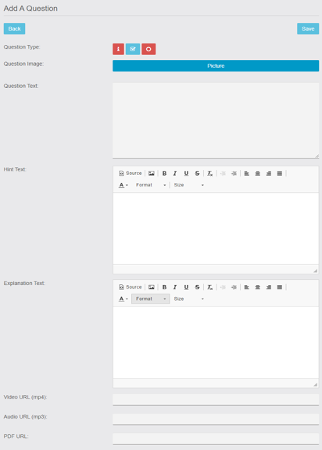
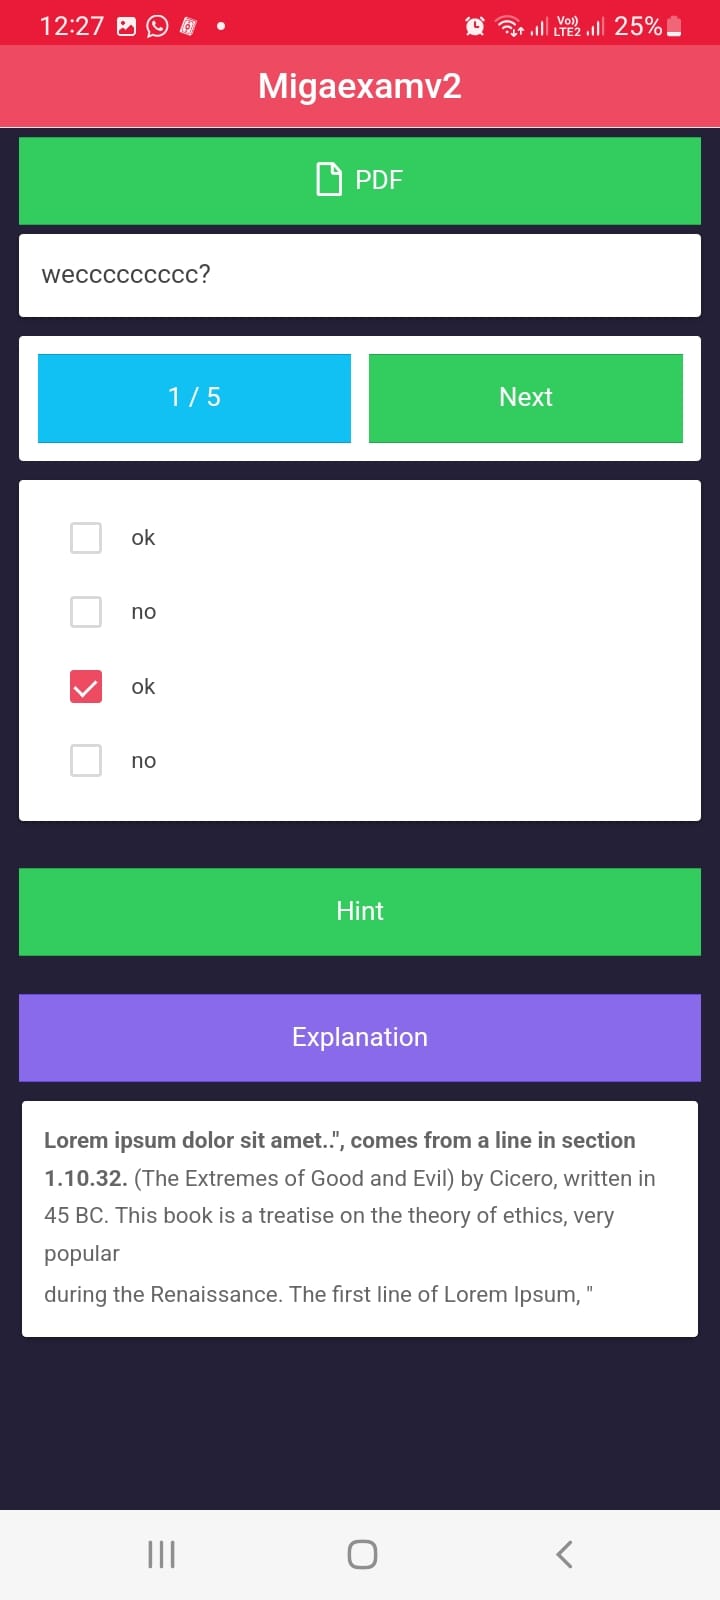
03- TIMED EXAM
Question Timer – The ability for the App Admin to set the Time for each Question in the Exam (in minutes).

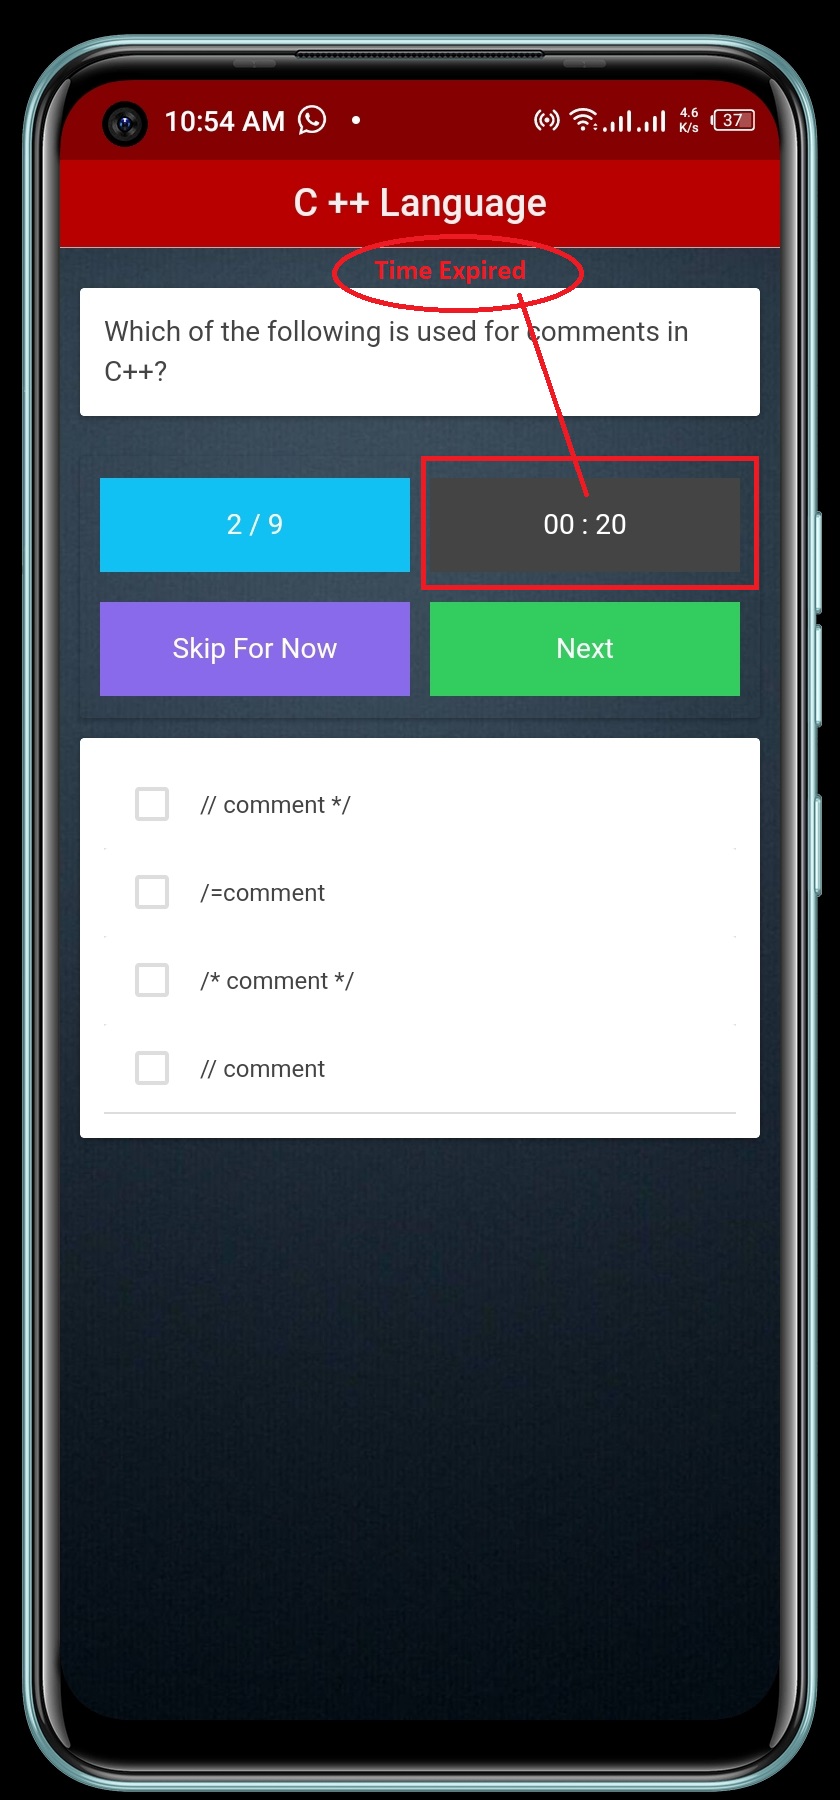
04- EXAM SCORING
- Points – The ability for the App Admin to select how many Points should be given to each question in the Exam (on a per-question basis). For example, the correct answer for one particular question could be 10 points but the correct answer to another question could be 15 points.
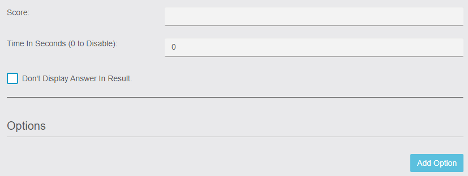
Don’t Display Answer in Result:
- Check box– When checked by the Admin Will not include the Question in the Result
- Skipping Questions – When taking the Exam, the App User will have an option (button) to go to the “Next” question. If the App User skips a question, then the question will be marked as incorrect.
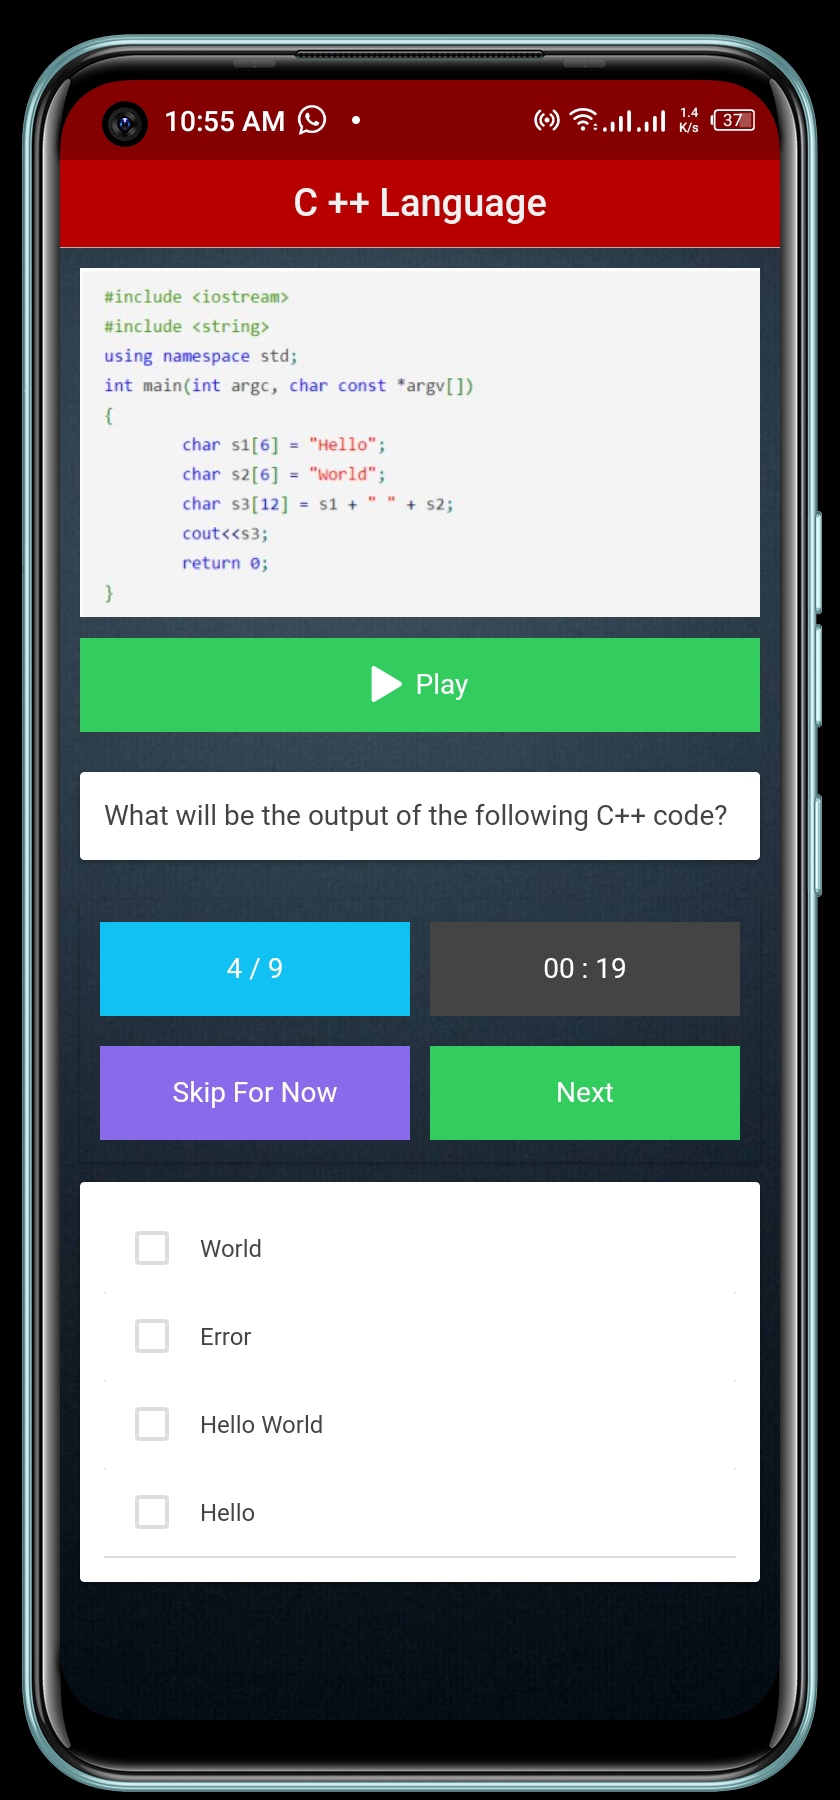
General Settings:
- Zip file Settings – The settings allow users to get the Zip file which includes all the settings of the Exam module. Users can also Import/Upload the zip file.

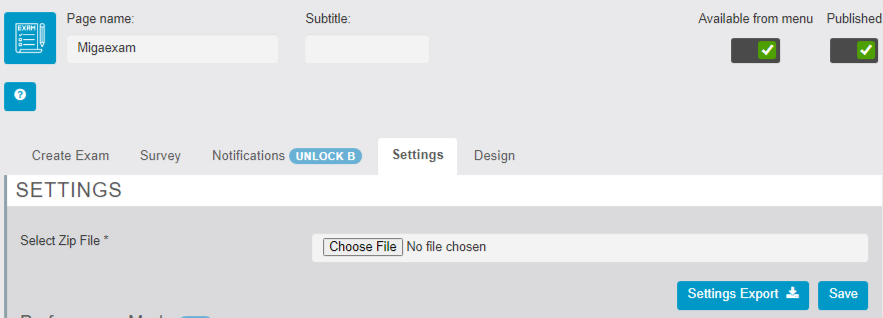
- Switched to Survey mode – The settings allow users to switch from normal exam to performance mode, survey is completed user can add a thank-you page where you can add a photo and text as shown in the image.
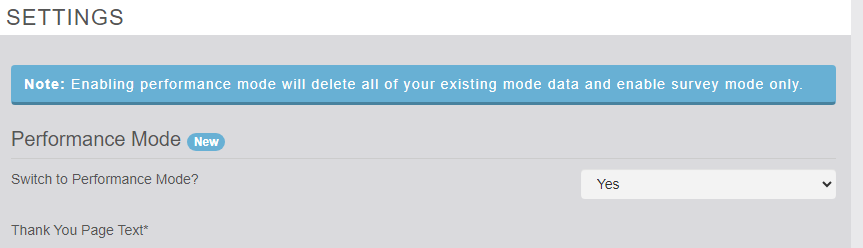
- Answer After Each Question – A setting for the App Admin to show if the question was Correct or Incorrect after each question.
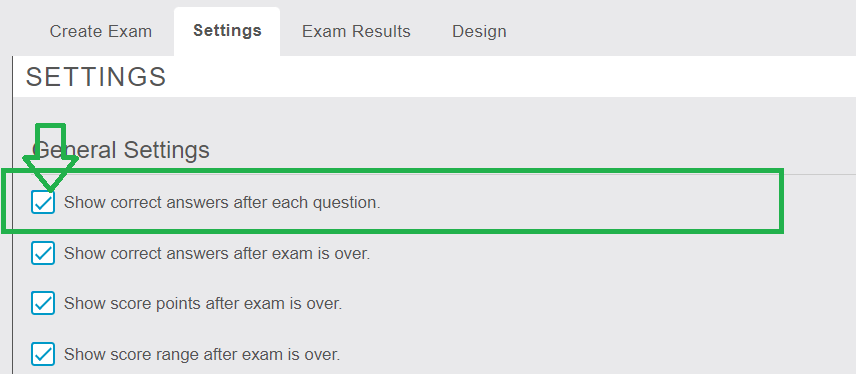
- Answer After Each Exam – A setting for the App Admin to show the answers to each question after the Exam is complete.
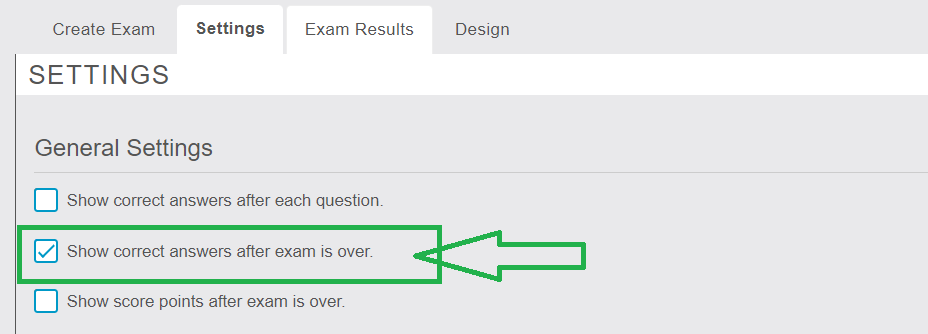
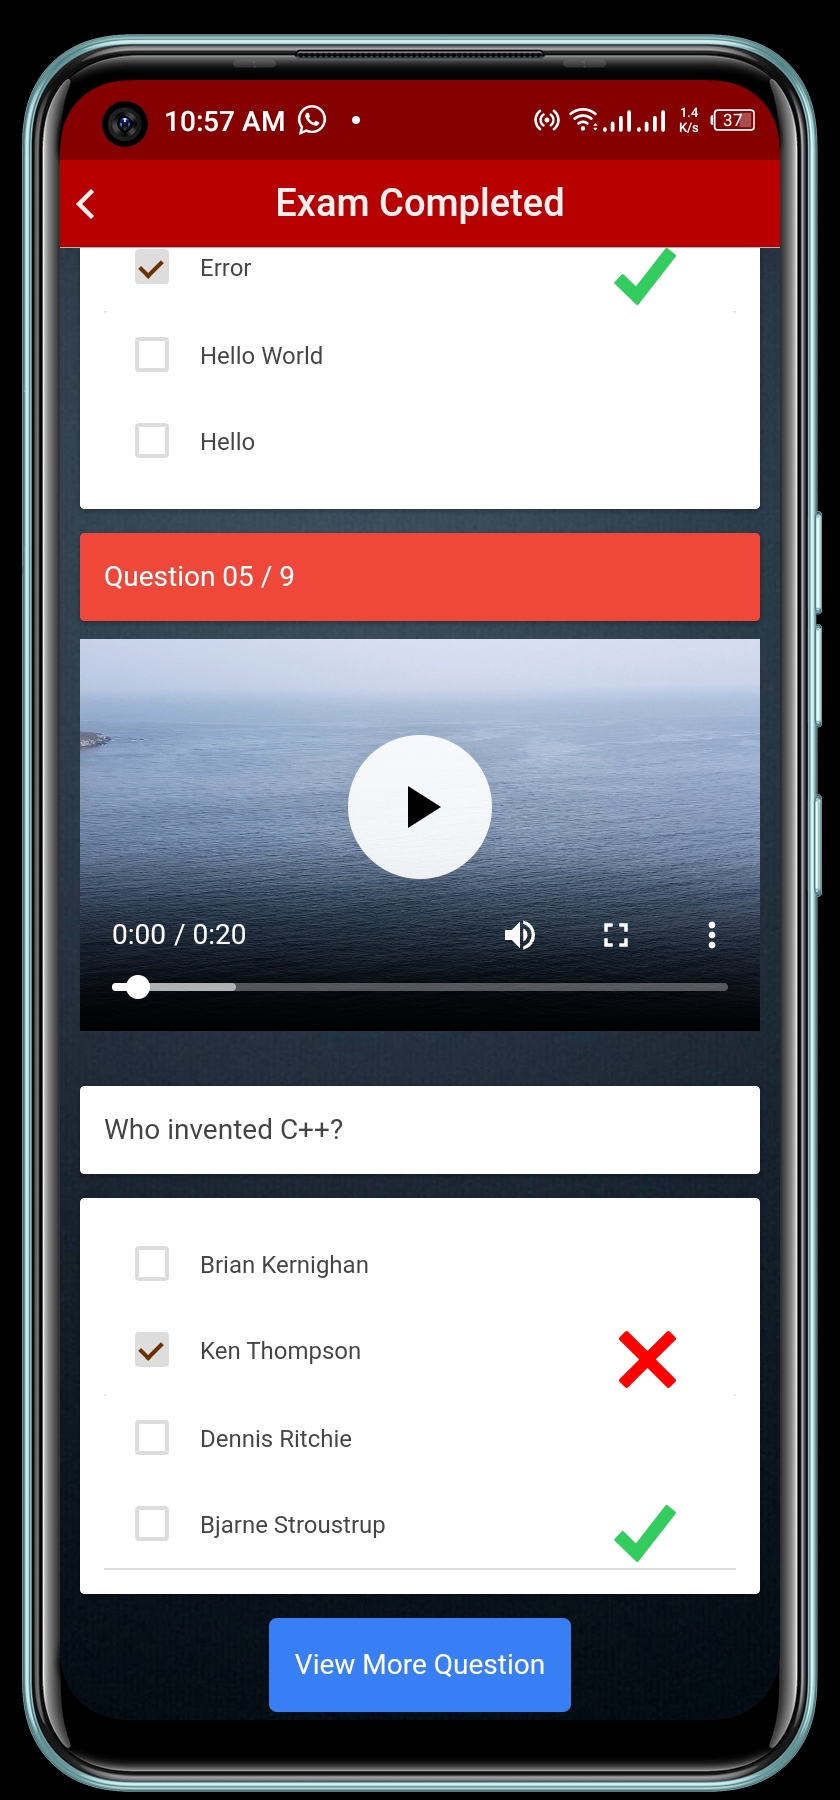
- Exam Percentage – A setting for the App Admin to select to show the Percentage of correct answers after the Exam is complete (ex: Score = 75%). If Disabled, no Percentage score is displayed.
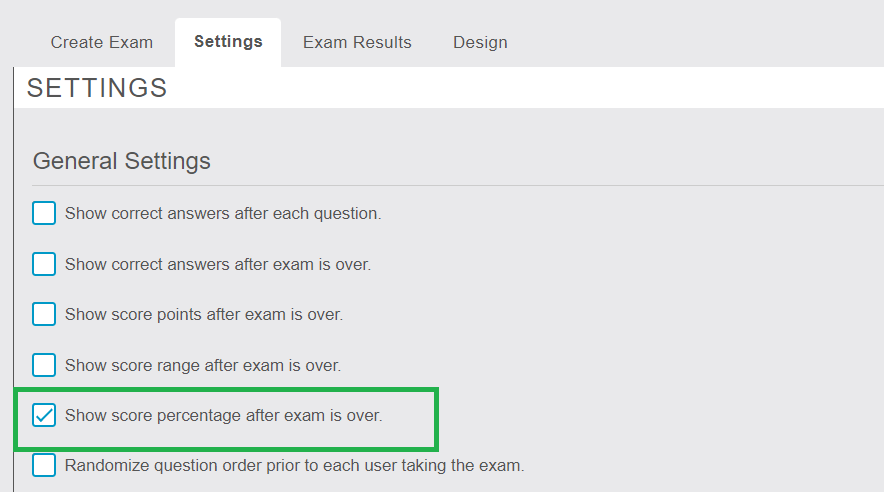
- Exam Range – A setting for the App Admin to select to show the Range of correct answers after the Exam is complete (ex: Score = 7/10). If Disabled, no Rane score is displayed.
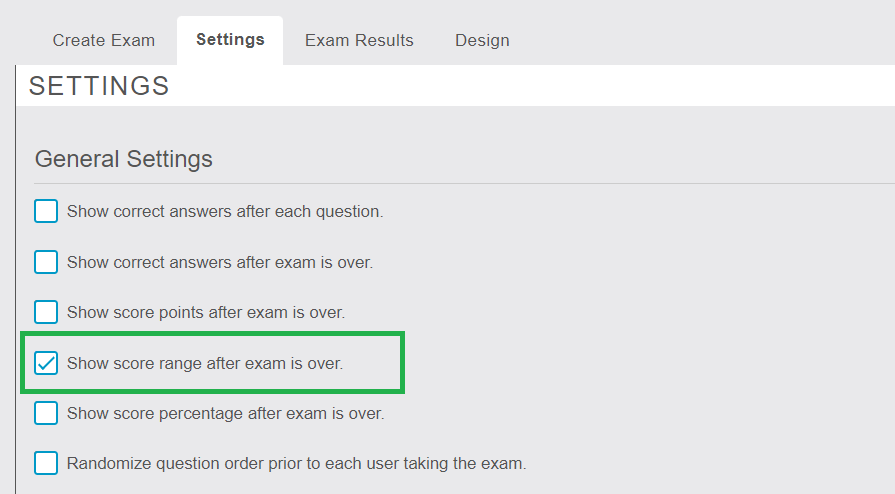
- Exam over on incorrect answer– The settings enable the test to stop on an incorrect answer.
- Hints – When enabled in the setting add Hints added while creating a question to give the App User clues as to the correct answer to the question.
- Explanation to each question – Settings that enable the App Admin to add Explanations to each respective question. If enabled, Explanations will display when the App Admin enables the ability to show the correct answer to questions.
- Redirect on Approved Score – If enabled, once the Exam is over, the App User will only be Re-directed if their Exam score is equal to or higher than a setting specified by the App Admin.
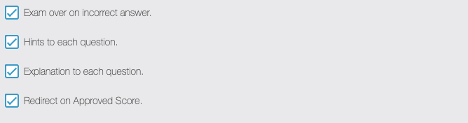
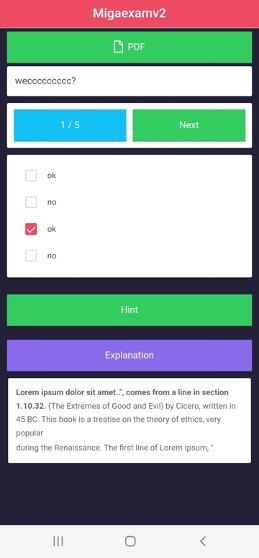
05- LEADERBOARD
If enabled, the Leaderboard displays the highest exam score of each App User. The Leaderboard will only be visible to logged-in users.
- The App Admin will have the option to set a reset period (that will remove all scores from the Leaderboard).
- Also, allow selecting the number of days until the Leaderboard automatically resets.
- The App Admin can reset the Leaderboard manually.
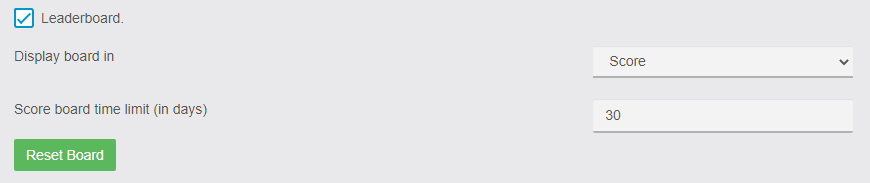
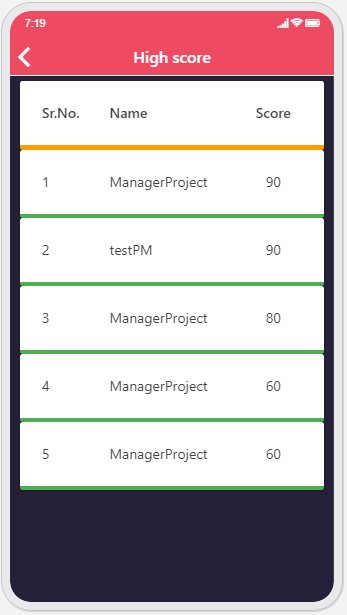
06- PERMISSIONS
- Exam Access – A setting for the App Admin to limit the App Users to take the Exam once, a certain number of times, or Unlimited times.
Note: (0 for Unlimited Exams)![]()
07- QUESTION SORTING:
- Default – The ability for App Admins to Drag and Drop Questions to create the question’s sort order.
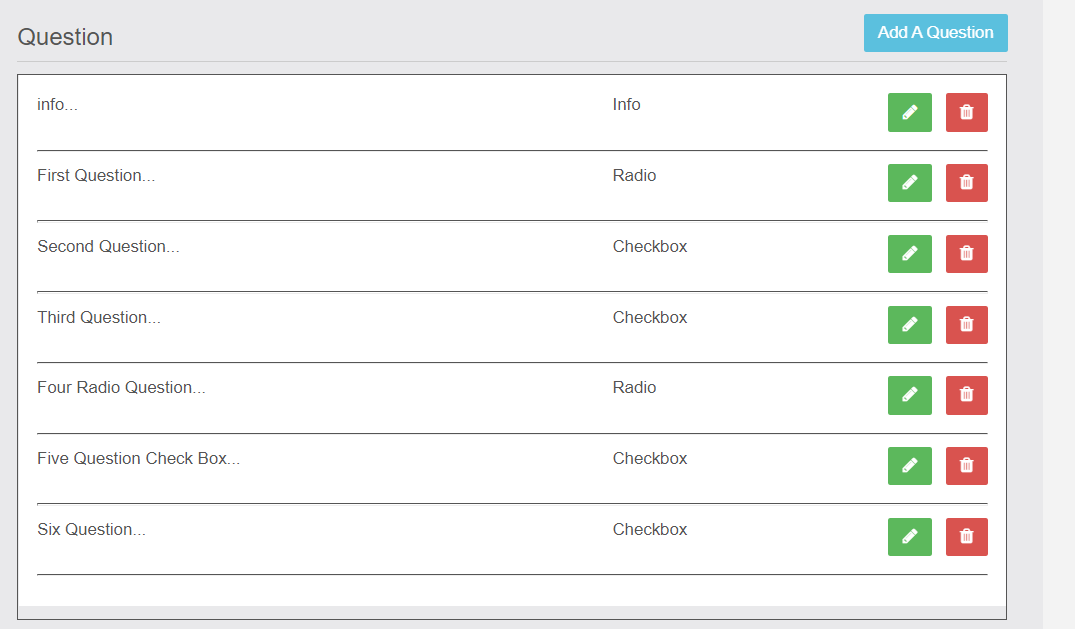
- Randomized – A setting for the App Admin to have the questions sort order automatically randomized each time an App User takes the Exam.
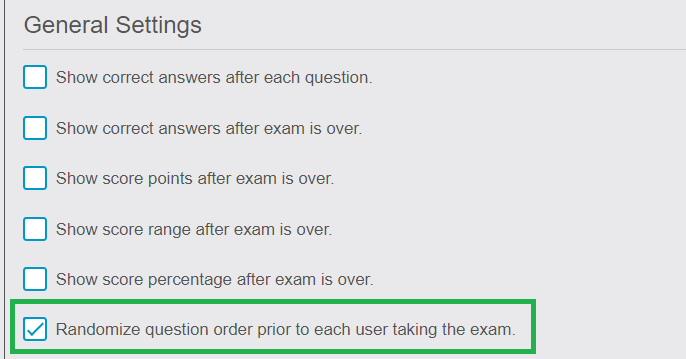
08) SCORE HISTORY
- App Users – The ability for App Users to see the score history of all of the Exams that they took. The Score History in the app should show the Date (that the exam was taken), Exam Name, and Score. A Search option will also be on the page.
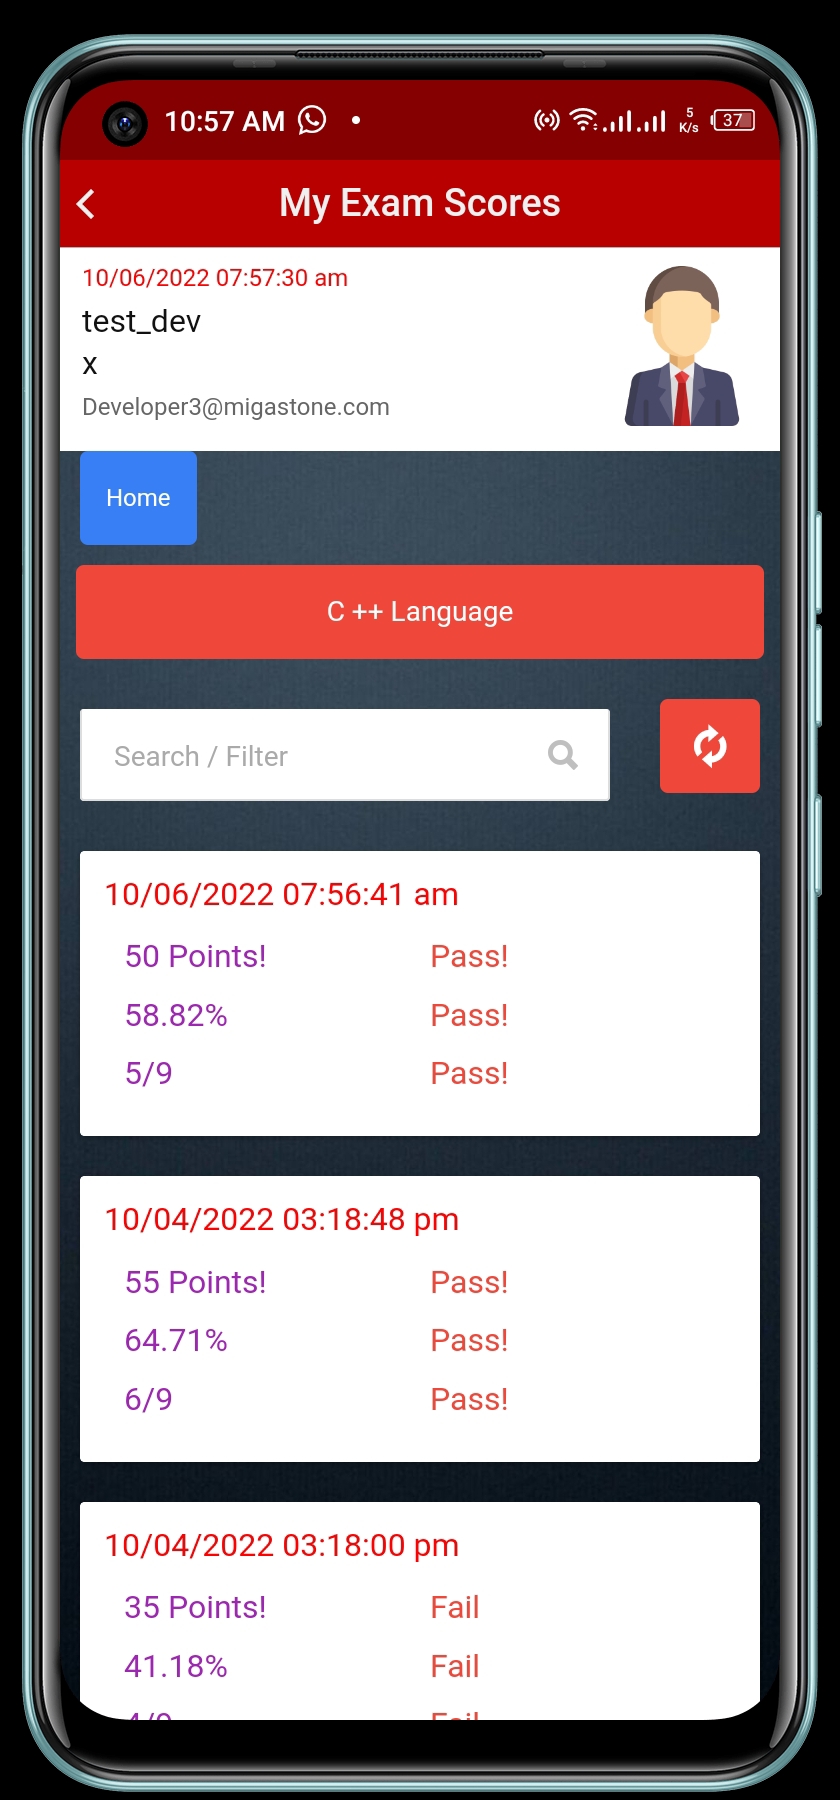
- App Admin/Staff – The ability for the App Admin/Staff to see the score history of all of the Exams that App Users took. The Score History in the app should show the Date (that the exam was taken), Exam Name, User Name (First & Last), and Score. A Search option will also be on the page.
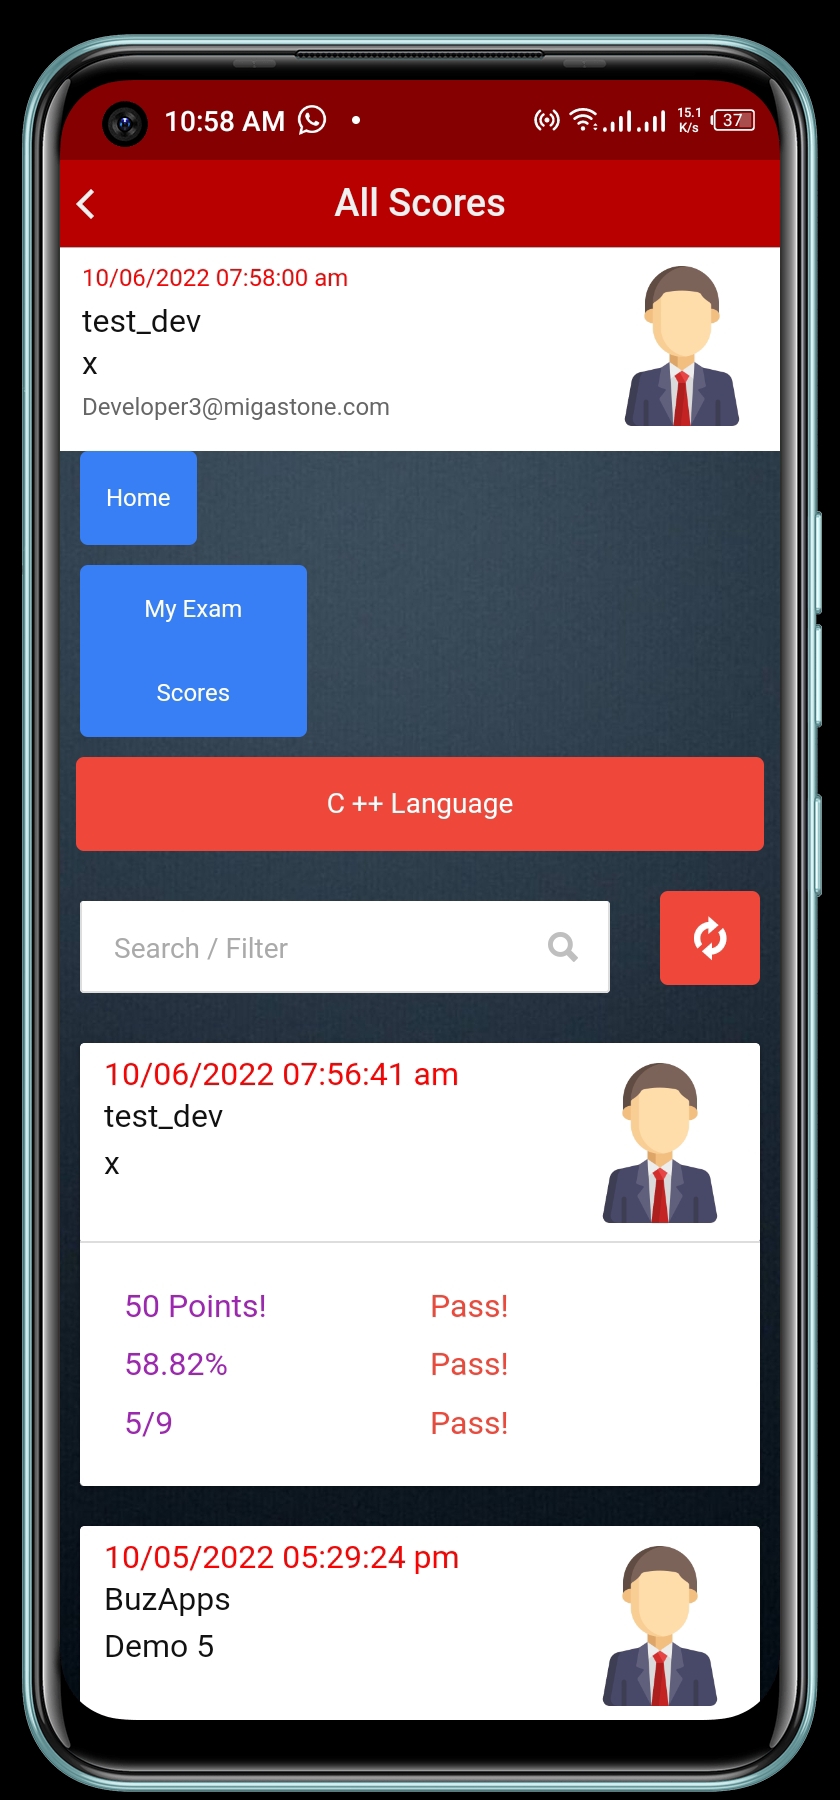
- Staff Option – In the Editor, a setting that enables the App Admin to select which App Users will have Staff credentials. Staff credentials will enable the App User to see all scores in the Score History section of the app.
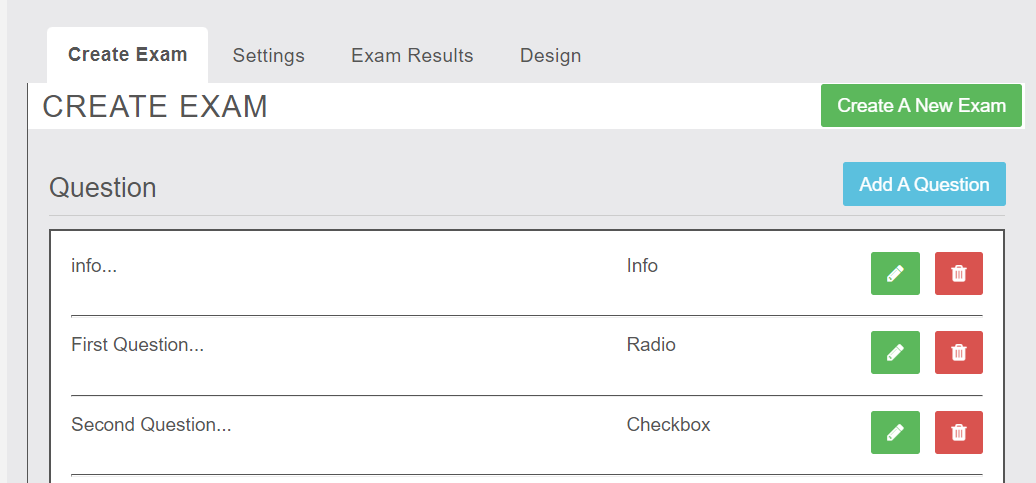
08- ADDITIONAL SETTINGS
- Exam Name – The App Admin will have the ability to add an Exam Name to the Exam.
![]()
- Exam Cover Image – The App Admin will have the ability to add a Cover Image to the Exam.
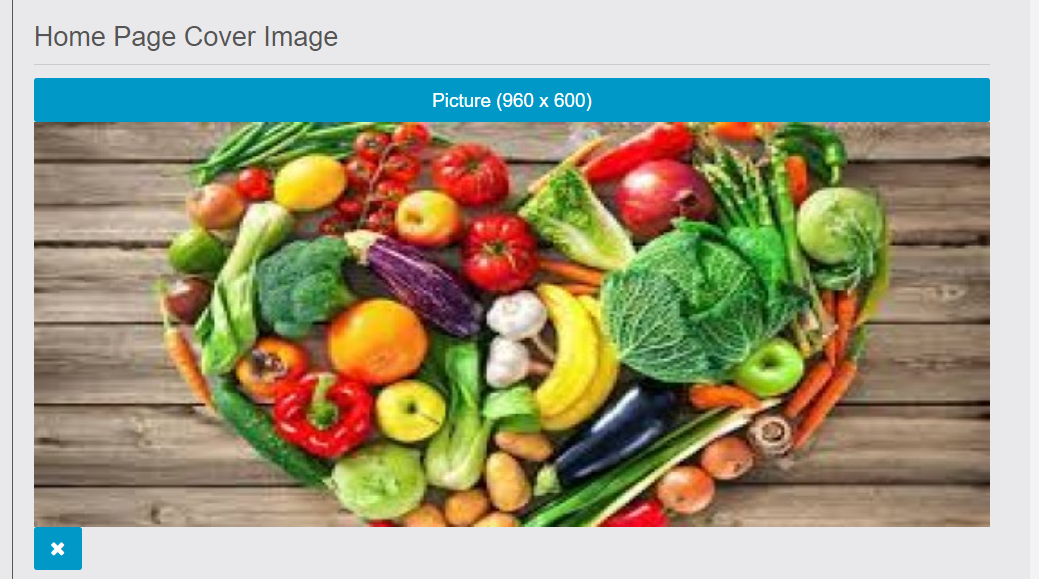
- Exam Description – The App Admin will have the ability to add a Description to the Exam. The description box should enable the App Admin to add formatting (bold, color, text size, etc) to the description text.
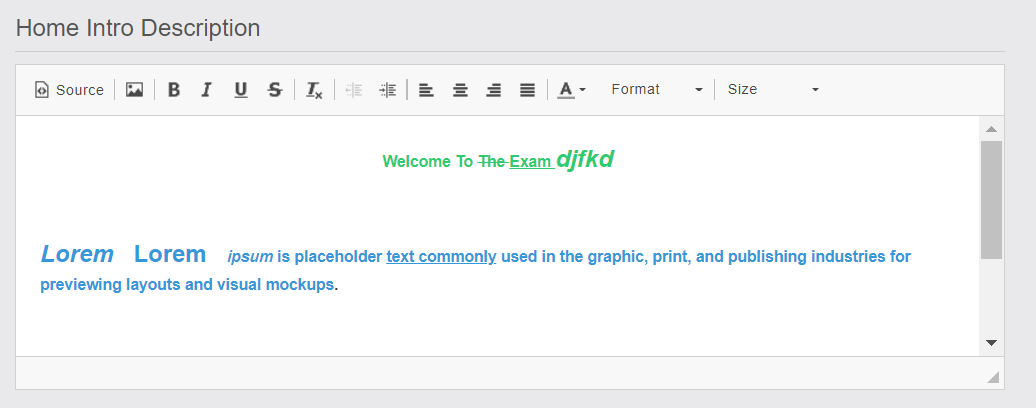
- Export – An option for the App Admin to Filter and Export the Exam Scores to csv format. The Filter/Export fields should include the Date (that the exam was taken), Exam Name, User Name (First & Last), and Score.
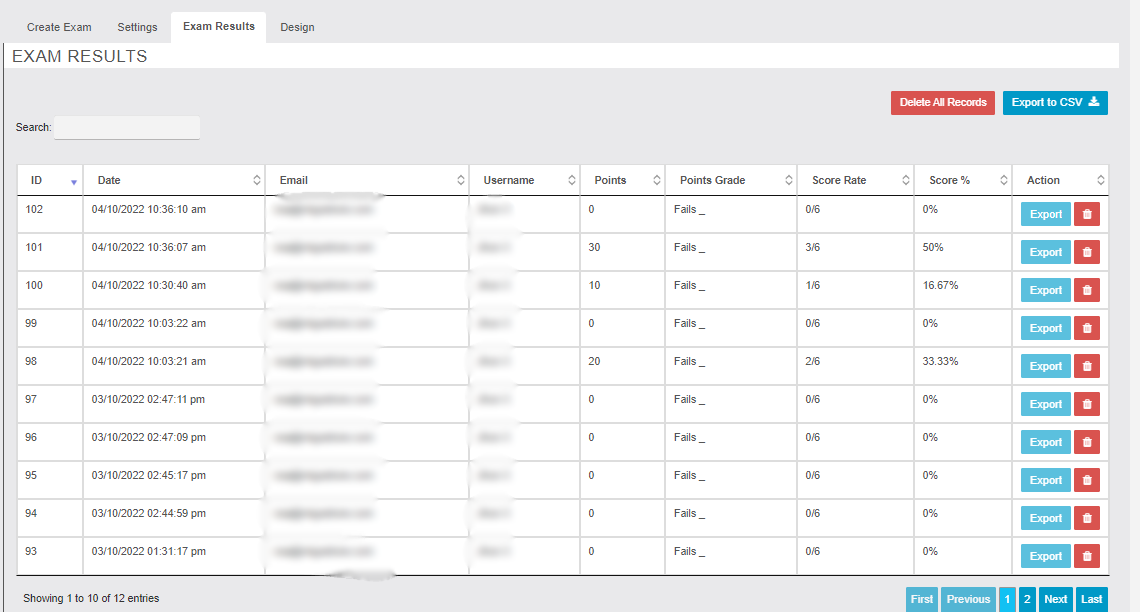
- Exam Completed – The ability for the App Admin to have a Completed Description (message) after the Exam is completed by the App User. The description box should enable the App Admin to add formatting (bold, color, text size, etc) to the description text. Also, an option for the App Admin to select an App Page that the App User can be redirected to (via a Button) after reading the Completed Description.

- Language – Field options in the Settings of the module for the App Admin to edit the front-end language strings that the App User sees in the app.
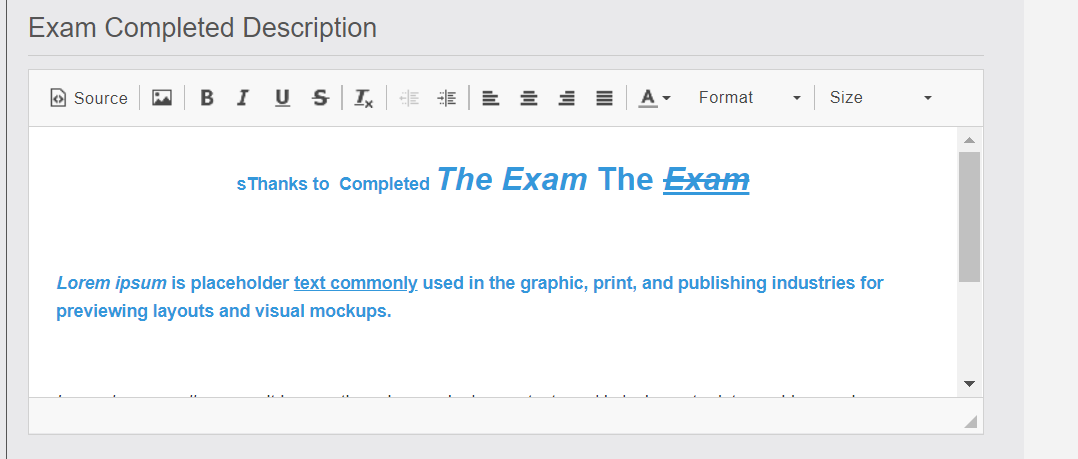
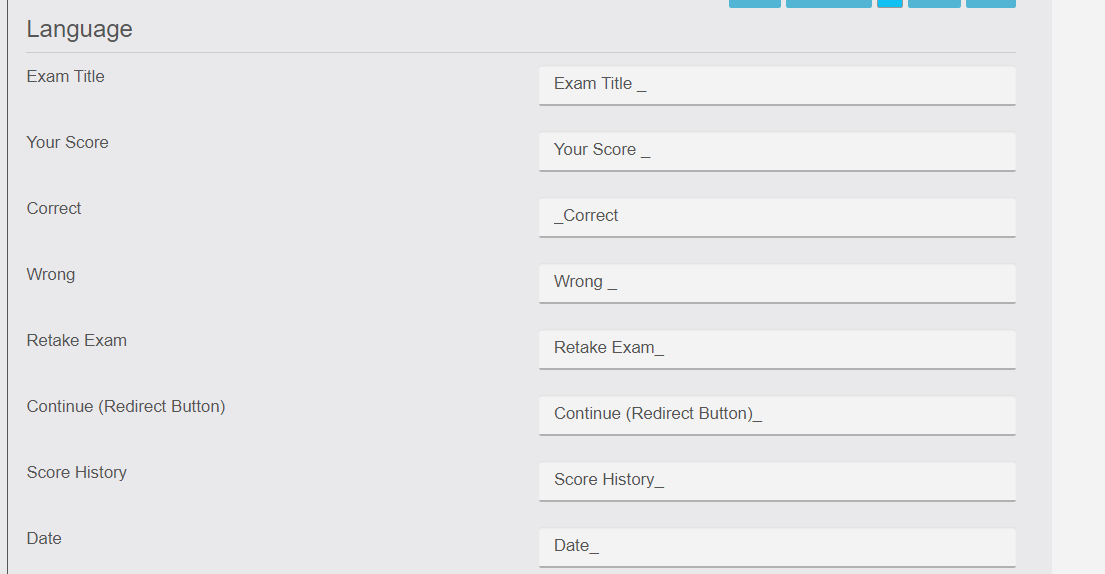
09- Design
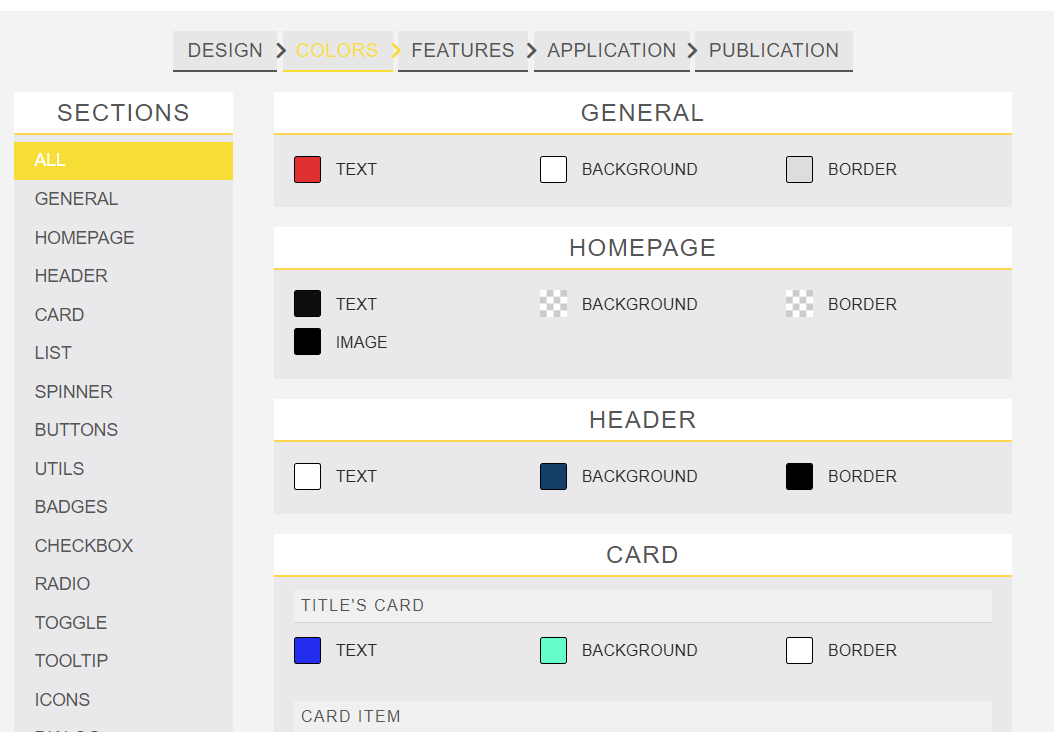
Admin can change The app side color and background via the Siberian color menu
- Buttons – Click on colors sections and go to the “Button tab” and change the color and background according to you.
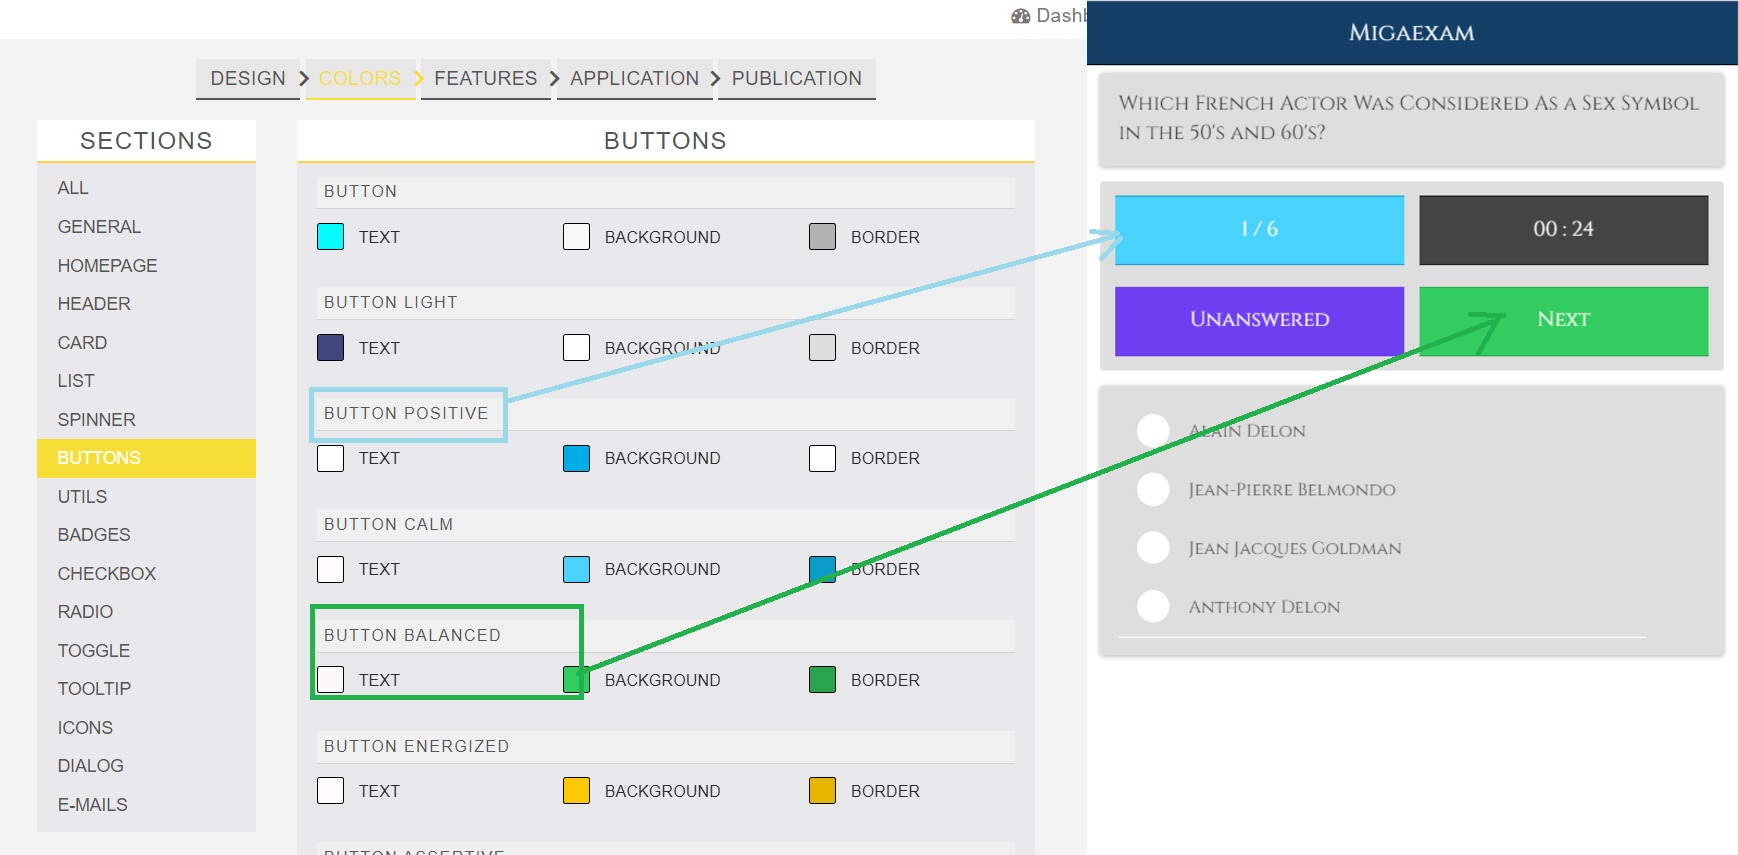

- Profile Section – Click on colors sections and go to the “List tab” and change the color and background according to you.
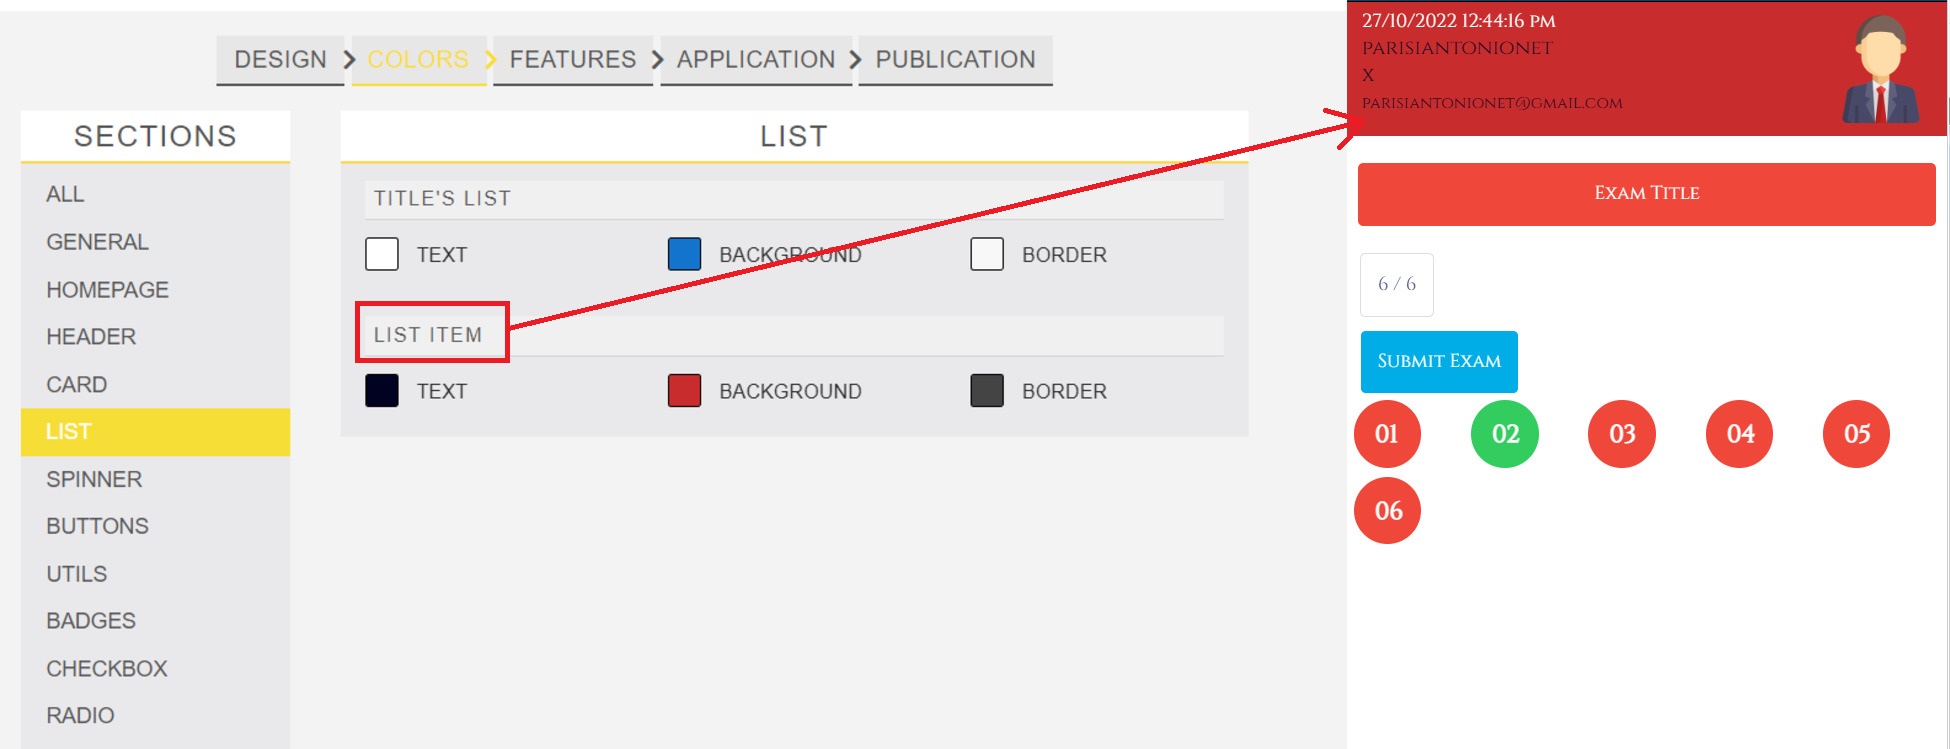
- Checkbox Section – Click on colors sections and go to the “Checkbox tab” and change the color and background according to you.
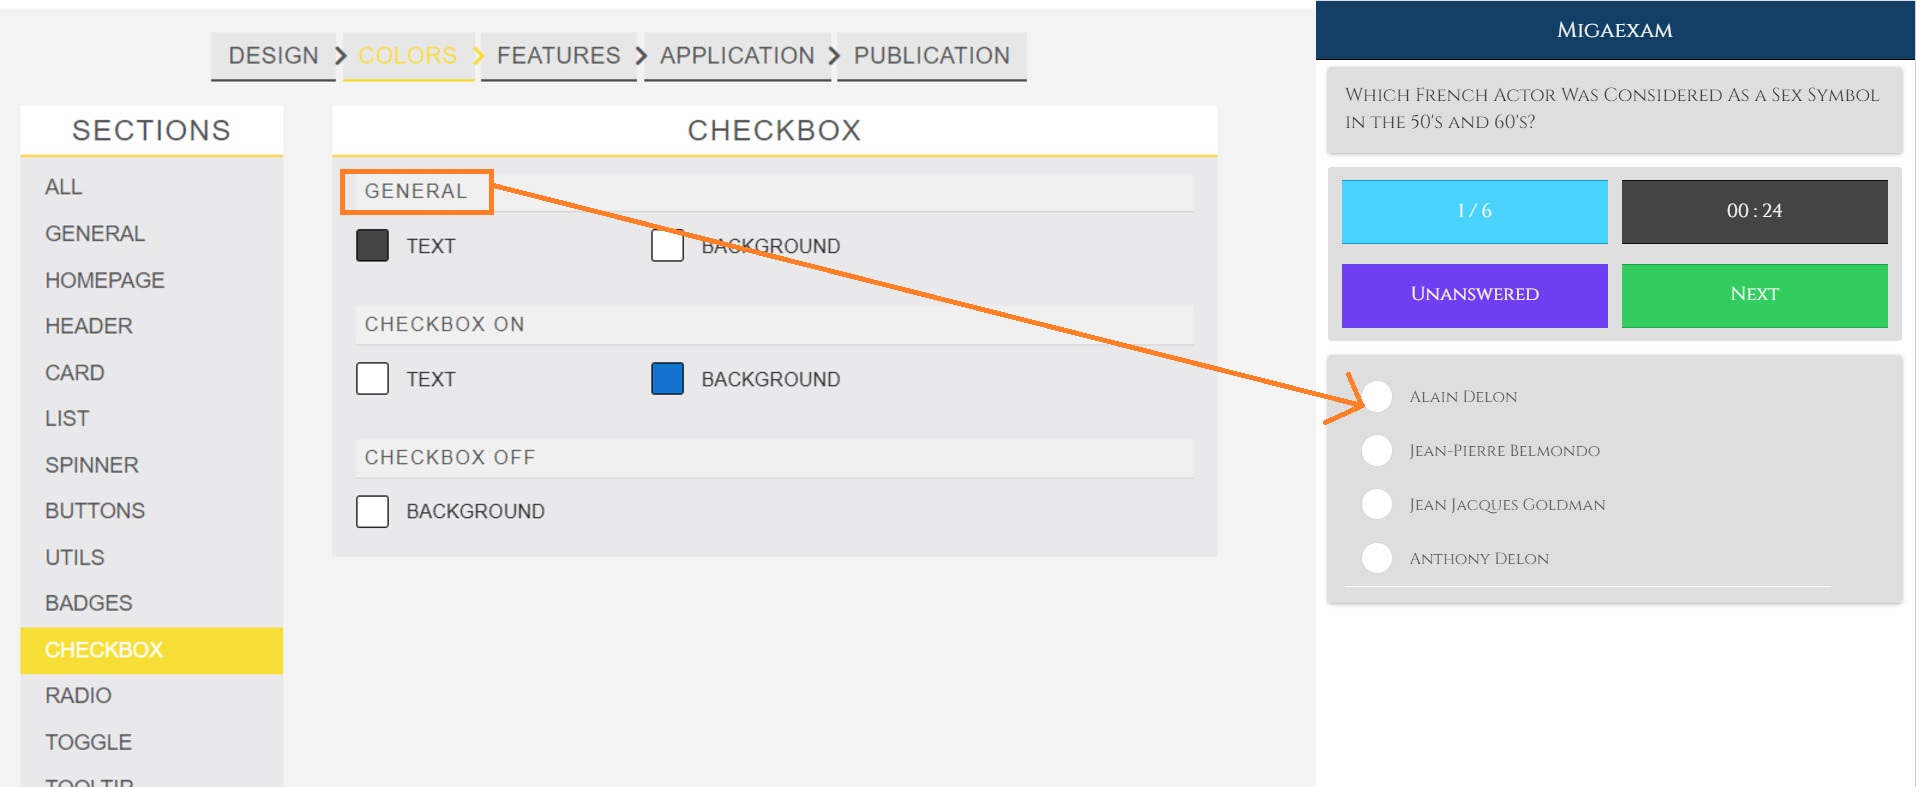
- Card Section – Click on colors sections and go to the “Card tab” and change the color and background according to you.
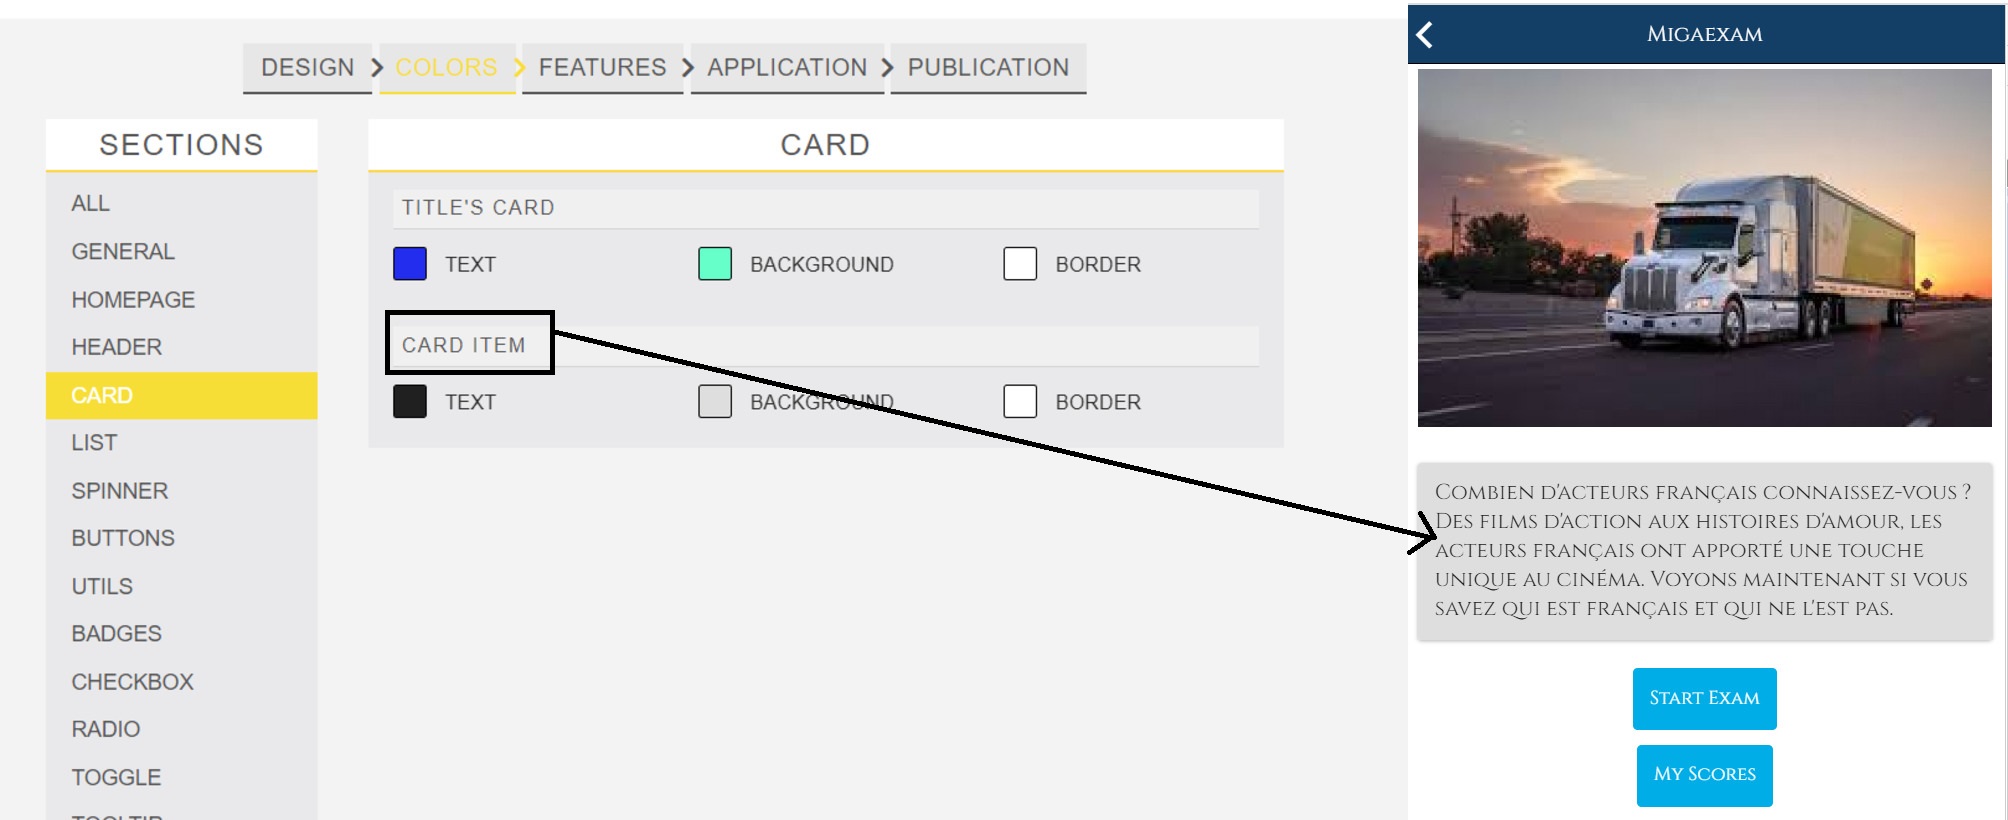
- Indicators and title Section – Click on colors sections and go to the “Utils tab” and change the color and background according to you.
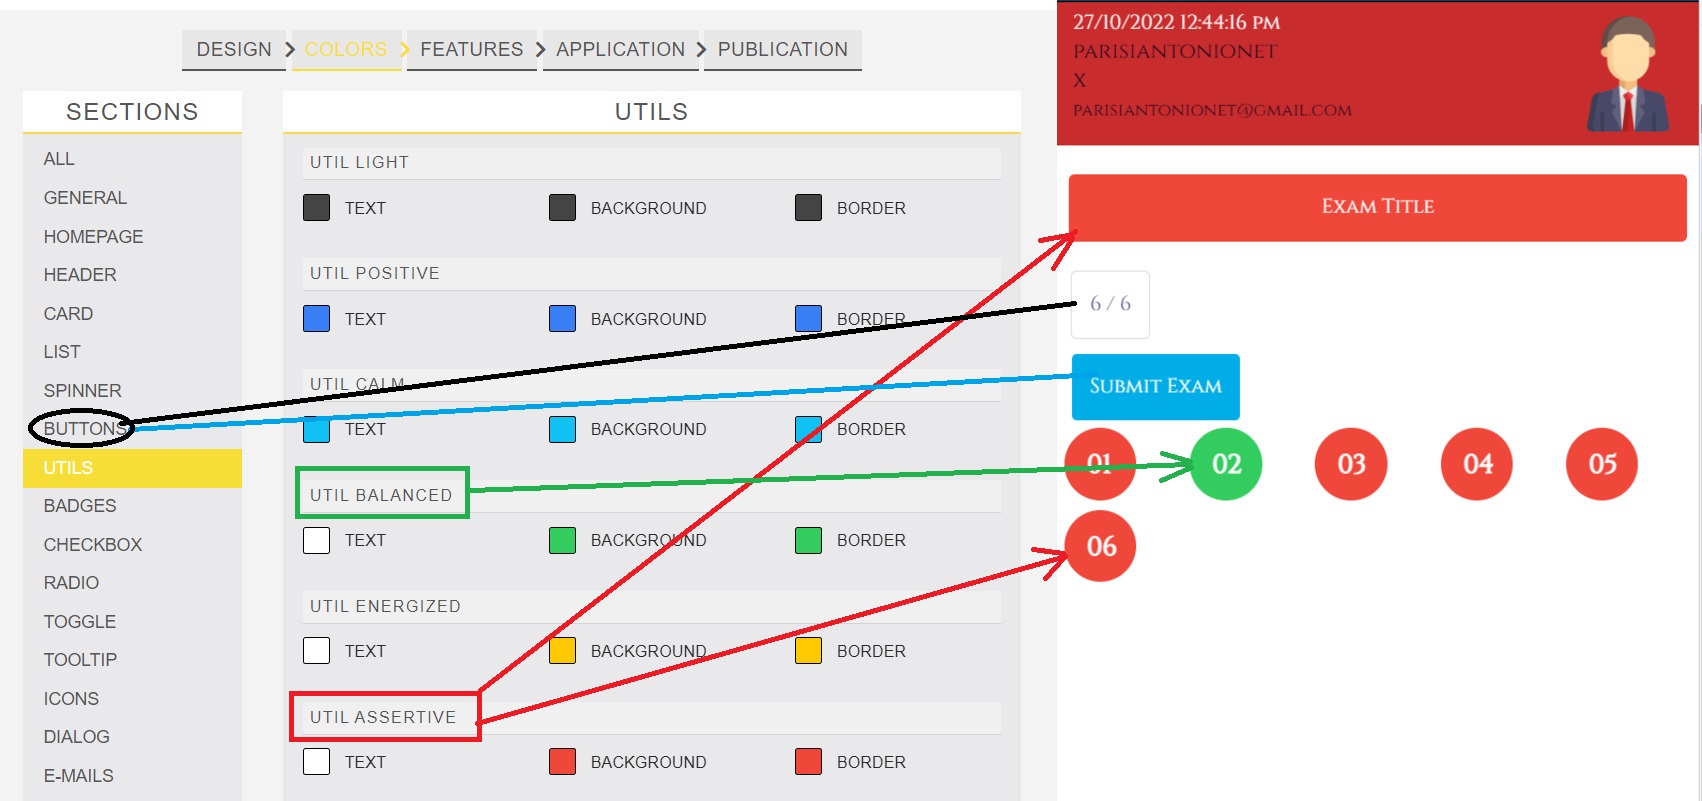
- Exam Completed Section – Click on colors sections and go to the “Utils tab” and change the color and background according to you.
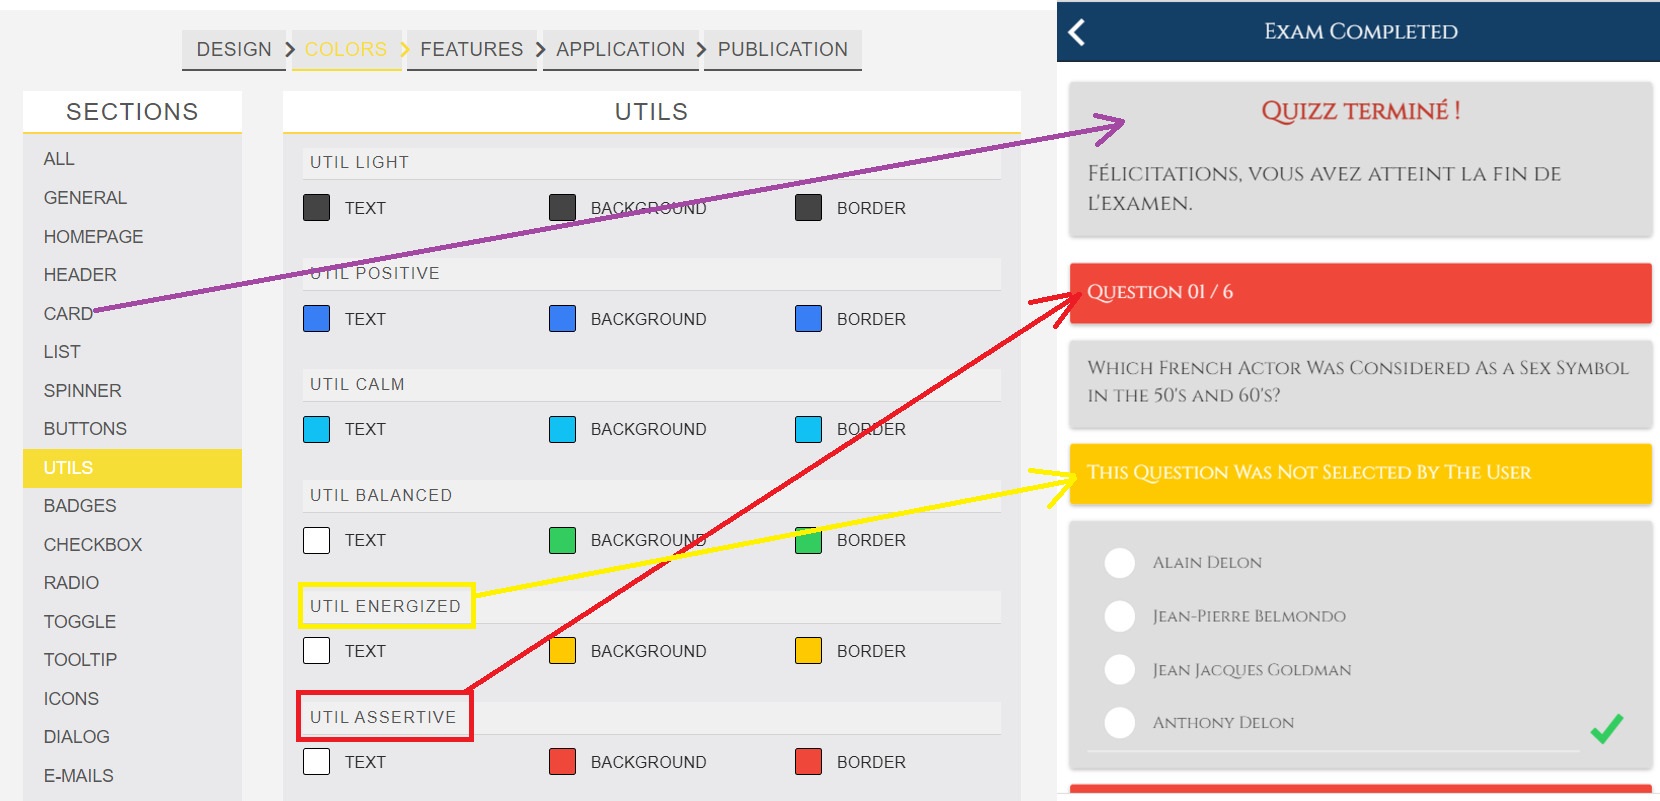
MIGAEXAM 3.0 PERFORMACE SURVEY
Features:
MIGAEXAM Performance is a special mode of operation of the classic Self Evaluation management function of MIGAEXAM. The “Performance” function has been designed to collect feedback from course participants in two phases, an initial one and a final one. This comparative feedback allows for measuring the performance of participants before and after the course. It is also used to gather feedback regarding instructors and other important data. You can view performance graphs and consult responses in an aggregated manner or for each individual participant. Additionally, it’s possible to export the data in CSV format for processing in major programs or Excel or Google Sheets.
Note: The first user has to enable the performance survey mood in the settings tab as shown in the image.
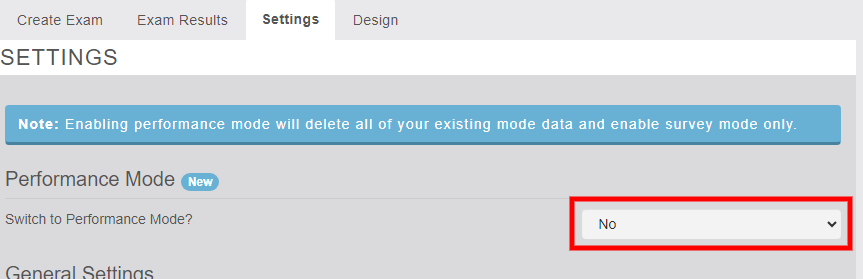
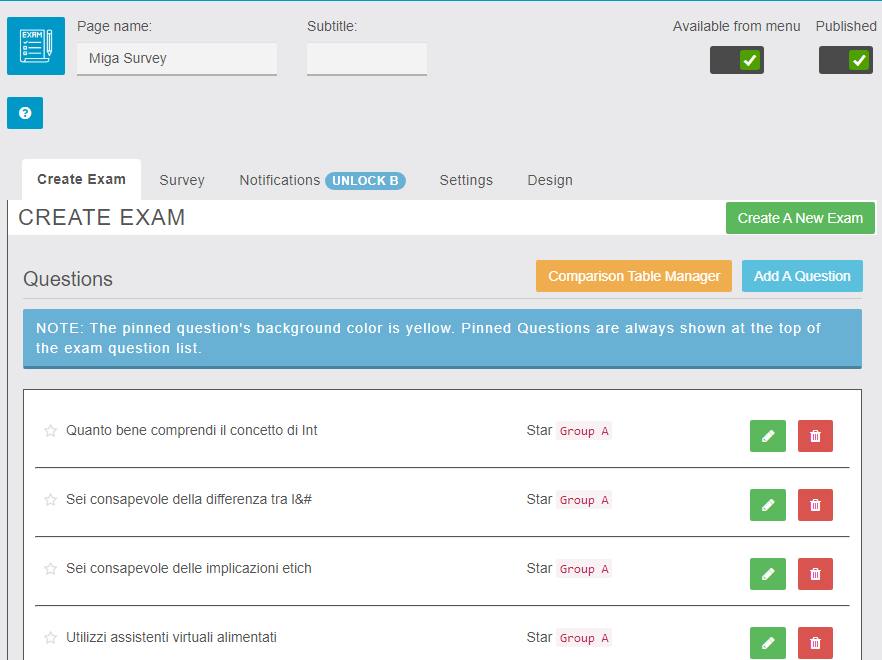
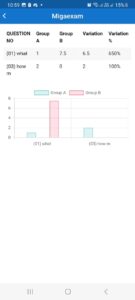
1. Create Exam:
The tab that Allows the user to create different types of questions for the performance survey is split into groups A & B.

When the user clicks on Add Question the new POP UP appears where the user add Queston details with type as shown in the image.
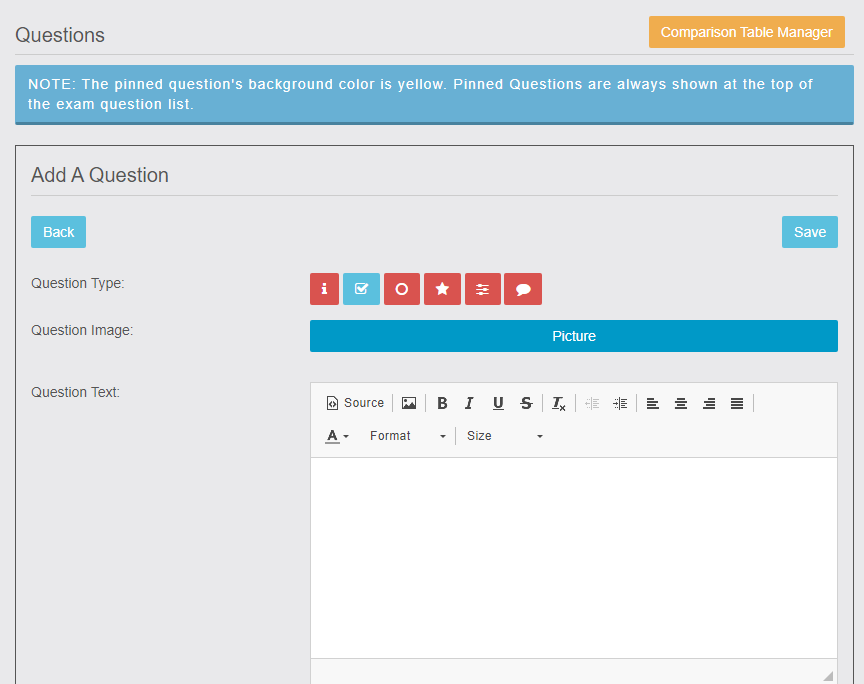
Users can add different types of questions by selecting them
- Checkbox – The App User can select several correct answers.
- Radio – Only one selection can be the correct answer to the question.
- Information – Allows the App Admin to provide instructions to the App User.
- Star – Allows to select the the value between the stars from 1 to 5 or 1 to 10.
- Slider- Allow the user to select the answer to the question by sliding with a decimal value range.
- Plan text – Allow the user to enter the plan text as an answer.


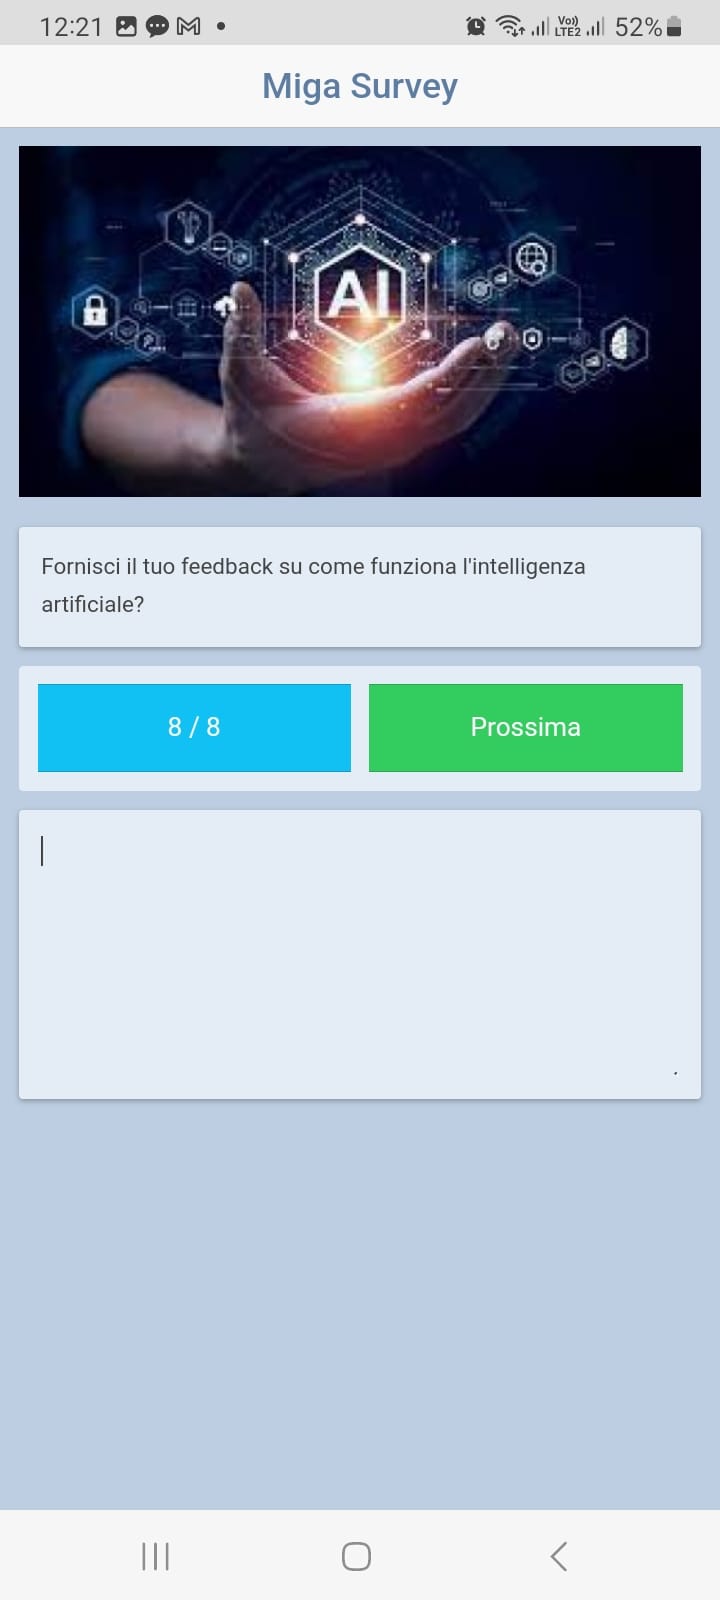
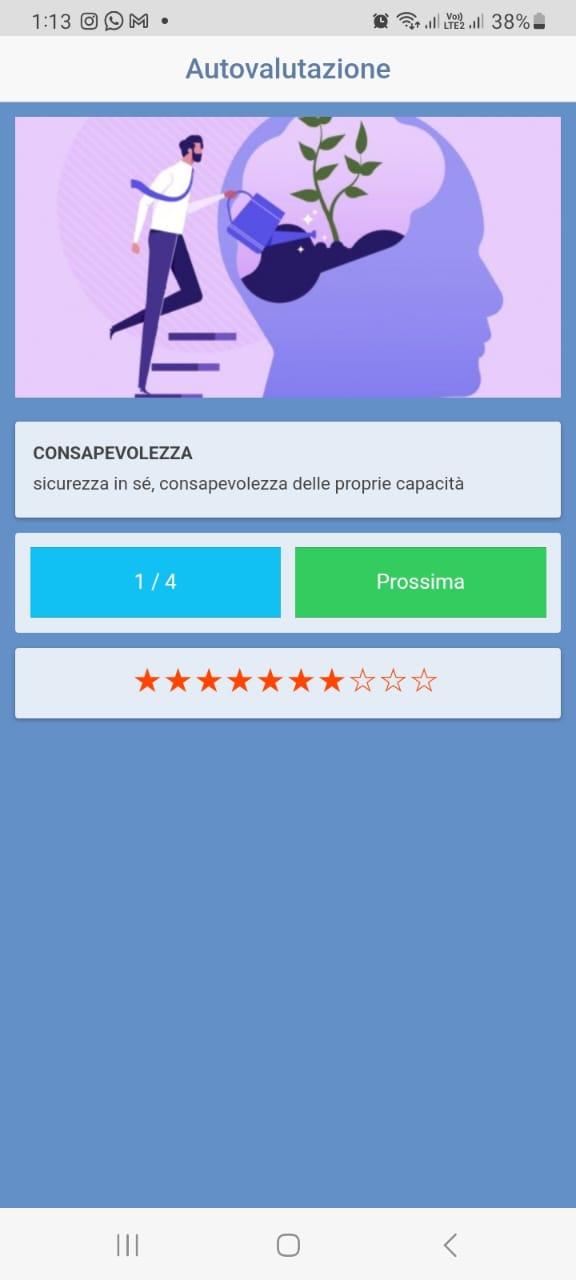
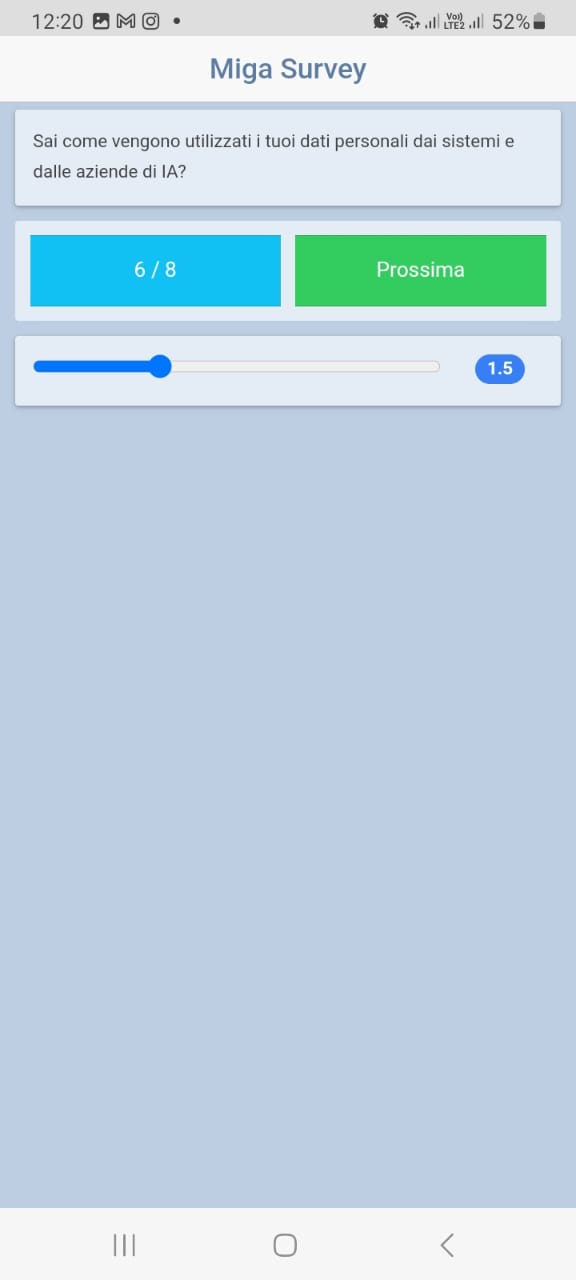
- Users can Assign a question to groups A or B

When the user clicks on “Comparison Table Manager “ the new POP UP appears where the user sets a Question to compare with Group B as shown in the image.
- From Export PDF User can Export the question in PDF form.
- Admin can enter the Label for Group question.
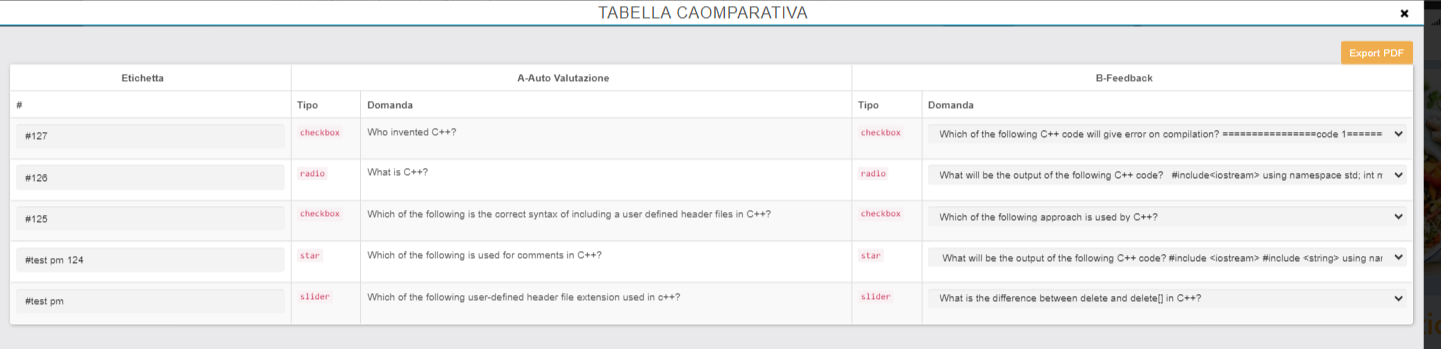
2. Survey:
The tab provides an extensive survey report in the form of a table and Graph where the user is able to compare the results before training (Group A) and after training (Group B).
- The Table is Exportable in a CSV file.
- The Graph allows the user to see the comparison from Group A & Group B.
- The Graph and Tabel is on both the App and CMS side.
- The User Filter Allows to filter the User by name
- Filtered results can be extracted in PDF form
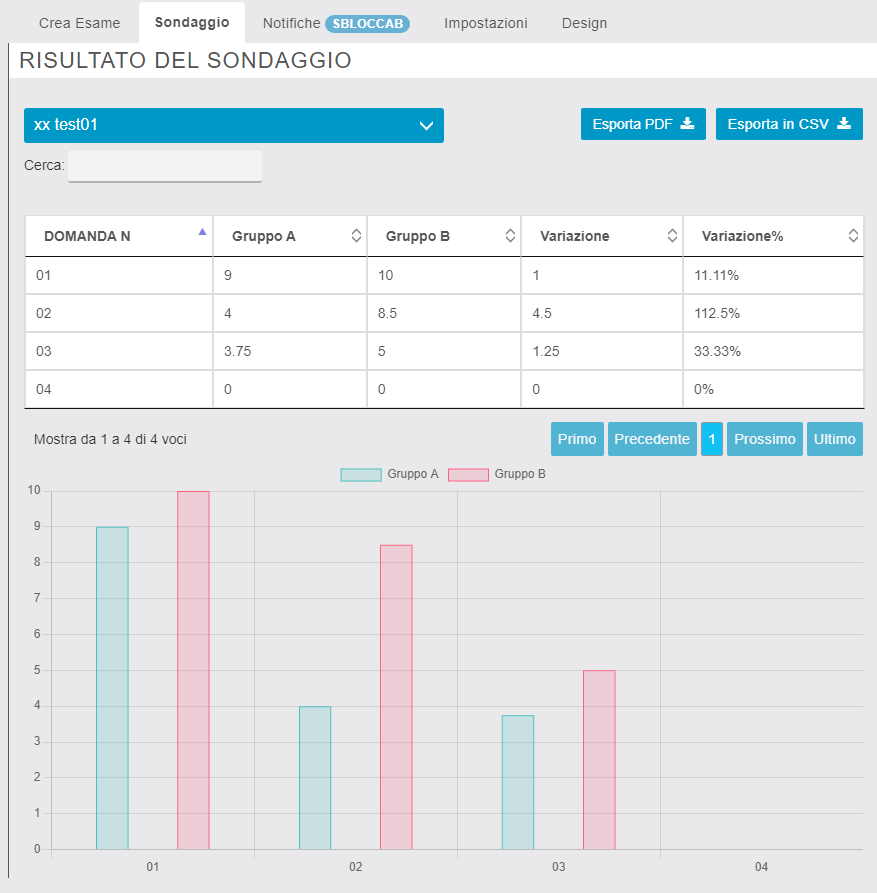
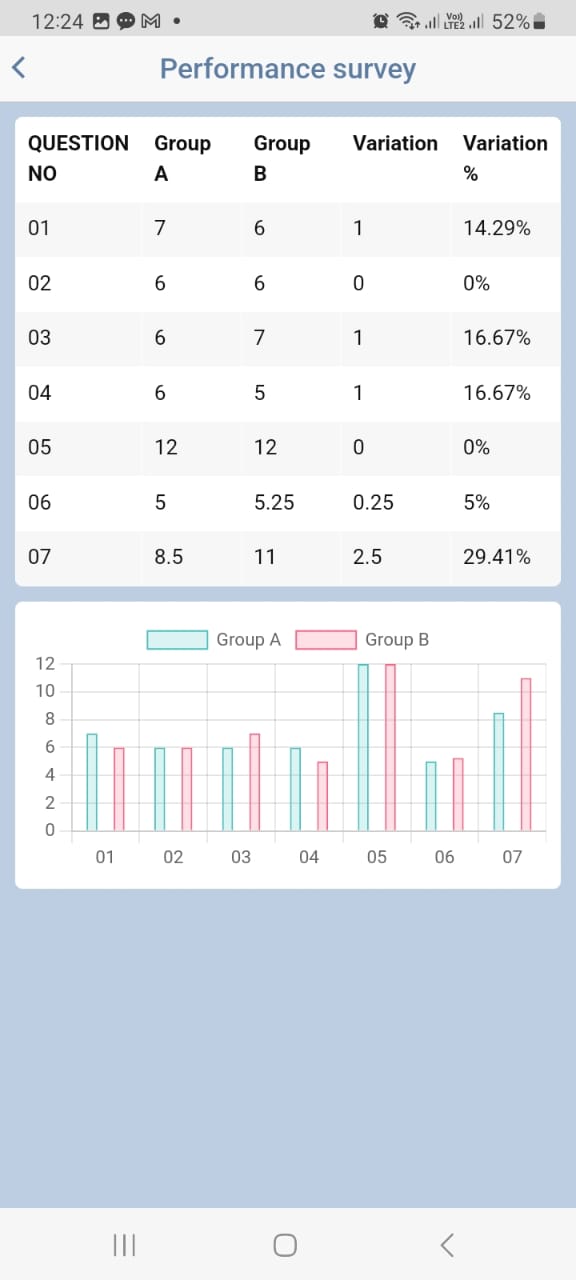
3. Notification:
The tab allows the notification setting, the system sends an EMAIL and a PUSH NOTIFICATION to all users who completed GROUP A, inviting them to retake the test for Group B. Both the content of the PUSH and EMAIL are customizable.
- Enable the Notification serves works when switched to yes as shown in the image.
- Users can set notifications by email, push, or both.
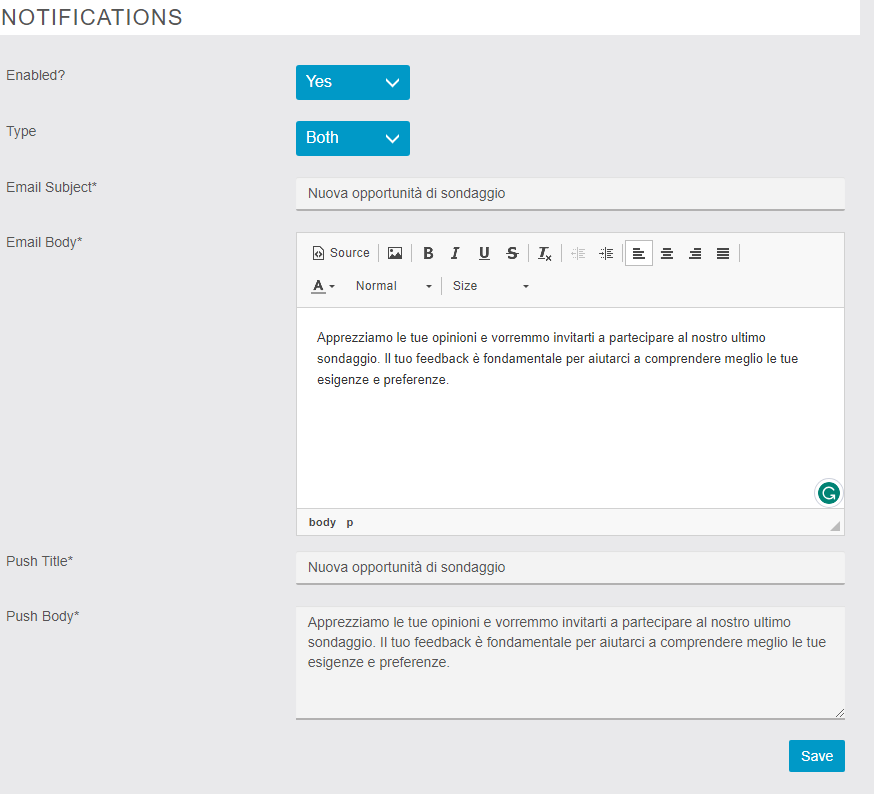
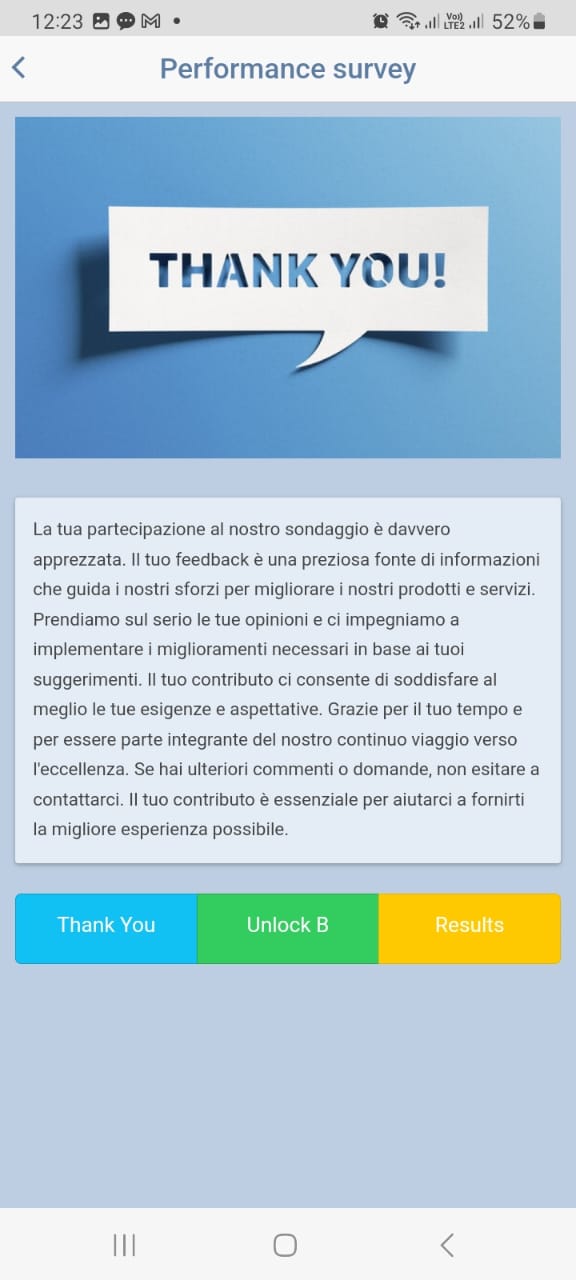
4. Settings:
The settings allow users to switch back from performance mode to normal exam mode, survey is completed user can add a thank-you page where you can add a photo and text as shown in the image.
- Admin can Export all settings, Questions, and Answers in a Zip file and import them into any other Performance Survey Module.

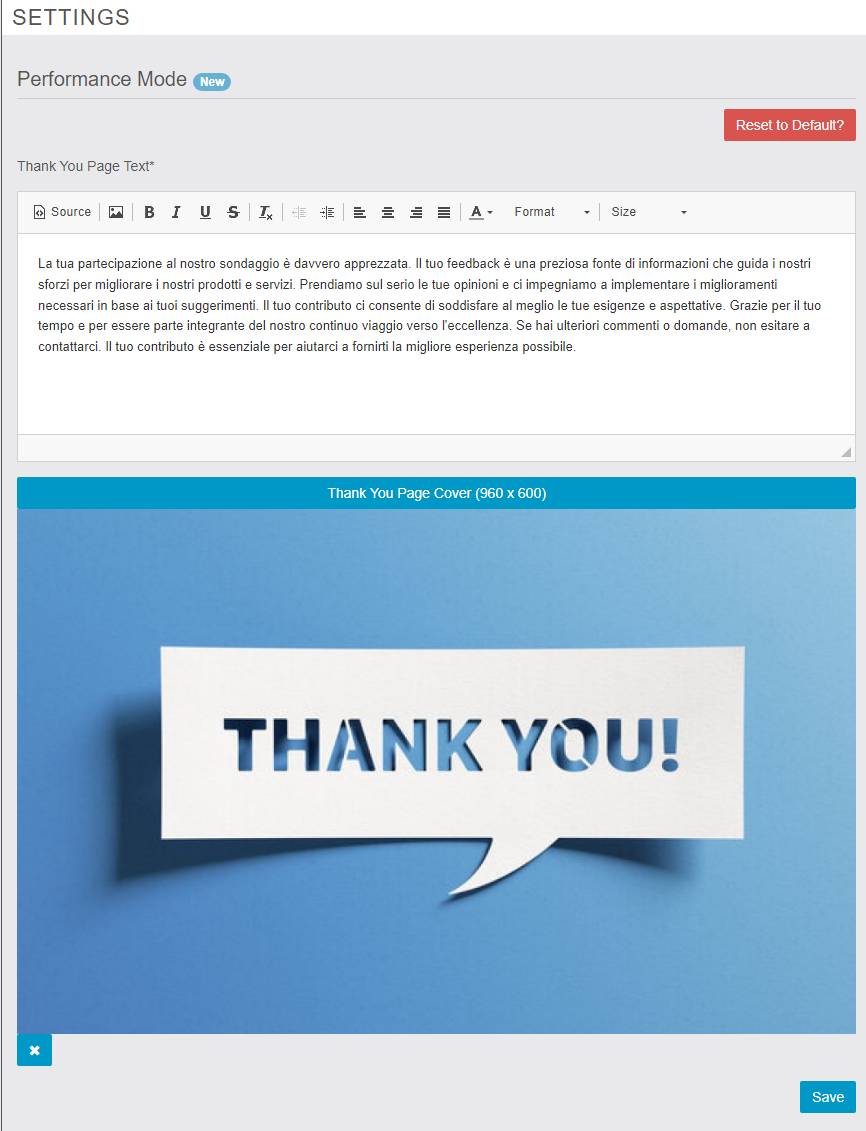
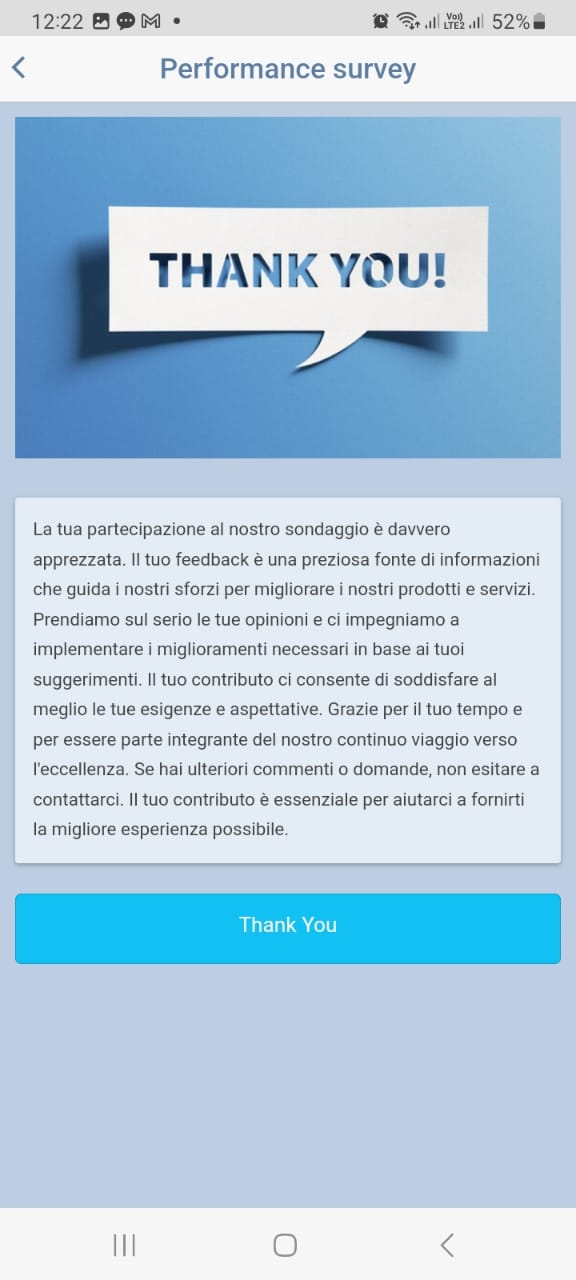
- The member table contains the user table where Admin is set for further Actions.
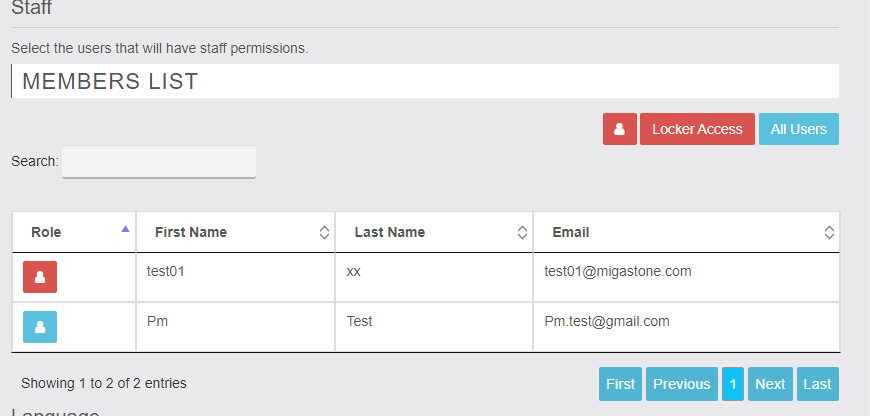
LINK: https://support.migastone.com/en/hrf_faq/migaexam-3-0-performace-survey/
MIGAFUNNELv2 – Automatic Push Notification and email funnel
EMAIL FUNNEL Update Video
Migafunnel is a module that allows to send automatic push notification or emails when a specific event/trigger is happening.
It is an innovative tool that is perfect for Direct Response Marketing, for example delivery an high value content with the APP and later followup the users with special contents delivered by push/email periodically and automatically, for example every week.
With the new Migafunnelv2 you can now interface with the most popular email marketing systems.
WARNING: from release 1.9.30 Migafunnelv2 it is compatible only with Siberian 5.x. Also module install require MIgaPushScheduler, you can dowload for free from this link.
Push/Email Funnels
On the Control Panel of Migafunnelv2 feature you can add from separate tabs:
- Push Notification Funnels
- Email Funnels
When one of the events/trigger is happening we are able to start a FUNNEL OF PUSH or EMAL, a sequence of unlimited number of pushes/emails scheduled to be sent automatically to the user.
Every push/email has a delay of hours or days from the previously push/email selected.
Is possible to setup a welcome push/email immediately after the registration of a new user and schedule every 7 days an automatic push sent to the user for an entire year!!
Follow the instructions of this guide to understand how to setup your FUNNEL.
When you activate Migafunnel the feature add to the menu of your APP a page that has the target to allow the final user of the APP to UNSUBSCRIBE from the automatic push service. Here in the screenshot an example:
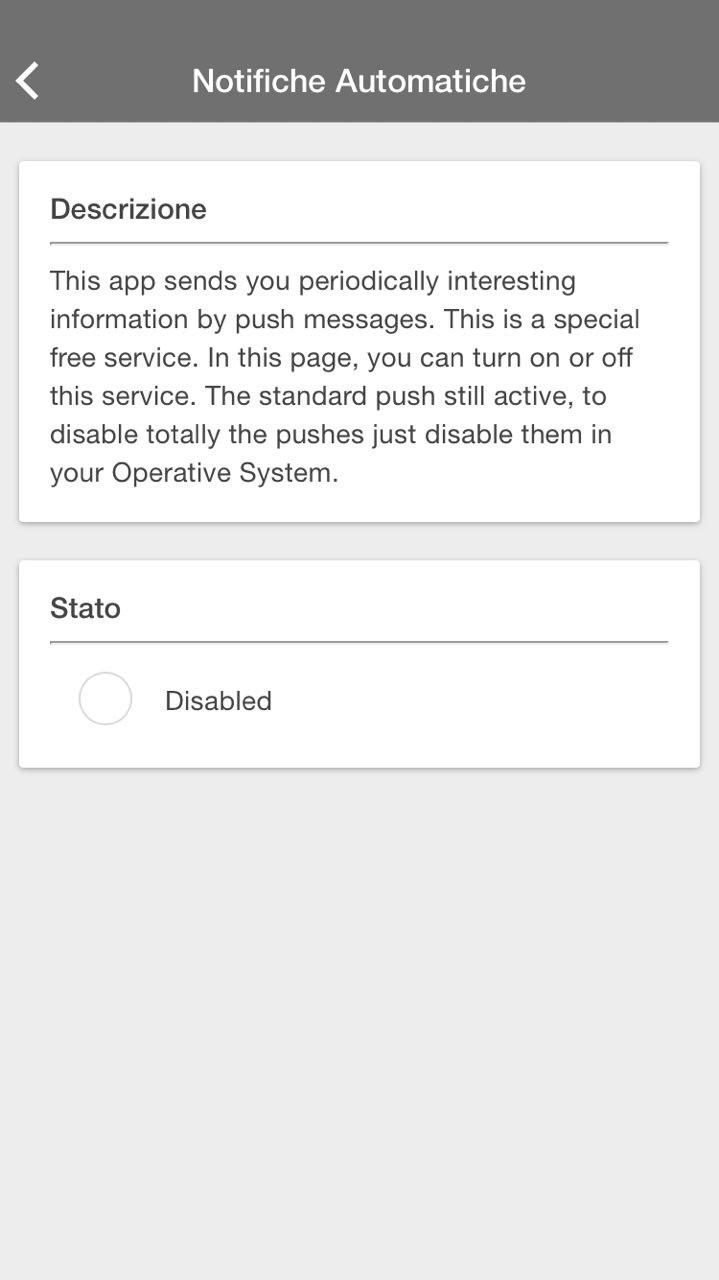
Push Funnel
From PUSH FUNNEL tab, click on ADD NEW FUNNEL button. In the screen that opens you will set:
- FUNNEL TITLE, just for your internal use.
- FUNNEL DESCRIPTION, just for your internal use.
- TRIGGER, this is the selection of the event that must happen to start the funnel.
- ADD OLD USERS, for example, if the trigger is the first login in the app, it is possible to choose whether or not to include users who have already installed the app previously.
- STATUS, to enable or disable the FUNNEL for future users actions. Push already scheduled can’t be stopped.
Supported TRIGGERS are:
- New device installed
- First login inside the app
- First loyalty point used (require Loyalty Card feature in the app)
- First order placed (require Mobile Commerce feature in the app)
- First coupon used (require Discount feature in the app)
- First subscribe of a token in any TOPIC (require Topics feature in the app)
- First progressive loyalty point used (require Progressive Loyalty Card feature in the app)
- First progressive prize redeemed (visible only if Progressive Loyalty Card is added in app)
- CommercePro first order placed (visible only if CommercePro is added in app)
- xDelivery first order placed (visible only if xDelivery is added in app)
NB: Progressive Loyalty Card, CommercePro and xDelivery are third party modules you can purchase separately.
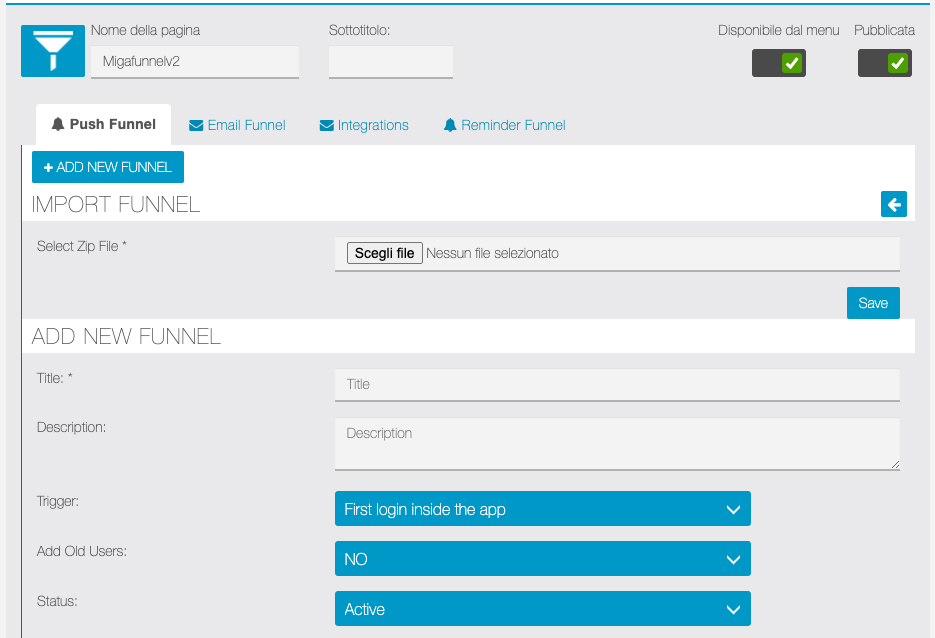
Now you have to set the First PUSH and you will continue with the configuration by entering the following data.
- TITLE of your first PUSH that will be sent when at TRIGGER event set.
- MESSAGE or the text of your first push, remember not too long.
- OPEN A FEATURE OR A CUSTOM URL if you select YES you can link a feature or a web url. You can also link an app page you set not visible in menu.
- PUSH START or when you want the push start after the TRIGGER set. You can choose AS SOON AS POSSIBLE or you can set number of days or hours after the TRIGGER set.
- STATUS, enable or disable.
- TOPICS FILTER, only if Topics feature is added to app, you can choose one or more topic.
- Insert a cover image, optional.
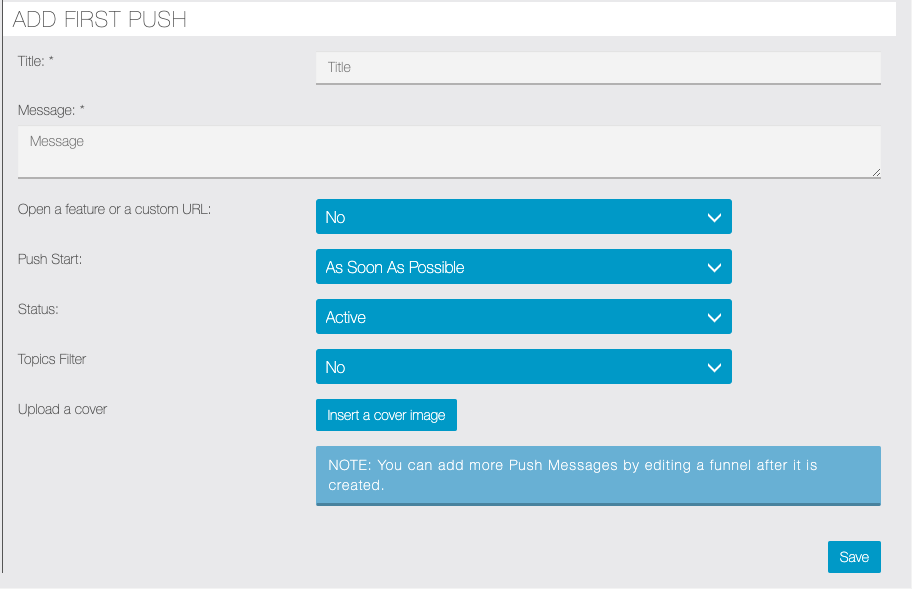
————– NEW TRANSLATION IN PROGRESS BELOW – WILL BE READY SOON ————————-
Dopo avere inserito la prima PUSH/EMAIL è necessario salvare il nuovo funnel. Successivamente potrai entrare in modifica ed aggiungere eventuali PUSH/EMAIL successive alla prima.
Nell’immagine seguente un esempio di prima PUSH con tutte le regole impostate:

Dopo avere salvato il nuovo funnel puoi continuare ad inserire ulteriori PUSH.
Il principio è che selezioneremo, nel menu INIZIA DOPO, la PUSH precedente, cioè quella dopo la quale collocheremo la nuova.
Dovermo inoltre indicare, nel menu AVVIO PUSH, dopo quanto tempo inviare la nuova push, rispetto all’invio della push/email precedente selezionata. Le opzioni sono sempre le solite: Al più presto possibile, ore oppure giorni dopo l’invio della precedente push/email precedente selezionata.
Nell’immagine che segue puoi vedere come appare la sezione AGGIUNGI NUOVA PUSH vuota:
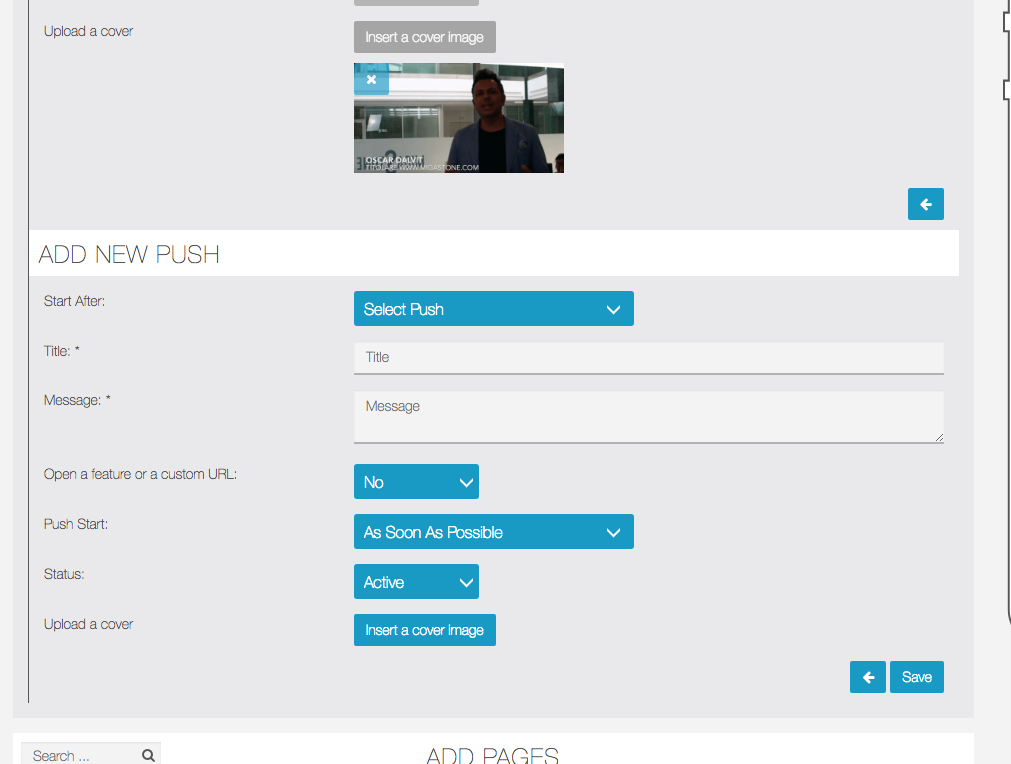
Nella immagine successiva vedi come è stata compilata la push successiva, abbiamo selezionato nel menu INIZIA DOPO la prima push inserita dal menu

e abbiamo impostato 1 giorno di ritardo dalla prima PUSH selezionata
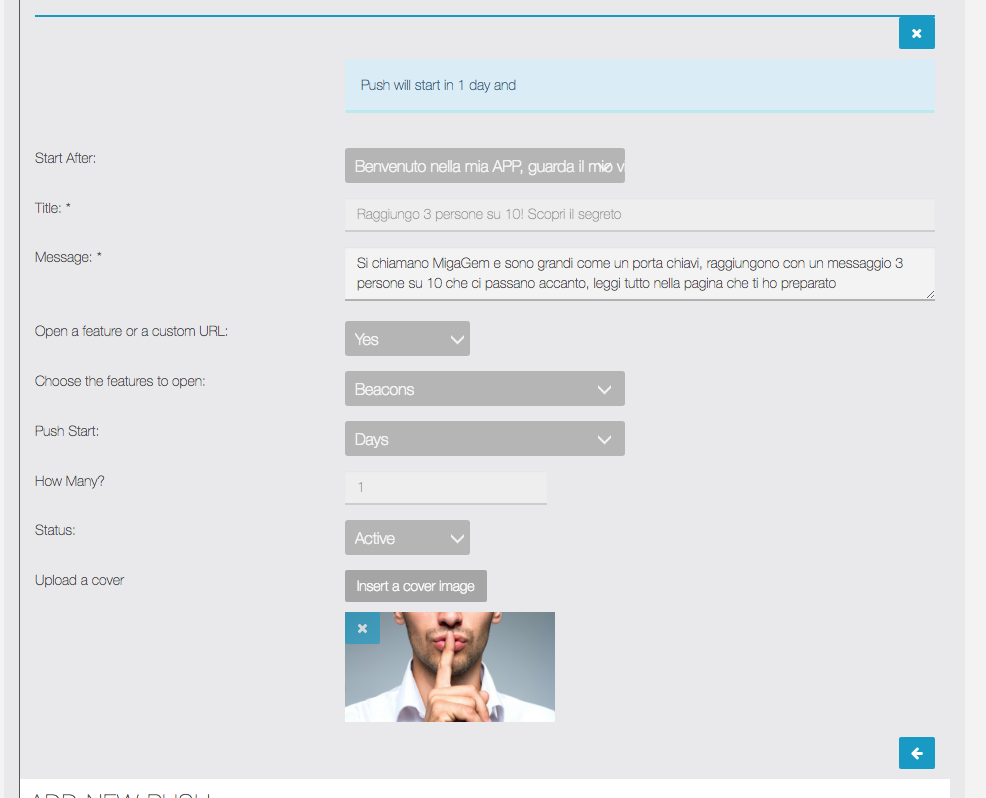
NOTE FINALI IMPORTANTI:
- Puoi trovare tutte le notifiche push impostate e pianificate per ogni utente nello storico invio notifiche push della funzione NOTIFICHE PUSH della tua APP
- Quando un utente si disiscrive dal servizio notifiche push automatico tutte le push pianificate per l’invio di quell’utente saranno cancellate
- Ogni qual volta una push viene cancellata dal funnel tutte le push pianificate relative a quella push saranno eliminate. E’ possibile cancellare solo l’ultima push presente in un funnel
- Puoi cancellare un funnel di push quando al suo interno è presente SOLO la prima push. Se sono presenti altre push devi cancellare prima quelle.
Funnel Email
Fai clic su AGGIUNGI NUOVO FUNNEL. Nella videata che si presenta imposterai:
- Il TITOLO del FUNNEL, ti servirà per ritrovarlo nella lista dei funnel.
- La DESCRIZIONE del FUNNEL, ti servirà per capire come hai impostato il funnel.
- INNESCO, questa è la selezione dell’evento che deve accadere per dare il via al Funnel
- AGGIUNGI VECCHI UTENTI, se l’innesco è il primo login nella app è possibile scegliere di includere o meno anche gli utenti che hanno già installato la app precedentemente.
- STATUS, permette di attivare o disattivare il FUNNEL per i futuri utenti che si registreranno nell’APP. Le push già pianificate per chi si è già iscritto non sono disattivabili.
Gli eventi supportati per INNESCO sono:
- Primo login nell’app
- Primo punto di una carta fedeltà validato (richiede nella app la funzione Carta Fedeltà)
- Primo Ordine effettuato nell’app (richiede nella app la funzione Mobile Commerce)
- Primo Coupon utilizzato (richiede nella app la funzione Sconto)
- Sottoscrizione da Landing Page
- Primo Login e Sottoscrizione da Landing Page
- Primo punto su Carta Fedeltà progressiva (visibile solo se tale funzione è inserita nella app)
- Primo premio riscattato in Carta Fedeltà progressiva (visibile solo se tale funzione è inserita nella app)
- Primo Ordine CommercePro (visibile solo se tale funzione è inserita nella app)
- Primo Ordine xDelivery (visibile solo se tale funzione è inserita nella app)
NB: Carta Fedeltà progressiva, CommercePro e xDelivery sono moduli di terze parti acquistabili separatamente.
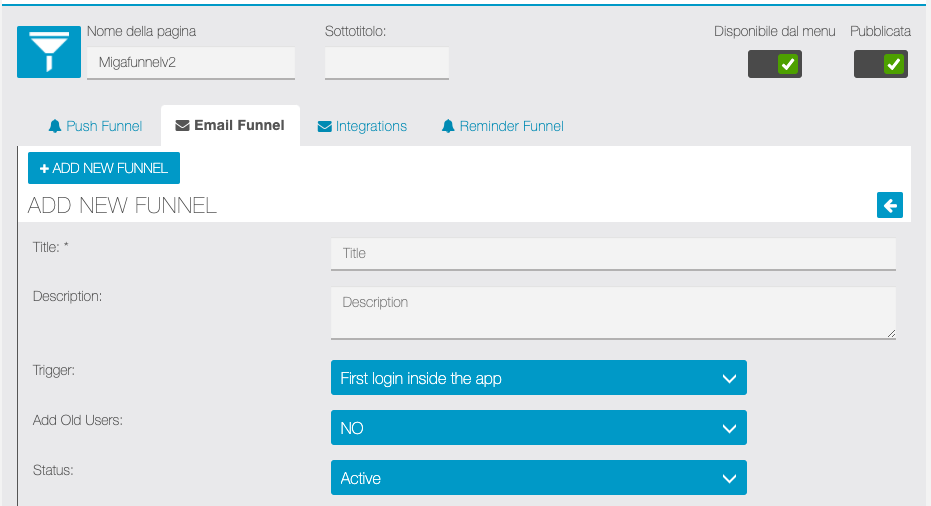
A questo punto devi impostare la Prima EMAIL e proseguirai nella configurazione inserendo i seguenti dati:
- Il TITOLO della tua prima EMAIL che verrà inviata quando si verificherà l’INNESCO ovvero l’EVENTO impostato.
- IL MESSAGGIO ovvero il testo del messaggio della email
- ALLEGATO eventuale da inviare con l’email
- AVVIO PUSH ovvero quando deve essere inviata la prima EMAIL dopo il verificarsi dell’evento di INNESCO impostato in precedenza. Qui potrai decidere di scegliere IL PRIMA POSSIBILE, e di solito parliamo di 1 o 2 minuti dopo il verificarsi dell’ INNESCO ovvero per esempio la prima registrazione di quell’utente. Oppure potrai impostare un intervallo in ore o giorni.
- STATO, attivo o disattivo.
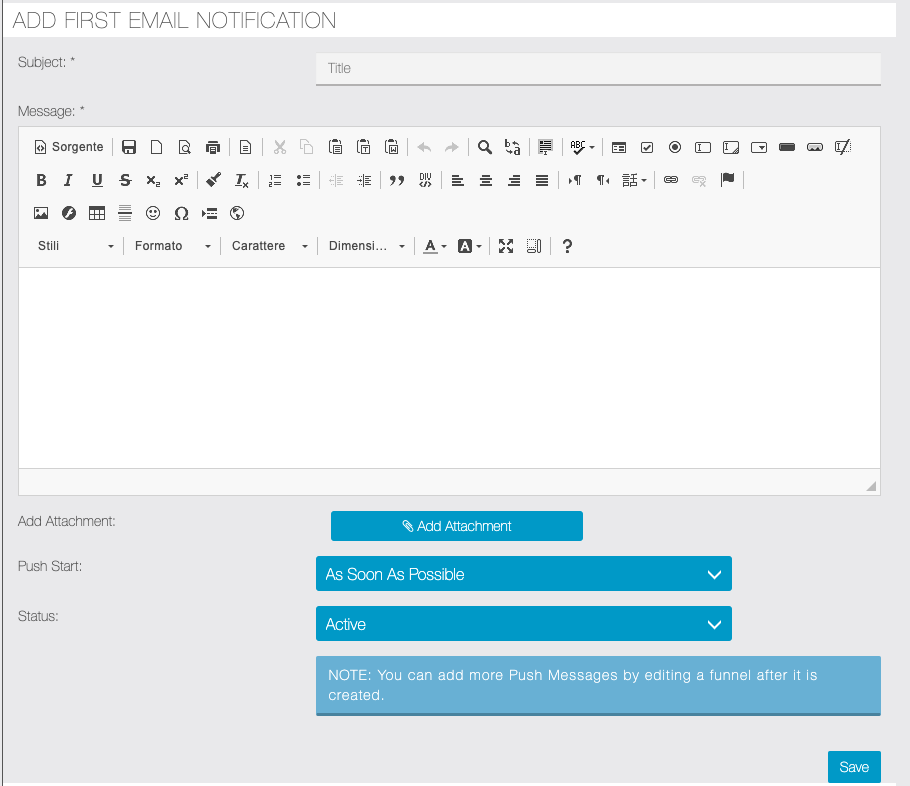
Dopo avere salvato il nuovo funnel puoi continuare ad inserire ulteriori EMAIL.
Il principio è lo stesso spiegato nel paragrafo relativo al Funnel Push: selezioneremo, nel menu INIZIA DOPO, la EMAIL precedente, cioè quella dopo la quale collocheremo la nuova, e così via.
Landing Page Trigger
Quando imposti un funnel email, puoi selezionare come innesco “Landing page” (o Primo Login e Landing page). Se imposti un funnel di email in questo modo puoi ottenere il codice sorgente di un form da inserire in una landing page. Quando i tuoi visitatori compilano ed inviano il form ricevono la prima email che hai impostato nel funnel, come un risponditore automatico. Potrai impostare le successive email del funnel dopo avere salvato, come spiegato al paragrafo precedente.
Questo è quello che vedi quando selezioni ad esempio “landing page trigger” dal menu a tendina (devi aver selezionato funnel “email”):
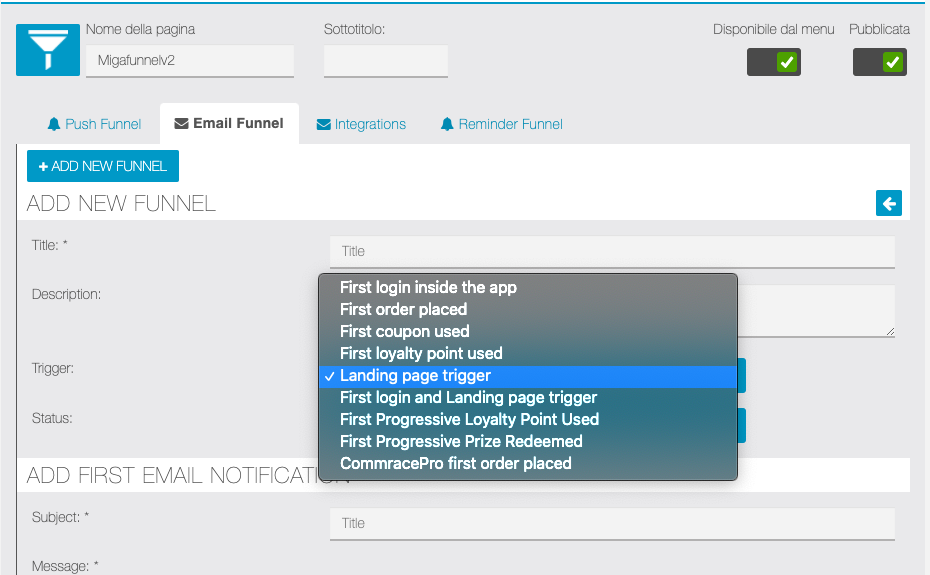
Quindi, quando imposti il messaggio della prima email puoi utilizzare alcuni tag per personalizzare la risposta automatica:
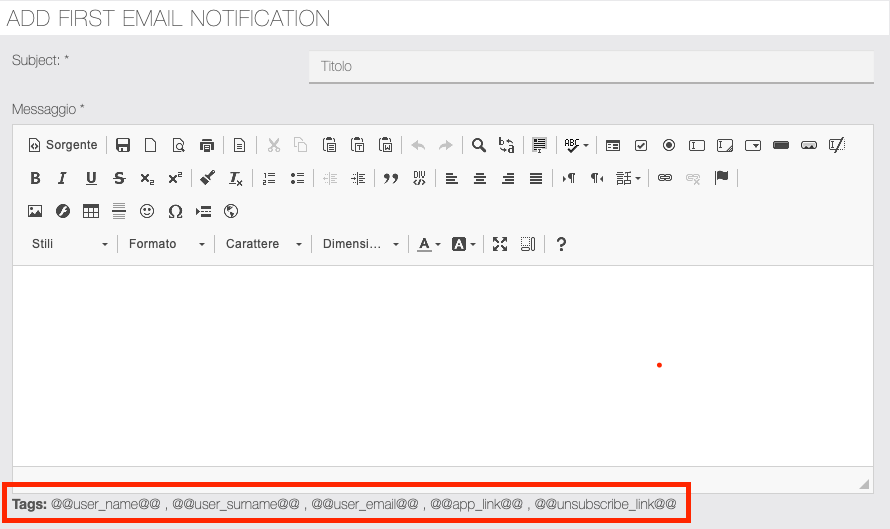
Scorrendo più in basso nella pagina puoi generare, copiare e incollare il codice sorgente per inserire il form nella tua landing page (puoi vedere l’anteprima del form e personalizzare alcuni colori/larghezza pulsante):
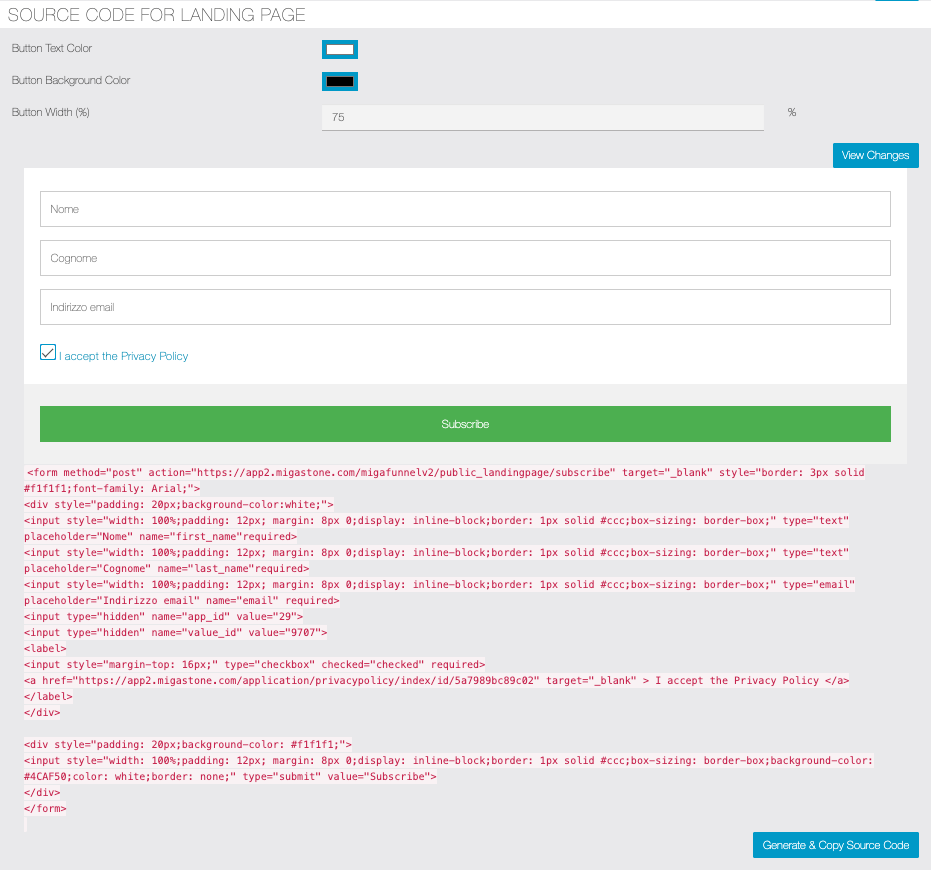
Fai clic sul pulsante Salva. Successivamente potrai entrare in modifica per aggiungere le email successive alla prima.
Impostazione SMTP Server per i funnel Email
Nella sezione SETTINGS:
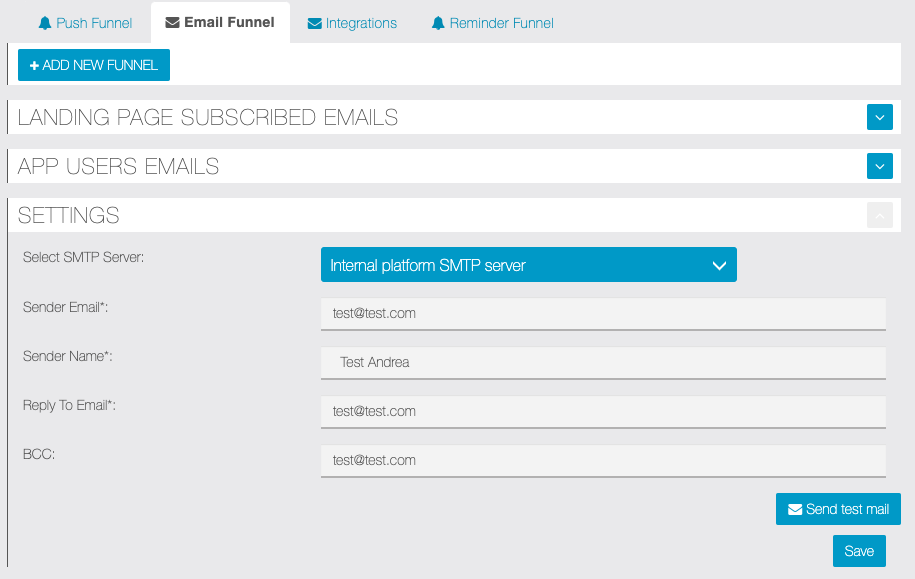
- Selezionare SMTP server per l’invio: puoi scegliere se utilizzare quello configurato nella piattaforma oppure utilizzarne uno personalizzato
- Indirizzo email mittente
- Nome del Mittente
- L’email “rispondi a” da indicare
- Atri destinatari in copia nascosta
Migrazione dati da Migafunnel
Nel passaggio al nuovo modulo Migafunnel v2 abbiamo reso disponibile una opzione che consente di importare i dati dei funnel precedentemente inseriti con il nostro modulo Migafunnel. Se nella tua app è già presente la funzione Migafunnel, aggiungendo la nuova funzione Migafunnel v2 comparirà un messaggio sopra le impostazioni con un pulsante per eseguire la migrazione.
ATTENZIONE: raccomandiamo di eseguire il passaggio dei dati al più presto poiché il modulo Migafunnel precedente non sarà più disponibile e supportato in futuro.
Import / Export
È possibile effettuare l’export di un funnel creato:

Per eseguire l’operazione di export fare clic sull’icona ![]() .
.
Si aprirà la finestra per scegliere la posizione in cui scaricare il file. Il file funnelDataExport.zip verrà creato e scaricato nella posizione scelta.
Per effettuare invece l’importazione di un funnel fare clic su ![]() :
:
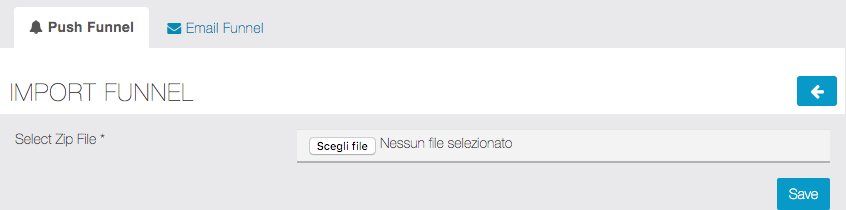
Nella sezione “IMPORT FUNNEL” fare quindi clic sul pulsante “Scegli file” e selezionare, dalla posizione in cui è stato precedentemente salvato, il file funnelDataExport.zip
Integrazione piattaforme Email Marketing
Il nuovo modulo Migafunnel v2 consente ora l’impostazione di funnel email, grazie all’interfaccia con le più diffuse piattaforme per l’Email marketing.
Per prima cosa selezionare GDPR PRIVACY e scegliere se utilizzare le informazioni predefinite oppure inserire un testo personalizzato:

Il passo successivo è effettuare la scelta della piattaforma e delle relative chiavi di accesso, da IMPOSTAZIONI, le piattaforme attualmente supportate sono:
- www.kartra.com
- www.mailchimp.com
- www.sendingblue.com (gratuito)

Infine impostare le regole per l’iscrizione. E’ possibile selezionare una lista diversa ed eventualmente un segmento diverso per ogni trigger (azione compiuta dall’utente nella app). E’ comunque necessario effettuare l’impostazione per tutti i trigger presenti nella lista.
Ogni volta che l’utente effettuerà una delle azioni previste la sua email verrà importata nella lista corrispondente della piattaforma di email marketing prescelta.
NB: l’importazione non avviene immediatamente, la sincronizzazione sarà effettuata automaticamente più volte al giorno.
Link alla pagina diretto https://support.migastone.com/en/hrf_faq/migafunnel/
MIGAGYM
Introduction:
Welcome to the MIGAGYM. This module provides a comprehensive control panel exclusively accessible to the owner of the APP and collaborators. With this powerful tool, you can manage various aspects of your fitness application. The Application provides various features
. Exercise sheets
. Training sheets
. Training sheets for specific users
1. Exercise sheets
On this page, the user is able to create pages with multimedia content exactly as if a custom Siberian page were being created in the APP (same functions, VIDEO, Photo). The pages created will have a category that will be filterable. (It is necessary to allow a global setting to create one or more categories to assign)
Note: Users have to create Categories first in the Settings Tab

Filters
- Categories
- Creation date
- Search
- Action Edith: To Edith an existing exercise sheet with assigned categories
- Action Duplicate:
 By clicking on Duplicate the Excercise sheet is duplicated with Prefix Duplicate
 - Action Delete: To remove the sheet.
2. Traning Sheets
Here you will be able to create training plans that essentially group one or more Exercise Pages in sequence.
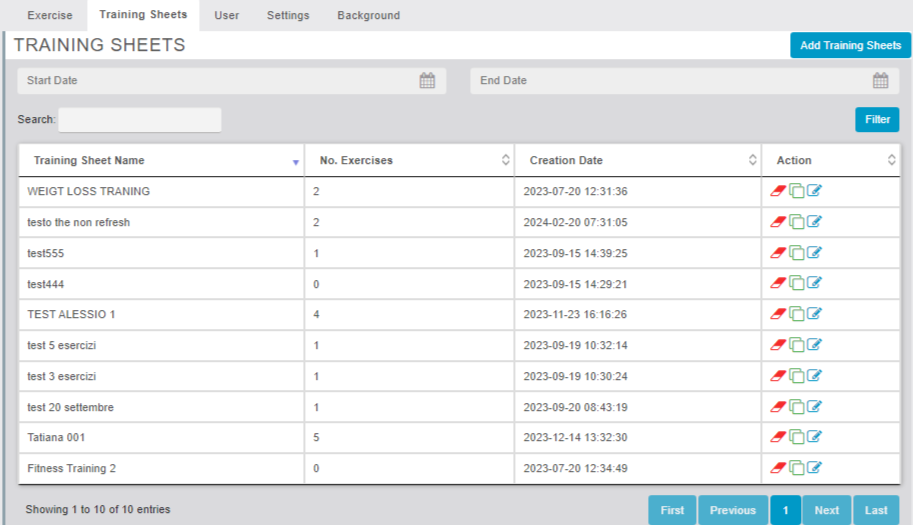
Action Duplicate: ![]() By clicking on Duplicate the Training sheet is duplicated with Prefix Duplicate.
By clicking on Duplicate the Training sheet is duplicated with Prefix Duplicate.
By clicking on the ![]() the popup Apperas catches the details as shown in Fig.
the popup Apperas catches the details as shown in Fig.
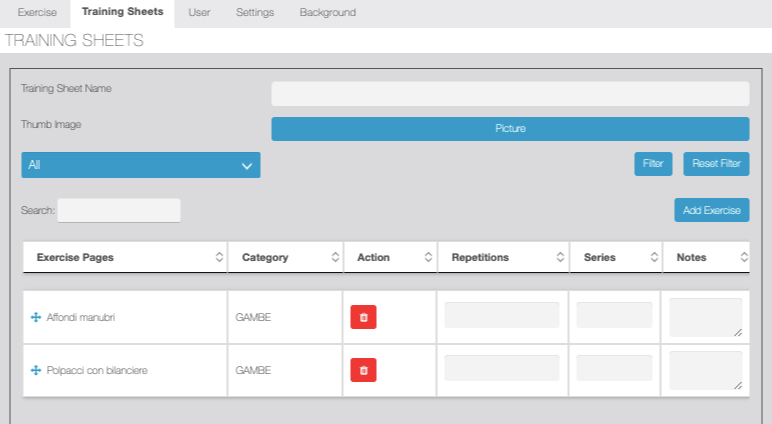
Reputation, series, and notes. The reputation feature allows you to assign a rating or difficulty level to each exercise sheet. This helps users gauge the complexity of the training and plan their learning accordingly. You can assign a reputation score from 1 to 50 for each exercise sheet.”Save” button to save the training sheet.
Users can add Multiple exercise sheets in training sheets When click on ![]() the Popup Appear, The POPUP, has two drop-down menus, one to select CATEGORY (A-Z) and one that near populated automatically with the EXERCISES to be selected for this category (A-Z)
the Popup Appear, The POPUP, has two drop-down menus, one to select CATEGORY (A-Z) and one that near populated automatically with the EXERCISES to be selected for this category (A-Z)
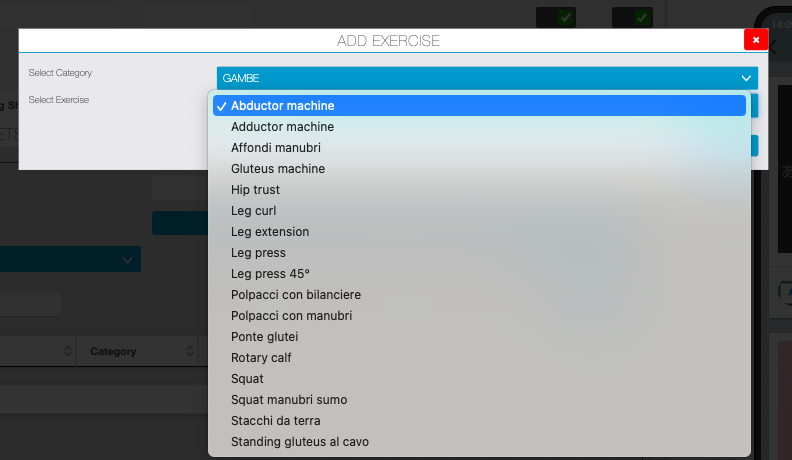
The training sheets Will be possible to search by training names and date filters as shown in fig
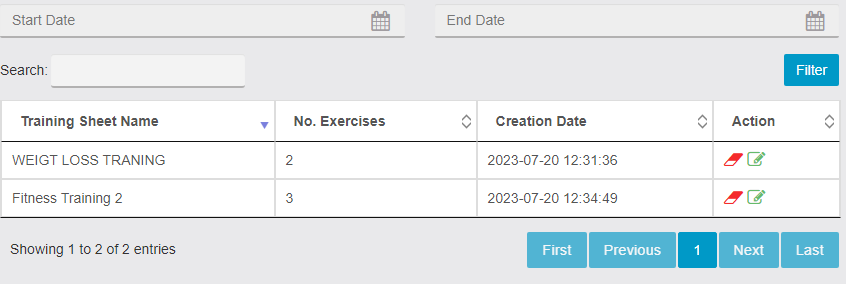
- Action Edith: To Edith an existing Training sheet with assigned categories.
- Action Delete: To remove the sheet.
3. User
Here the Admin can see all the users registered in the APP, by clicking their card will open where it will be able to associate one or more Training Sheets. Each time a Training sheet is assigned admin should assign an expiration date mandatory (is possible to modify the expiration date again if it is necessary).
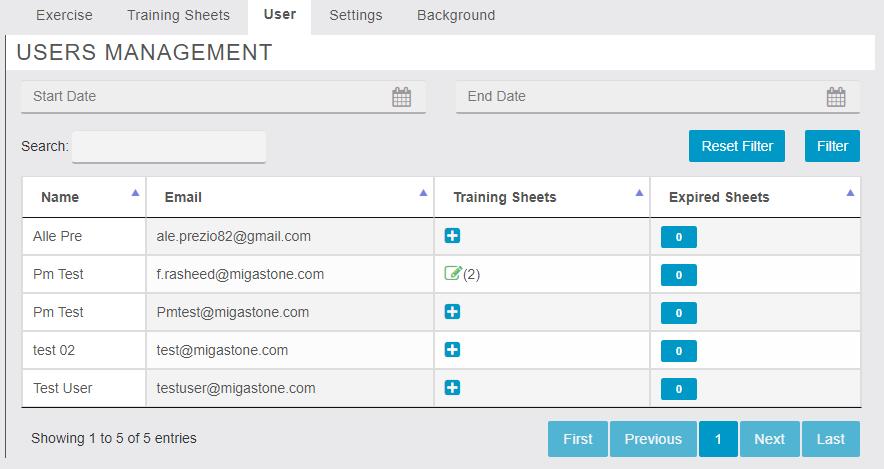
By clicking on Add Traning sheets ![]()
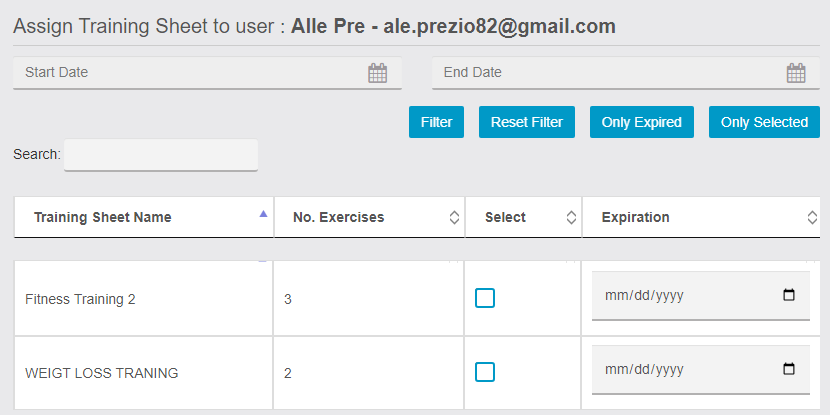
4. Settings
Global settings allow the user to add new Icon for training sheets and Expiry Inside the setting sheet user is able to add Categories as shown in Fig
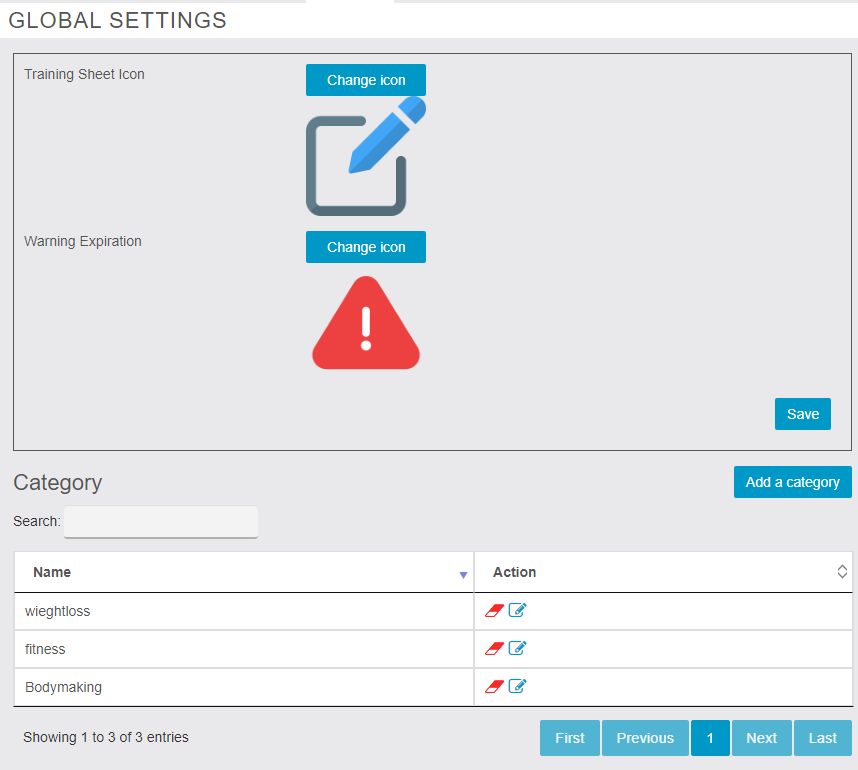
By clicking on Add a Category ![]() Button pop up Appears where the user can enter the Category name
Button pop up Appears where the user can enter the Category name 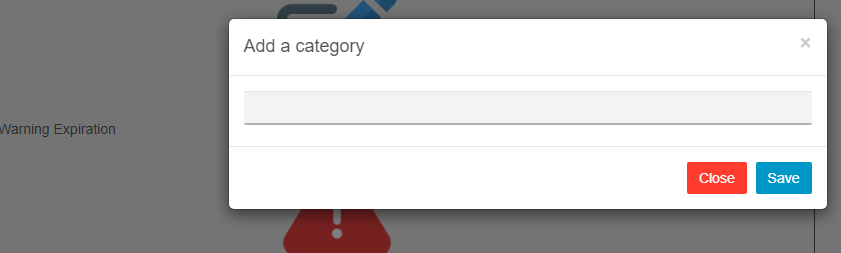
APP SIDE:
In the APP, the training sheets Assign to clients shown
- Display all available Training Sheets with their expiration dates.
- Warn users with an icon and display the expiration date in red if a Training Sheet is expired.

- Clicking on a Training Sheet opens the first Exercise Sheet with a side menu for easy navigation between Excercise sheets.
- Clicking on the “DONE” button the next exercise appears on the top of each sheet Reputation |Series |Notes are shown as shown in Fig.

You can try MIGAGYM on our demo platform: https://demo.migastone.com/
MIGAINFODISCO
Introduction:
This app serves as a dynamic marketplace, spotlighting venues within specific geographical areas by leveraging the enticing allure of coupons. As a strategic market test, our initial focus will be on the vibrant city of Milan, where we aim to unveil the app’s potential impact.
- Allow the user to check their favorite venue nearby.
- Users can check Events on Venue.
- Users have the opportunity to get a Promo from the App.
- Users can buy Prepaid Services from the App via Paypal.
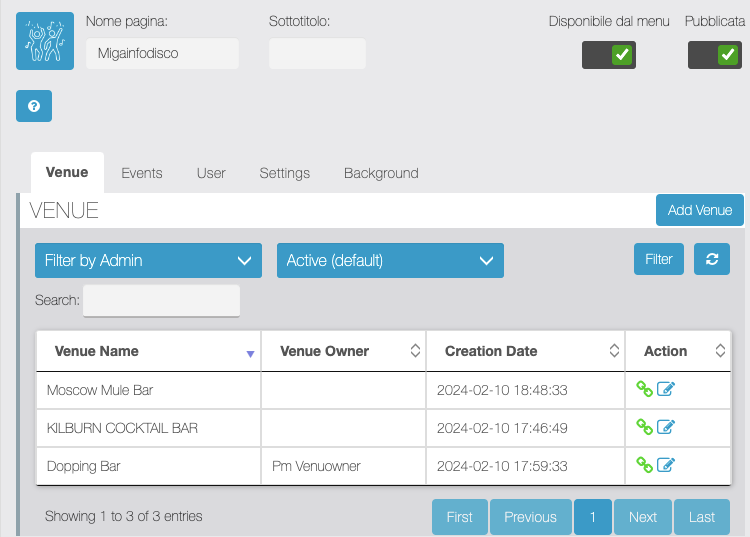
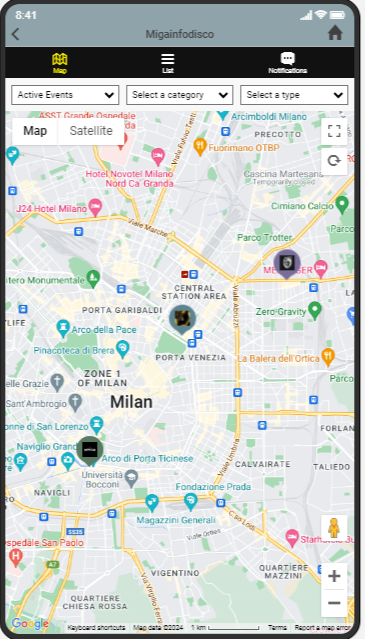
Admin Side (CMS):
The Admin CMS side has various Pages and users to manage
Settings:
The Setting Tab allows the Admin to Set the Following.
- Paypal Settings: The admin can add the Paypal settings for the prepaid services offered on the app side, the payments made are transferred to the owner account.
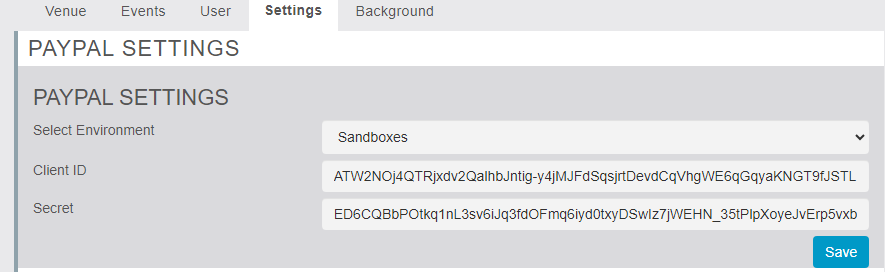
- Geolocation: The admin can set the default Geolocation for the App user and the radius of the Map shown on the App end.
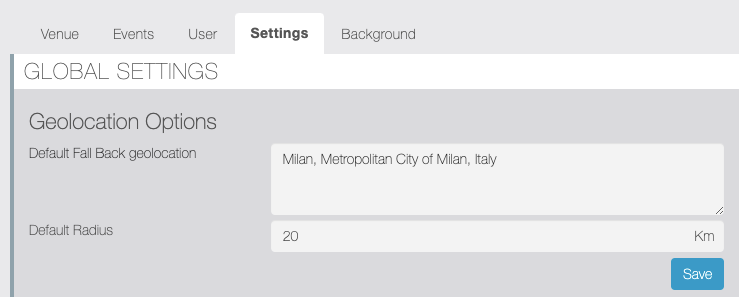
- Category Name: Allow the admin to add an Event Category when clicking on Add Category the POP UP appears when the admin enters the Category name and adds the category Icon used for filtering on the App side.
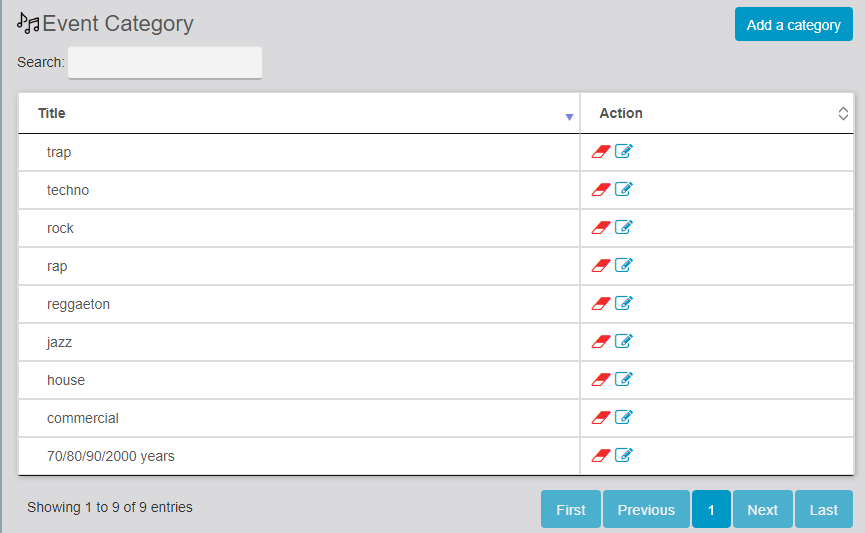
- Event Type: Allow the admin to add an Event Type when clicking on Add TYPE the POP UP appears when the admin enters the Event type name name used for filtering on the App side.
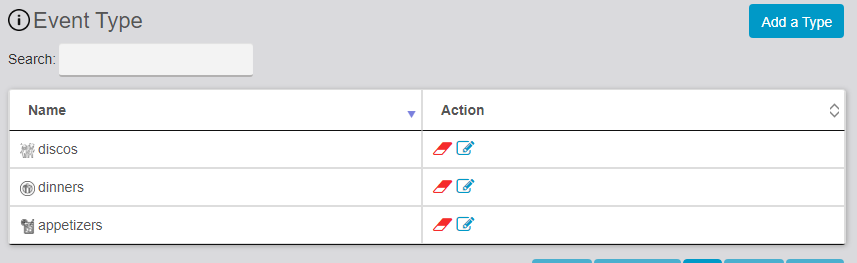
- New Event Push Notification: When Push settings are enabled allow the user to get a push notification when new events are launched.
- Event Customize Text Share: Allow the Admin to share the Custom Text about the event
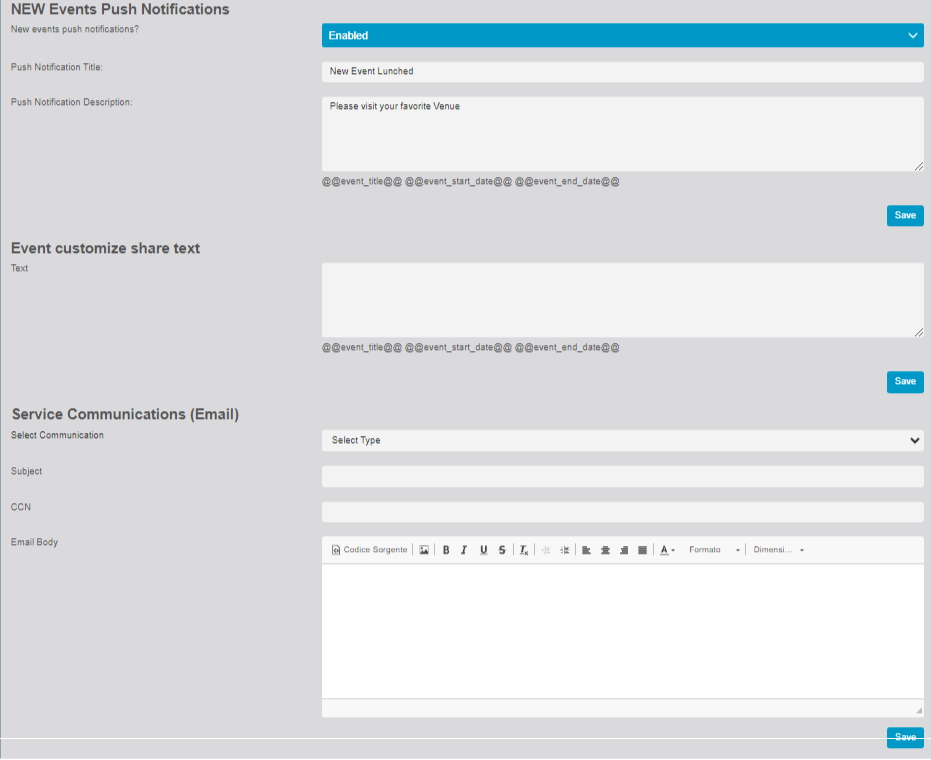
Venue:
The Venue tab allows this admin to add/Edith Venue the table allows to manage the Venue pages also from the Table the Admin can Edith the Venue page,
- Add Venue: When clicking on Add Venue
 the Custom page settings Appear where Admin can enter details of Venue.
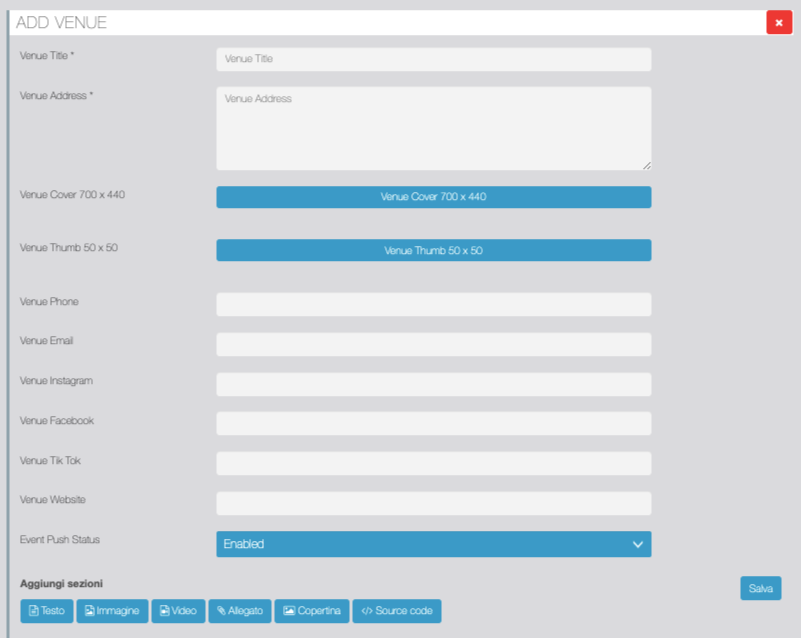
- The Table shows the information about the venue the user can edit the venue page from the table.
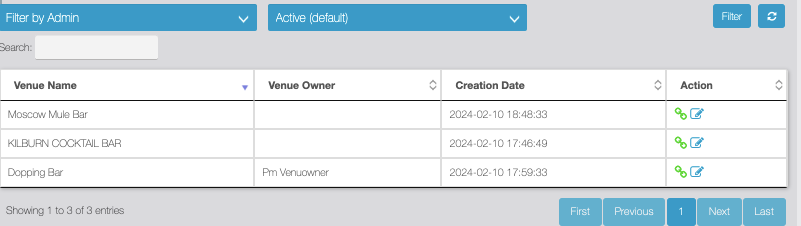
Events:
The Event tab allows this admin to add/Edith Event for the Specific Venue, the table allows to manage the Event pages also from the Table the Admin can Edith the Event page,
- Add Event: When clicking on Add Event
 the Custom page settings Appear where Admin can enter details of the Event like Event type, time, Promo, Event Description, Images, etc.
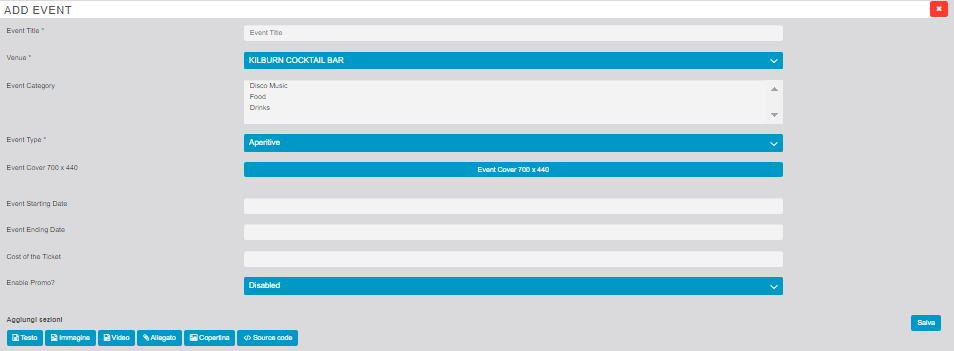
- Prepaid Services: Venue owner can add prepaid services When enabling the prepaid services by clicking Add Service
 the service is added admin has to enter details of the service like title, price, and description which are shown in the event on the App side users can purchase these services via Paypal and get the QR.
The Qr scans by the venue owner and provides the service to the customer.
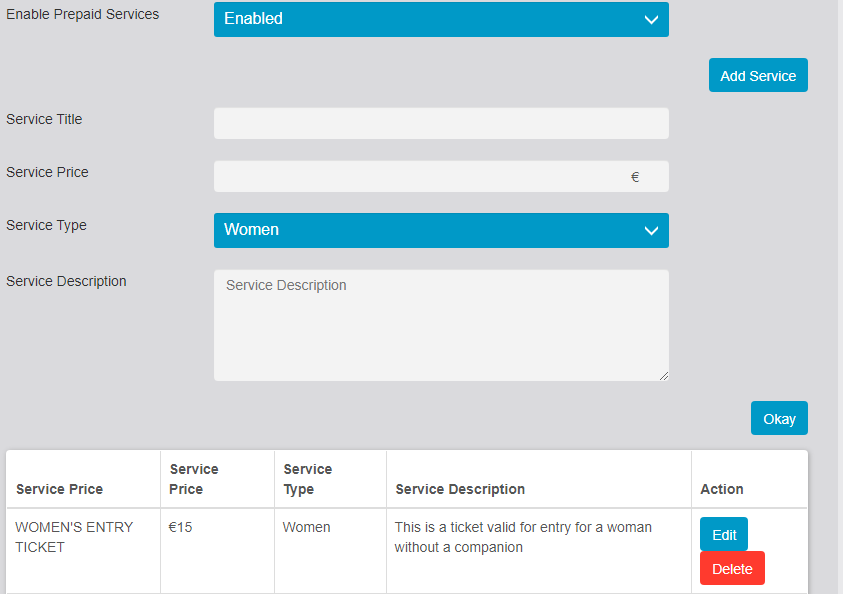
The Prepaid Service Ledger Table provides information about the service purchased, and the used QR Admin can filter the search to a specific service or event by Category, name, and Date.
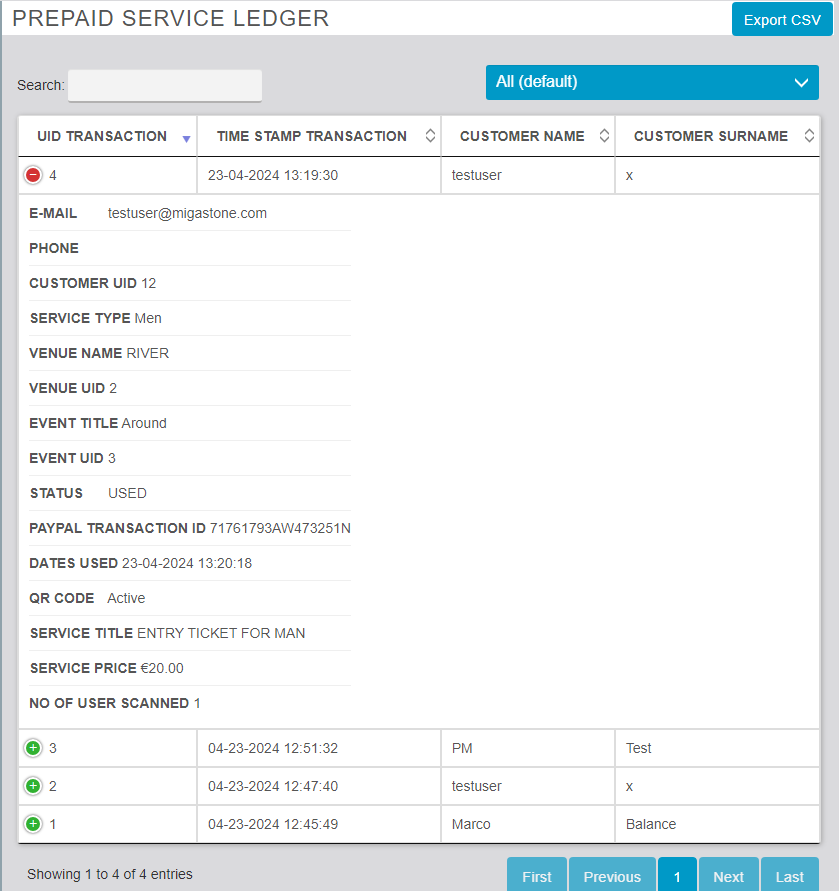
The Table provides information about the events with Venue Admin can filter the search to a specific Event by Category, name, and Date.
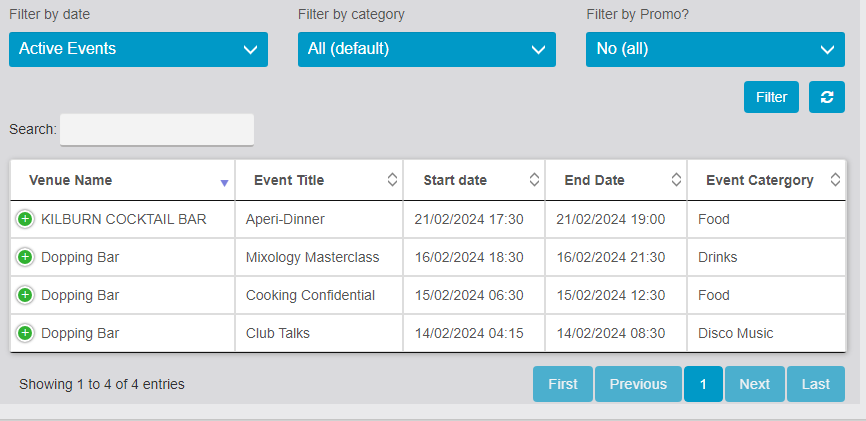
APP SIDE:
Introducing our innovative app that revolutionizes your event planning experience – a dynamic platform designed to simplify and enhance your search for the perfect venue. With an intuitive interface, our app seamlessly combines mapping technology with powerful filters, allowing users to explore a curated list of venues based on Event Category, date, and distance preferences. Whether you’re organizing a corporate gathering, wedding, or social event, our app empowers you to find the ideal venue tailored to your unique needs.
- MAP View, LIST View, Notifications.
- Filters.
- Customizable Card colors.
- LIST VIEW: The List View is in card view form where each card represents a Venue along with the distance number of Active Events and Number of likes
- When the user clicks on Venue Card The List of Active Events appears along with Venue Detail.
- Venue: Cover Image, Title Of Venue, Location Distance, and Linked Butten of all social Pages of the venue. when the user clicks on Venue Detail The App Provides Venue Details.
- Event: Cover image, Title of Event, Date, Time, Ticket Price, Promo Title the user can Add an event to the calendar by clicking on Add to Calander
- Promo Code: The promo code is enabled by the Admin Contains Offers and QR Code for Venue entry.
- Prepaid Services: Prepaid services are offered on the App side as shown in Fig after purchase the App user has a QR code for its services.

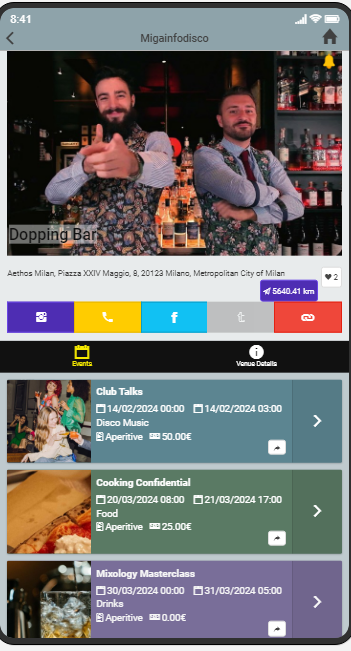
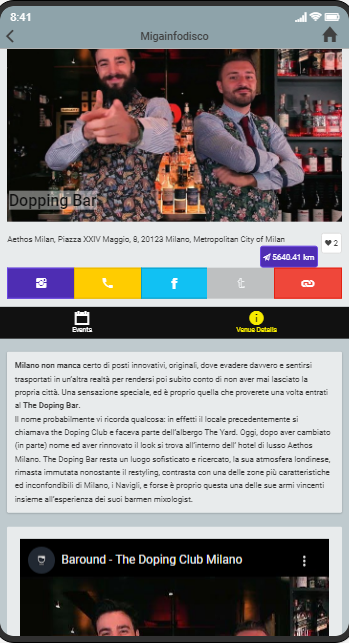
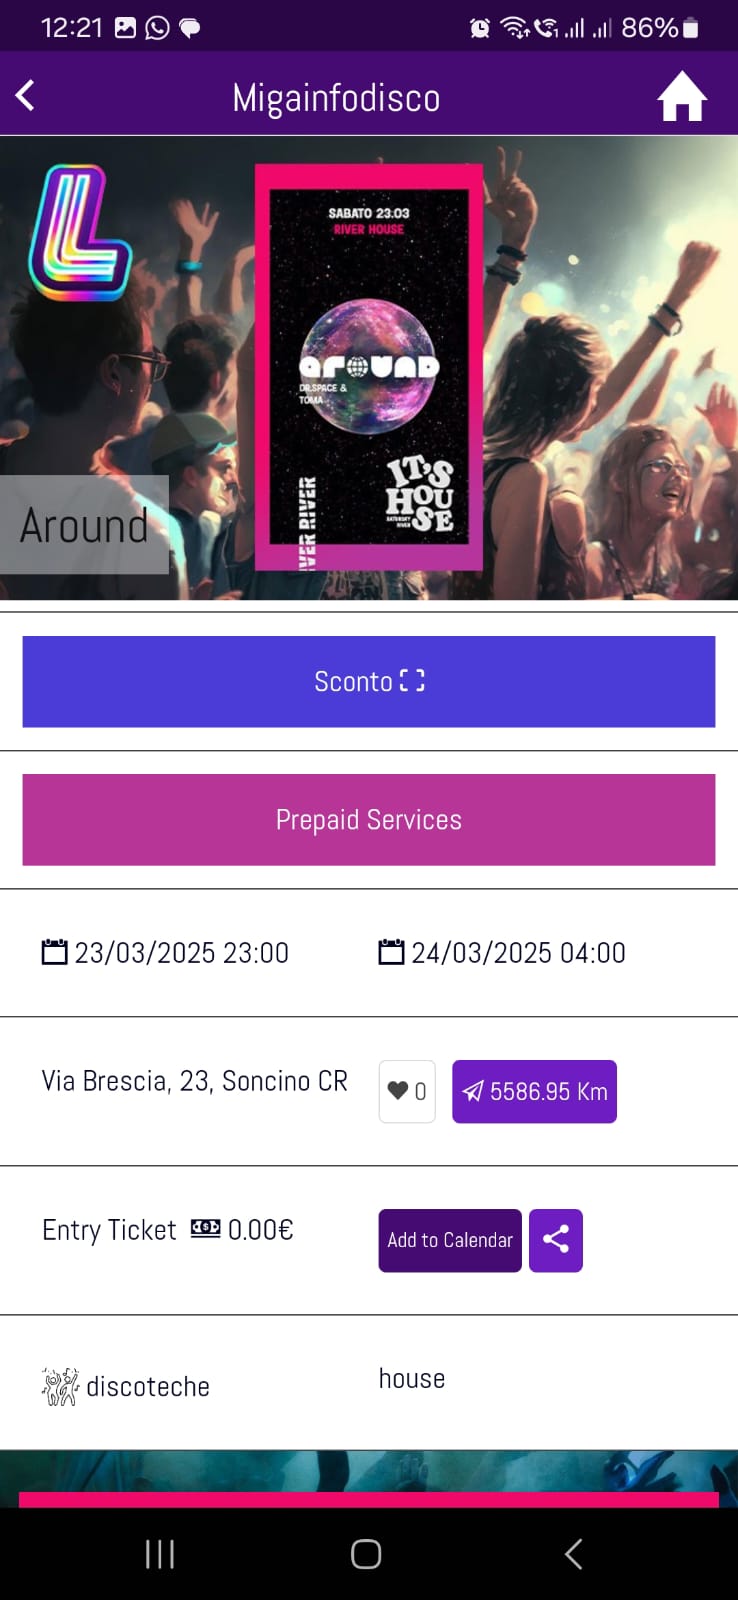
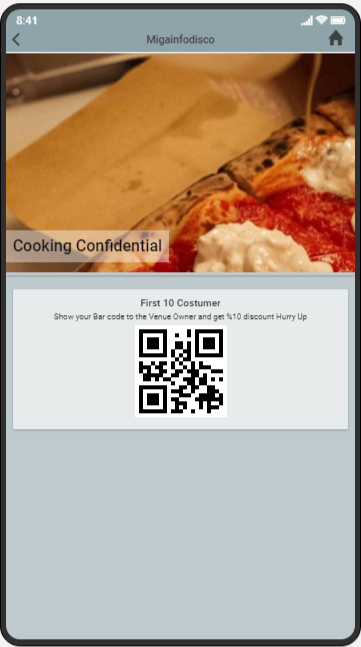
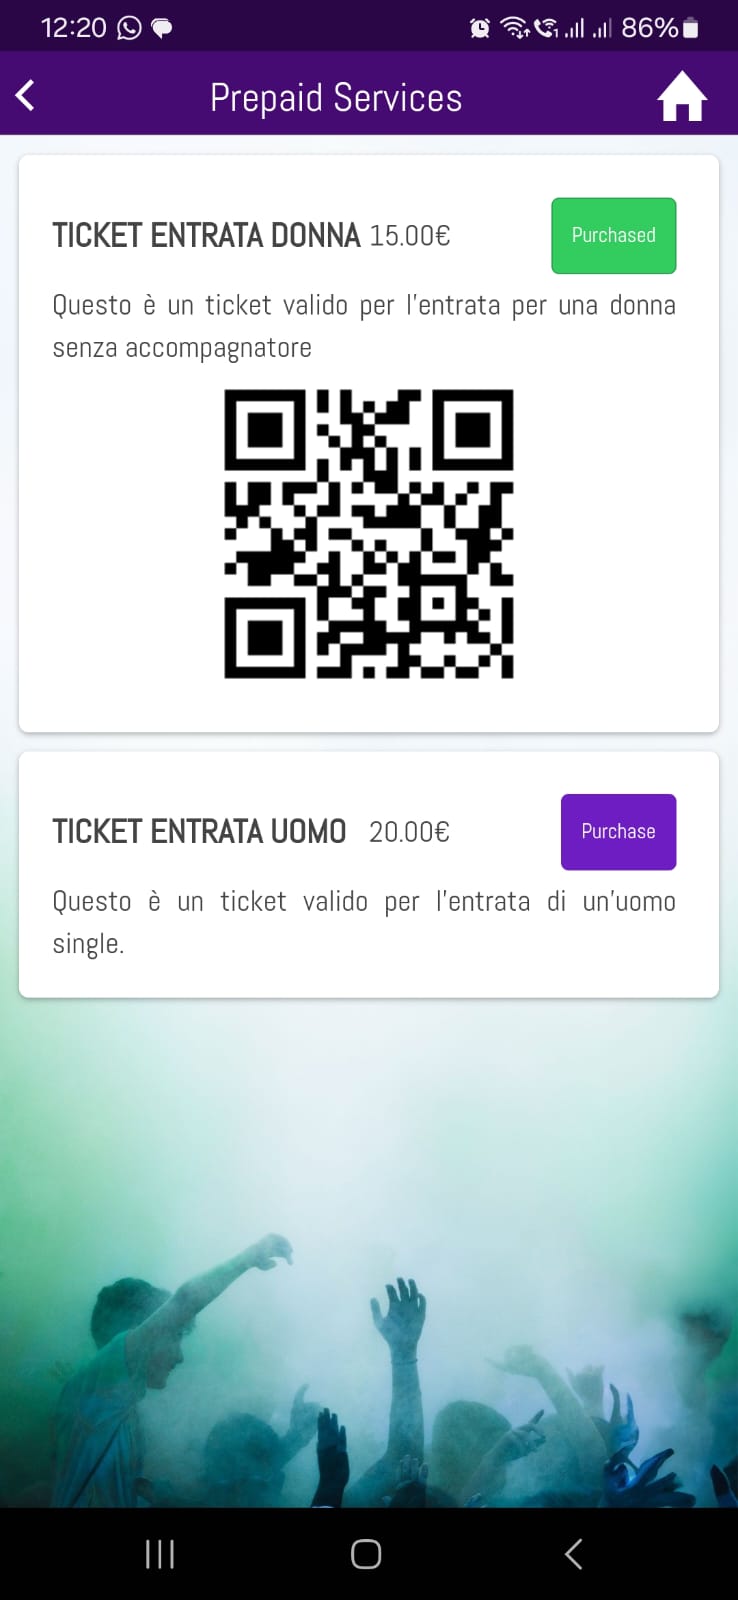
Customizable Card colors.
Users can Customize the color of card buttons, icons, text, and Backgrounds from the color tabs. The CSS of some buttons is shown in the settings tab which allows you to customize the app in a better and easier way.
- Cards Colors
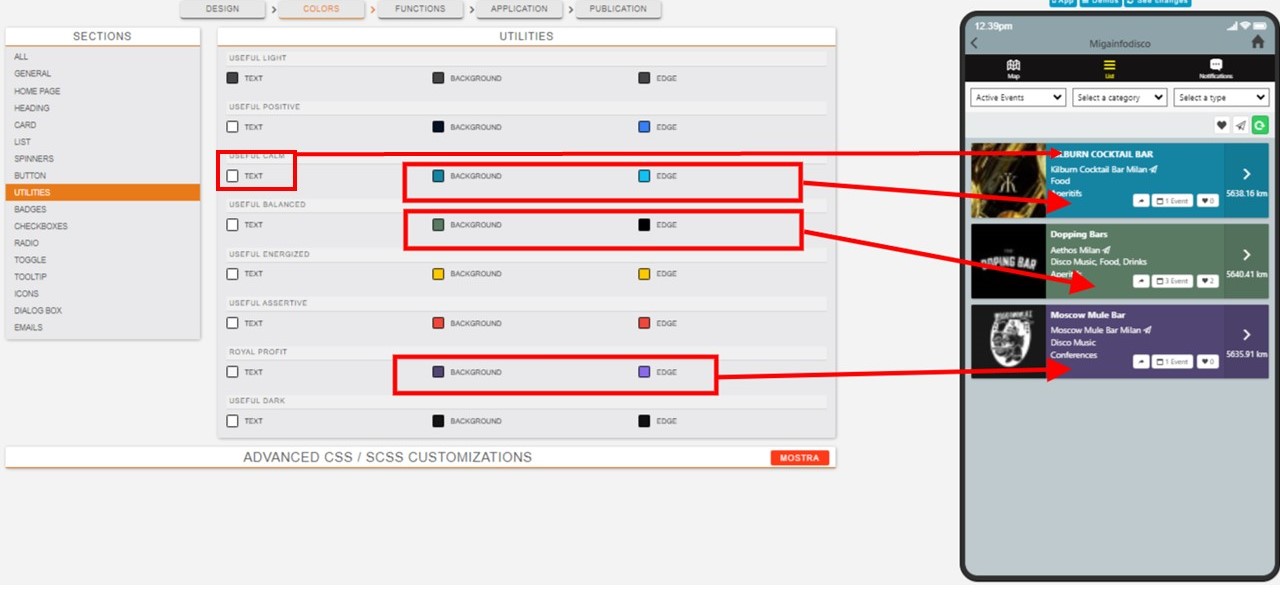
- Buttons Colors

Venue Owner App side:
The Venue Owner app side view is different from the normal user.
- Access to the QR Scanner for both promo and Prepaid Services.
- One Venue owner has Multiple Venues.
- Different reports of scanned Promo and Prepaid services
- Can Export the Sacaned Report in CSV form.

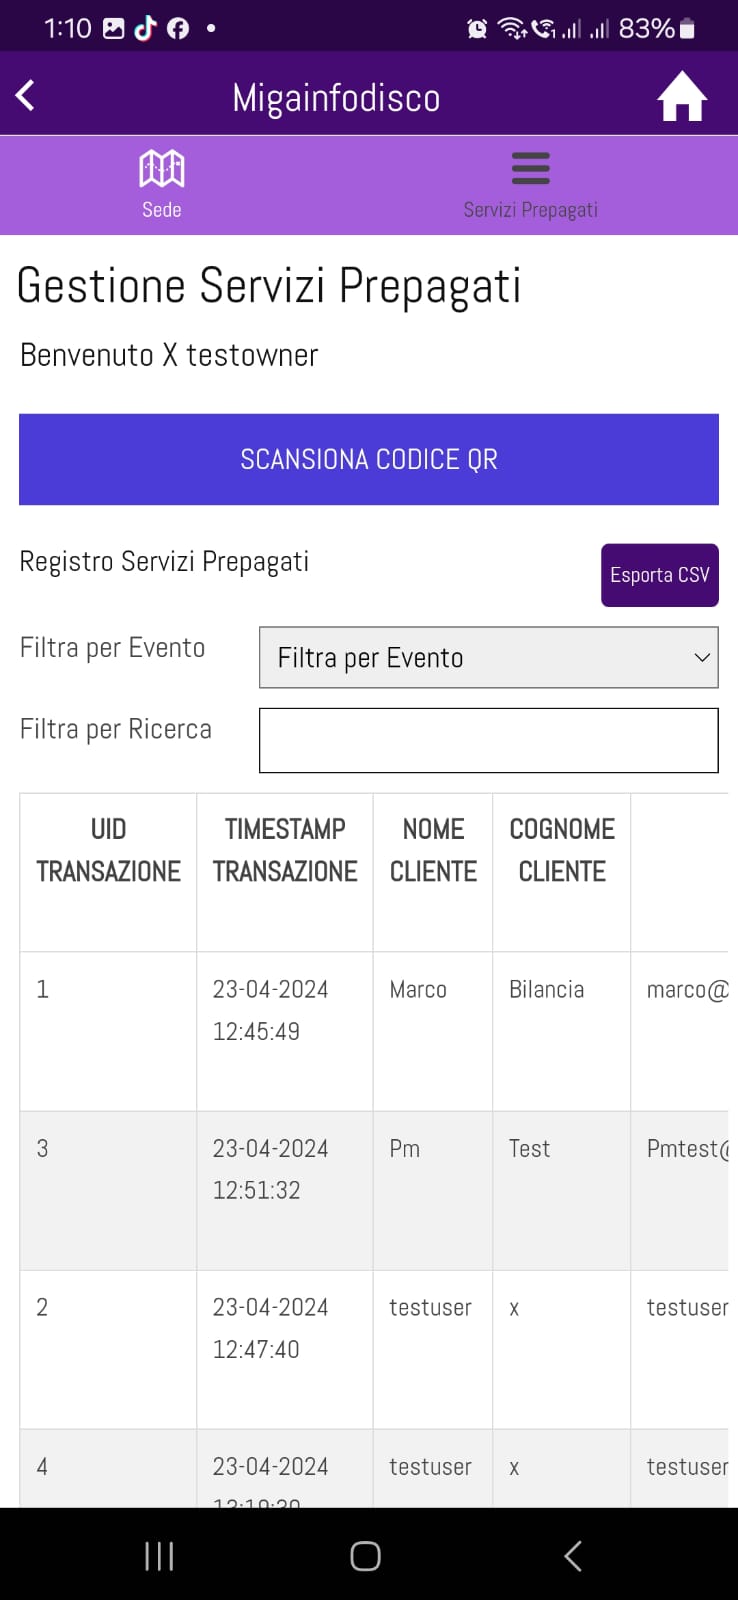
link: https://support.migastone.com/en/hrf_faq/migainfodisco/
MigaID
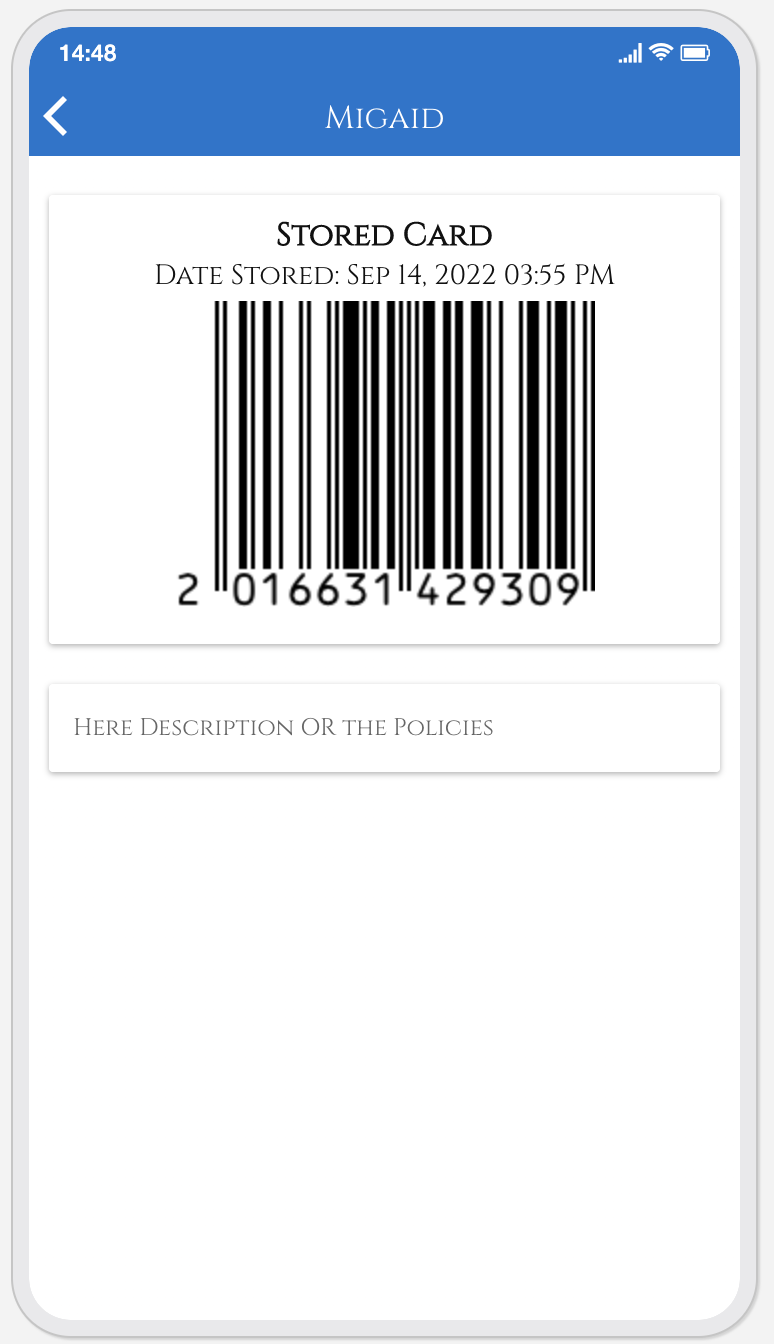
Orientation
This feature is specially designed to generate a unique ID for every register app user. Admin can set to display the user ID in app with EAN Code or QR Code. Also, the admin can show some info or policies in the feature page.
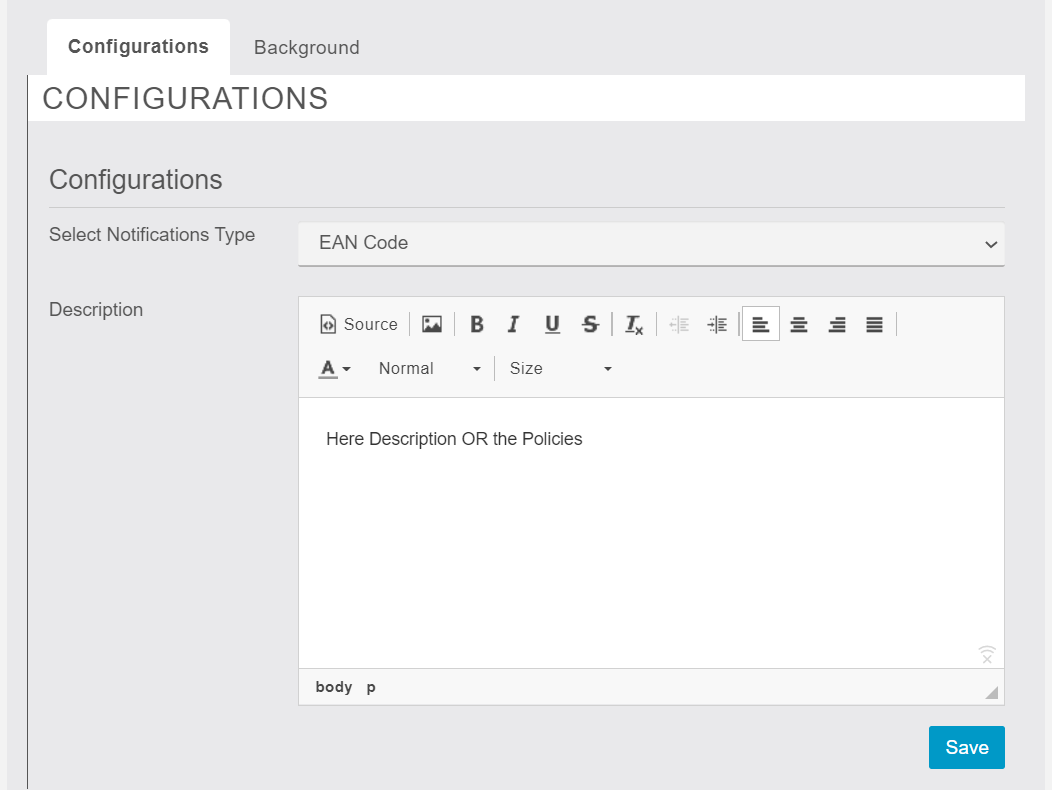
MigaIframe
With the MigaIframe feature you will be able to integrate and navigate the pages of your responsive website, directly in your Migastone app.
MigaIframe uses the iFrame html tag as the Source Code feature but has very powerful options to improve the navigation of the website pages , including any reserved areas. It is also possible to scan barcodes to facilitate the search for products in large catalogs.
First of all, the MigaIframe function must be added to the app. Just click on the icon  in the “Add Pages” area of the MAB.
URL and Query String Settings
Once you have added the MIgaIframe feature, or by clicking on the MigaIframe icon in “My Pages”, you access the setting screen:
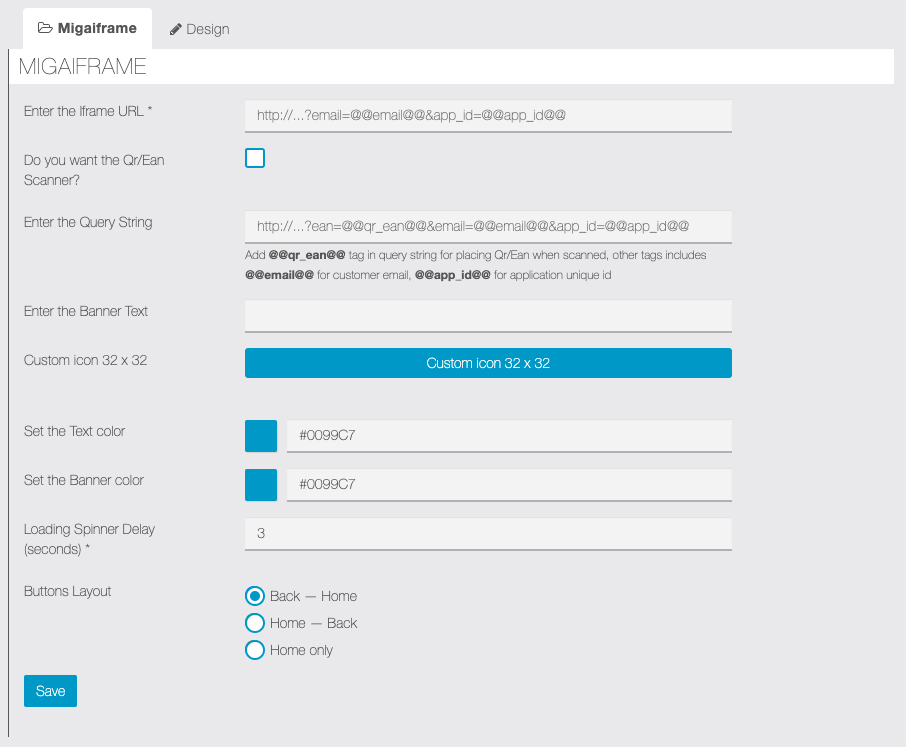
In the first field, “Enter Iframe URL”, we have to indicate the address of the website to be integrated into the app.
NOTE: This feature uses the IFRAME html tag. Some websites or web hosting may have restrictions that do not allow display the website or some pages through IFRAME. We recommend that you ask the provider or your webmaster for this. You can also check your WordPress website to make sure you are able to use iFrames. To do this, simply Click Here and add your login url into the box.
NOTE: The website must be created with a “responsive” technique, that is, it must be able to adapt to any screen size, obviously including those of the displays of mobile devices. If the website does not effectively implement responsive properties, the display of the site in the app may be non optimal or even the pages of the site may not be visible.
For sites that provide access to restricted areas we have set up the possibility of acquiring two parameters via query string: the email address of the logged-in user (email) and a unique id of the app (app_id).
Here is an example of a complete address that could be entered in the “Insert Iframe URL” field:: //www.mywebsite.com?email=@@email@@&app_id=@@app_id@@
NOTE: to use this feature it is necessary that the developers of the website have specifically implemented a system capable of acquiring the data passed by the app in the manner indicated above.
QR Code / barcode scan setting
By flag the option “Do you want the QR / Ean scanner?”, a banner will be enabled: this banner will be located at the bottom of the website’s display screen in the app.
In addition, the configuration page will enable the “Enter the Query String” field in which we have to enter the string provided by the website developers. The string can be populated with the qr_ean parameter which will correspond to the qrcode / barcode read via the smartphone.
Here is an example of how a complete address could be: //www.mywebsite.com/searchpage?ean=@@qr_ean@@
Also, the string can be populated with the two parameters to access reserved area, as mentioned in the previous paragraph.
Here is an example with an address that contains the qr_ean parameter, the email and the app_id parameters: //www.miositoweb.com/paginadiricerca?ean=@@qr_ean@@&email=@@email@@&app_id=@@app_id@@
Finally it is possible to customize the display by setting:
a customized icon for the code scan button, the color and text for the banner and the delay seconds after which the waiting spinner will appear.

Migalock
With Migalock you can manage access to the contents of your app in a more precise and flexible way, with a login page that can be customized according to your needs and your communication style.
To enhance MIGALOCK’s functionality, we propose incorporating an API feature for managing app users, which will allow for comprehensive user account creation and access control through specific parameters. This feature will enable basic user management with optional configurations to regulate access rights and streamline the MIGALOCK setup process.
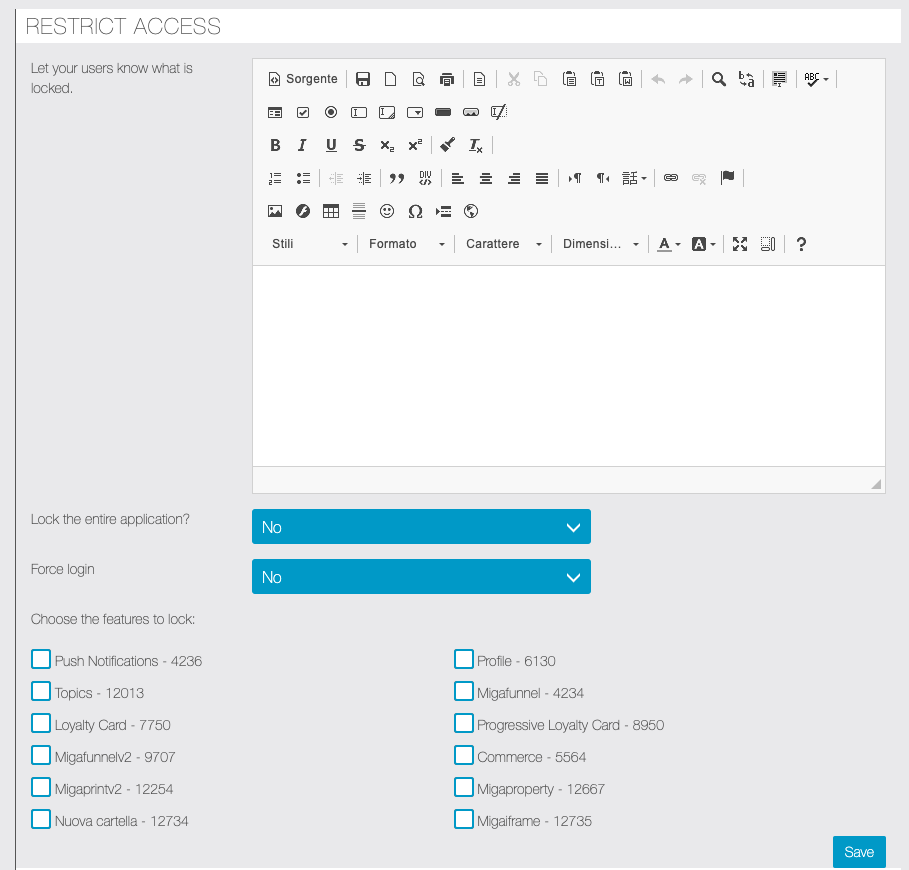
Lock the entire application
If you choose to lock access to all the contents of the app, you can choose two ways to allow access:

Allow access to all content as soon as the user registers or log in your app.
Or

Allow access only to certain users.
You will decide which ones, by enabling each individual user (after having registered) from the “Users” menu of the frontend panel:

You can search for the desired user, possibly using the search filter, then click on the “Edit” button next to the interested user.
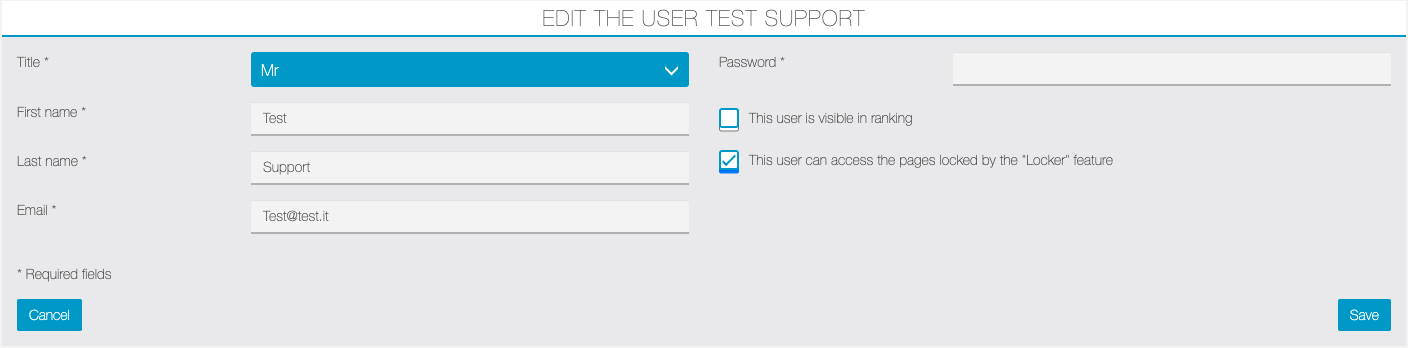
Enable the flag “This user can access the pages locked by the padlock feature” and click on the “Save” button.
Lock only some pages of the app
If you choose not to lock the entire app, you can select the individual pages to be locked.
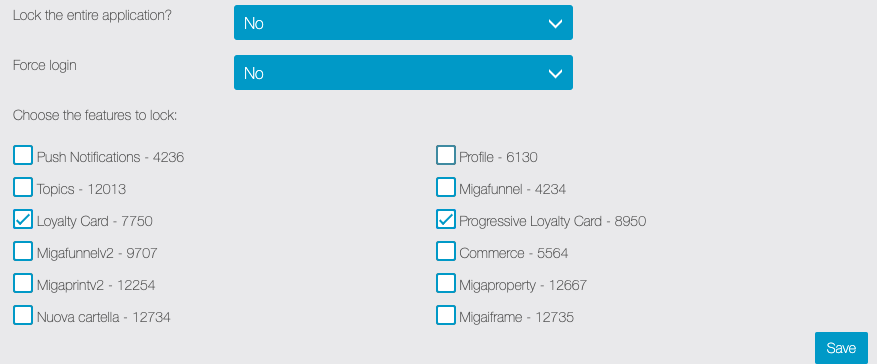
You can also choose to force the login anyway, so that users still have to login or register to see the contents.

Once the user has logged in, if he has been enabled to access locked contents (from the “Users” menu of the frontend panel, as explained in the previous paragraph) he will be able to see all the pages of the app, otherwise only those that are not locked .
Manage App Layout
You can customize the appearance of the login page by choosing between three different views:
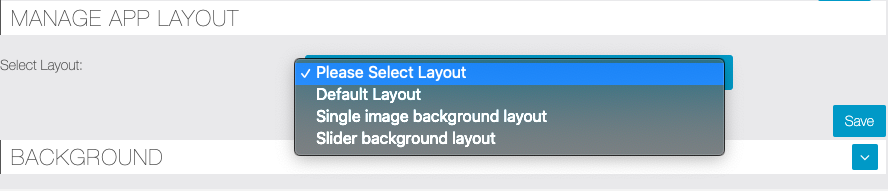
By choosing the default layout, the page will have clear but basic graphics.
By choosing the further options you can customize combinations of color and buttons appearance, as well as set a background image displayed on full screen.
The last option even allows you to create a slider of three different background images.
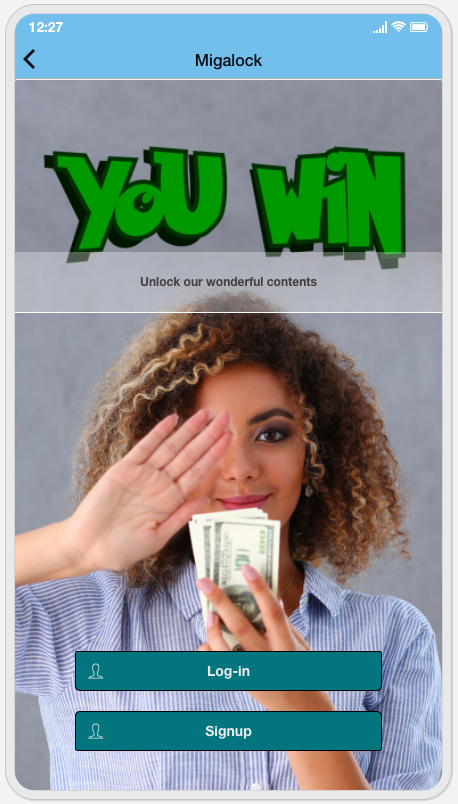
API Detail
- User Management via API
Create users with basic information (name, surname, email) and manage comprehensive account entries with optional parameters. - Access Control
Regulate access rights to specific app instances through an array that enables or disables instance IDs. - Dynamic Field Configuration
Implement dynamic fields based on the app’s setup, allowing additional options to be managed via the API. - Basic Setup Configuration
Configure fundamental aspects of MIGALOCK, such as app locking status, directly within the app. - Simplified Configuration Management
Restrict dropdown modifications to the MAB module while allowing modifications to the INSTANCE array via the API. - Privacy and Compliance Management
Ensure GDPR compliance with mandatory privacy policies and optional Cookie Agreements (CA).
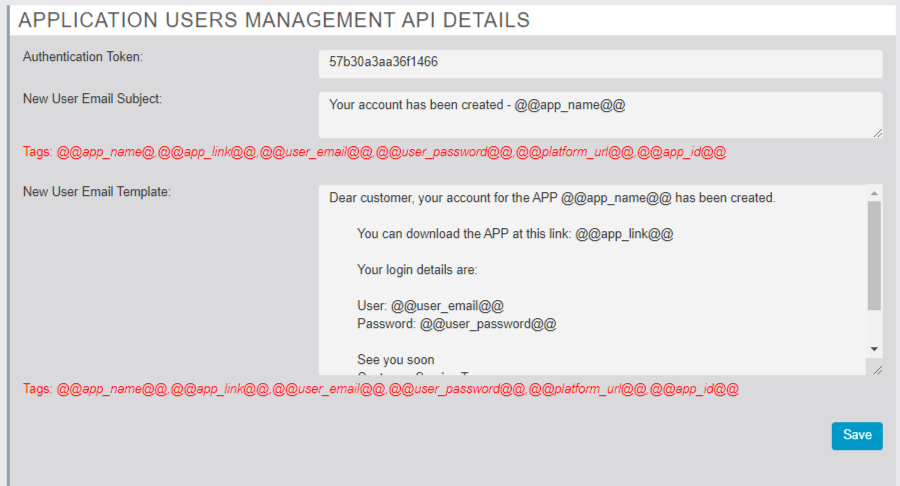
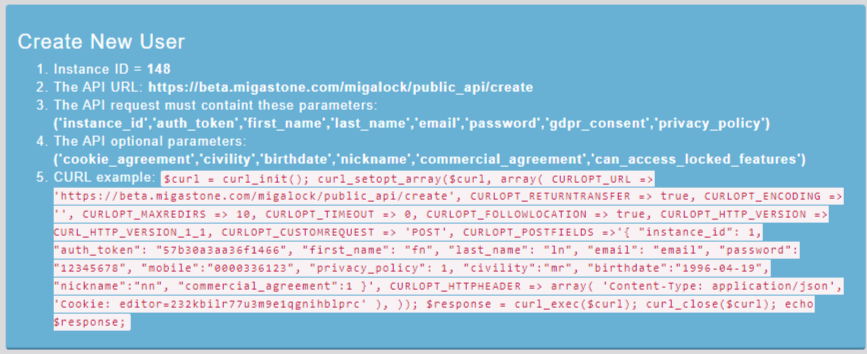
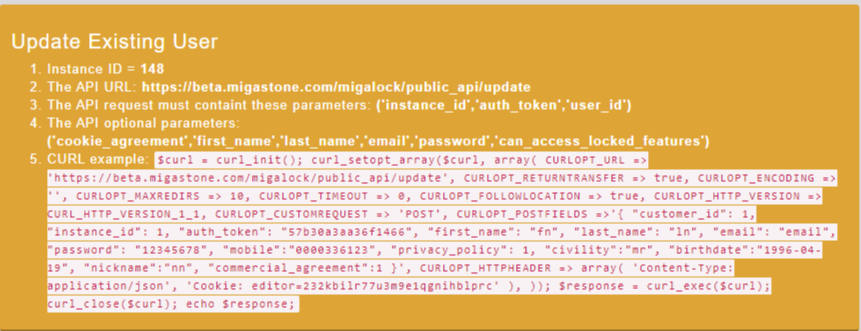
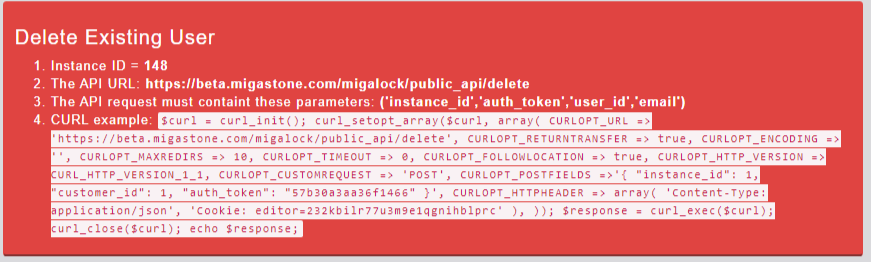
You can try this module on our demo installation https://demo.migastone.com
User: demo@migastone.com
Pass: demopass
Direct link: https://support.migastone.com/en/hrf_faq/migalock-feature-2/
Migaprint
IMPORTANT!
Migaprint is working normally with a GoodCom Printer, but now it allows also to emulate the printer and see the receipts directly on the APP if you are an ADMIN of Migaprint.
This mean that the APP owner can manage the orders with a TABLET or a PHONE directly on the APP itself.
Even if the printer is not present, it is mandatory to set always a PRINTER in setting page, if not the whole system cannot work properly. So please read careful this documentation and don’t miss to setup correctly the setting page with a printer.
MIGAPRINT now supports the SUNMI V2 device with internal printer.

There are no extra settings for this update. If the application is installed on SUNMI V2 device, it will automatically detect the SUNMI hardware and APP will use the internal printer. The receipt view and printing process is same.
You can also publish the application on SUNMI app store by following the given link documentation https://docs.sunmi.com/en/appstore/app-release/
Check our guide to SUNMI-V2 configuration.
MIGAPRINT now supports CommercePro module and Xdelivery.
Add Ecommerce and Migaprint features in the app
First of all, you have to add in your app both both Migaprint feature and an ecommerce feature.
Migaprint can work with Mobile Commerce feature, Commercepro module or Xdelivery module.
If you use Migaprint with Mobile Commerce, the Home Page of your shop is completely redesigned. On this page, users will be able to clearly see the main information and do actions needed to proceed with the orders: “Open” or “Closed” status of the shop, default waiting time for order fulfillment, button to log in without leaving the page and choosing preferred time for delivery by the customer.
To do this, the following steps must be performed in order:
- Add Mobile Commerce feature in your app but leave this page in DEACTIVATED status. NOTE: this step is mandatory to work with the new Migaprint function and mobile commerce feature combined.
- Configure Mobile Commerce feature as usual, you can follow our mcommerce feature manual. All settings can be made even if the page status is DEACTIVATED.
- Add MIgaprint feature in the app and proceed with its configuration as explained in the following paragraphs of this guide.
If you use Migaprint with Commercepro o Xdelivery, instead, users make order directly from ecommerce feature pages and have to be visible. You can leave also Migaprint feature visible (or locked with padlock) to allow Admins to manage orders from app. Otherwise you can set Migaprint feature not visible.
Settings
From the App Builder frontend, click on the Migaprint feature in “My Pages” section.
Then select the “Settings” tab to proceed with Migaprint configuration, this screen will appear:
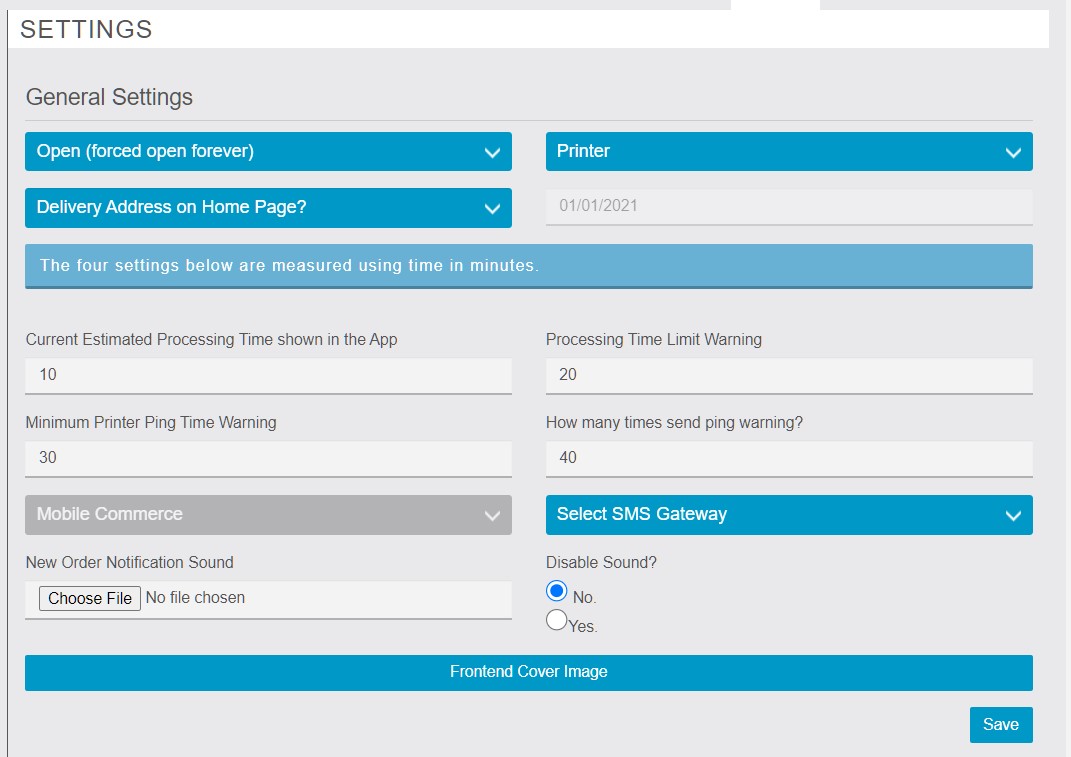
NOTE: First you need to make some preliminary settings. Only after this step all the settings of the Migaprint feature will be made visible.
Store opening and closing
The first setting we find on this page is the selection of the store opening or closing status.
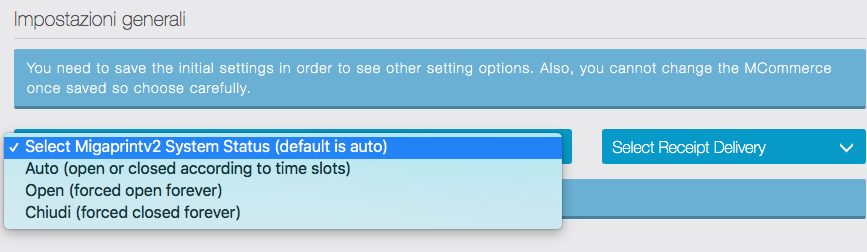
You can choose from three options:
- Auto – Open or closed according to time slots, as we’ll explain in following steps.
- Open – Forced open indefinitely.
- Closed – Forced closed indefinitely.
This selection can be changed later, as needed.
Receipt Delivery selection
You can choose to send orders to the Migaprint printer or alternatively receive them and manage IN APP. Select the preferred mode from drop-down menu:
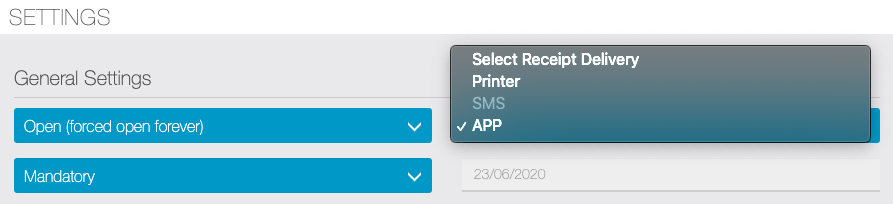
This selection can be modified later: for example, in the event of temporary unavailability of the printer, you can choose to manage orders IN APP.
At the end of this guide we will show you how to manage orders directly from your APP.
Shipping address on Home Page
Only if you use Migaprint with mobile commerce: It is possible to ask user to choose the shipping address directly on the Home Page, before proceeding with the order. This setting can be hidden (the user will choose the shipping address when checking out), optional (useful for those who also take away) and mandatory.
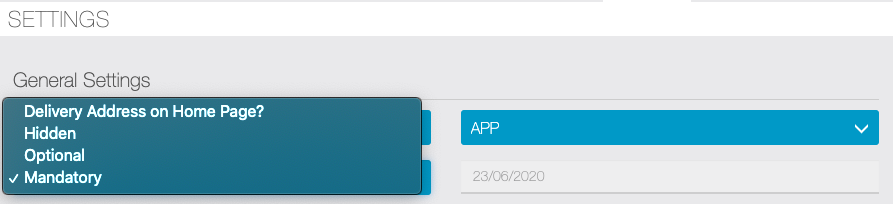
Order Fetch date
It is necessary to set a start date. From that date the orders will be acquired by the MIgaprint module.
Note: This setting makes it possible to introduce the Migaprint feature in apps where the Ecommerce feature is already in use: Migaprint will only process orders received from the set date.
WARNING: The date CANNOT be changed.
Delivery times and system notifications

Only if you use Migaprint with mobile commerce, you have to set:
- Current estimated processing time showing in the app – Will be displayed on the Shop home page.
- Processing time limit warning – If an operator does not manage the received order within the specified time, an email will be sent to the manager.
- Minimum printer ping time warning – the printer performs periodic checks to verify the connection with the system. If no reply is received in the specified time, an email will be sent to the manager.
- How many times send ping warning? – How many times you want to send the warning that the printer is disconnected from the system.
Ecommerce feature selection
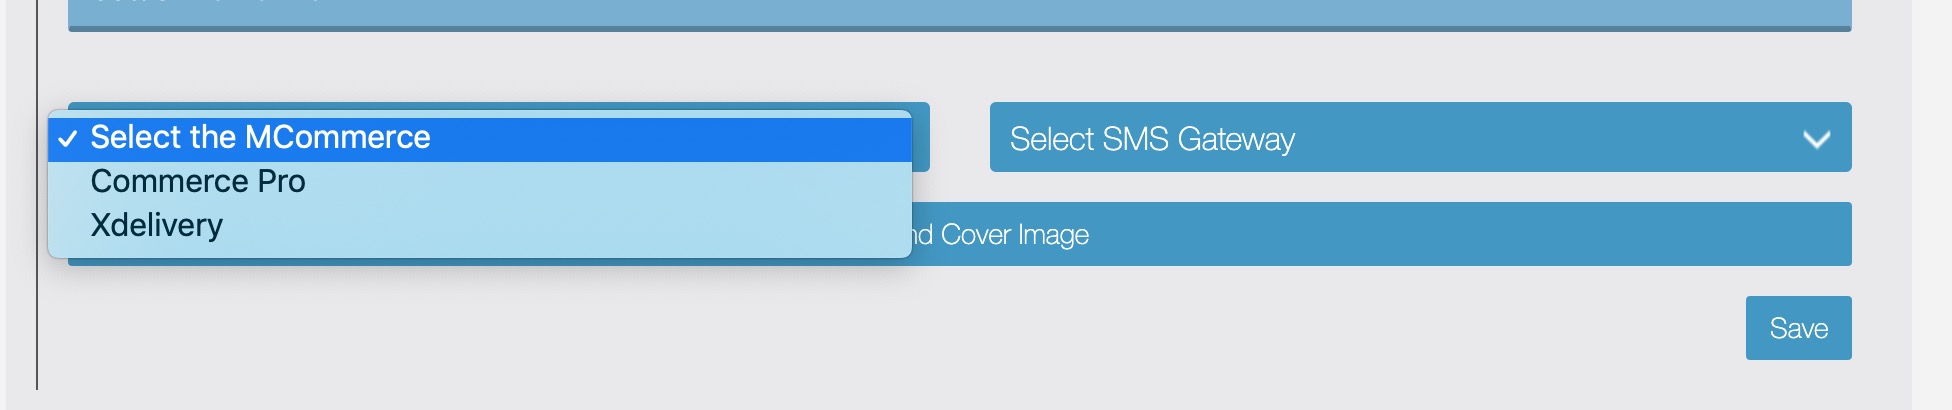
This setting is needed to connect the Ecommerce feature with the Migaprint feature. NOTE: once the selection has been made, it will no longer be editable. You have to add in your app and configure ecommerce feature previously, in order to can find and select in this dropdown.
Right now CommercePro and Xdelivery are supported. To see the options in the list you should add first the feature to the APP and enable it correctly.
WARNING: This selection CANNOT be changed.
SMS gateway selection
Optional: if you want to receive the order via sms then you have to choose the system with which SMS sending will be managed and set the API keys.
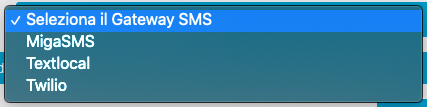
New order notification sound (alert)
On the “Orders Queue” view in the application where the new orders are reloaded every minute, For new Orders alert add “.mp3” sound. If the sound is not uploaded there is a default sound. You can also disable the notification sound with the given option.

Cover Image

Only if you use Migaprint with mobile commerce: with this setting, you can optionally upload an image that will appear on the home page of your store.
Click on the Save button to save the settings made up to this step.
NOTE: the setting sections we will explain below (printers and time slots) will be visible only after saving the settings described above.
Printers Management
This section will be visible only after saving the settings described in the previous paragraphs.
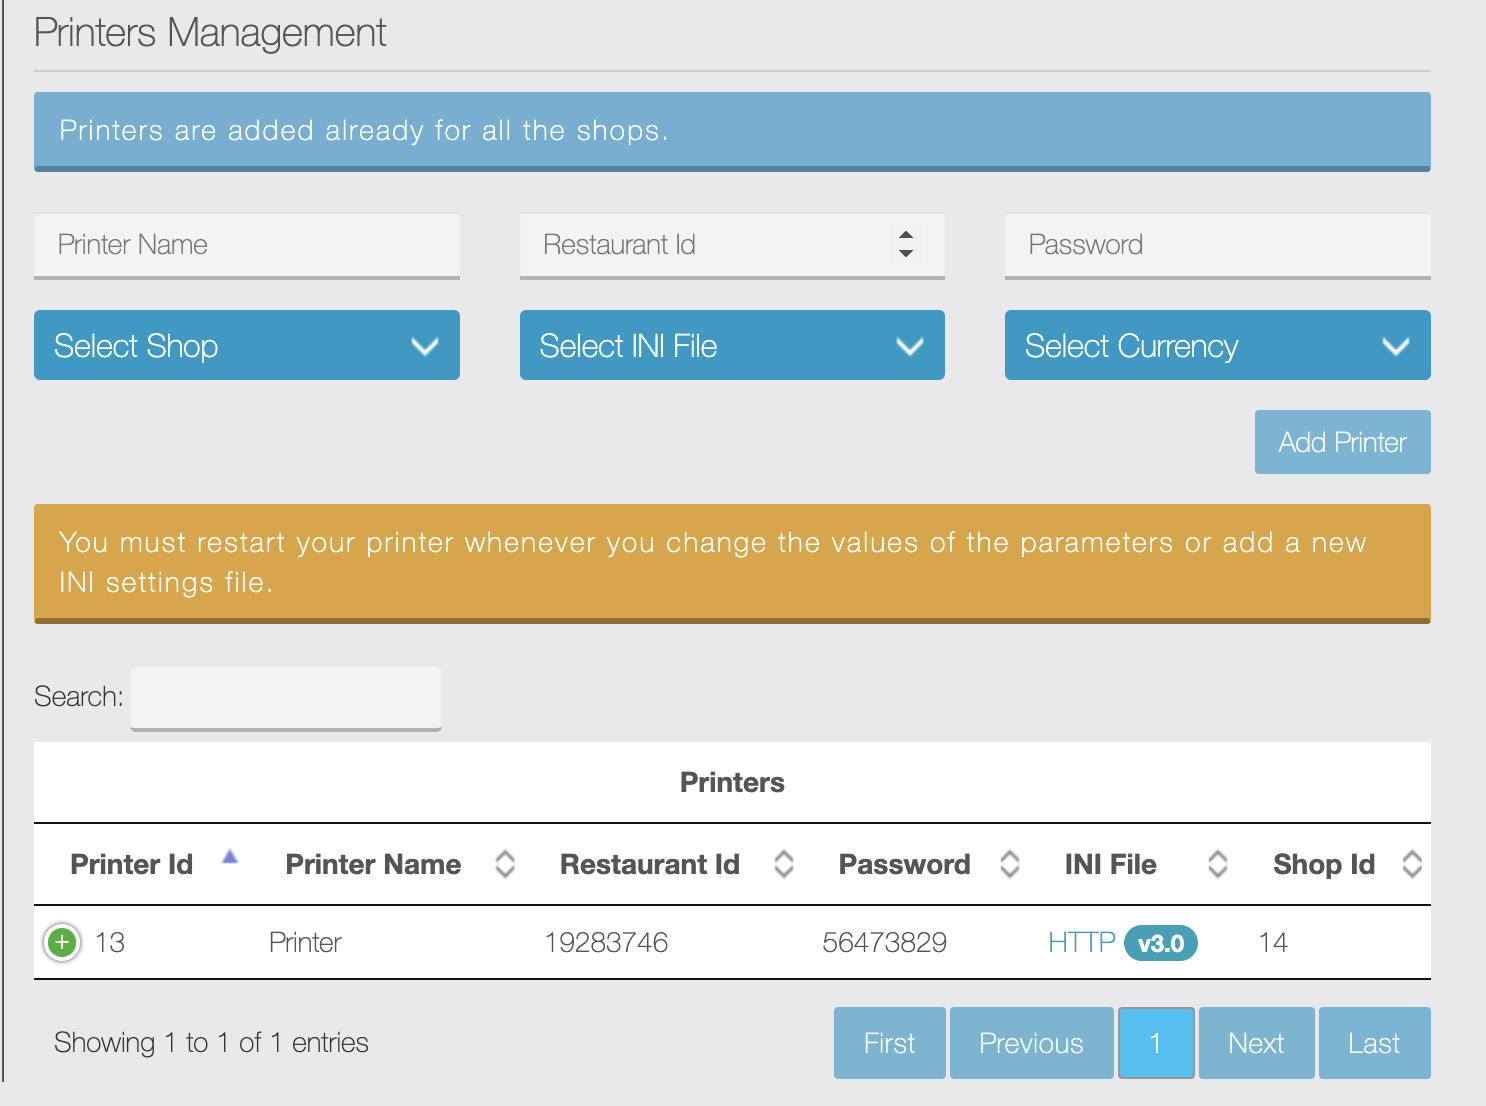
Set up a Migaprint printer for each shop added in the ecommerce feature. These shops will be in the “select shop” drop-down menu.
WARNING: in order to manage orders of a shop with migaprint you have to set a printer in this section, even if you choose to manage only IN APP, even if you don’t use printers.
It is possible to assign any name to the printer, while “Restaurant id” and “Password” must be codes consisting of 8 characters, numeric only. Use codes of your choice, they are only necessary for the printer configuration.
From the “Select INI File” drop-down menu choose version 2.0 or 3.0 depending of your Migaprint printer series. Check our guide to printer configuration.
Then click on “Add Printer” button: the added printer will be visible in the “Printers” list below.
Proceed in this way to connect printers for all your shops.
In the printers list there are two active links:
- Delete – to delete the added Migaprint printer if necessary
- FILE – to export the INI file needed to printed configuration
Time slots setting

Enter the opening time slots, for all days of week in which the store will be open. You can have more than one time slot for each day.
NB: these timeslots are used only if you have choose mobile commerce. Commercepro and Xdelivery have their own timeslots settings.
Notifications
From this section it is necessary to set in which way the order will be notified to the customer and the Opening / Closing labels that the customer will see in the shop home page.
WARNING: you have to proceed with this steps only in the order shown below.
Shop Notifications (processing time text)
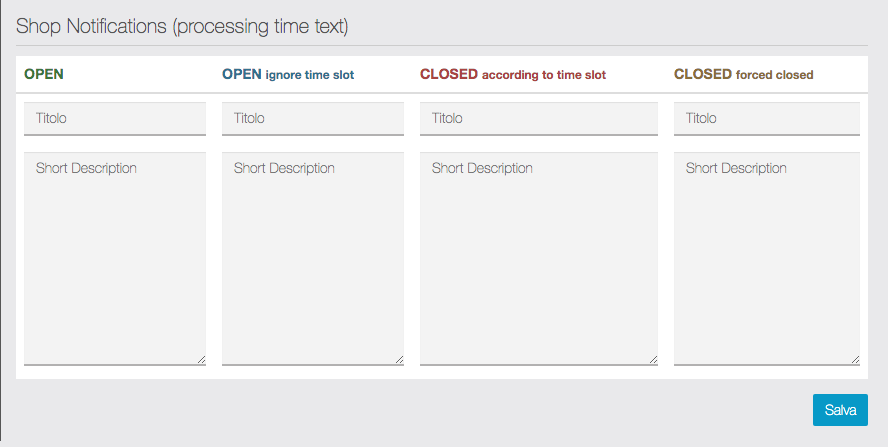
This section is located at the bottom of the “Notifications” tab screen. You have to add the text that users will see on the Store home page. It is mandatory to add some text in all four fields which will be displayed:
- When the store is open according to time slots
- When the store is open by manual setting (please read “Settings” chapter of this guide)
- When the store is closed according to time slots
- When the store is closed by manual setting (please read “Settings” chapter of this guide)
Notification Templates
This section completes the settings of “Notifications” tab. You have to choose for each type of notification (identified by an item in the drop-down menu) to whom to send the message and you can customize the text of those messages.
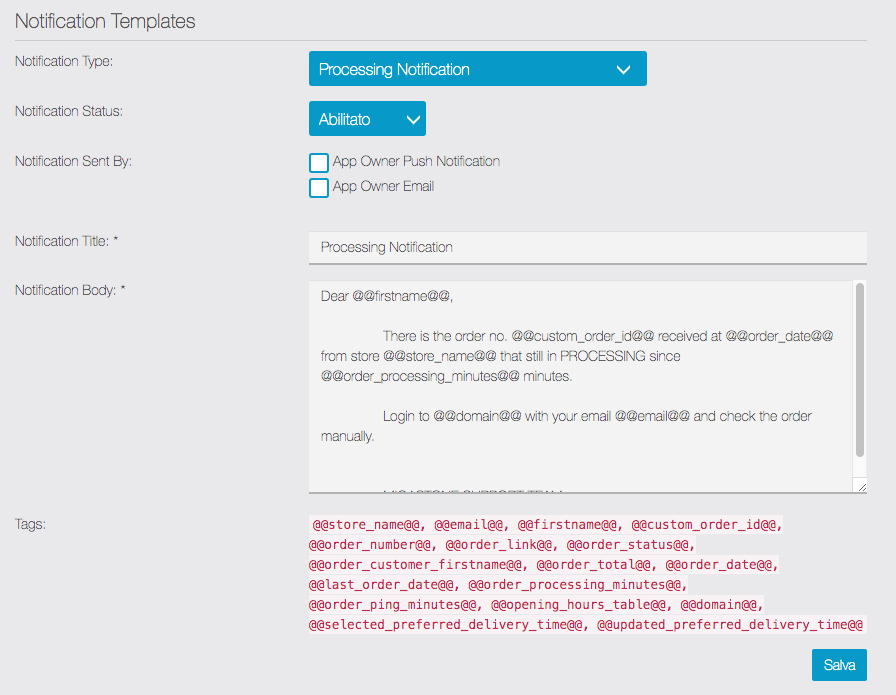
The message types in the drop-down menu are:
- Processing Notification: the message sent when the manager accepts the order
- Ping Notification: message sent (to manager only) when there is a connection issue with the Migaprint printer
- Suspended Notification: message sent (to manager only) if the order is suspended for any progressive misalignment
- Refund Notification: message sent to notify that the order was rejected as payment was not accepted (for paypal payment)
- Order Status Notification: message sent to notify the new order status
- Preferred Delivery Time Notification: message sent if the manager decide to change the delivery time chosen by the customer
- SMS: active only if you have chosen SMS as the order receipt mode (see previous paragraphs)
Then select the sending options for each message (at least one option must be ticked for each type of message) and customize the text if necessary. The tags displayed can also be used.
WARNING: it is necessary to make the desired settings for all message types, selecting them from the drop-down menu. Press the SAVE button only after completing all message settings.
App Owners / Admins
Opening this tab you can see the list of registered users in the app:
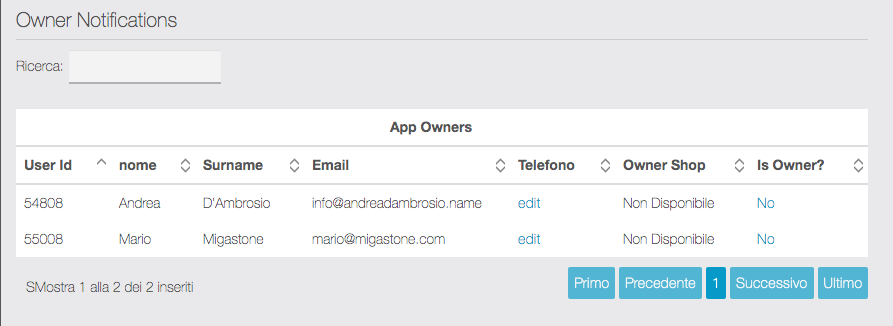
NOTE: if no app user has registered yet, the list will be empty. The business owner (ie the one who will receive the orders) must be registered in the app before being able to proceed.
MIGAPRINT needs mandatory at least one ADMIN, if not the system is paused and a red warning is showed on the screen
Then identify the Owner in the list and click on the “NO” link on the “Is Owner?” column on the corresponding row. By doing this the screen will be reloaded to apply the change, so click again on the “Notifications” tab to return to this page. Now the Owner user will be highlighted in the list like this:
![]()
The step just made is mandatory in any case. If you have chosen to receive orders via SMS, you must now enter the mobile phone number of the Owner. We recommend entering the number in any case in order to be able to manage orders even for example without a printer.
To enter the owner’s mobile phone number, proceed as follows:
- Locate the Owner in the list (the one already identified as “Owner” with the step just described.
- In the “Phone” column click on “Edit” and enter the mobile phone number including the international prefix.
- To save the setting click on “Enter” button on the keyboard. By doing this the screen will be reloaded to apply the change, so click again on the “Notifications” tab to return to this page.
Orders Status
This screen will display the orders placed by customers and you can manage their progress status.
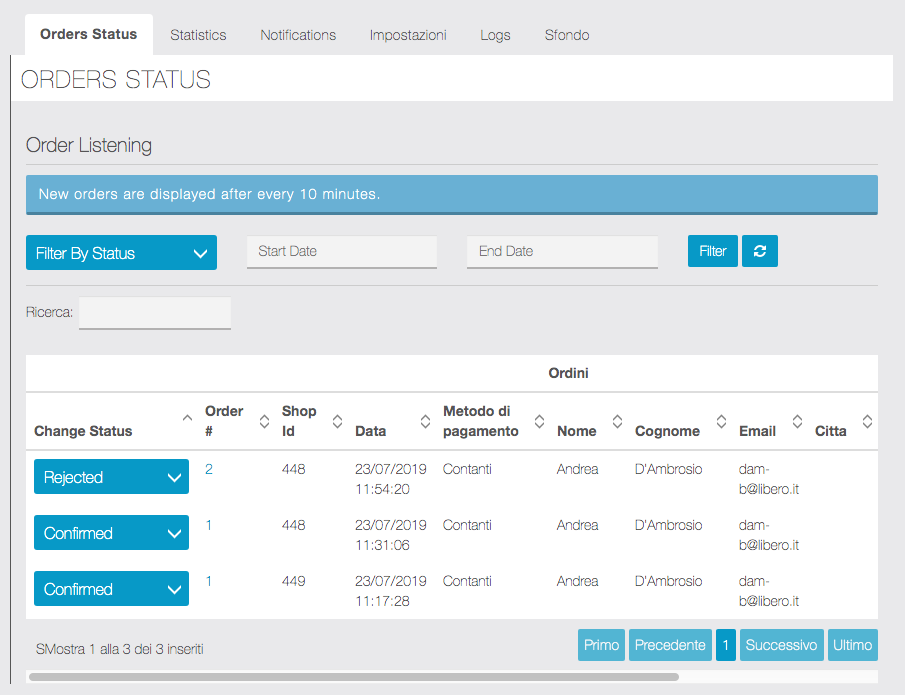
The main order statuses will be managed automatically during the progress, based on the actions of the operator to the printer, and according to the type of payment chosen by the customer (for online payments). The manager can also act manually to change the status of an order, selecting it via the drop-down menu.
WARNING: orders are processed by the servers every 10 minutes and will therefore be displayed in the list on this screen only after processing.
You can search for orders using filters and use the button![]() to refresh.
to refresh.
Statistics
This screen will display analytical data useful for store management.
Logs
This screen, for technical / diagnostic use, will show the log of operations managed by the system and the orders managed by the Migaprint printers.
API
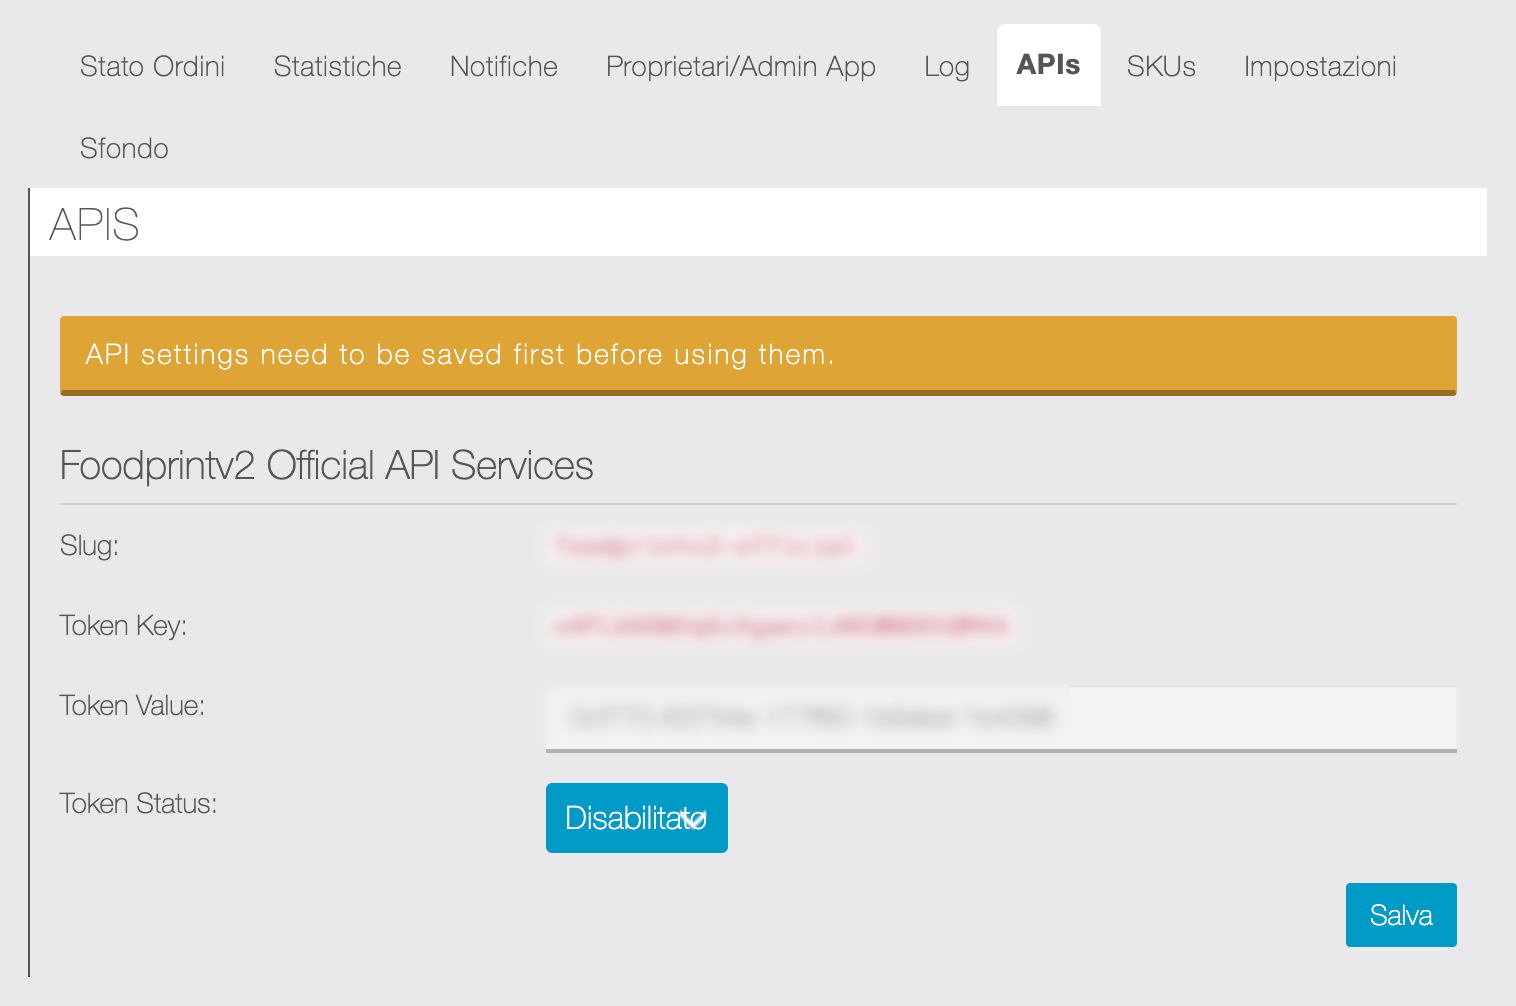
Tou need to save settings from this tab in order to use the API.
Click here for complete MigaprintV2 API documentation.
Background
Finally, as with other features of the Migastone apps, you can eventually upload a custom background image.
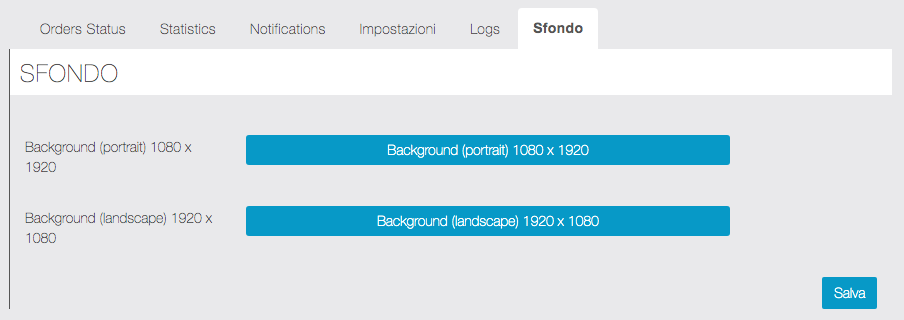
Cron Job Settings
With our MigaprintV2 module you need to run a Cron Job on the server where your Mobile App Builder is installed.
Here is an example: /usr/local/bin/curl –silent //urlofyourmab/migaprintv2/public_cron/run > /dev/null
Cron schedule have to be set every minute.
Please note that the part of the string “/usr/local/bin/curl” can be different depending on the type of server and make sure to replace the first part of the url in the example above (urlofyourmab) with the url of your MAB platform. If you have no knowledge of the cron job settings on the server side please refer to your sysadmin.
Display and manage Orders from the App
To view and manage the status of orders directly from the APP, the owner / manager must register in the app and be enabled as App Owner / Admin (see in the previous paragraphs of this guide).
WARNING: if you have already logged in and later you set your user as Owner / Admin of the app, remember to log out and then login again for the first time. Otherwise you will not see the administration options explained below.
By accessing the home page of the Migaprint feature from the APP, the owner / operator will see a screen similar to the following:
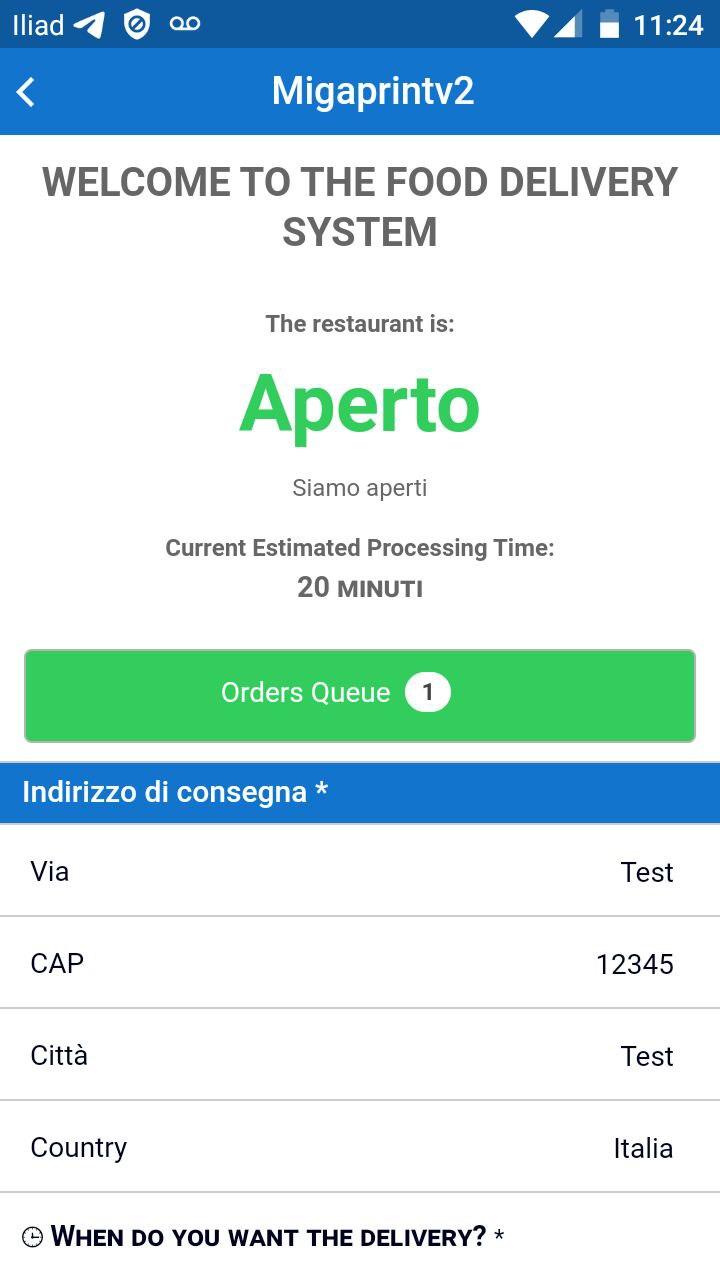
Facendo click sul pulsante “Coda Ordini” avrà accesso alla lista degli ordini ricevuti:
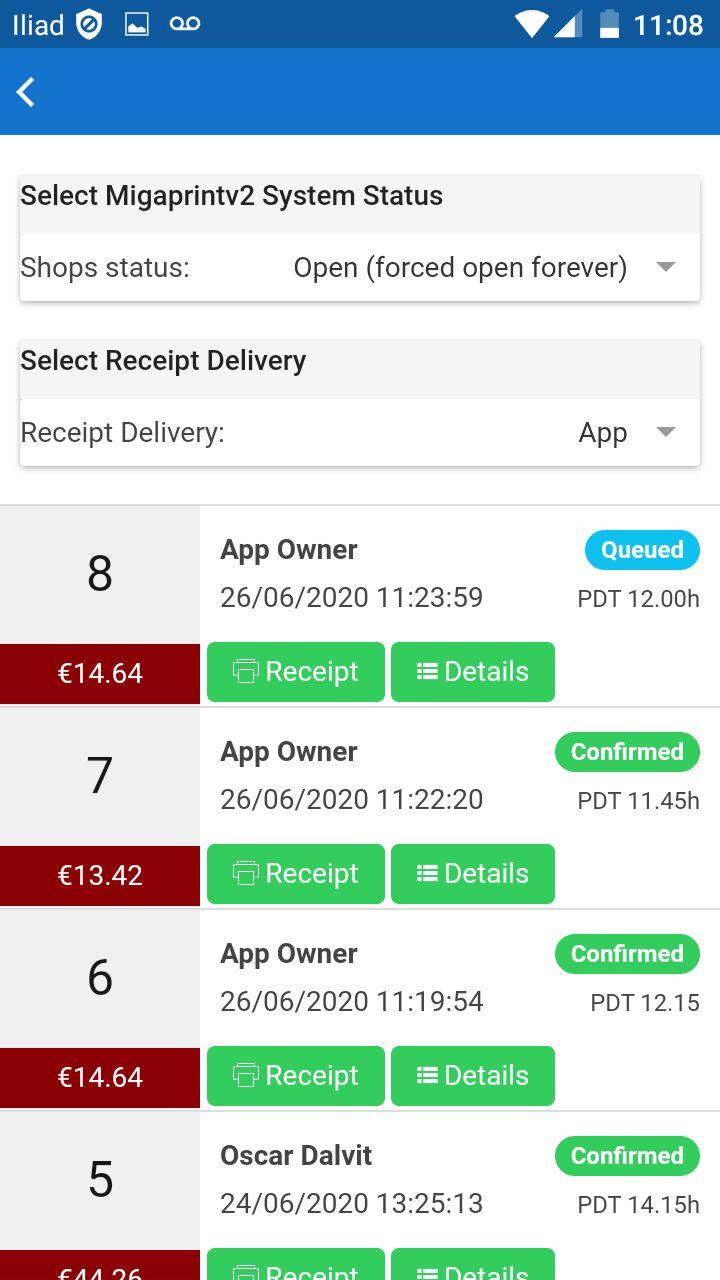
From this page, first of all, it is possible to Open/Close the shop and select the receipt delivery, Printer or App, as needed.
Also, the main Order informations is displayed in the list:
- Prder Number and Total
- Client’s name
- Order Date and Time
- Order status
- Preferred delivery time (PDT)
The detail of the single order can be viewed by clicking on the “Details” button.
Then, by clicking on the “Receipt” button in correspondence with the order to be managed, you can view the order and accept / modify the delivery time / reject the order:
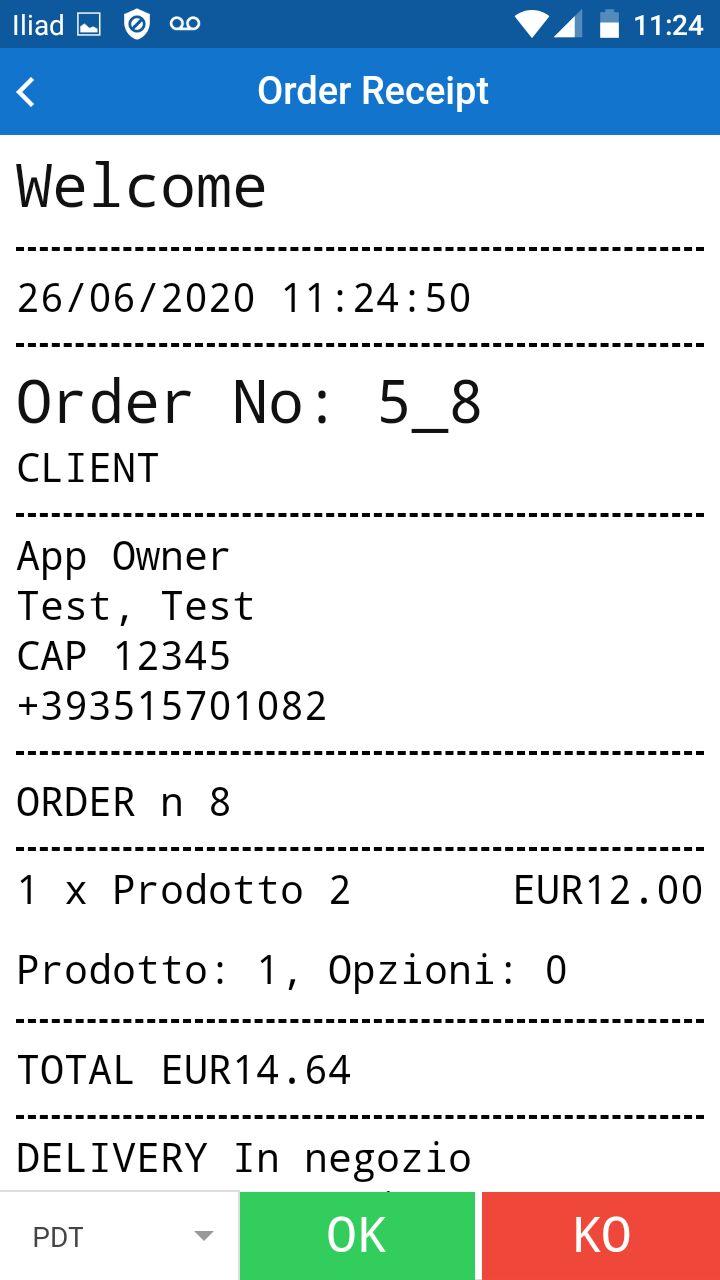
Table ordering
If you use Commercepro you can also set any of your stores to take orders from customers sitting inside the restaurant. The process is same but a simple variation is that instead of a selection of prefered delivery time and other stuff now the customer will have to enter the table number on which he/she is sitting.
On the receipt, order details, and on all other place owners will be able to see the table number instead of prefered delivery time and address.
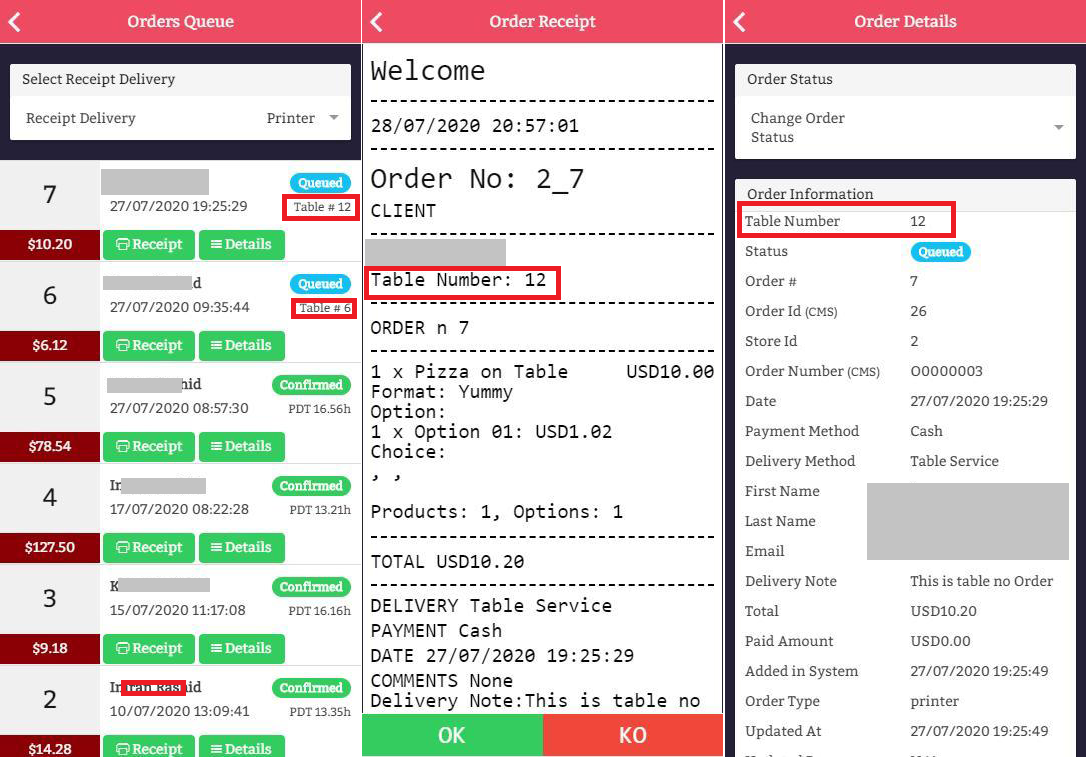
Demo Migaprint feature
To try all the Migaprint configuration options you can access our demo platform: https://demo.migastone.com
User: demo@migastone.com
Pass: demopass
SETUP OF THE FEATURE FOR THE FINAL USER APP
Mcommerce Siberian shop hasn’t management of DELIVERY TIME and so we should collect this data before starting any ordering process.
In this case, MIGAPRINT is the starting point for the order process.
You should set it as VISIBLE on the system, change the name to SHOP or as you want, and keep HIDDEN the Mcommerce Siberian feature.
The user will enter in MIGAPRINT feature, see the cover, select the Preferred Delivery Time and finally Migaprint forward it to Shop feature to complete the order.
For CommerePro and Xdelivery we don’t suggest to work in this way. These shops are able to collect already all the data and delivery time necessary.
The starting point for orders should be these modules, and migaprint will fetch the orders automatically from them.
In this scenario the MIGAPRINT feature on APP side is used and accessible only from the ADMIN so we suggest these options:
1. Put MIGAPRINT feature in a subfolder, call it “Setting” or similar and finish. This is the easiest way
2. Put MIGAPRINT hidden from MENU but enabled. Use the DEEP LINK feature to add a small link somewhere in a CUSTOM PAGE, and you teach the APP owner where to find this small link. This is a sure more elegant way to hidden totally to the final user the feature from the menu, but allows the App owner to access it.
Migaprint – Printers Settings
In this guide you will find step-by-step instructions to configure all printer models compatible with Migaprintv2 module.
SUNMI-V2 Settings
1. Turn on the printer by pressing the power button on left side of SUNMI-V2 printer.
2. next there will be Location consent, touch “Agree” Button.
3. than touch the arrow button (>).
4. allow location and content access.
5. select the language and press next.
6. select time-zone and press next.
7. Setup wifi network informatio by selecting your wifi network option and press next.
8. than press start configure button.
9. enter your email and press “send activation code” button below.
10. access activation code from your email and enter.
11. add new password and press next.
12. press enter device button.
13. now install your app from Playstore in the printer.
14. Open the app and create a new user on the app from Account page.
15. User you created have to be set as “Admin” on the Migaprint setting (see Migaprint manual).
16. Keep your app always open on the printer, open Migaprint page then click on “order queue” to manage orders.
17. you can cange the settings of SUNMI v2 inner-printer from settings application of device in “InnerPrinter” menu.
HOW TO MANAGE FONTS
On sunmi device
1. Open the settings
2. Goto innerPrinnter menu/tab
3. Goto “print font compatibility mode”
4. Turn on the “font compatibility mode”
5. Select “sunmimonospaced 1.0”
HOW TO INCREASE DENSITY
On sunmi device
1. Open the settings
2. Goto innerPrinnter menu/tab
3. Goto “printer density” and increase the density to higher percentage.
https://support.migastone.com/en/hrf_faq/migaprint-printers-settings/
MigaPushAPI
Orientation
This module is very simple, and allows external applications to:
- send individual push notifications via customer email
- fetch user list
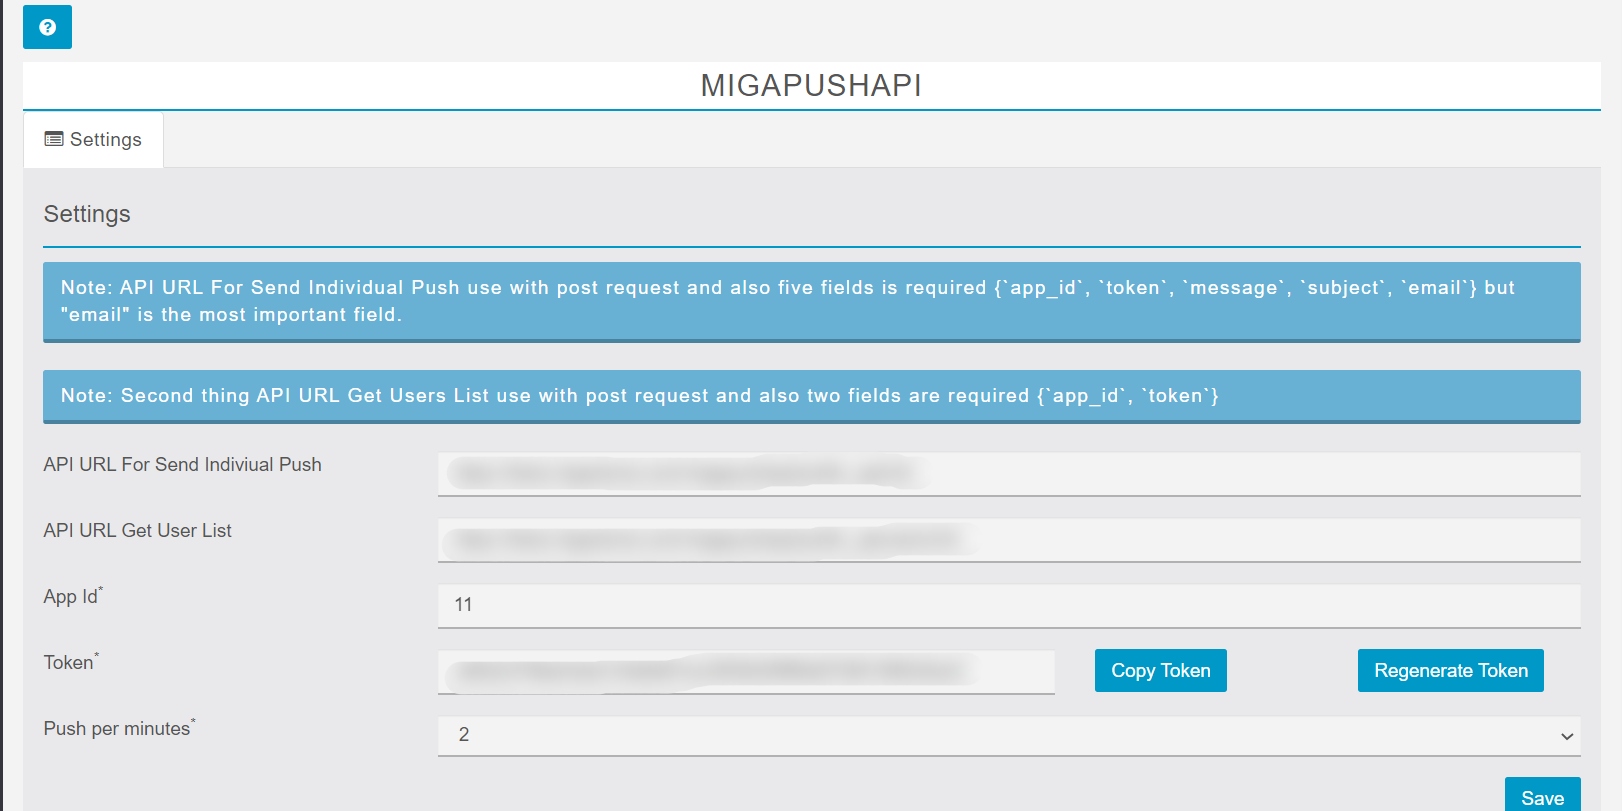
Settings
You can access the Settings tab from app builder frontend. From Vertical menu on the left, click on Module section and so “Miga Push Api”.
You have to set only the maximum per minute sends a push to the customer. Also, user can regenerate token if any need.
Note:
- API URL For Send Individual Push use with post request and also five fields are required {`app_id`, `token`, `message`, `subject`, ’email’} but “email” is the most important field
- API URL Get Users List use with post request and also two fields are required {`app_id`, `token`}
User List
Description
Fetch all the users available for sending Push notifications.
$endpoint = "https://www.domain.com/migapushapi/public_apiusers/init"
Request
| Param | Type |
|---|---|
| app_id | int |
| token | string |
Response
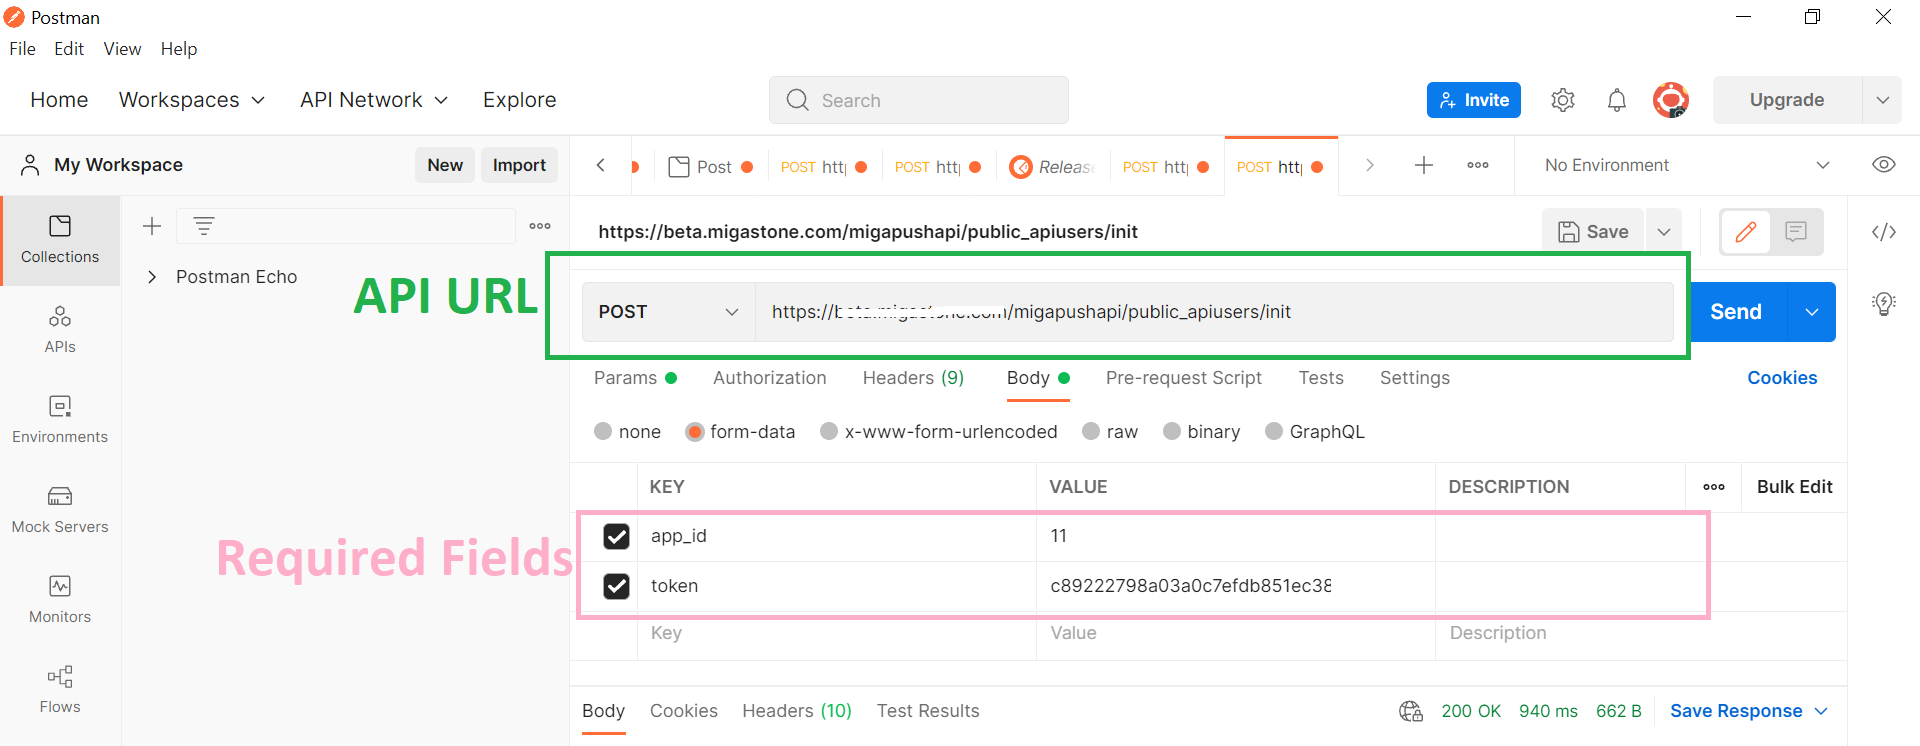
Send Individual Push
Description
Sends an individual push notification via user email.
$endpoint = "http://www.domain.com/migapushapi/public_api/init"Request
| Param | Type | Details |
|---|---|---|
| subject * | string | Push title |
| message * | string | Push message |
| app_id * | int | |
| token * | string | |
| email * | string | |
| devices | string | all, android, ios |
| open_url | int | If set to 1 url will be opened in app |
| url | string | Along with open_url set to 1, the url to open |
| cover | string | base64 encoded image to display as a cover, must be png or jpg. For Example: data:image/jpeg;base64,/9j/4AAQSkZJRgABAQEASABIAAD……… |
Cover Image BASE64 Conversion Steps.
- Go to BASE64 Conversion link
- Choose a cover image (jpg, png)
- Select output type format (Data URI — data:content/type;base64)
- Click on encode image button.
Example of PHP implementation
For Get User List
<?php
?>
For Send Push Notification
<?php
?>
Example of Javascript implementation
For Get User List
Success Response
All Response
| Response | Details |
|---|---|
| 1 | Successful |
| 0 | Wrong/Missing Token |
| 2 | App ID is missing |
| 3 | Email is missing” |
| 4 | Email User hasn’t a push token |
| 5 | Message field is empty |
| 6 | Subject is missing |
| 7 | Url is missing (if field OpenUrl is 1 value and Url is empty) |
| 8 | Wrong Cover Image base64 encoded image to display as a cover, must be png or jpg |
| 9 | Invalid Request |
| 10 | Invalid Parameter(s) Found. |
| 11 | Already user send max push plz wait one minute |
| 12 | Email does not exists |
| 13 | Cover image size must be smaller than 1MB |
| 14 | Cover image must be jpg, png |
Example
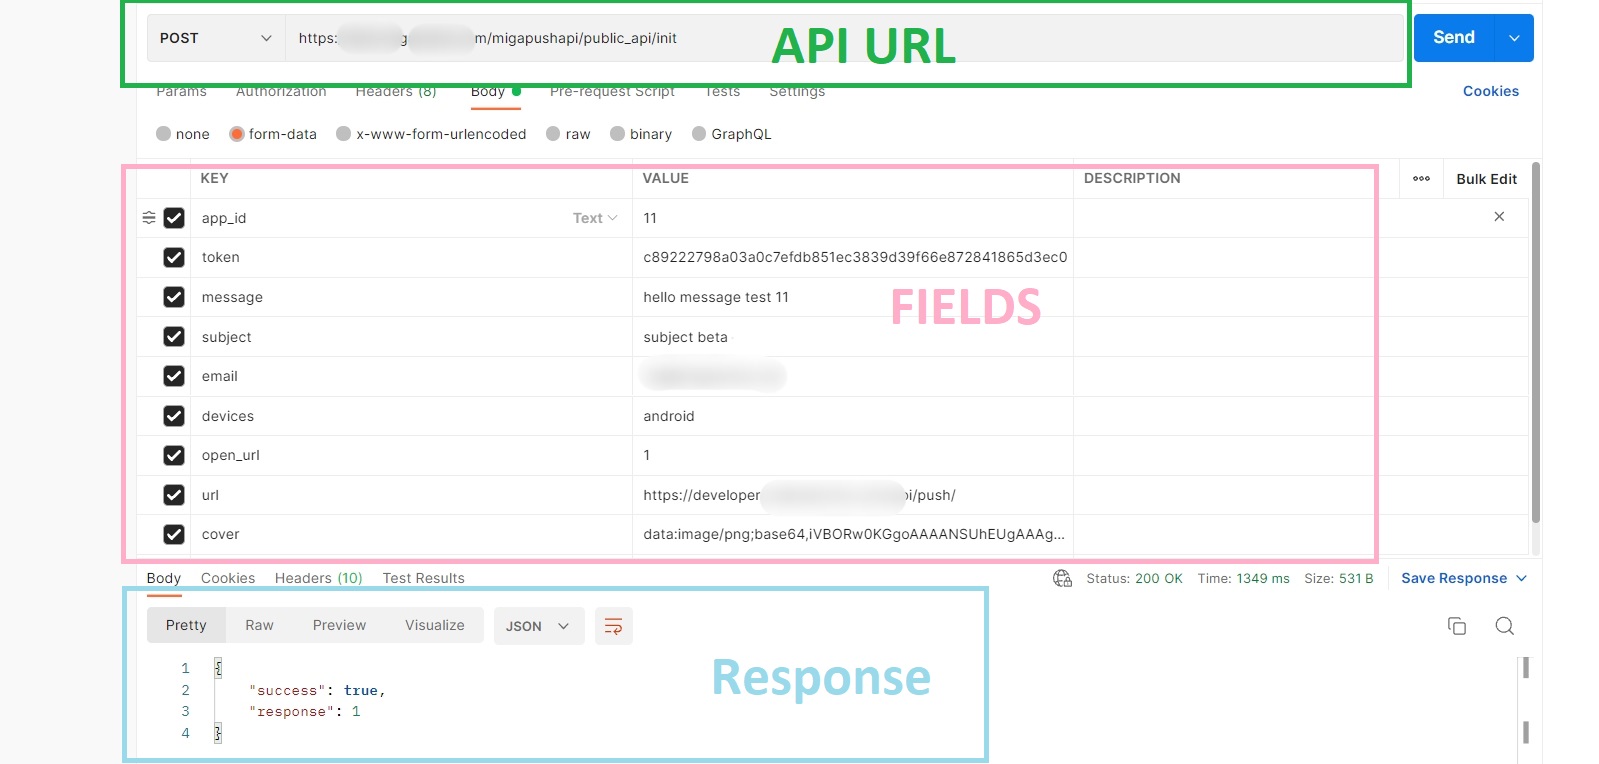
MIGAPUSH DEBUG
Migapush debug is a module to investigate problems reported on PUSH NOTIFICATIONS from the users.
To understand better how it works we should first understand how the push system is working.
In general, every time an app is installed on a phone (and on IOS the permission to push notifications are granted) the system is assigning a TOKEN, like a car plate, that identified the specific APP inside the network.
The servers that manage the PUSH NOTIFICATION delivery are called APN (Access Point Name) and are provided from APPLE and GOOGLE.
If the APP is uninstalled from the device the TOKEN is also deleted from the APN and if our Mobile App Builder tries to send a message to this token, it will get an error back.
Our Mobile App Builder is storing for each app ALL the TOKEN created, also is linking each TOKEN to a USER when there is a login. This allows sending SINGLE PUSH NOTIFICATIONS to a specific user.
When the Mobile App builder gets an error on sending a Push to a specific TOKEN, this TOKEN is deleted.
So, why does it happens that sometimes the pushes aren’t delivered?
There are many reasons out from the control of the Mobile App Builder that this is happening, with this module we will investigate better the status INSIDE the Mobile App Builder.
Let’s see the tools we have now with our module.
APP FEATURE
- TESTING IF PUSHES ARE ACTIVE AND TOKEN PRESENT:
When you add the module inside your APP and you tap the module page you will see this. The first part of the page is showing if PUSH NOTIFICATION is ACTIVE or NOT. Basically, we check if the TOKEN is present. An APP without a TOKEN is sure an APP without push notifications authorizations.
This is surely important to understand if the customer that has issues with the APP has granted the right permissions during installation if not the simplest way is asking to re-install the APP and authorize the pushes. - SECTION “YOUR TOKEN IS ASSOCIATED TO THESE SIBERIAN ACCOUNTS” This section is searching all the accounts that are connected to the specific TOKEN. If there is more than one account linked there is a problem in Mobile Builder database. If this happens the only way is to LOGOFF the user, and reinstall the APP.
- BUTTON “SEND TO ME A TEST PUSH NOW” this allows the user to test if pushes are working, just tap on this button and wait 1 minute the delivery of the test push.
- ASSOCIATE TOKEN TO CURRENT ACCOUNT. This is the opposite if the APP has the TOKEN but it is not connected to the logged user there is a problem. It is probably not possible to send single push notifications to this APP but only broadcast one.
In this case, is possible to re-associate the TOKEN to the USER by pressing this button.
 The first part of the page is showing if PUSH NOTIFICATION is ACTIVE or NOT. Basically, we check if the TOKEN is present. An APP without a TOKEN is sure an APP without push notifications authorizations.
APP OWNER BACKOFFICE
- Is it possible to search all tokens in the Mobile Builder database, see for each one the creation date and investigate better the problems. In general, the user should communicate the TOKEN showed inside the feature inside the APP and you as an app owner can search the specific token. Here the page that is showing the token data base.
 By clicking on DETAILS is possible to see more information about the specific token linked to a user. Is possible also to unlink the token from the specific user.
You can see the token creation date and also when the user was linked to the specific token.
- The last section allows checking all the tokens not linked to any specific user.

 By clicking on DETAILS is possible to see more information about the specific token linked to a user. Is possible also to unlink the token from the specific user.

Migapushscheduler
https://drive.google.com/file/d/1G5wYbN_6qc-oZpBmKcVNXdNoZiIpukHI/view?usp=drive_link
In this module, a method will be provided to create scheduled push notifications for the following scenarios:
- (Individual) Customer Id
- (Individual) Player Id (for triggers such as a new app installation)
- (Group) Application customers
The method will return the Push Notification ID, which can be utilized for deleting the push notification.The scheduled pushes will be stored in a database table first.
These pushes will be delivered via a CRON job when the scheduled time for the push notification is reached.A straightforward method for sending push notifications using the OneSignal API will be implemented.
After sending the push notification, the relevant data will be saved in PUSH2 tables, ensuring compatibility with any statistics provided by Siberian.
Send Push to a CustomerID
use Migapushscheduler\Model\SchedulePush; (add this at start of file)
Description
This function is responsible for scheduling and sending a push notification to a specific customer using the Migapushscheduler system. It constructs the necessary data, including the push content and optional features, and then sends the push notification to the specified customer.
Parameters
– $data (array): An associative array containing the data required for scheduling and sending the push notification.
– `‘app_id’ (string):` The identifier for the application associated with the push notification.
– `‘value_id’ (string):` The unique identifier associated with the value or context related to the push notification.
– `‘title’ (string):` The title of the push notification.
– `‘body’ (string):` The main message content of the push notification.
– `‘big_picture_url’ (string|null):` The URL of a big picture associated with the push notification. It can be null if no big picture is provided.
– `‘send_at’ (string|null):` The scheduled date and time for sending the push notification. If null, the notification is sent immediately.
– `‘customer_id’ (string):` The unique identifier of the target customer who will receive the push notification.
– `‘is_for_module’ (bool):` A boolean indicating whether the push notification is intended for a specific module.
– `‘is_individual’ (int):` An integer value indicating whether the push notification is meant for an individual customer.
– `‘open_feature’ (int):` An optional parameter indicating whether the push notification includes an additional feature. Set to 1 if true.
– `‘feature_url’ (string|null):` The URL associated with the additional feature. It can be null if no URL is provided.
– `‘feature_id’ (string|null):` The identifier associated with the additional feature. It can be null if no identifier is provided.
Return Value
The function returns an associative array containing the response from the Migafunnel system. If the push notification is successfully scheduled and sent, the array includes a `’success’` key set to `true`, along with other relevant information such as the `’message_id’` assigned to the sent push notification.
Example Usage
$data = [
// … (as described in Parameters section)
];
$pushScheduler = new SchedulePush();
$response = $pushScheduler->sendToCustomerId($data);
if (isset($response[‘success’]) && $response[‘success’]) {
// Process success, retrieve message_id, etc.
} else {
// Handle failure, log errors, etc.
}
Send push to PlayerID
Description
This function is responsible for scheduling and sending a push notification to a specific player using the Migapushscheduler system. It constructs the necessary data, including the push content and optional features, and then sends the push notification to the specified player identified by their player_id.
Parameters
– $data (array): An associative array containing the data required for scheduling and sending the push notification.
– `‘app_id’ (string):` The identifier for the application associated with the push notification.
– `‘value_id’ (string):` The unique identifier associated with the value or context related to the push notification.
– `‘title’ (string):` The title of the push notification.
– `‘body’ (string):` The main message content of the push notification.
– `‘big_picture_url’ (string):` The URL of a big picture associated with the push notification. It can be an empty string if no big picture is provided.
– `‘send_at’ (string):` The scheduled date and time for sending the push notification.
– `‘player_id’ (string):` The unique identifier of the target player who will receive the push notification.
– `‘is_for_module’ (bool):` A boolean indicating whether the push notification is intended for a specific module.
– `‘is_individual’ (int):` An integer value indicating whether the push notification is meant for an individual player.
– `‘is_player’ (int):` An integer value indicating that the push notification is targeting a player.
– `‘open_feature’ (int):` An optional parameter indicating whether the push notification includes an additional feature. Set to 1 if true.
– `‘feature_url’ (string|null):` The URL associated with the additional feature. It can be null if no URL is provided.
– `‘feature_id’ (string|null):` The identifier associated with the additional feature. It can be null if no identifier is provided.
Return Value
The function returns an associative array containing the response from the Migafunnel system. If the push notification is successfully scheduled and sent, the array includes a `’success’` key set to `true`, along with other relevant information such as the `’message_id’` assigned to the sent push notification.
Example Usage
$data = [
// … (as described in Parameters section)
];
$pushScheduler = new SchedulePush();
$response = $pushScheduler->sendToPlayerId($data);
if (isset($response[‘success’]) && $response[‘success’]) {
// Process success, retrieve message_id, etc.
} else {
// Handle failure, log errors, etc.
}
Send push to app customers.
Description
This function is responsible for scheduling and sending a push notification to all customers of a specific application using the Migafunnel system. It constructs the necessary data, including the push content and optional features, and then sends the push notification to all customers associated with the specified application.
Parameters
– $data (array): An associative array containing the data required for scheduling and sending the push notification.
– `‘app_id’ (string):` The identifier for the application associated with the push notification.
– `‘value_id’ (string):` The unique identifier associated with the value or context related to the push notification.
– `‘title’ (string):` The title of the push notification.
– `‘body’ (string):` The main message content of the push notification.
– `‘big_picture_url’ (string|null):` The URL of a big picture associated with the push notification. It can be null if no big picture is provided.
– `‘send_at’ (string):` The scheduled date and time for sending the push notification.
– `‘is_for_module’ (bool):` A boolean indicating whether the push notification is intended for a specific module.
– `‘is_individual’ (int):` An integer value indicating that the push notification is not meant for an individual customer but for all customers associated with the specified application.
– `‘open_feature’ (int):` An optional parameter indicating whether the push notification includes an additional feature. Set to 1 if true.
– `‘feature_url’ (string|null):` The URL associated with the additional feature. It can be null if no URL is provided.
– `‘feature_id’ (string|null):` The identifier associated with the additional feature. It can be null if no identifier is provided.
Return Value
The function returns an associative array containing the response from the Migafunnel system. If the push notification is successfully scheduled and sent, the array includes a `’success’` key set to `true`, along with other relevant information such as the `’message_id’` assigned to the sent push notification.
Example Usage
$data = [
// … (as described in Parameters section)
];
$pushScheduler = new SchedulePush();
$response = $pushScheduler->sendToAppCustomers($data);
if (isset($response[‘success’]) && $response[‘success’]) {
// Process success, retrieve message_id, etc.
} else {
// Handle failure, log errors, etc.
}
Get Data of a latest 200 notification per app.
use Migapushscheduler\Model\Onesignal\Scheduler;
### Description
This method is part of the `Scheduler` class and is responsible for retrieving a list of notifications from the OneSignal service for the associated application. It queries the OneSignal API to fetch information about all notifications associated with the specified application.
### Return Value
The method returns an array of notifications. Each notification is represented as an instance of the `\onesignal\client\model\NotificationSlice` class, or a similar class that encapsulates information about a notification. The array typically includes details such as notification IDs, titles, bodies, and other relevant information retrieved from the OneSignal service.
### Example Usage
try {
$scheduler = new Scheduler($application);
/**
* @var $notificationSlice \onesignal\client\model\NotificationSlice
*/
$notifications = $scheduler->fetchNotifications();
foreach ($notifications as $notification) {
// Access details from each notification
$notificationId = $notification->getId();
$title = $notification->getTitle();
$body = $notification->getBody();
// … other details
}
} catch (\Exception $e) {
// Handle exceptions, log errors, etc.
$notifications = [];
}
Get stats of a single notification
Description
This method is part of the `Migapushscheduler\Model\Onesignal\Scheduler` class and is responsible for retrieving details about a specific notification from the OneSignal service. It queries the OneSignal API to fetch information such as title, body, and other relevant data associated with the given notification ID.
Parameters
– **$app_id (int):** The app_id for the application associated with the notification.
– **$notification_id (string):** The unique identifier of the notification within the OneSignal service. That you can get from push2_messages table, column name onesignal_id.
Return Value
The method returns an associative array containing information about the specified notification. The array typically includes details such as the notification title, body, additional data, and other relevant information retrieved from the OneSignal service.
Example Usage
$notification_id = ‘your_notification_id’;
$app_id = ‘your_application_id’;
$application = (new \Application_Model_Application())->find($app_id);
$notification_obj = (new Migapushscheduler\Model\Onesignal\Scheduler($application));
$notification_data = $notification_obj->fetchNotification($app_id, $notification_id);
// Access details from the fetched notification data
$title = $notification_data[‘title’];
$body = $notification_data[‘body’];
// … other details
https://github.com/OneSignal/onesignal-java-api/blob/main/docs/NotificationWithMeta.md
MIGAREMINDER
Migareminder is a simple module that allows generating customized reminders inside your APP.
The classic scenario is the dentist, who wants to remember his client’s annual dental cleaning visit.
To do that the Dentist will create a REMINDER TEMPLATE inside your APP control panel, for example a Reminder after 365 days from the current visit date.
After the reminder template is set, he is able to print a QR CODE.
Later, for every patient, he will ask them to scan the QR CODE and the APP automatically creates a REMINDER of “Dental cleaning” after 365 days.
The feature allows also the USERS to create their personal reminders inside the app.
The cost of the feature is 99,00€ / yearly and includes updates and technical support by email.
Here the principal features
- Create unlimited REMINDERS TEMPLATES based on
- A certain amount of days after the QR Scan
- A specific date
- Set how much before getting the reminder by push notification: 1 hour before, 2 hours before, 3 hours before, 1 day before, 2 days before, 3 days before. You can select one or all of them.
- Set if it is a ONE TIME reminder or a RECURRING reminder
- Set if the RECURRING reminder is daily, monthly or yearly.

You can also customize the Reminder Push Notification with your own Title, Text, Picture and link to feature or web page.

You can check all the REMINDER TEMPLATES, generate again the QR CODE and modify them as you want

An ACTIVE REMINDERS page allows you to check all the current active reminders.

Is it possible to customize the ICONS and the COVER IMAGE of the module

Here some screenshots of the phone interface that include three menus:
- ADD A REMINDER: to add manually a reminder
- SCAN QR: Where the user can scan the QR code and get immediately the reminder set
- ACTIVE REMINDER: Where the user can see the current active reminders and can modify them.


Send an email to support@migastone.com for information or technical support.
Direct link to this page //support.migastone.com/en/hrf_faq/migareminder/
Migareview
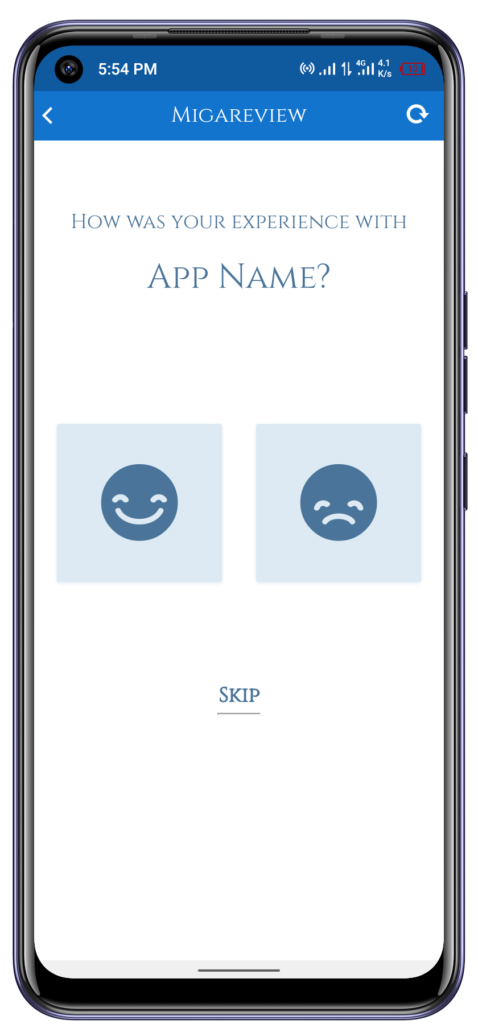
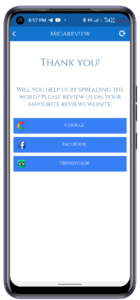
Orientation
Migareview is a module that allows sending push notifications or emails when a specific event/trigger then customers can add good or bad reviews like Google reviews, Facebook reviews, TripAdvisor reviews, and other review site links. The Migareview is the best module for enhancing your business in case any bad things are available in your business. The owner can check the response rate against fired triggers.
Settings
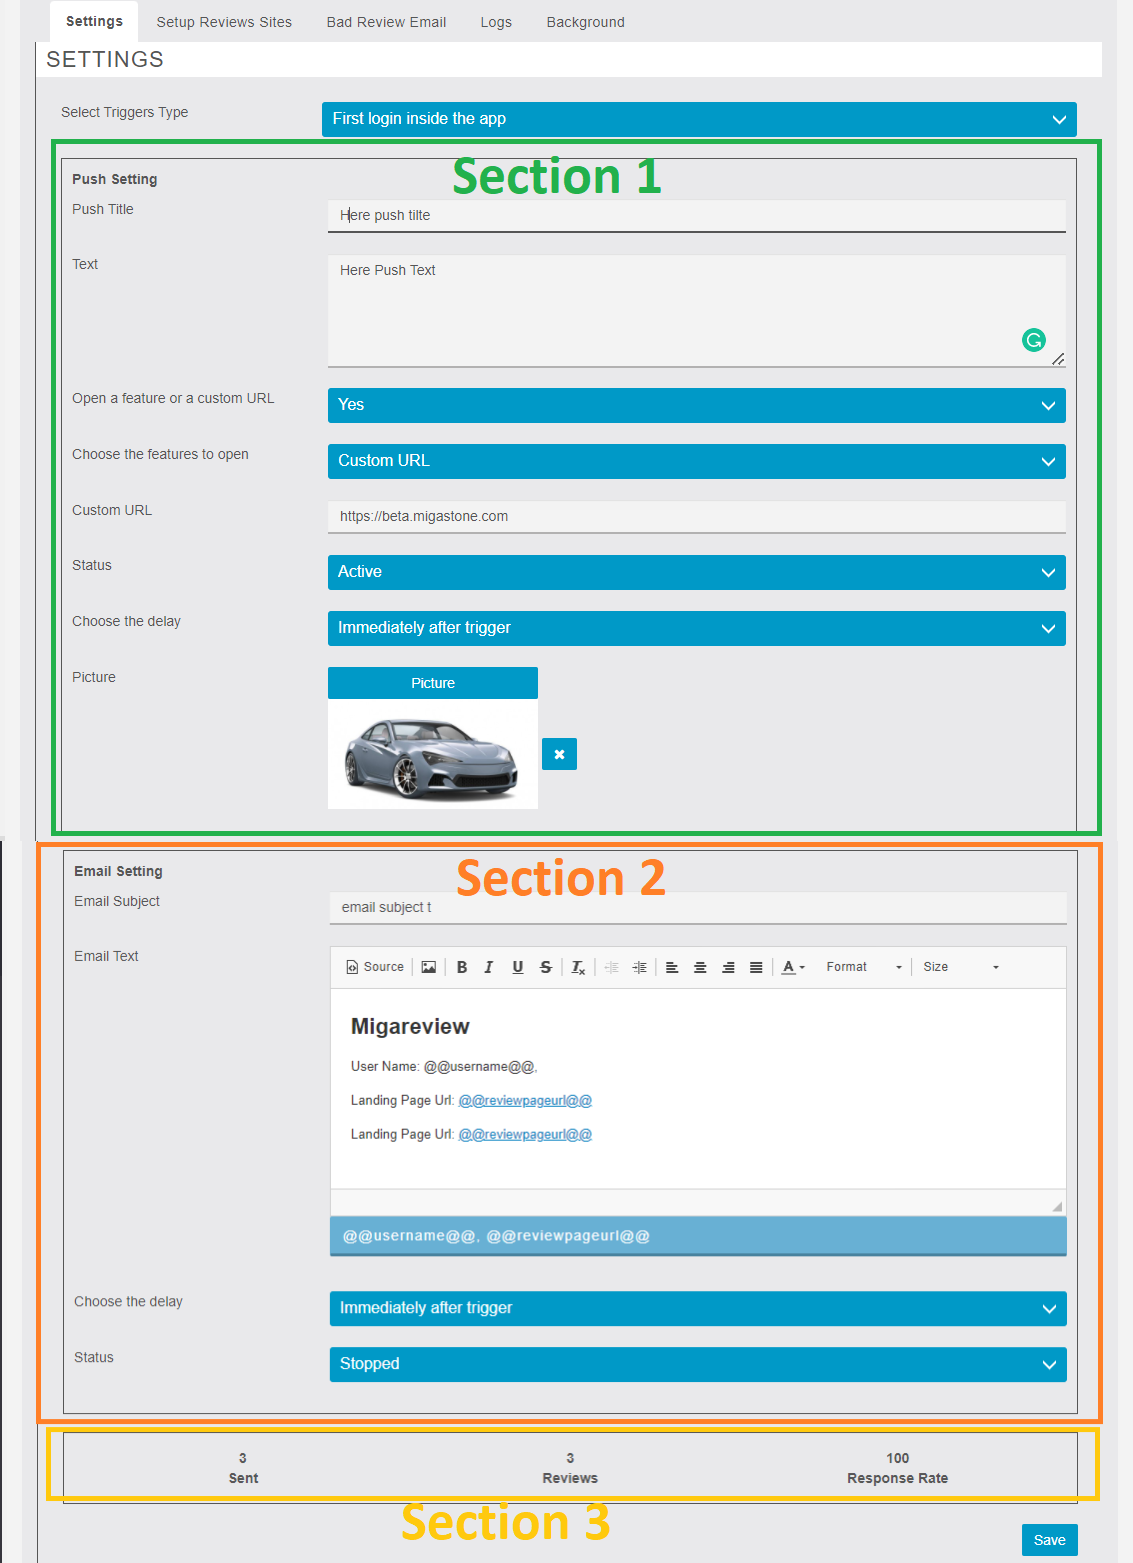
In this setting tab, you will be able to see three different sections. But all the sections are dependent on the trigger type. According to trigger type, you can set all push/ email configurations.
Supported TRIGGERS are:
- New device installed
- First login inside the app
- First loyalty point used (require Loyalty Card feature in the app)
- First order placed (require Mobile Commerce feature in the app)
- The First coupon used (require Discount feature in the app)
- First subscribe of a token in any TOPIC (require Topics feature in the app)
- First progressive loyalty point used (require Progressive Loyalty Card feature in the app)
- First progressive prize redeemed (visible only if Progressive Loyalty Card is added in app)
- CommercePro first order placed (visible only if CommercePro is added in app)
- xDelivery first order placed (visible only if xDelivery is added in app)
In this 1st Section for Push Configuration.
- PUSH TITLE, just for your internal use.
- PUSH TEXT, just for your internal use.
- STATUS, to enable or disable
- Choose the delay.
- Set Picture
- Custom URL
In this 2nd Section for Email Configuration.
- EMAIL TITLE, just for your internal use.
- EMAIL TEXT, just for your internal use.
- STATUS, to enable or disable
- Choose the delay.
In this 3rd Section, the user sees the review status according to select triggers. Like total sent, total reviews, and total response rate.
Setup Reviews Sites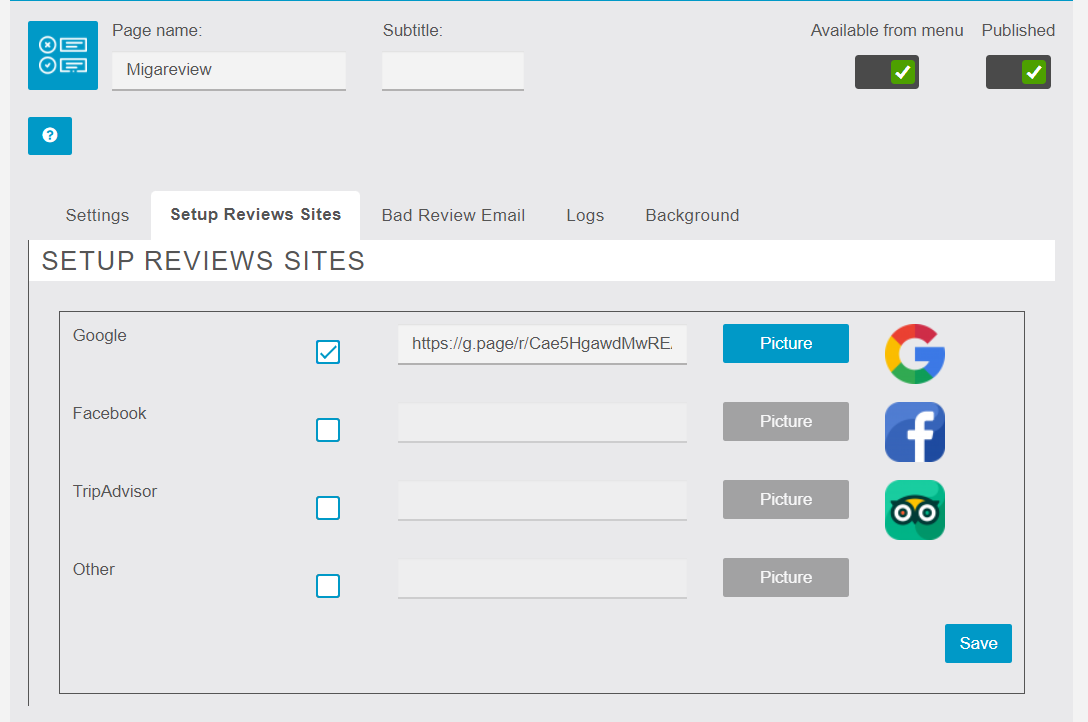
In this tab owner can configure sites links. Like google reviews, Facebook reviews, trip-advisor, and other sites link set. Also, can change the icon according to you.
Bad Review Email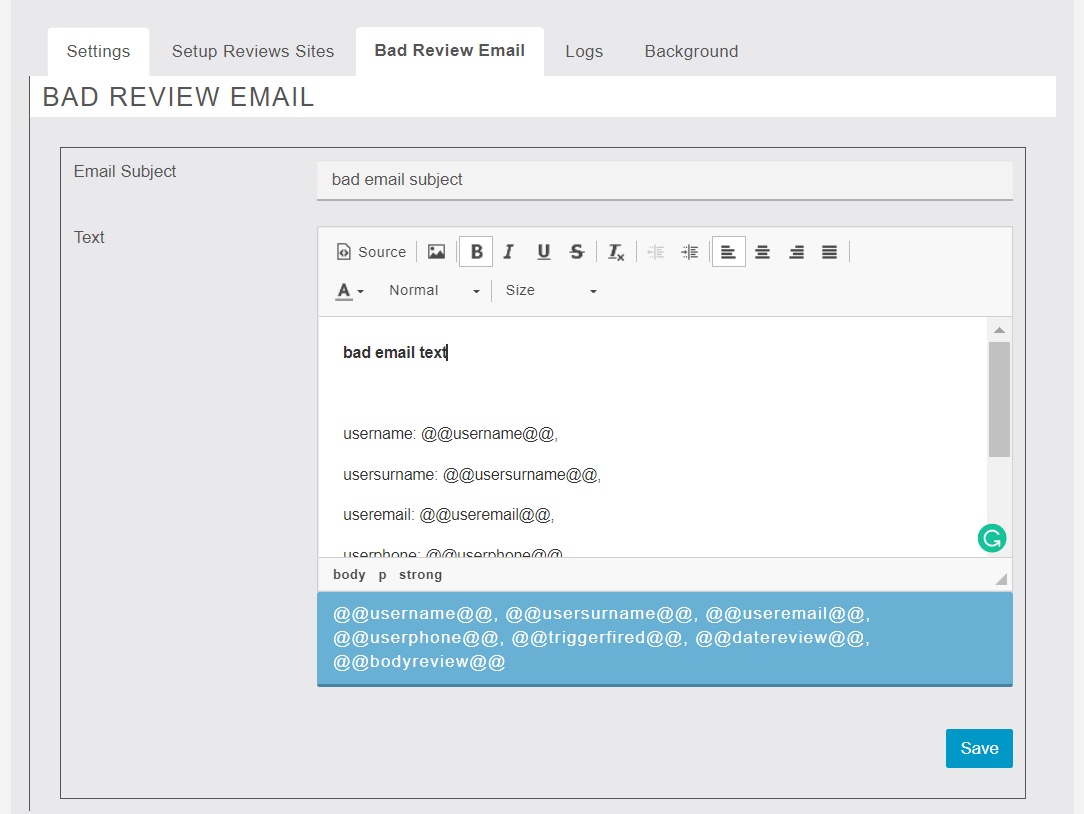
In this tab, the user can configure a bad review email. BAD REVIEW EMAIL means in case customer can give bad review then send email to owner-end he read an email why did add a bad review and improve your own business.
Logs
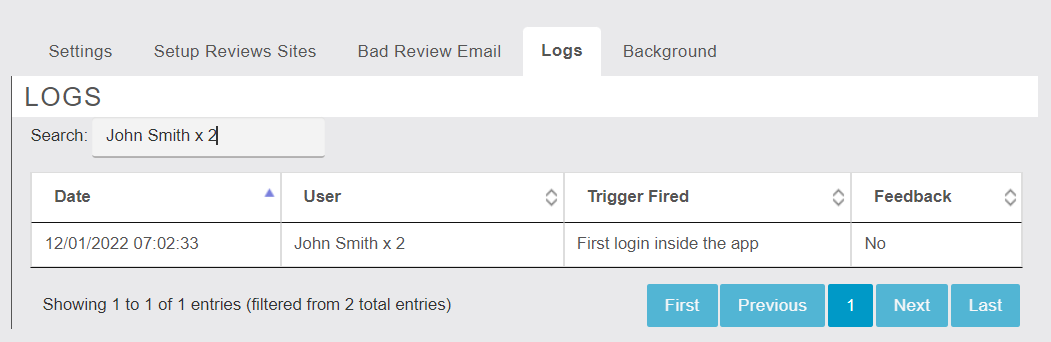
In this tab, the owner can see the last 7days feedback. He can search by name or trigger fired.
Background And Color Settings
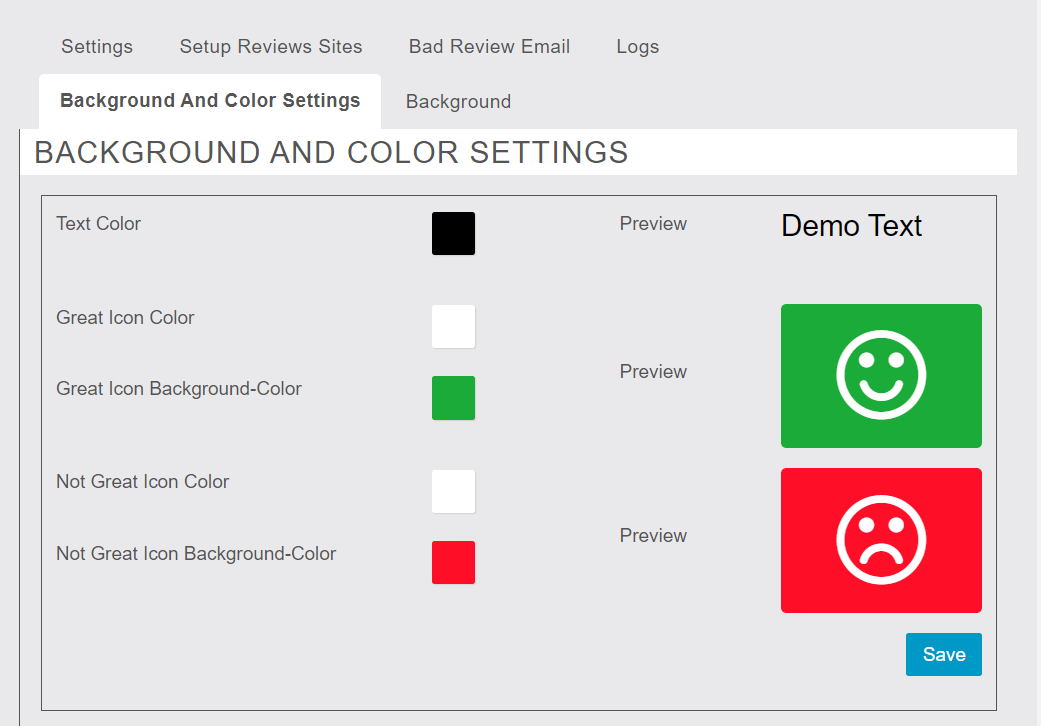
In this tab, the owner can set the landing page theme. When the owner updates theme colors then shows a live preview and after all the settings are done the owner clicks on the save button then all the settings update.
Mobile / App Area
Mobile-end is the main area where customers can add a good review, bad review, and skipped review. In case the user can exit the app if again open feature then shown again review.

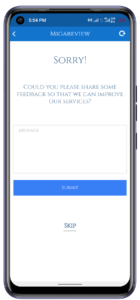
Migashipday – Drivers Management
Migashipday is a great addition to the feature list of every app that manages delivery orders of any sort within the possible fence and wants to manage the tracking of orders for customers, business owners, and position of the riders/carriers/drivers. The module uses one of the greatest services for managing such situations and is known as Shipday.
The module works perfectly with the following Siberian Commerce Modules:
- Commerce Pro
- Mobile Commerce
- Xdelivery
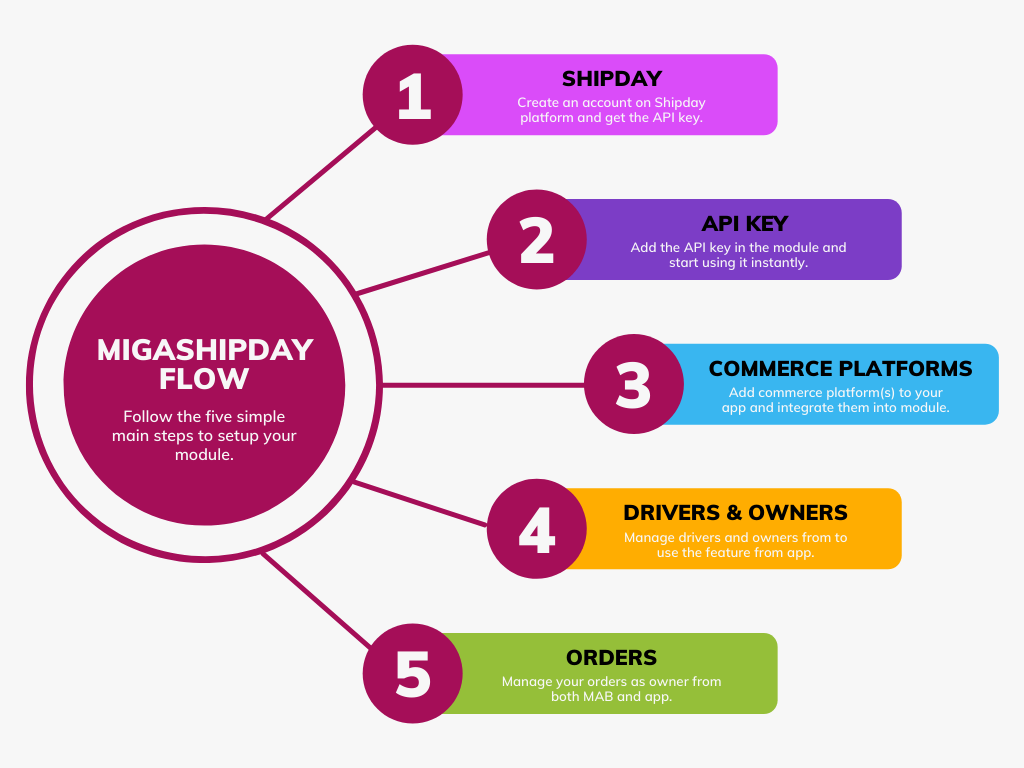
The figure below will elaborate the flow of the module in a trivial detail:
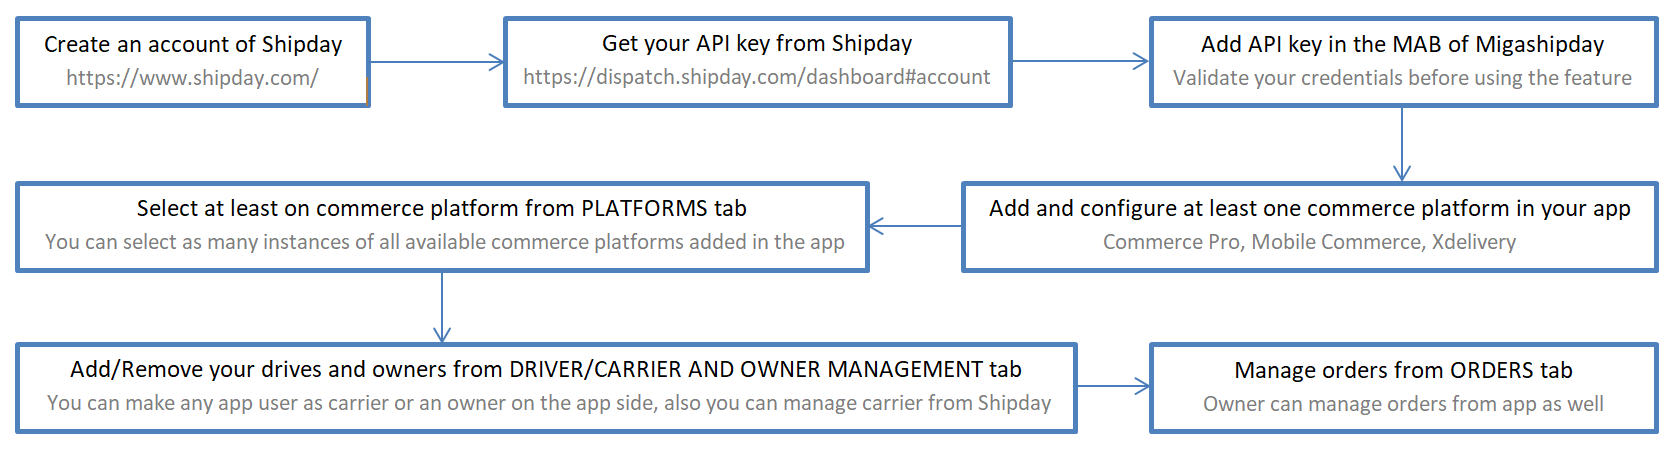
Order Processing Flowchart
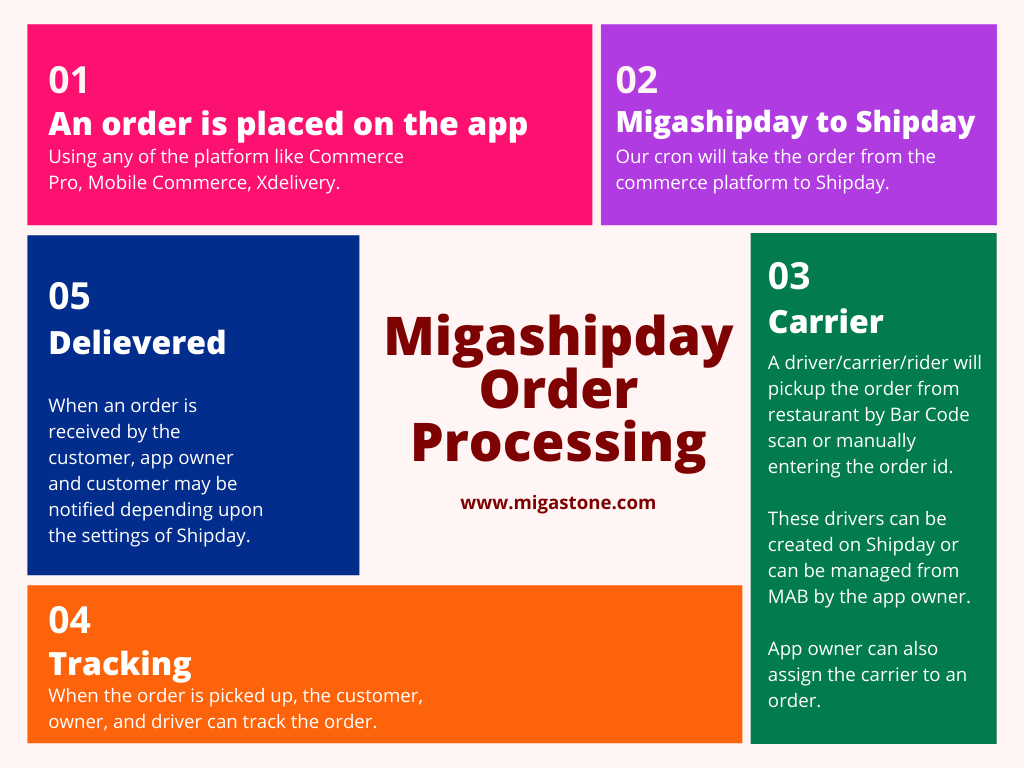
API Keys
You’ll need your API keys, so go to https://dispatch.shipday.com/dashboard#accountInfo if you don’t have them.
Way to Get
You will get your API key from the Shipday account. Go to Account Info, where you will find the API key option. But to get the API key visible you have to put your account password.
API Credentials
After getting the API key from Shipday, you can add the key to the module inside the API Credentials tab. The module will validate your API key before saving it into the system and if will not be correct it will send you proper feedback about the issue. Once the API key is validated successfully, you can start moving further to add and select your platforms.

Platform
When your API credentials are validated then you will see some new tabs appear and one of them will be “Platforms”. You might not see anything (maybe an information or warning message) in this tab if you have not added yet any one of the supported commerce platforms (Commerce Pro, Mobile Commerce, Xdelivery) inside your and configured it properly to take orders from customers. And if you have done this already you will see a list of all the instances of each available commerce platform with:
- Id
- Title
- Order Start Date
Order start date will help you to decide from which date your want to start your orders to be sent to Shipday for tracking purposes. You must have at least one instance selected and saved.
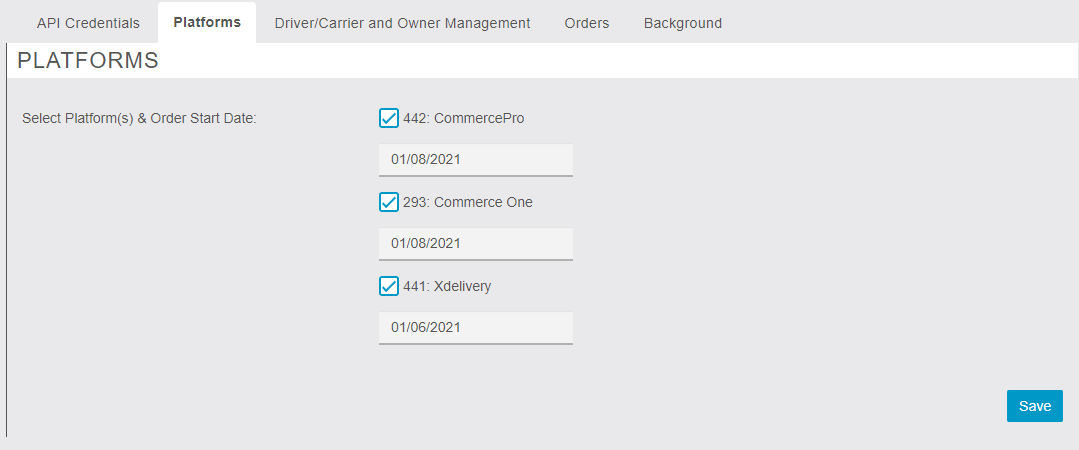
Driver/Carrier and Owner Management
In this tab, you will be able to see the list of all of the customers registered inside your app. You can mark any of the customers as a Driver/Carrier or an app Owner. A driver/carrier can pick up orders from the app side of the module and check the status of the order. The owner can assign the driver from both MAB and app sides and can track all the orders.
However, a customer can only see the orders of his/her own as a driver/carrier will see the orders that he has accepted for pickup. But the owner has no restrictions both at MAB and app.
The owner from MAB can delete user access as owner or driver/carrier. A user can have only one role at a time.
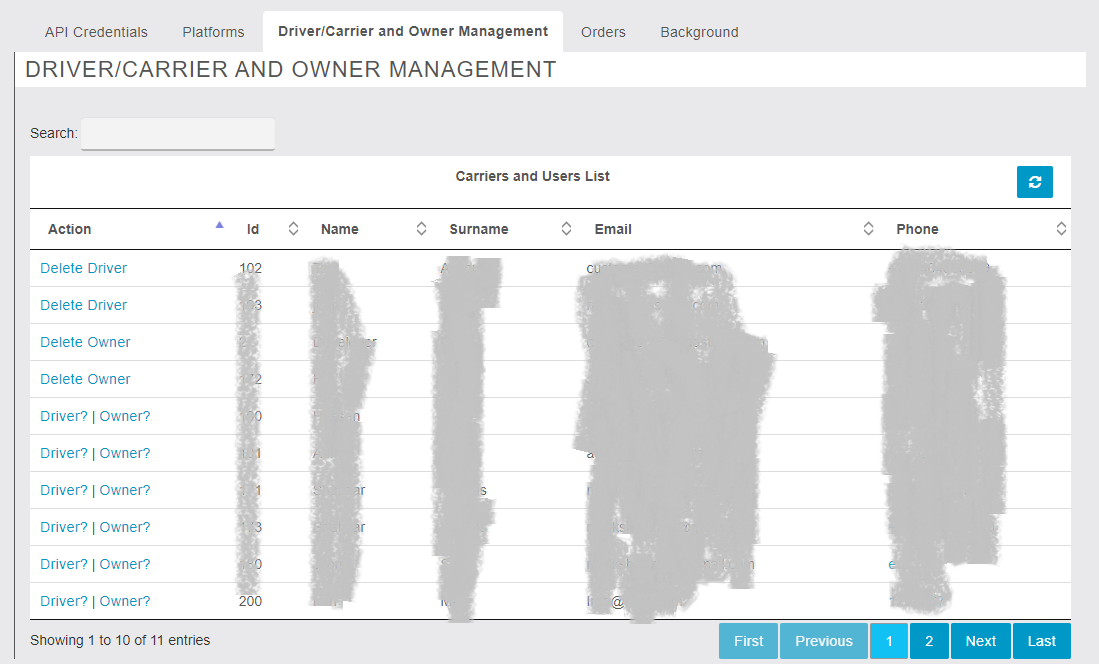
Orders
App owners can keep the track of the orders from both MAB and the app. It is more than just a monitoring grid or screen. One can select and updated or assign a driver to any particular order. A detailed view of orders is provided as well.
There will be two grids one will show Successful Orders and the other will have the data of all the Failed Orders. Failed orders will be those which are unable to be posted on the API due to some technical glitch.
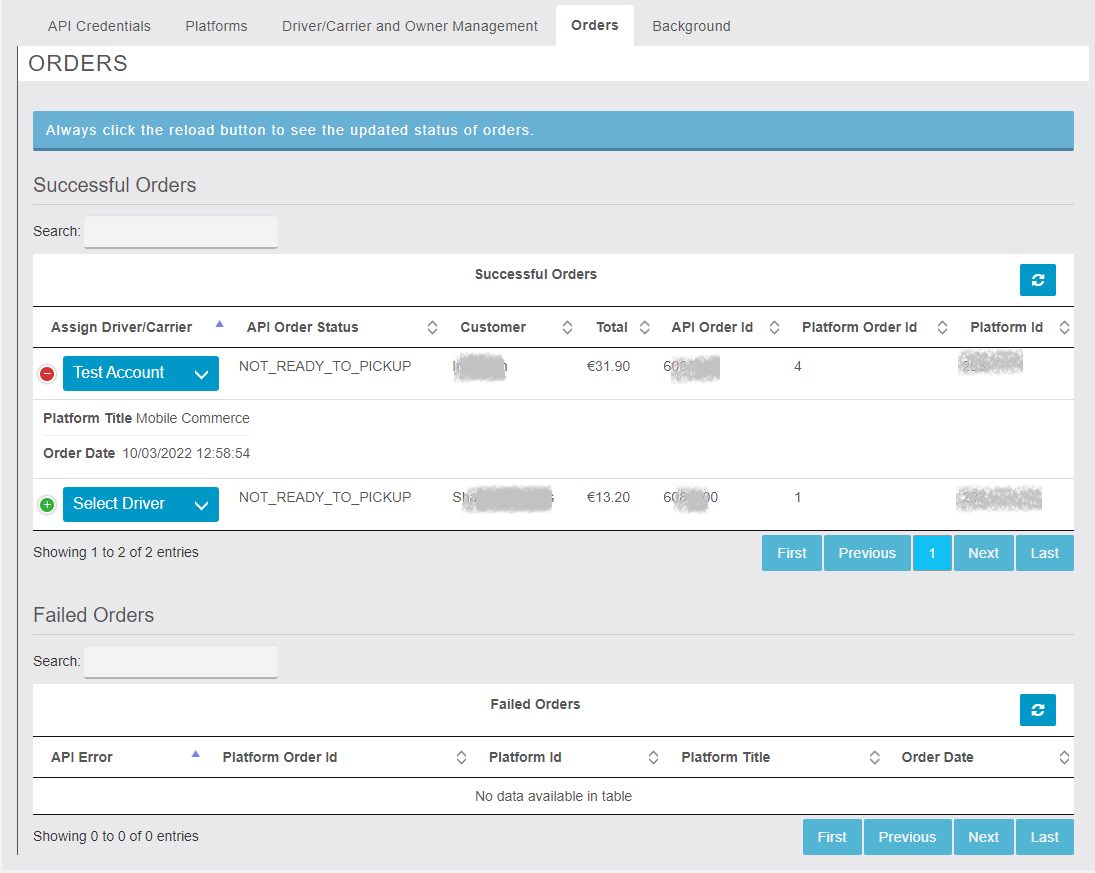
Application or Mobile End
A user must be logged in order to use the module from the application/mobile. From the mobile end, the app access is divided into 3 groups:
Customers
Customers can be any user who has posted orders using any of the commerce platforms. Customers can track their orders and check the status by using the pull-refresh feature.
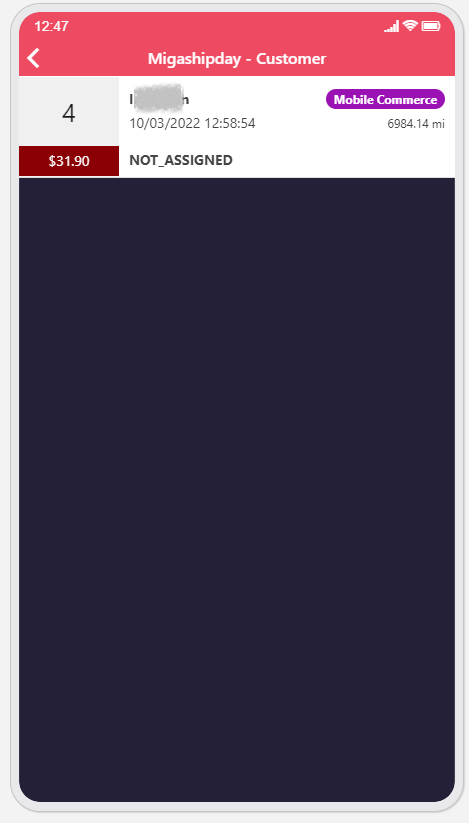
Owner
An owner can see a list of all orders as well as assign or update the driver of an order. Owners can update the orders listening by the pull-refresh feature.
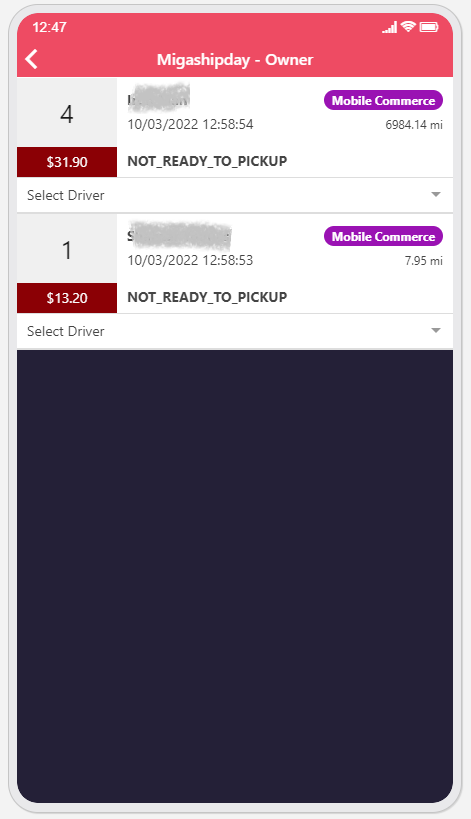
Driver or Carrier
A driver or carrier can pick up an order using two methods. The rider can either select the commerce instance by adding the order id to pick it up or can scan the Bar Code from the printed order receipt. Drivers can update the orders listening by the pull-refresh feature.
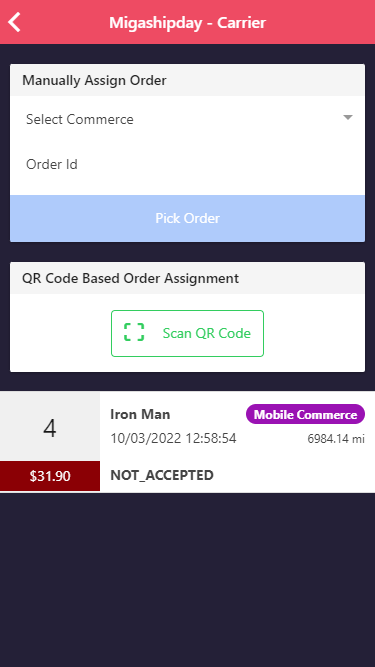
Link diretto alla pagina https://support.migastone.com/en/hrf_faq/migashipday/
MIGASMS
Do you want a huge and powerful phone book of potential customers? Be Smart! Ask to send an SMS to download your APP!
Yes! with this module your potential customers will send an SMS like “PIZZERIA NAPOLI” to your Twilio SMS inbound number and they will get back the link to download the APP from the stores, and at the same time the module is storing the sender name of the potential customers… ready to be used in the future for promotional contents, 100% ok with GDPR.
Whatch this video introduction here:
Instructions how to configure it:
- Go to https://www.twilio.com create an Account, and buy an inbound/outbound SMS phone number.
- Copy the ACCOUNT SID and TOKEN from Twilio dashboard to the MIGASMS module.
- Go to your ADMIN backoffice >> MANAGE >> MODULES >> MIGASMS
- Enter the LICENSE CODE
- Add your twilio platform credentials. Migasms will use the platform credentials for the INBOUND SMS. All your customers will send TEXT messages to ONLY ONE SMS INBOUND number. (here you enter YOUR twilio credentials as PLATFORM OWNER)
- Go to bit.ly and create a free account. bitly is an API that allows creating shorteners links, necessary to send out short SMS.
- On FILTERS you are able to see all the STRINGS currently configured in the system and witch App is linked.
- Platform Logs will be useful to identify any problem with APIs
- Go to APP FRONTEND enter the TWILIO account of the customers, we use this account for OUTBOUND SMS that will use the credits of the APP owner account on Twilio
- Add the string of the specific APP, for example “PIZZERIA NAPOLI”. Please note that any space and any special character will be removed. Also capital characters are ignored and treated as normal one. The String should be unique for the whole platform.
- Select the SENDER ID from the drop down menu.
- Add the optional LANDING PAGE link, this link will be added in the SHORTNER TAG on the message. If the user leave empty this field the system is using the QR CODE link of Siberian (promote feature) with a shortlink
- Select AUTO-ANSWER “YES” or “NO”. If NO is selected the system will not send out any SMS back to the sender
- Message body of the auto-answer message. Remember to leave the TAG of shortnerurl.
Send an email to support@migastone.com for informations or technical support.
Visit our website www.migamodules.com
Migastats
Introduction:
Introducing Migastats, a comprehensive system designed to collect and analyze app statistics. The Side Menu Module serves as a powerful tool, offering detailed insights into key metrics such as app installations, uninstalls, total visits, and feature-specific visits. This information is presented in visually informative graphs, providing a user-friendly interface for effective statistical analysis.
- Provide the user to filter data by dates
- The update of Siberian from 4.xx to 5.xx has changed the push mechanism we have fixed this in a way that users can analyze the old and new stats
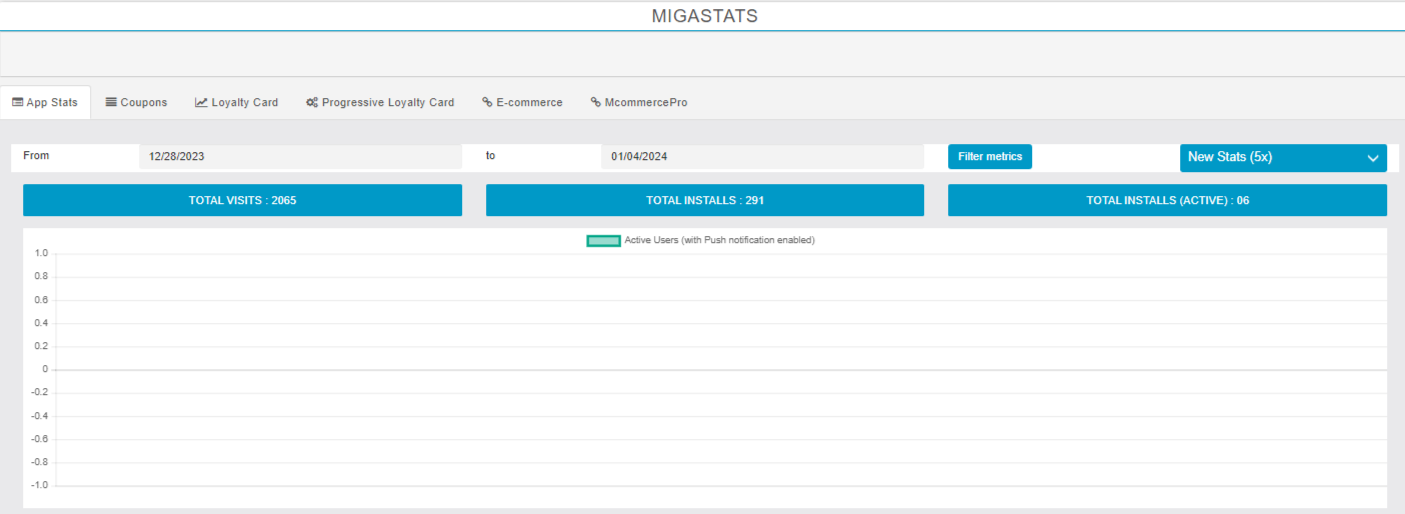
- The Chart that provides the installation and uninstall of devices based on push-enabled
- The green bar shows the new devices along with the date
- The red bar shows Uninstall devices on the specific date

- Visit by Features allows the user to have a graphical analysis of the top most visited features
- The list of features provides the user number of visits per feature
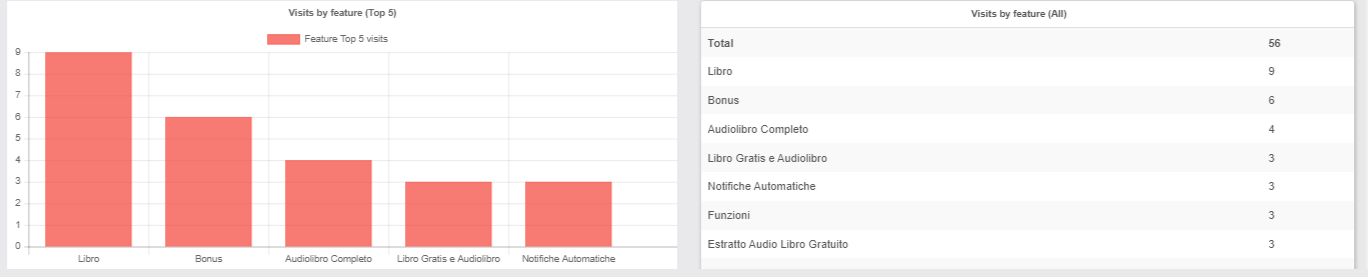
- Device type stats provide the Installation of the App on specific devices ios/Android
- The red color shows the IOS devices
- The green color shows the Android devices
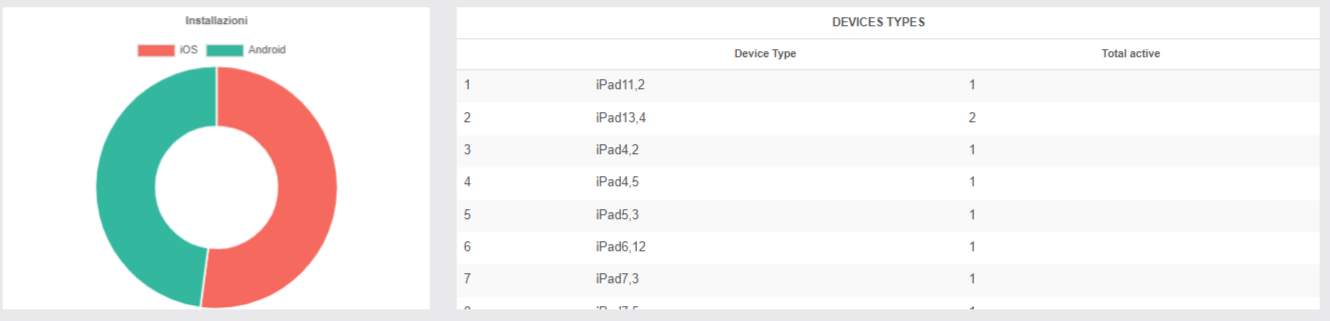
Manage Report View Permissions
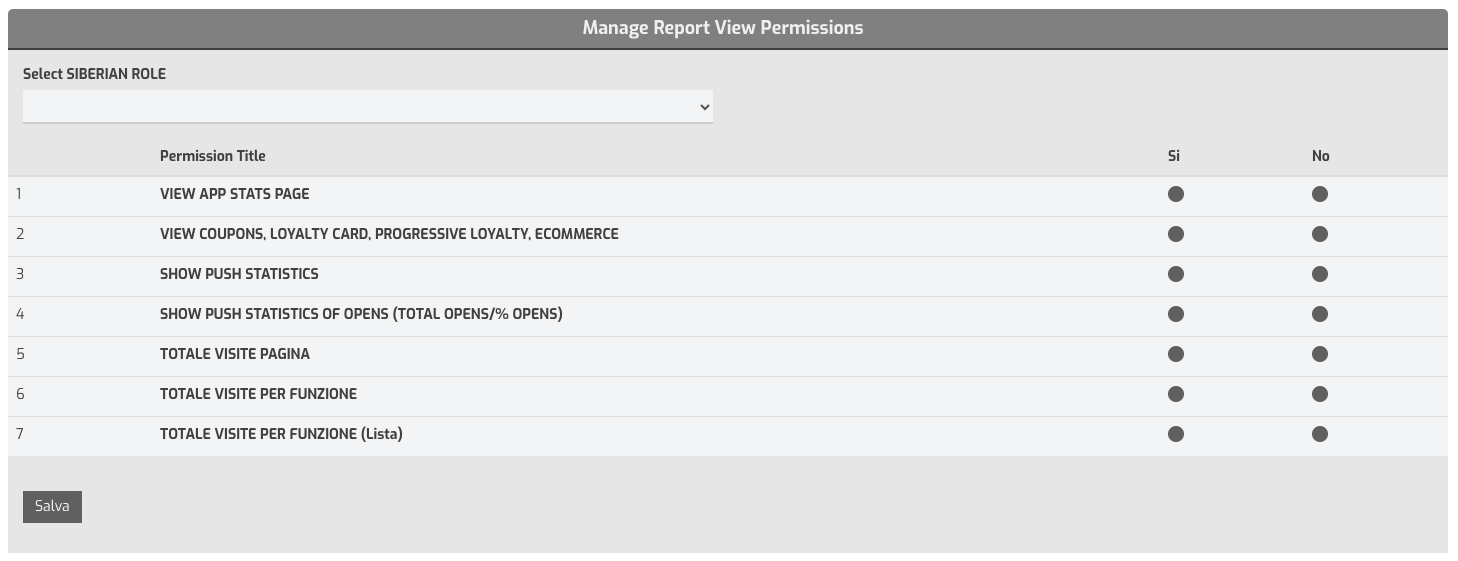
From this section, located in Backoffice > Manage > Modules > Migastats, you will need to enable permissions for each Siberian user role you want to give access to viewing statistics.
Select the role from the drop-down menu, enable the desired views and click the Save button. Repeat the operation for all the roles for which you want to enable statistics viewing. We recommend to refresh the page after every role set, to check to check that you have correctly enabled the desired views for each role.
WARNING: the permissions must also be enabled for the ADMINISTRATOR role, otherwise the statistics will not be displayed.
link: https://support.migastone.com/en/hrf_faq/migastats/
MIGATICKET
This module has been specifically designed for municipalities, aiming to streamline the reporting of issues and concerns within the community. The MIGATICKET app empowers citizens to report various issues, from potholes in roads to problems within the municipality itself, facilitating a proactive approach to municipal maintenance and improvement.
- Issue Reporting Functionality:
- Citizens can report various issues such as potholes and problems within the municipality.
- Enhanced FORM V2 Module:
- Ability to set a status for the report.
- Receive notifications when the report’s status changes.
- Notification System:
- Push notifications for status changes.
- Emails are sent when the report is first received.
- Export Functionality:
- Ability to export all reports in CSV format.
- CSV export includes all custom fields inserted in the report.
- Printing Capability:
- Ability to print the details of a report in PDF format.
- Report Status:
- Ability to check the report status – new report -in progress -done.
- Tickets Near Me:
- Ability to check the report/Tickets reported near me the list is ordered by distance on App side
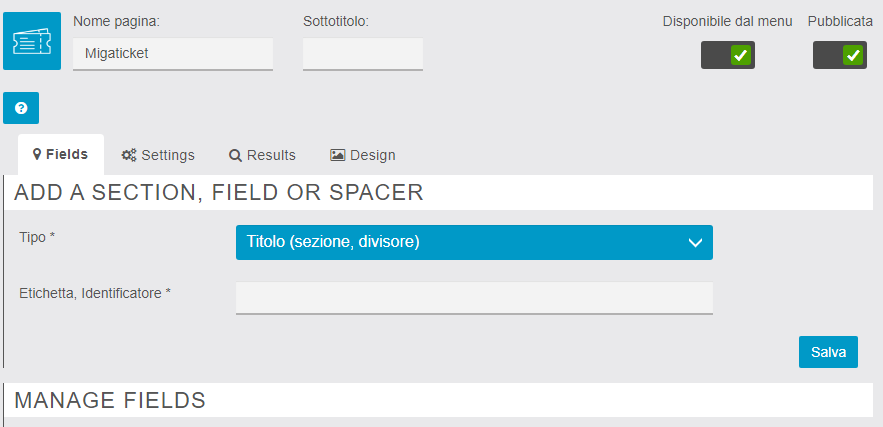
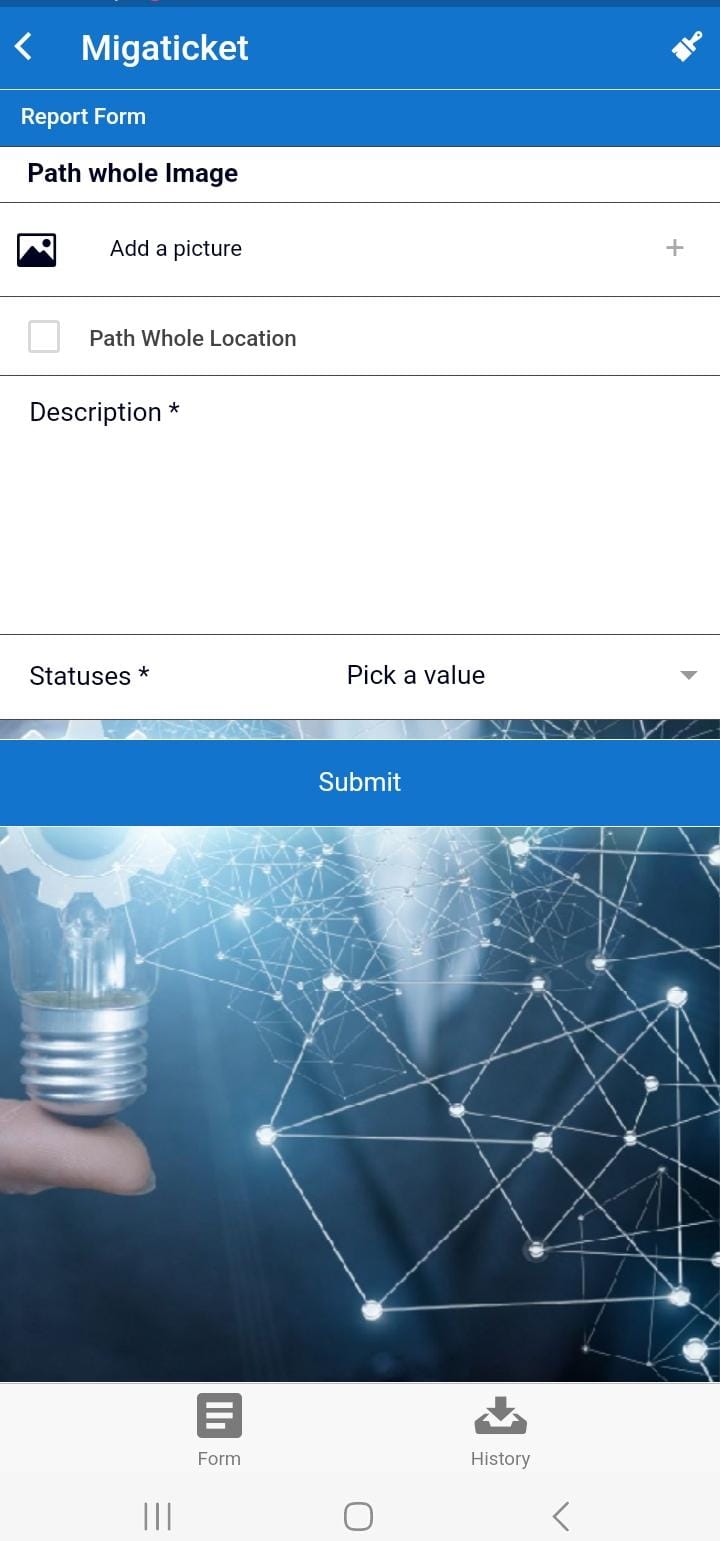
1- FIELDS
Enable the Admins to Add Multiple fields as shown in the Image to submit reports from the App side. The Admin can set the fields required or optional as well.
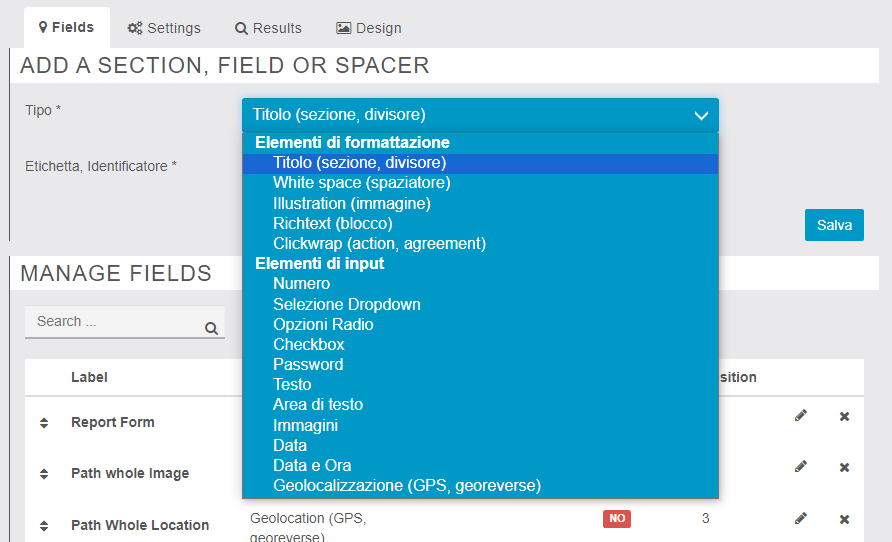
The user can Edith and remove the fields (Report Form)
![]()
2- SETTINGS
Settings Allow the Administrative Controls for Webhook Configuration, Email Notifications, Push Notifications, and Status Settings”
- The webhook sends out the following data. USER Name, Surname, Email, and Phone number if present in Siberian.

- The Module Allows two types of Notifications (Email and push)
- Email notification is sent when a new report is created and also when a report changes status
- Push notification is sent when there is a report status change, not when a report is placed first time
- Save button to save all settings
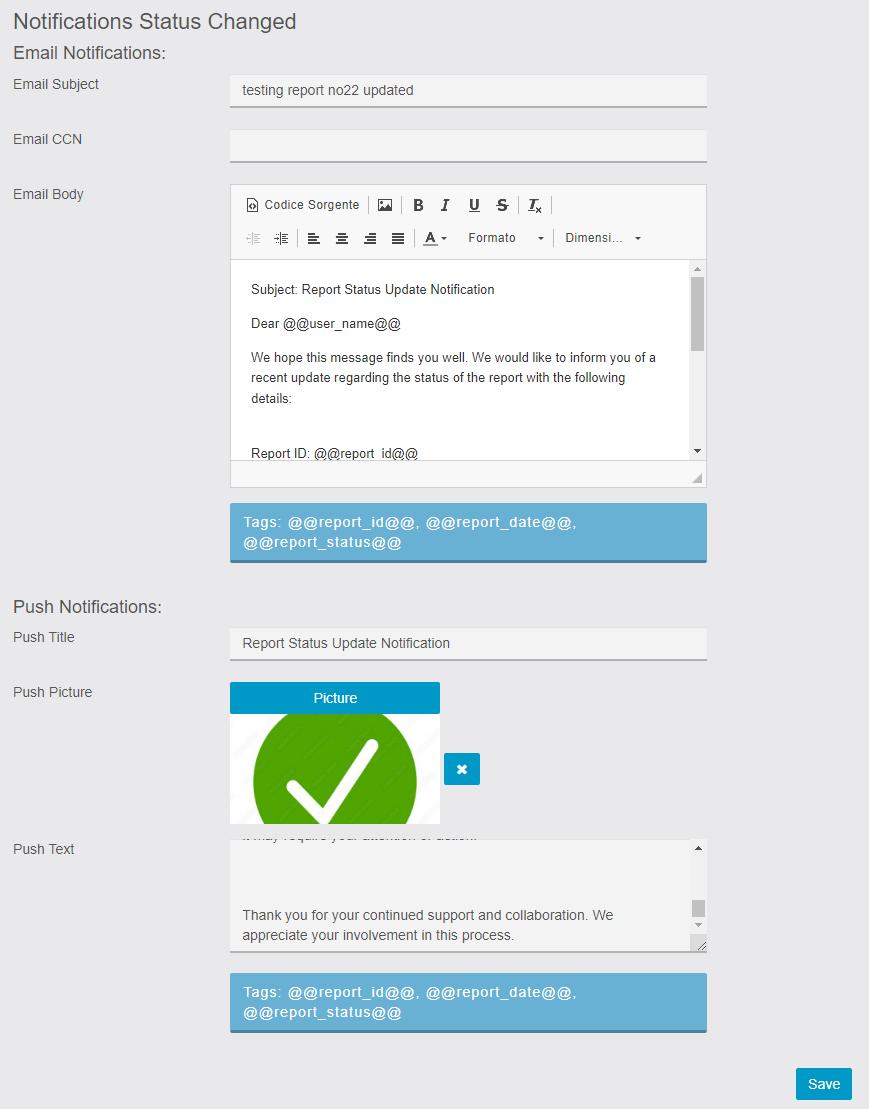
- Status Enables the user to create different statuses for reports submitted by end-users basically there are three types of Status as shown in the image.
- NEW REPORT you can only change the title You can add other statuses.
- Each status has an icon set.
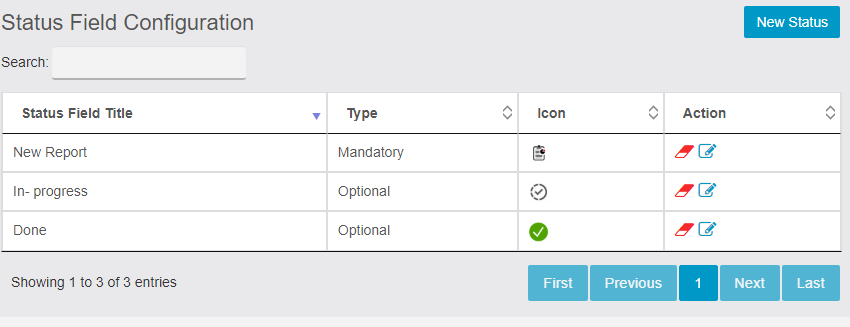
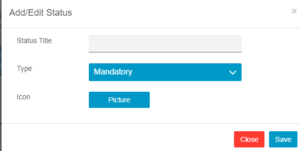
3- RESULTS
The tab that allows the Admin to have All details of the report on one page User detail, Report status, and report detail allows the user to Export the report in PDF and CSV as shown in the image
- Allows the user to filter reports by Reports Status.
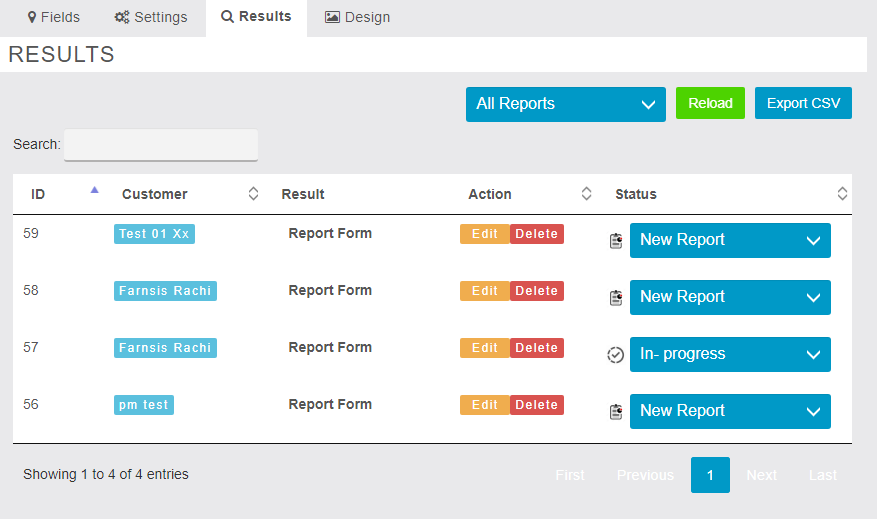
- Admin can view/Edith’s report and change the status of the report.
- Print the Report in PDF form by clicking on PDF Print.
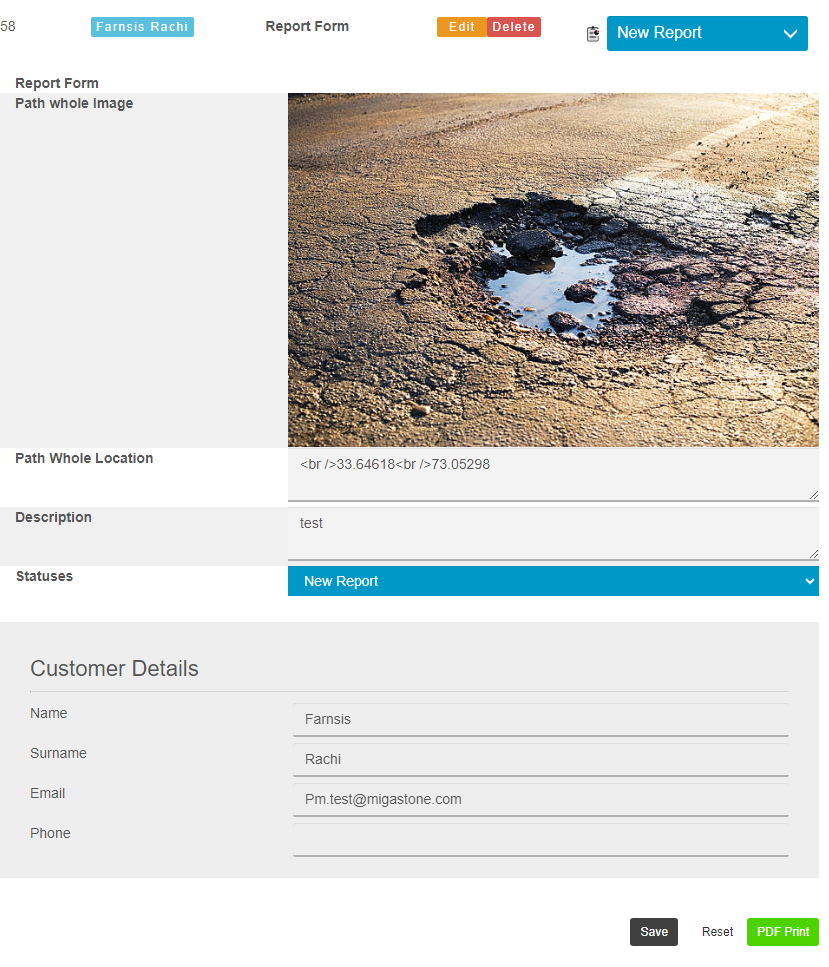
APP SIDE:
The main screen split in half. On one side, the user can view a map displaying nearby tickets. On the other side, the user can see a list of all tickets from other people, organized by distance. At the bottom of the screen, there are three buttons: ‘My History,’ ‘Near Me,’ and ‘Create a New Ticket.
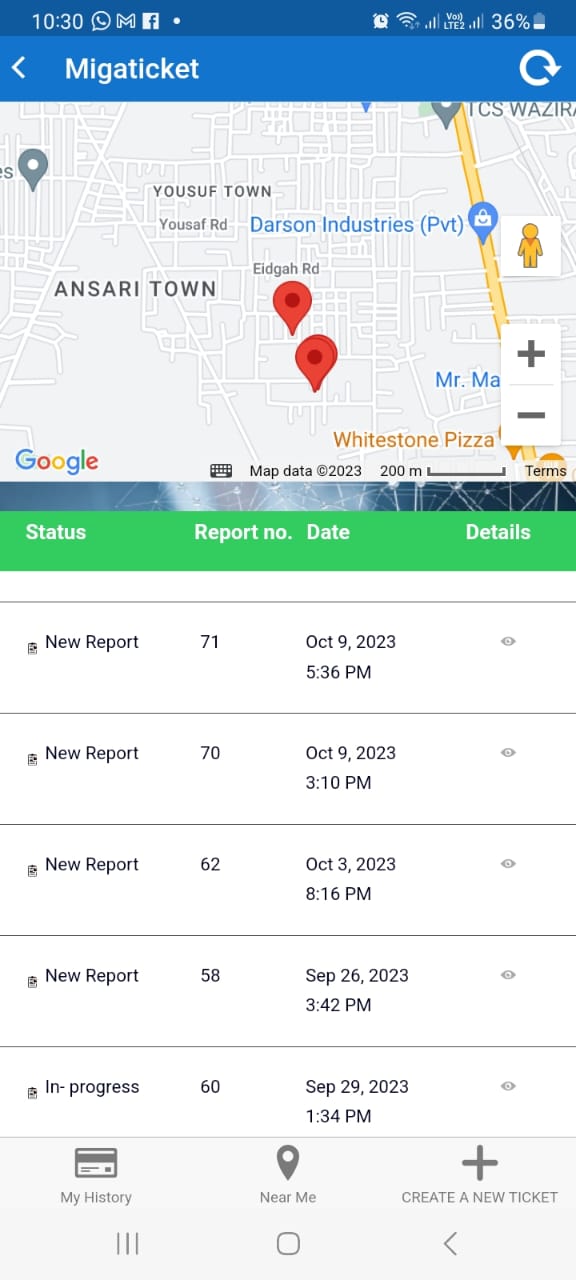
- The My History tab Allows the user to see the number of reports submitted and their status and details of the report as shown in the image.
- The Near Me tab allows the User to see the Ticket reported near it ordered by Distance.
- Creat New Report While submitting the report the user just has to check the location of the check box the App itself gets the current location.
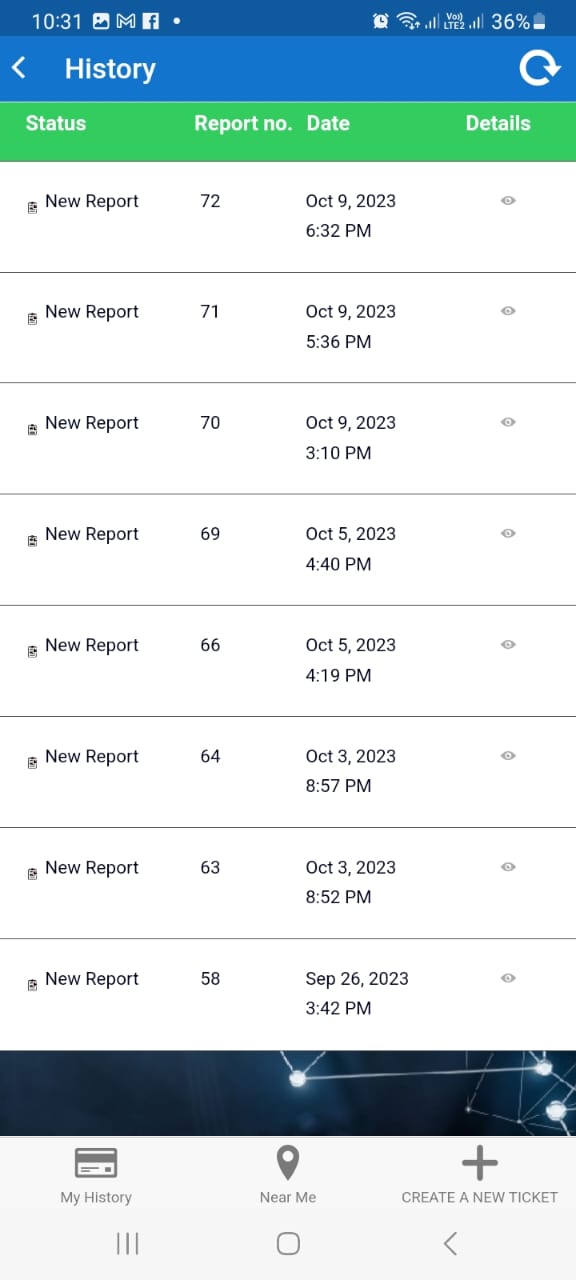
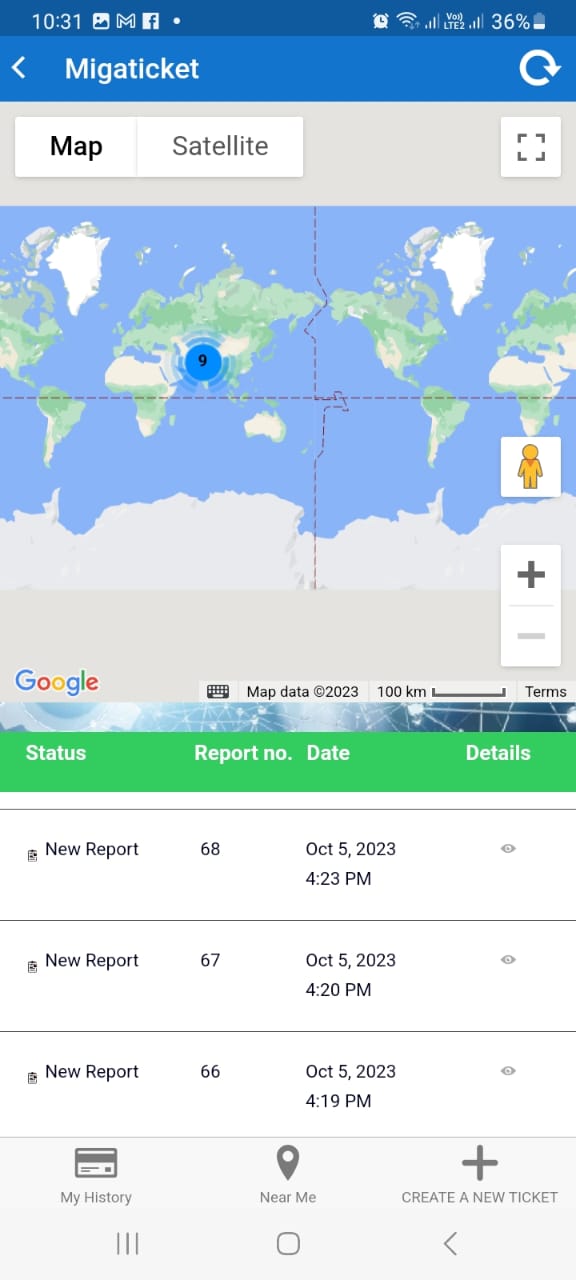
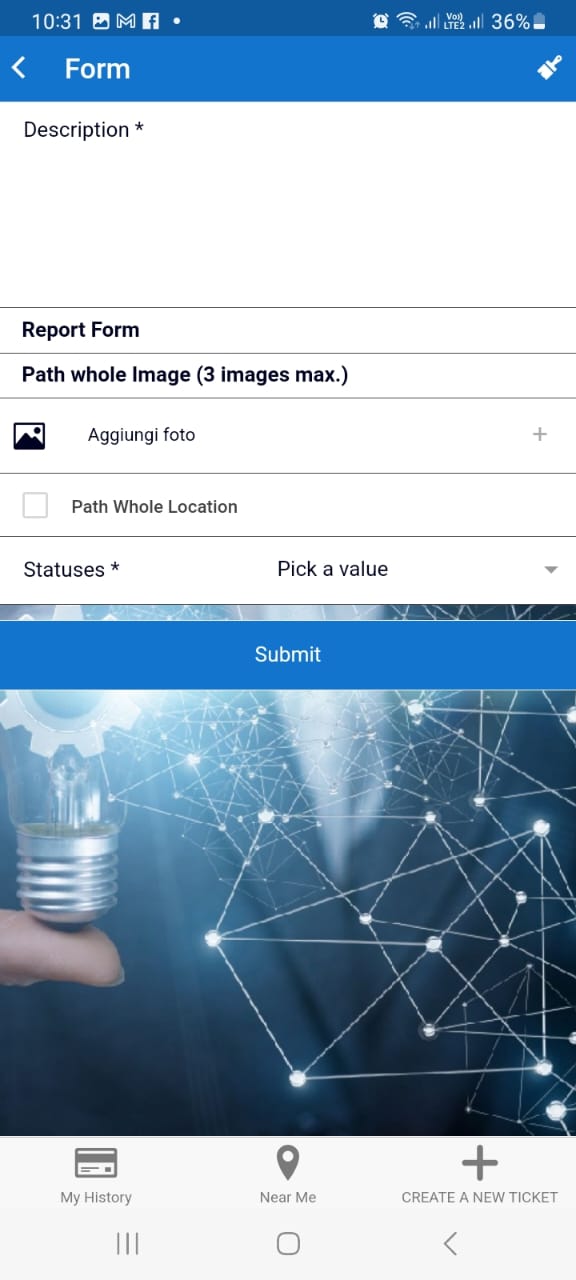
Migavenue
This feature allows the creation of a list of geolocated places and the Moderation of pages.
It is possible to locate places on a map, or, if the user opens the page of a particular location, he can get the route and directions to this location, by walking or driving. The list of places is sorted according to the distance between the places and the user, from closest to furthest.
After adding the Migavenue feature to your app, click the button![]() to add a place to the list.
to add a place to the list.
For each place, it is necessary to enter the Title. It is also possible to optionally insert the subtitle and the images to be enabled through the desired display options. It is also possible to assign tags and categories to the place (if previously entered from the specific “Categories” screen).
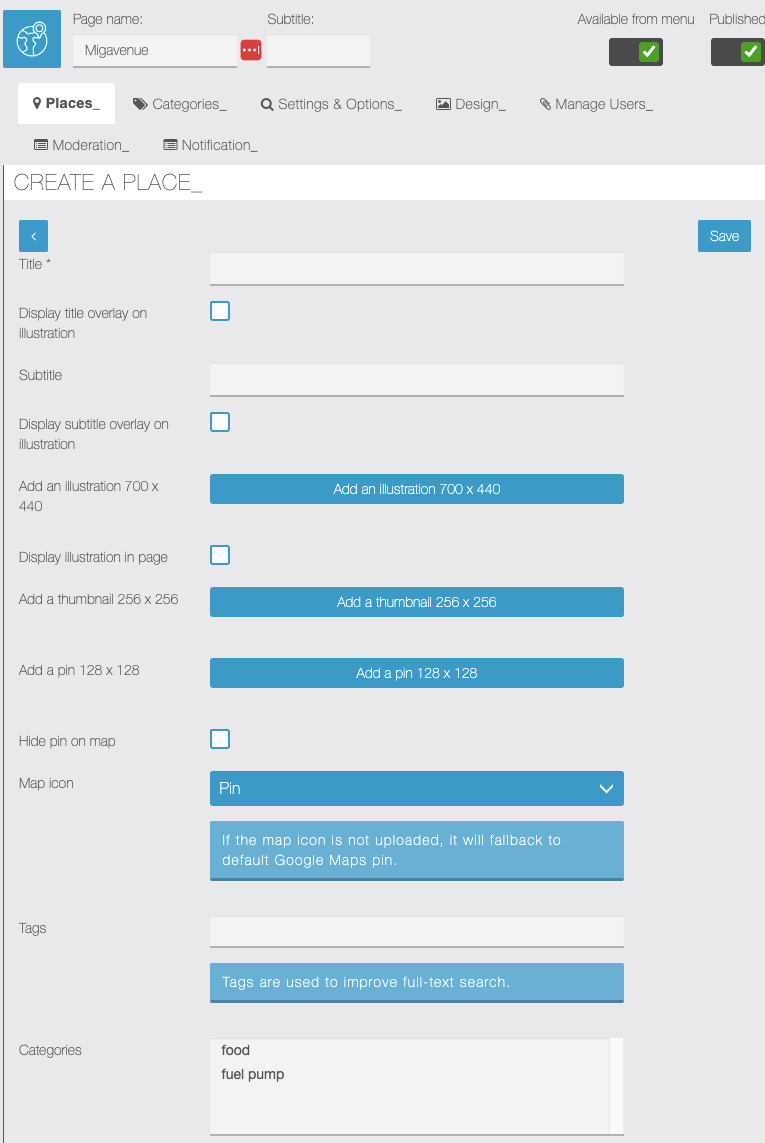
At this point enter an address or its coordinates. It is possible to add a label for this address, but it is not mandatory.
If you select the ‘Show address’ option, the address will appear on the card. If you select the “Show locator button” option, the locator button will be displayed allowing the user to see the route.
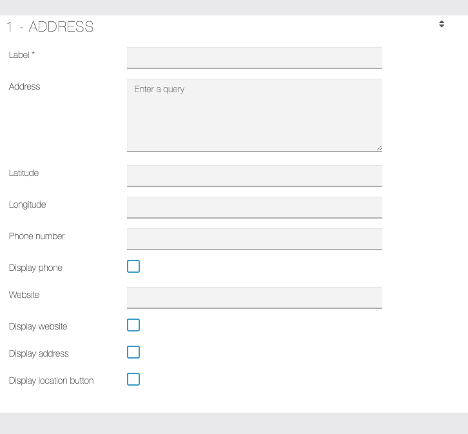
It is possible to insert other sections such as text, images, videos, or attachments on the page of a single place.

Categories
Allow the user the enter the Categories of the place for example: Eat and drink, Entertainment, Fuel, etc.
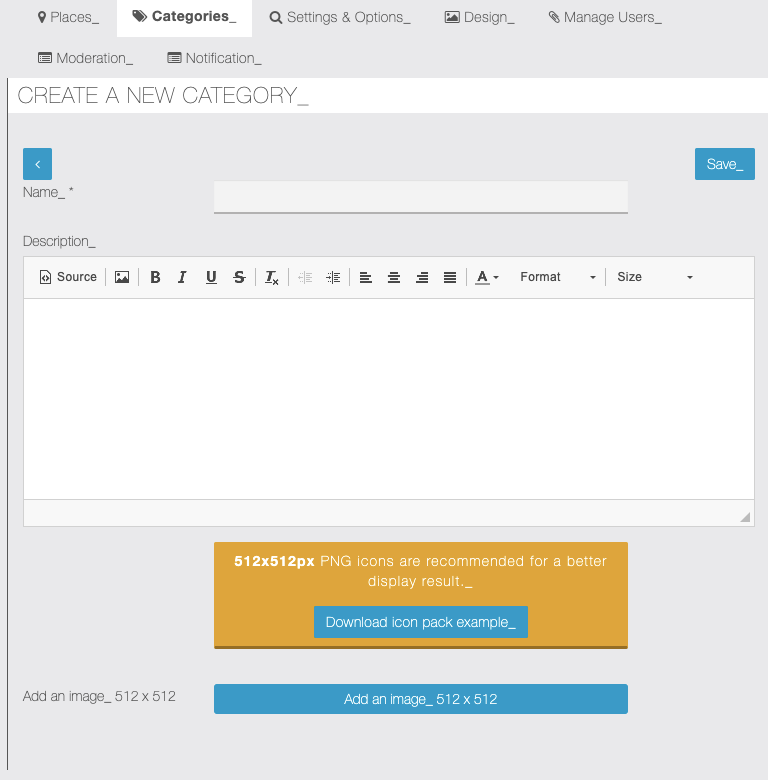
Settings and Options
From this screen, it is possible to set some display options for Migavenue page in the app
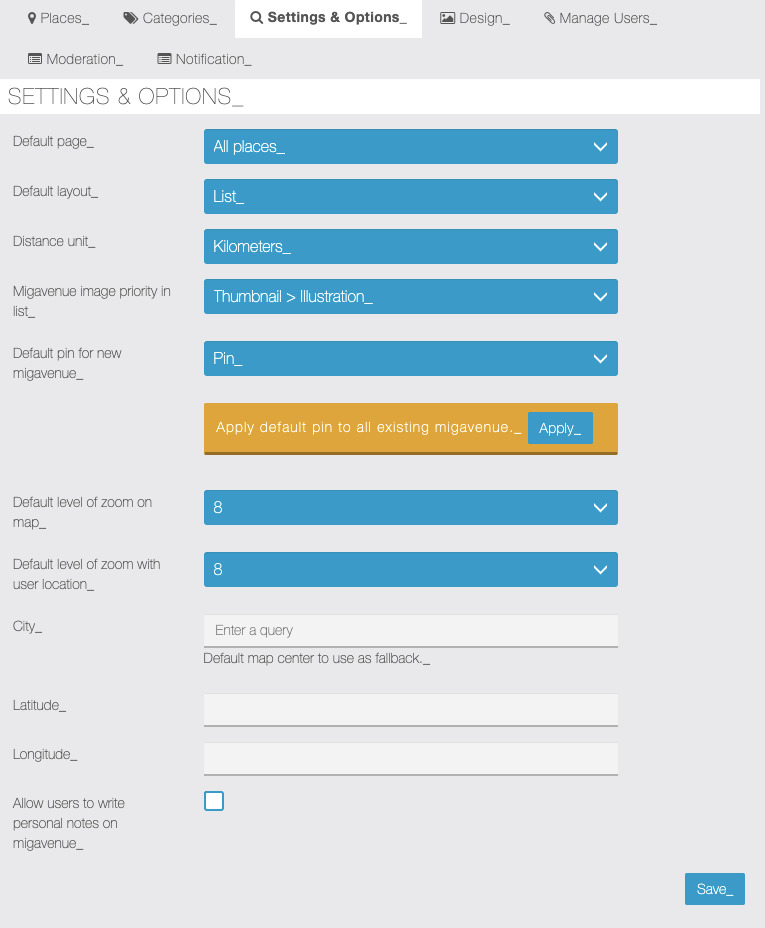
- Default Page – You can change the default home page showing categories (if used).
- Default layout – You can also select a multi-column list view.
- Default unit – The unit of distance measurement.
- Image priority places in list – Select according to viewing preference
- Default pin for new places – You can choose the type of “pin” for places on the map.
- Default level of zoom on map – You can choose the level of zoom on the ma
- Default level of Zoom with location – You can choose the level of zoom for places on the map.
Manage user
From this screen it is possible to set the user role Admin selected the users can access a WEB PAGE with the same EDITOR of SIBERIAN that allows managing the page assigned. We have two kinds of users
- ENABLED: Means that can manage the assigned (Edith, update) page without any permission.
- ENABLED W/MOD: Means that they can change the page but ADMIN should moderate it before accepting or refusing it.
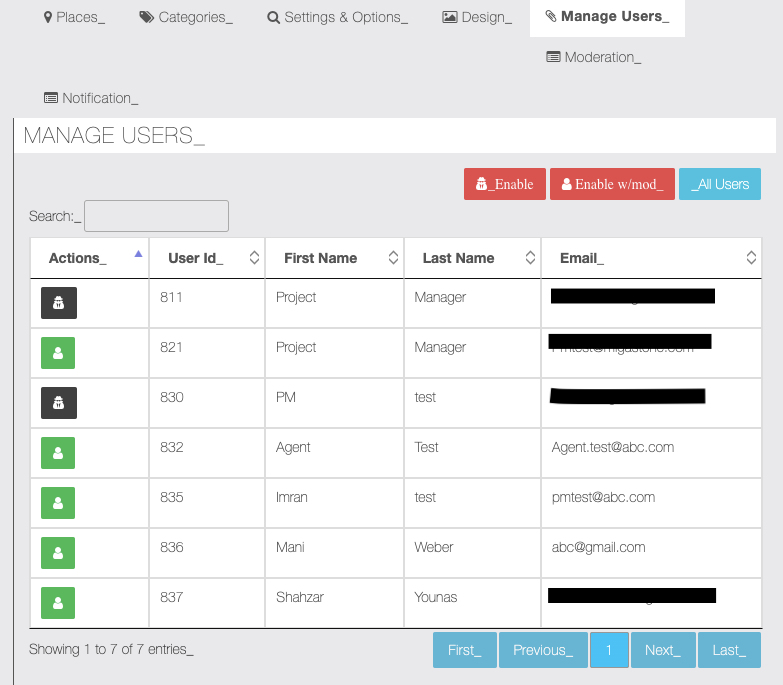
Moderation
From this screen, it is possible to allow the Changes done by the ENABLED W/MOD user also user can see what changes happened previous and current. The admin can Accept or Refuse the changes.
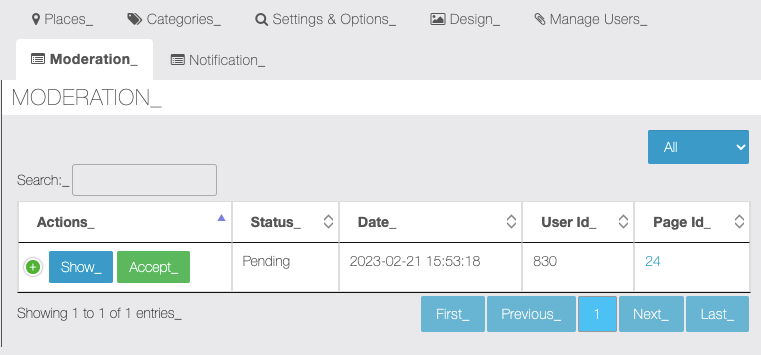
By clicking the show screen it is possible to allow the changes done by the ENABLED W/MOD. Admin can see the changes
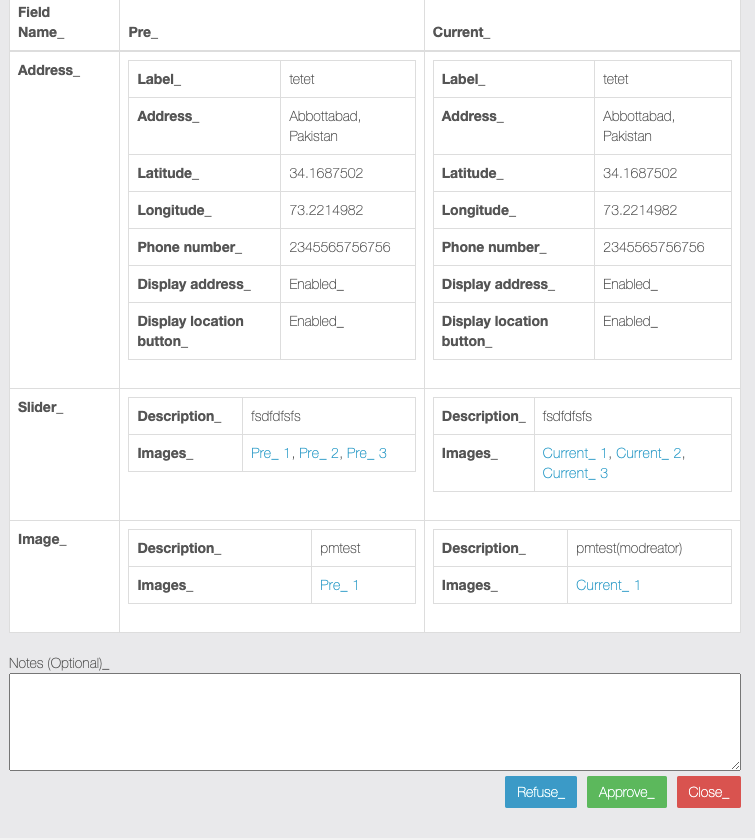
Here is an example of a list of places displayed in the app:
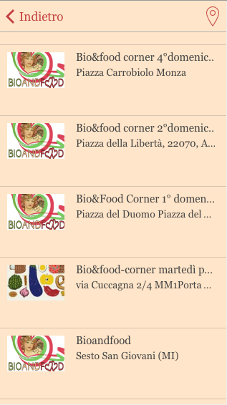
Here’s an example of a single place page:
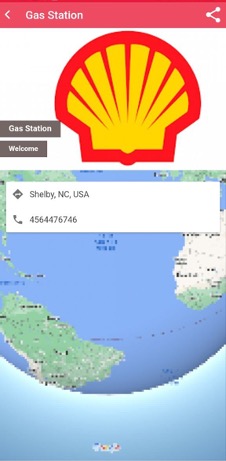
Here is an example of Moderation user App side view red warning with a button, “MODIFY” button. If the user will click on it a web page is opened with the editor.
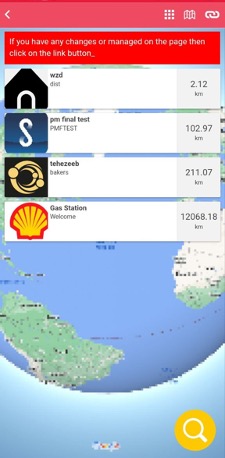
Migawelcome
Orientation
Introducing the new feature that allows to invite external users through a landing page, which contains Basic Information field Sets
- with MigaWelcome module you can generate HTML source code of an OPTIN FORM that can be embedded in an external Web page.
- When the OPTIN FORM is submitted, the module create a new APP User and send a custom welcome email that gives these details:
- User and Password (automatically generated)
- Link to download the APP or WPA APP

Source Code For Landing Page
It is an HTML source code that shows an OPTIN FORM that can be embedded to an external Web page.

Track Affiliate: When this checkbox is checked, it activates the logic to track all the query strings of the page where the form is embedded. This means that when the “Track Affiliate” checkbox is checked, the system or code will start capturing and storing all the query string parameters from the URL where the form is embedded.
Is Affiliate Visible: This field appears to be used for capturing the first query string parameter if it’s visible in the URL. The text field is editable if the first query string parameter is visible in the URL. If the first query string parameter is present in the URL, you can enter its value in this text field. This is useful for manually specifying or recording the value of the first query string parameter if needed.
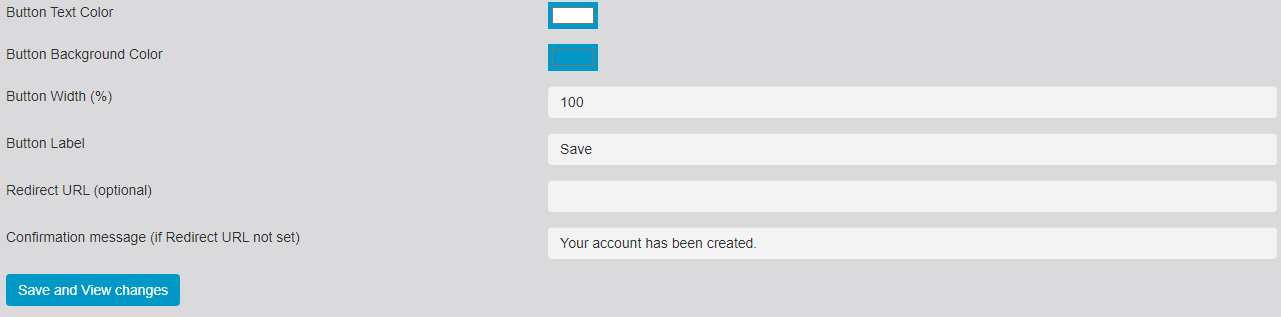
- Button color
- Button Background
- Button Width
- Button label
- Redirect Url
- Confirmation message (if Redirect URL not set)
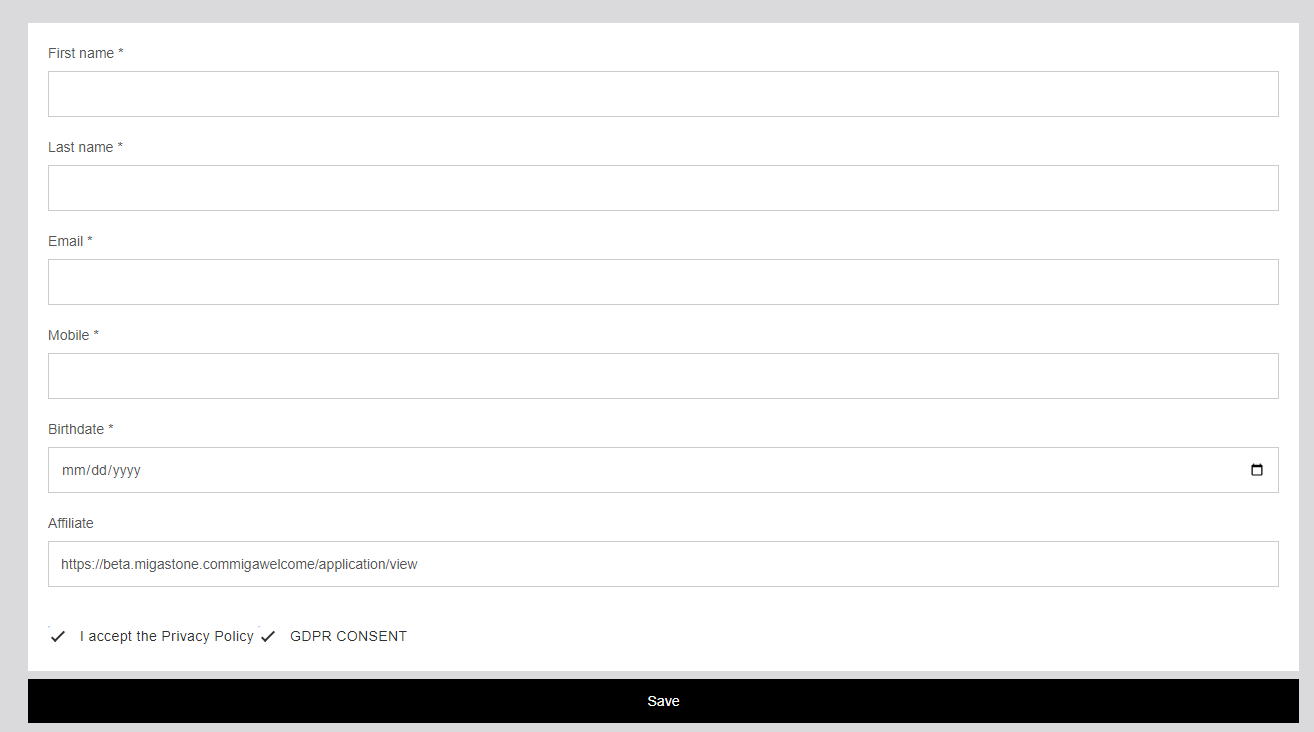
OPTIN form view along with source code to embed on different sites
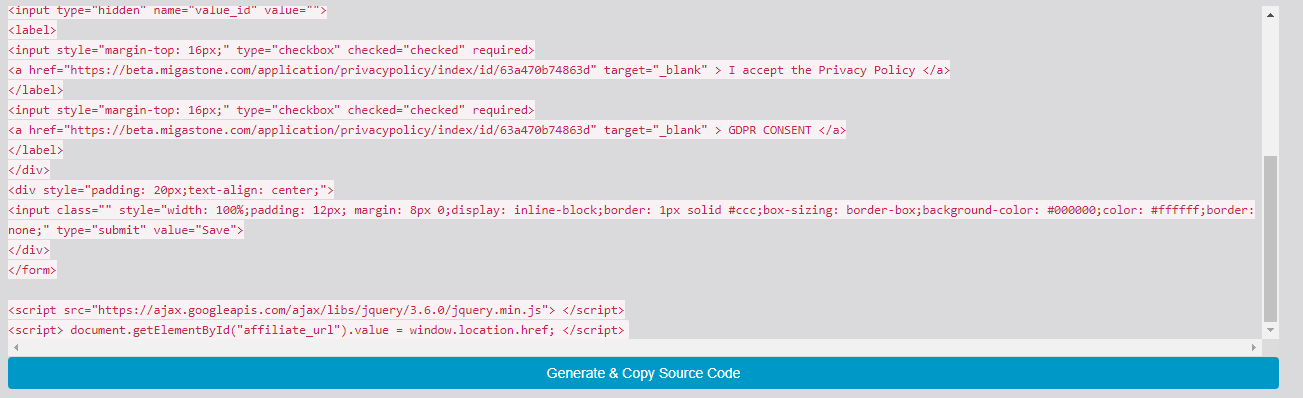
Source code needs to be generated and copied from the button and placed on the desired site/page
Welcome Email
This form represents the welcome email that will be sent to the user who will sign up using the landing page form code
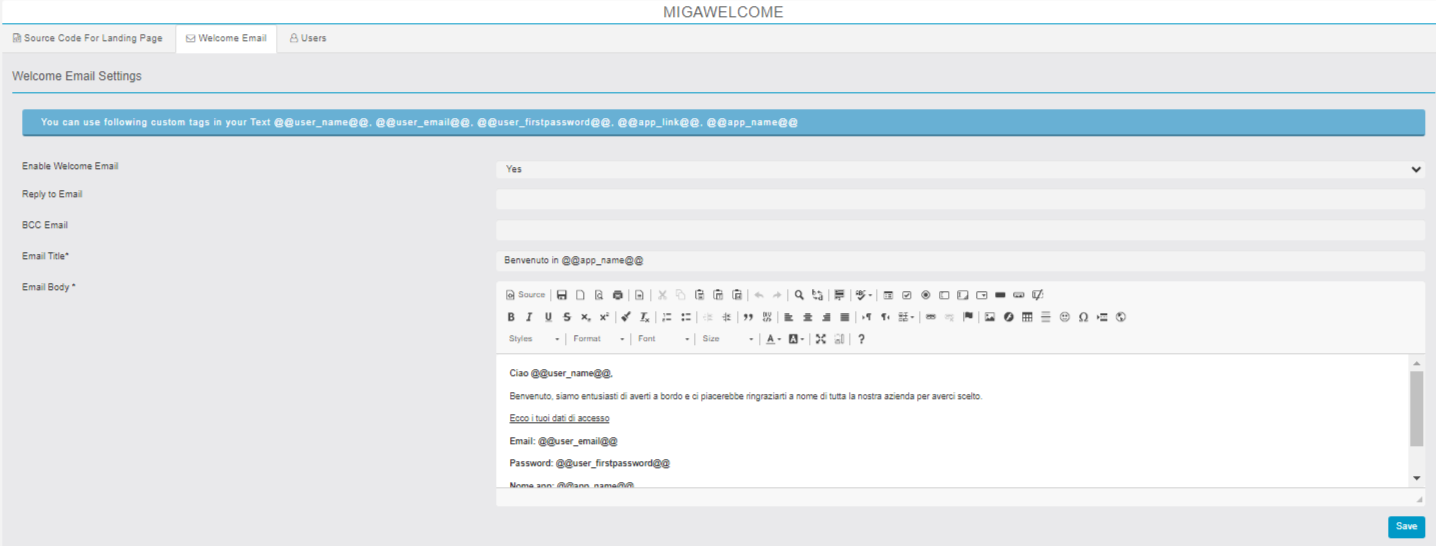
- By Filling out the optin form, we create an APP User and there will be a custom welcome email that gives these details:
- User name and Password (automatically generated)
- Link to download the APP or WPA APP
- Other custom text
LINK: https://support.migastone.com/en/hrf_faq/migawelcome/
MIGAWHATSAPP
ORIENTATION
The Migawhatsapp introduces the new ability to dispatch WhatsApp messages from Siberian to all users with registered mobile numbers. This innovation fills a critical gap by reaching users who might otherwise remain inaccessible through conventional push notifications. Moreover, to streamline communication and prevent redundancy, users equipped with both a mobile number and a push token can be selectively excluded from these transmissions.
This update seamlessly integrates with the MIGACHAT module, offering an optional AI integration feature within Siberian. Upon installation, administrators have the flexibility to enable or disable MIGACHAT integration through a newly introduced menu, with the integration set to enabled by default.
The integration empowers Migachat to receive and respond to messages originating from WhatsApp users. handle the AI’s response and forward it to the specific WhatsApp user with specific procedures to handle message forwarding and maintain communication history.
FEATURES
To access the Migawhatsapp interface, open the “Modules” section in the vertical menu of your App Builder. Then select “MIgawhatsapp”.
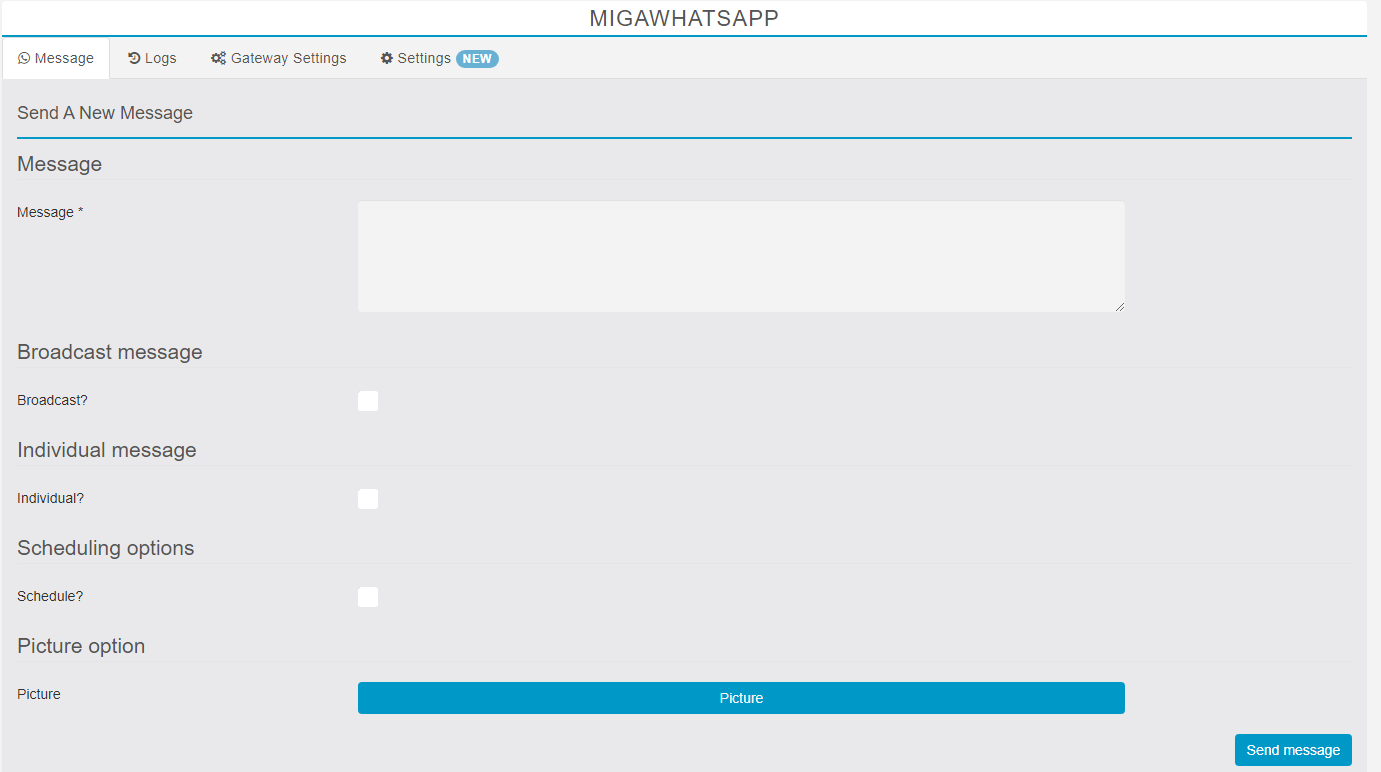
Manual sending: Users have the ability to manually send WhatsApp messages from the interface. They can enter the message in a text area provided in the Migawhatsapp function.
Broadcast or individual message sending: Users can choose between two options for sending WhatsApp messages: broadcast or individual message.
Filtering valid phone numbers: The interface filters and displays only the users who have a valid phone number stored in their account. This ensures that WhatsApp messages are sent only to users who have provided a phone number.
Selecting recipients for individual messages: If the single message-sending option is chosen, users can select specific recipients from the entire module interface. The interface filters all app users and displays only those who have a mobile phone number stored.
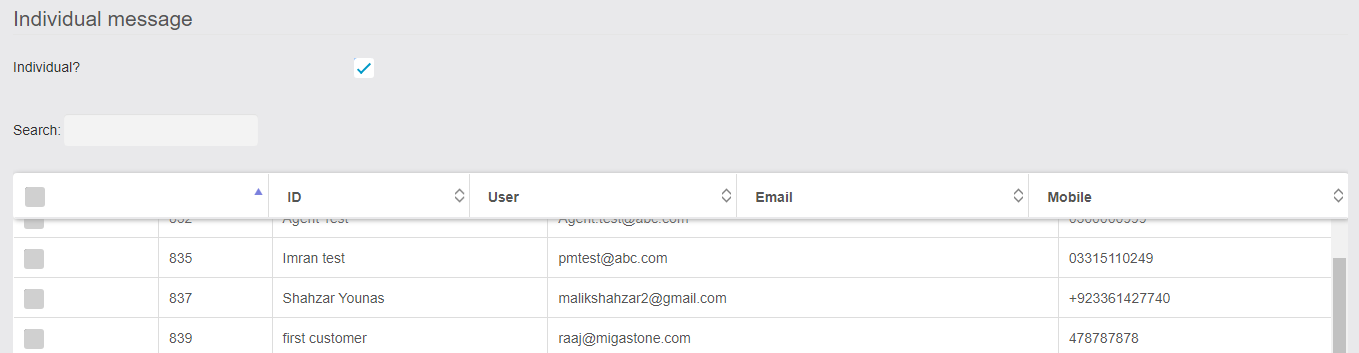
Scheduling options: When selecting the Scheduling Option the menu Appears as shown in the Image which allows the administrator to Schedule the message.
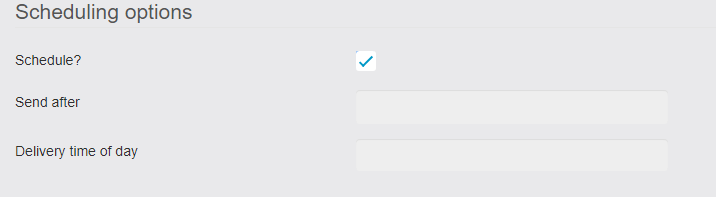
Simplified management: With this new feature, there is no need to check the PUSH table or create a cron job. The sending of WhatsApp messages can be managed manually through the Migawhatsapp module.
GATEWAY SETTINGS
From this tab, you need to set the API keys of our gateway.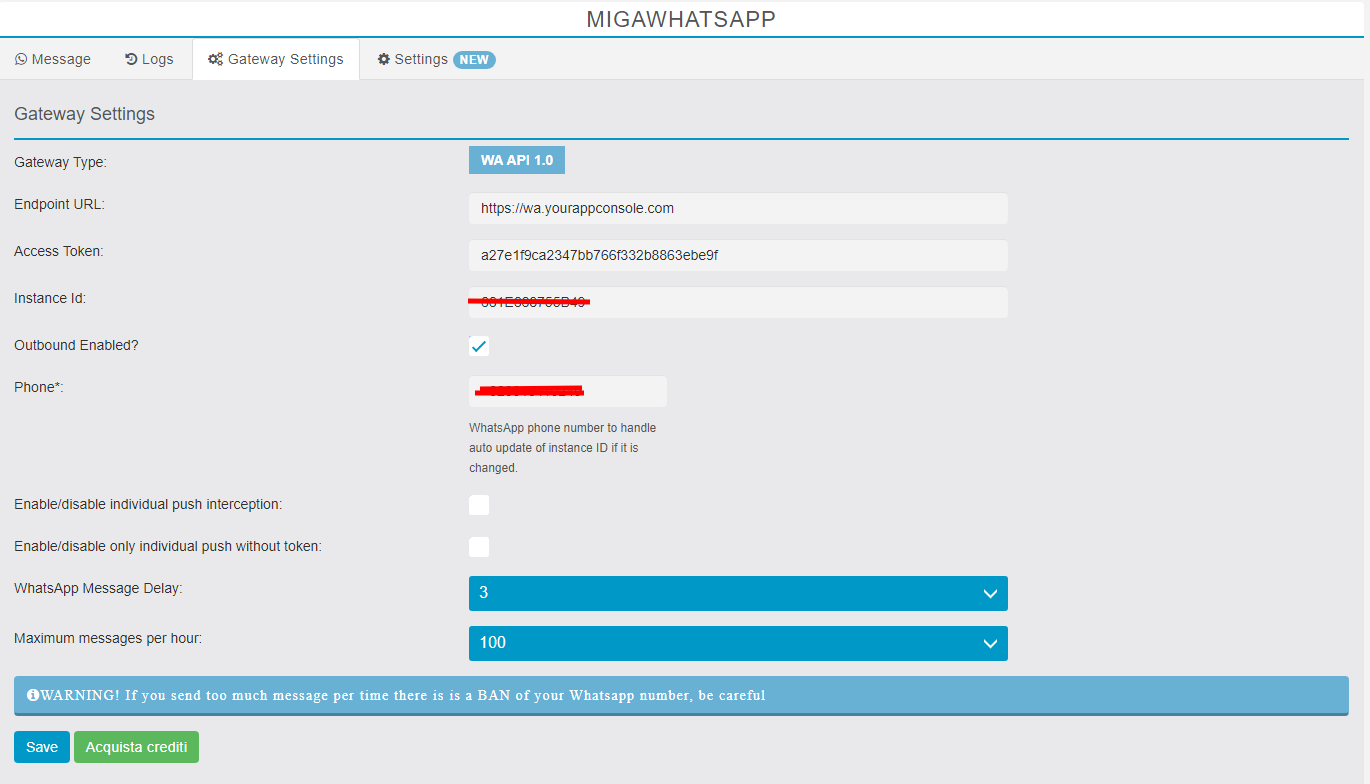
- **Sign Up:**
- Complete the registration process with the required information.
- Log in using your newly created credentials.
- **Add Phone Number:**
- Locate the option to add a phone number in your account settings.
- Input the desired phone number and complete the verification process.
- **Retrieve Keys:**
- Go to the “Number Profile” section in your account settings.
- Copy both keys: Access Token and Instance ID.
- **Endpoint URL:**
- Use [https://wa.yourappconsole.com/] as your base Endpoint URL.
NOTICE: Avoid using the full endpoint URL (e.g., “send.php”).
NOTICE: To use the system you must purchase a subscription for each of your Whatsapp numbers on the website www.migasender.com
IMPORTANT: every sim must be run in for at least a week with a few messages a day before connecting them to migasender. Otherwise there may be a risk of ban.
SETTINGS:
The new Settings Tab allows the Admin user to configure the various General Settings listed below with their function.
- **Country Code Settings:**
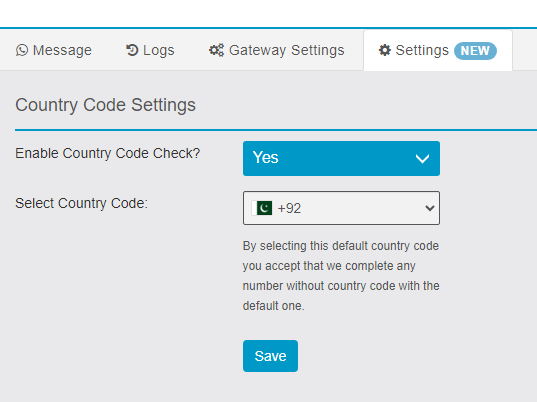
2.**Webhook Settings:**
We declare the webhook to Siberian when we store the first configuration, so the WA gateway can notify of new instances, etc.
When there is an instance ID issue occurs warn the admin with an email.
When a new instance is created the instance ID is updated in the system automatically.
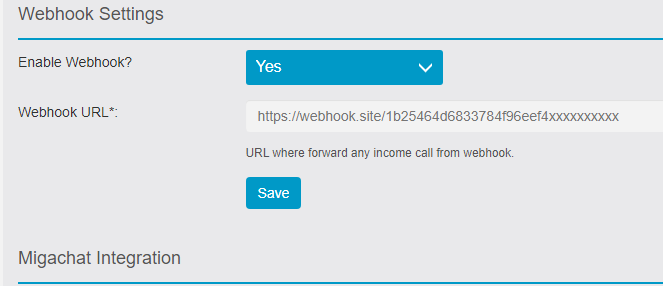
3.**Migachat Intigeration:**
- The MIGACHAT module is installed in Siberian and an INSTANCE is installed in the current APP, we will display a new menu to ENABLE or DISABLE MIGACHAT AI INTEGRATION. By default, the integration is ENABLED.
- Migachat needs to receive any messages written on WhatsApp from users and respond accordingly.
NOTICE: To use Migachat Integeration MIGACHAT module must be installed in the APP.
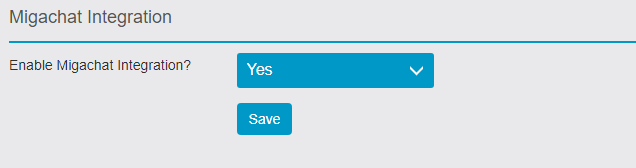
3.**Api Settings:**
- The Settings that enable the Chat history API Token.
- Enabled Send Message API allows the user to get an API Token.
- For more Details Please Read the API DOCS.
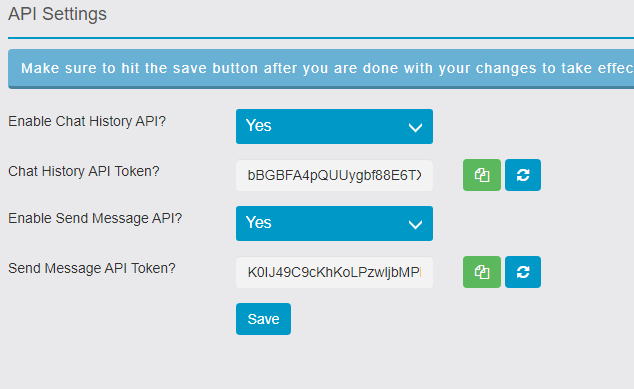
LOGS:
The Tab contains grids of Message logs with details of status, origin, etc.
- logs can be filtered by phone number, start date, and End date.
- Logs are extractable from Excel, and CSV or can simply copy.

LINK: https://support.migastone.com/en/hrf_faq/migawhatsapp/
Migawordpress3
WordPress Admin settings.
Install Simple JWT WP plugin and set the configurations required listed below.
THE MODULE IS SUPPORTING MULTIPLE INSTANCES PER APP, EVERY INSTANCE CAN BE CONNECTED TO A SPECIFIC PAGE.
General Configurations
In the Simple JWT plugin open the “General” tab:
- Setup “Route Namespace” with the same format “namespace/” (any unique string end with ‘/’).
- E.g “xyz/”, “yourdomain/”, “google/”, “migawordpress/”.
- any string containing only English small characters and ending with “/”.
- it is better to use your “company” or “domain” name as it’s unique.
- The Route namespace is used in Migawordpress3, so be precise.
- Under Decryption key source select ‘Plugin Settings’
- Under JWT Decrypt Algorithm select ‘HS256’
- For JWT Decryption Key enter the unique string.
- any string that is like a password.
- e.g. “abcdefghij”, “aaaaaaaaa”, “xyzabldfkjsdlfo8ewl”.
- the string can contain capital letters, small letters, and integers.
- It is not used in Migawordpress but is used for JWT plugin settings.
- For Get JWT token from setup “REQUEST = JWT” and select ‘On’ for connected dropdown.
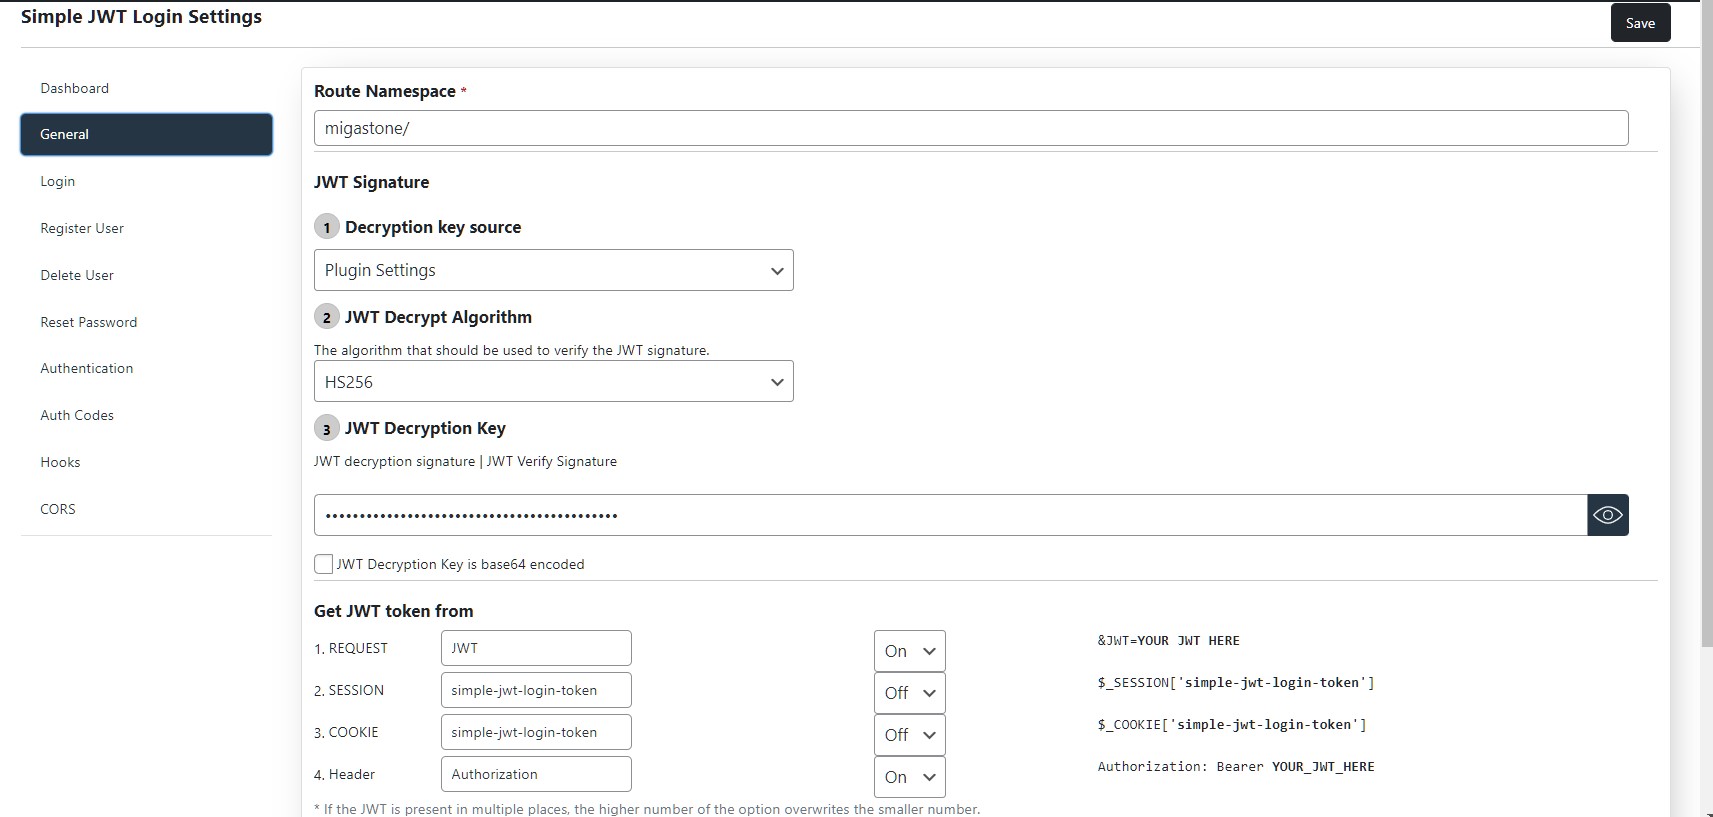
Open the “Login” tab
- Toggle Allow Auto-Login to ‘YES’
- Toggle Auto-Login Requires Auth Code to ‘NO’
- Under JWT Login Settings select ‘Log in by WordPress Username’
- In the JWT parameter key | JWT payload data-id input field write “username” keyword. remember its not any other user name or login name its exactly this string “username”.
- Then set up the redirect page after Auto-Login.


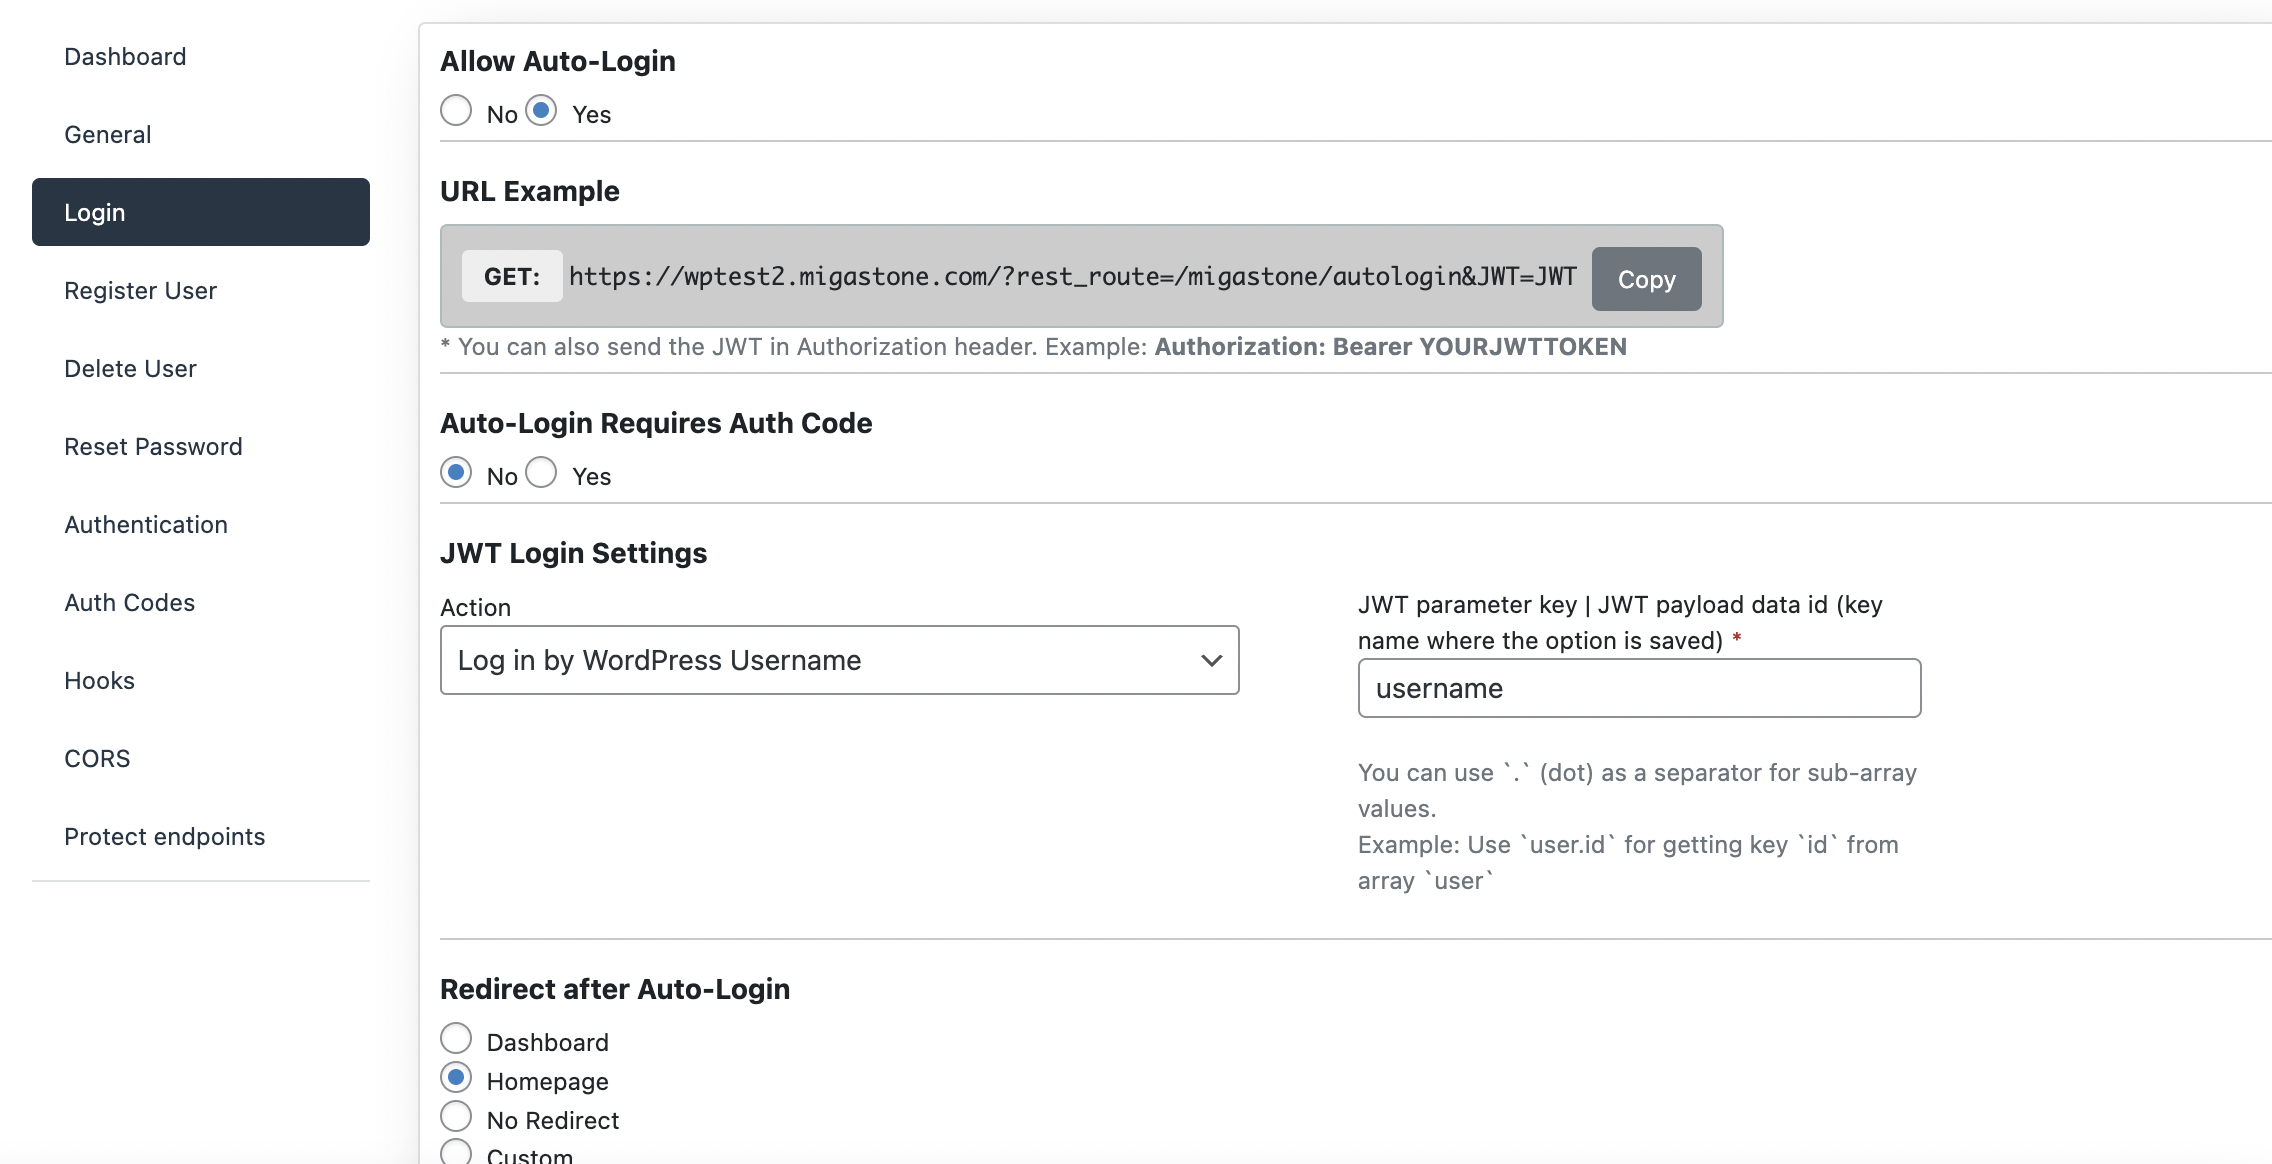
In “Register Users” Tab
- Toggle “Allow Register” to ‘YES’
- Toggle “Register Requires Auth Code” to ‘NO’
- Setup “New User profile slug” from any of given below as default.
- Check the “Return a JWT in the response” checkbox.
- Under “Allowed user_meta keys on create user” enter ‘phone’ in input field.
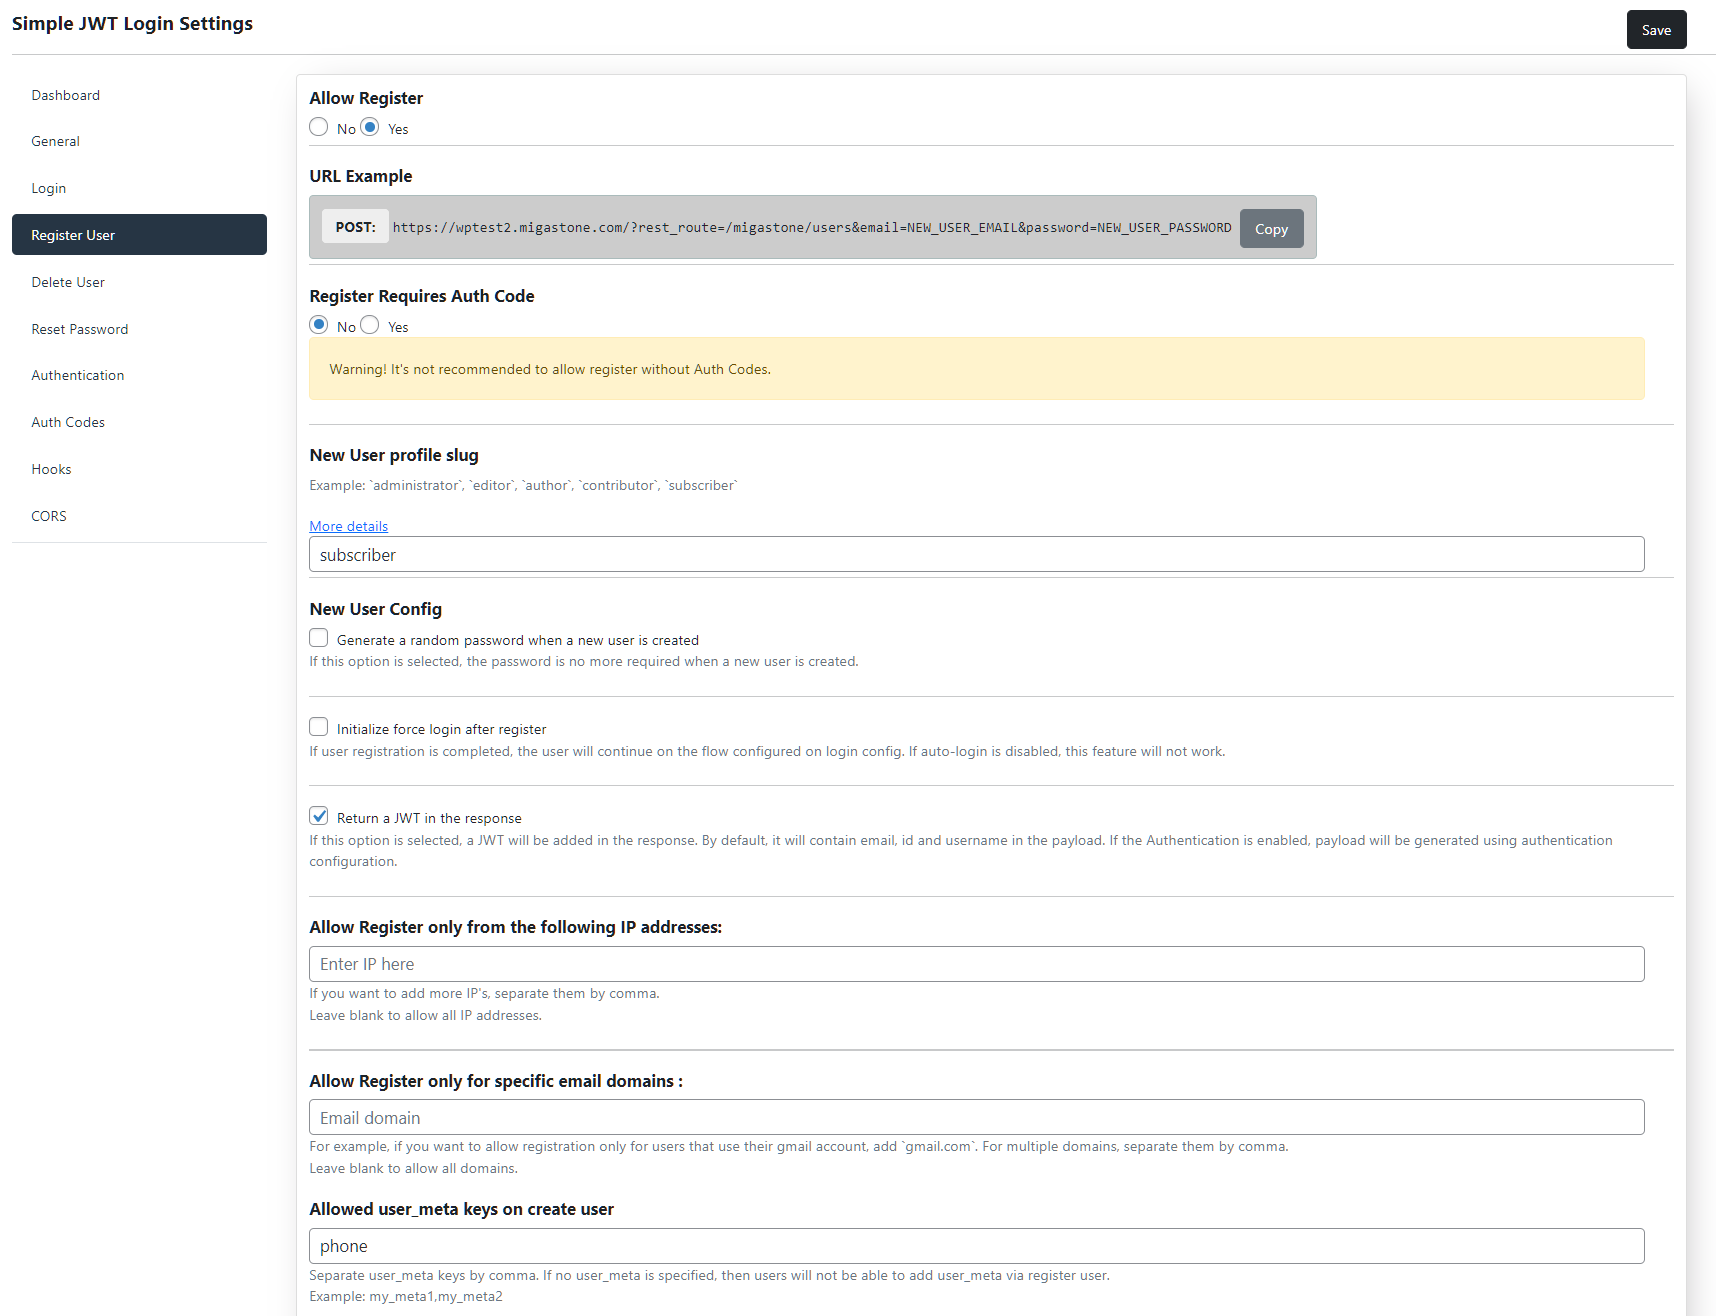
In the “Authentication” tab
- Toggle “Allow Authentication” to ‘Yes’
- Toggle “Authentication Requires Auth Code” to ‘No’
- Select all checkboxes under the “JWT Payload parameters”
- Add “JWT time to live”
- Configure the “Refresh time to live”
- And save the setting from top right corner button.
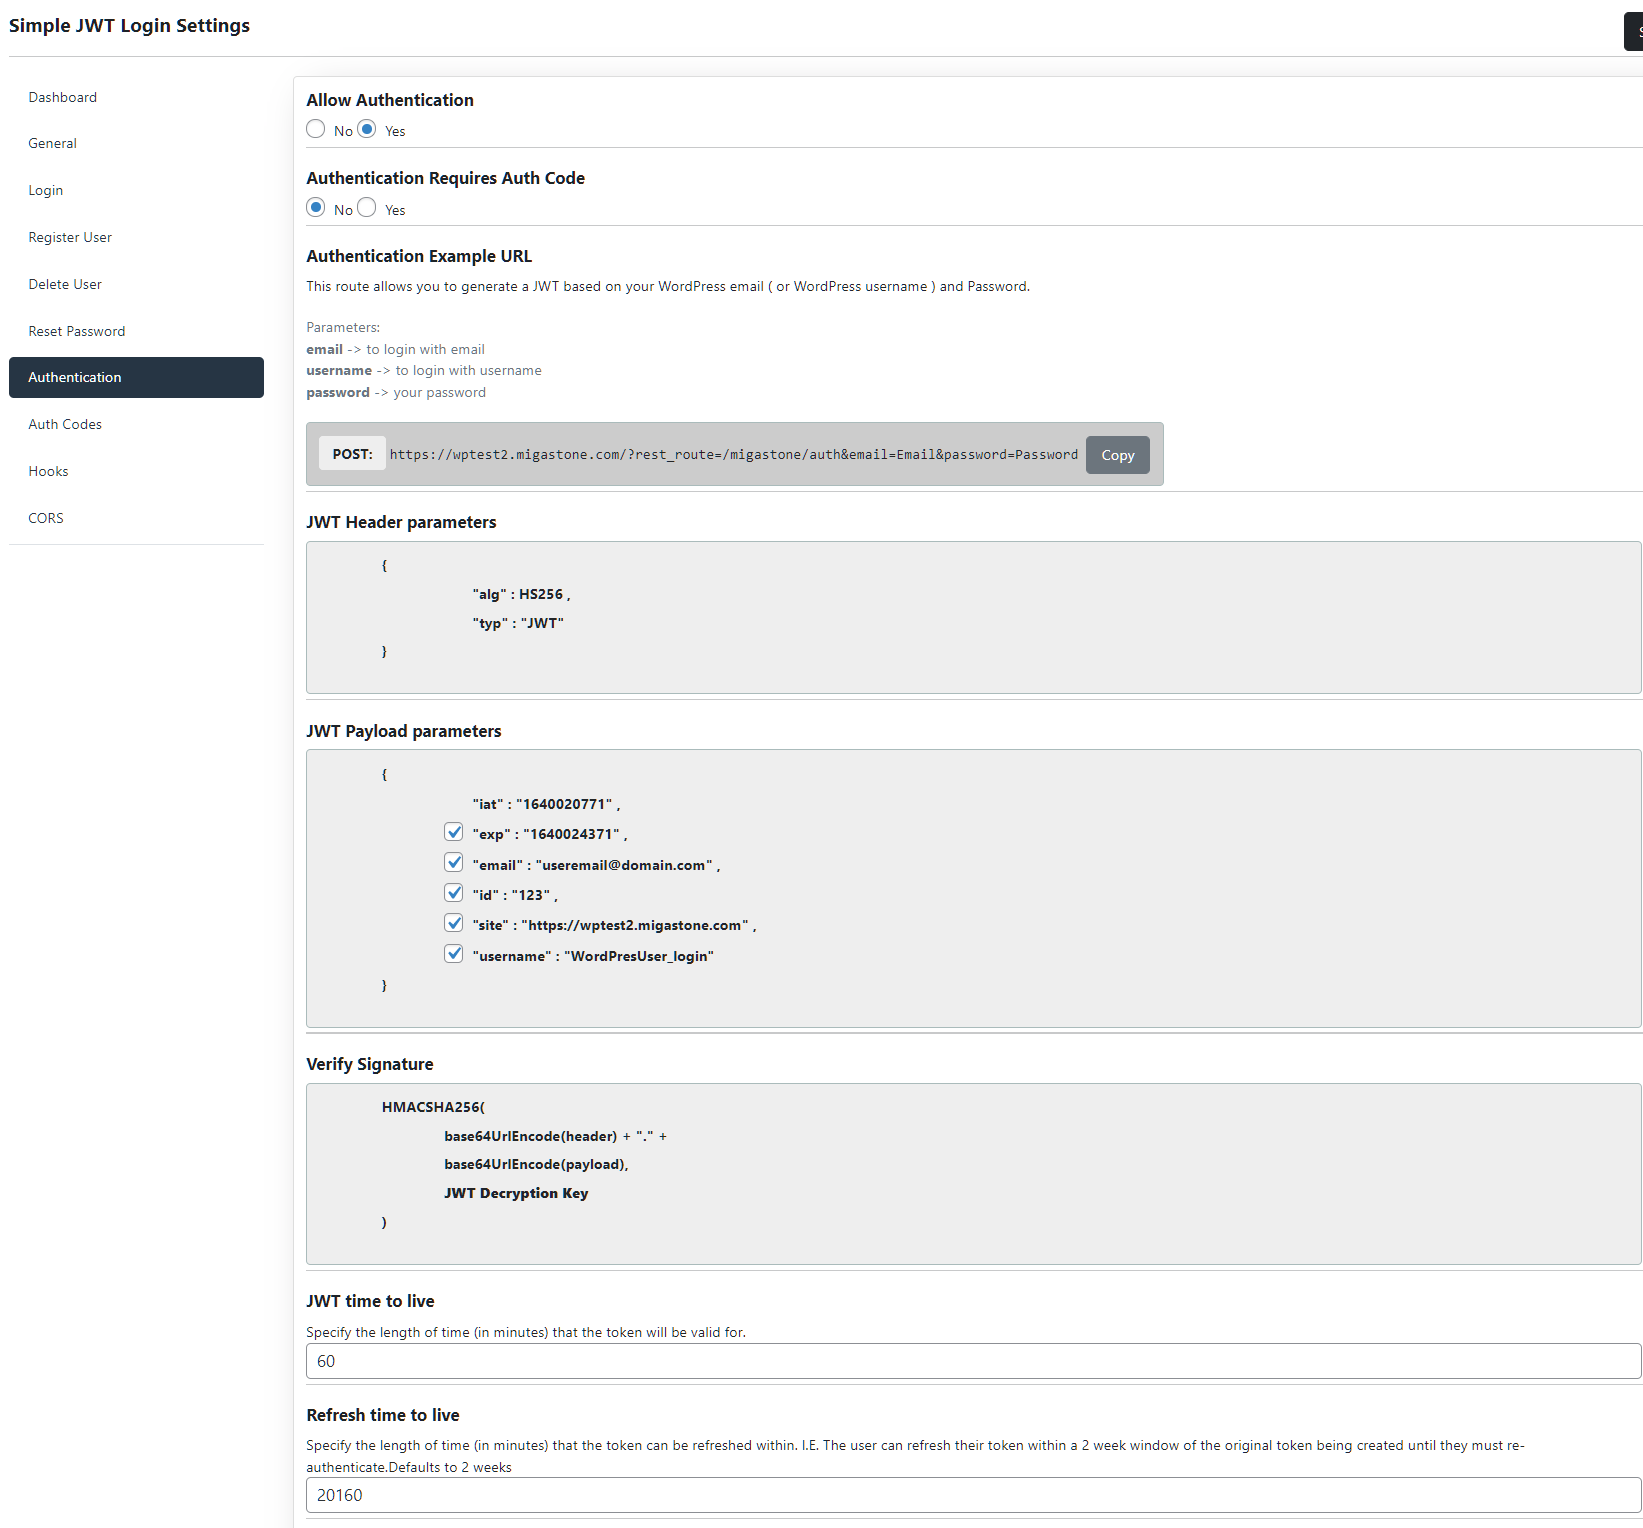
Module Settings
- Configure “Main URL” the base URL of WordPress Site.
- Configure “Simple JWT Plugin Namespace” same as configured in WordPress site earlier.

- Select Registration Type.
- Add heading to display on login page.
- Set text and banner colors.
- Save and you are good to go.
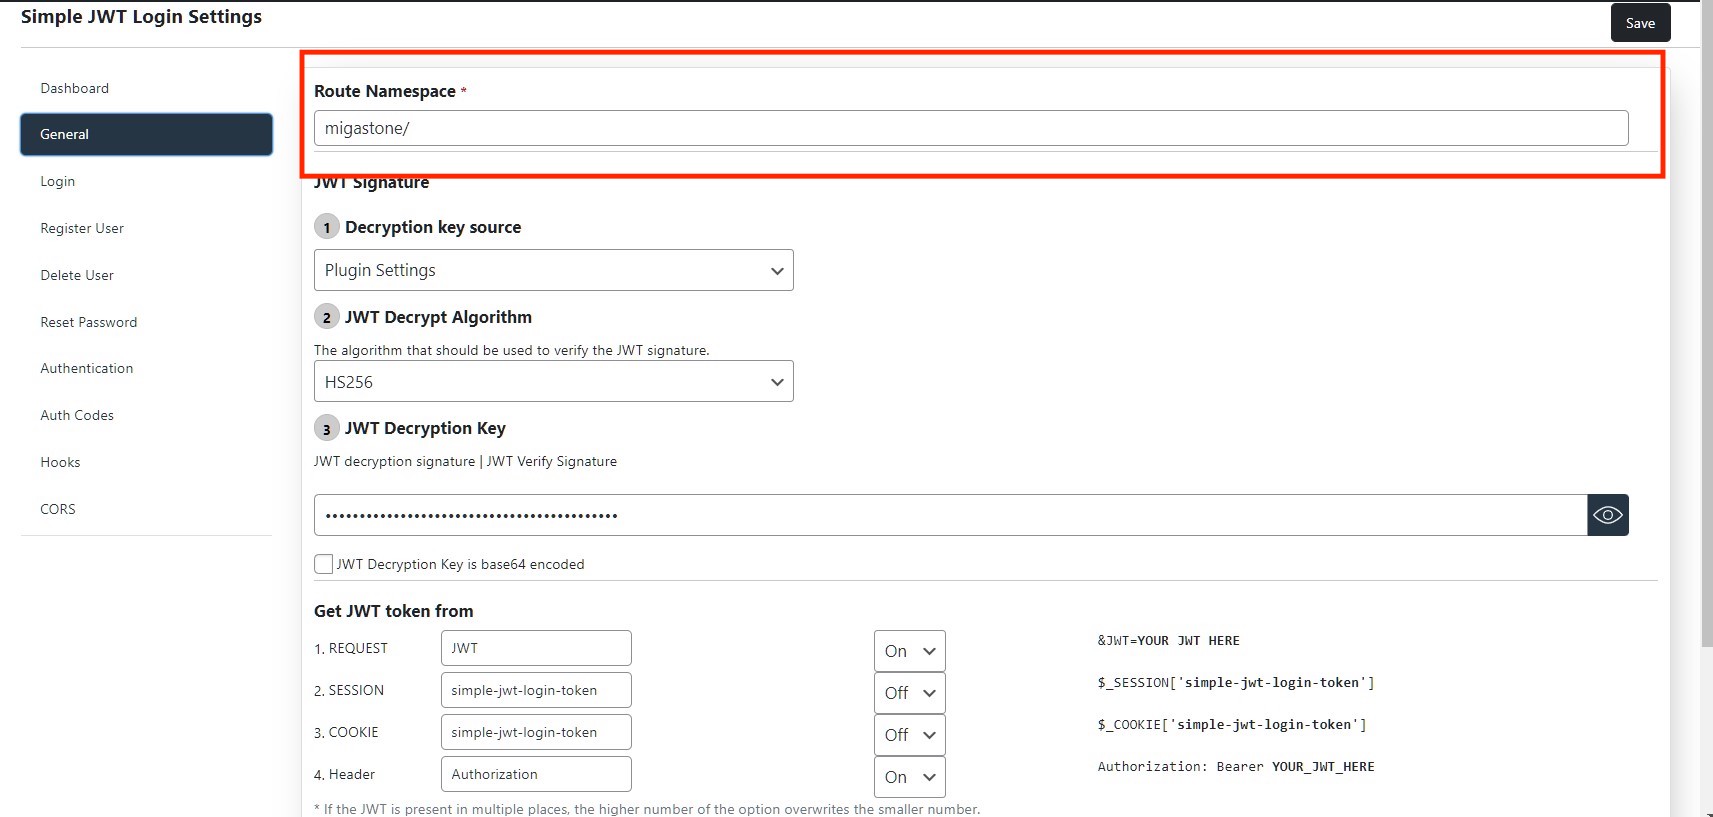
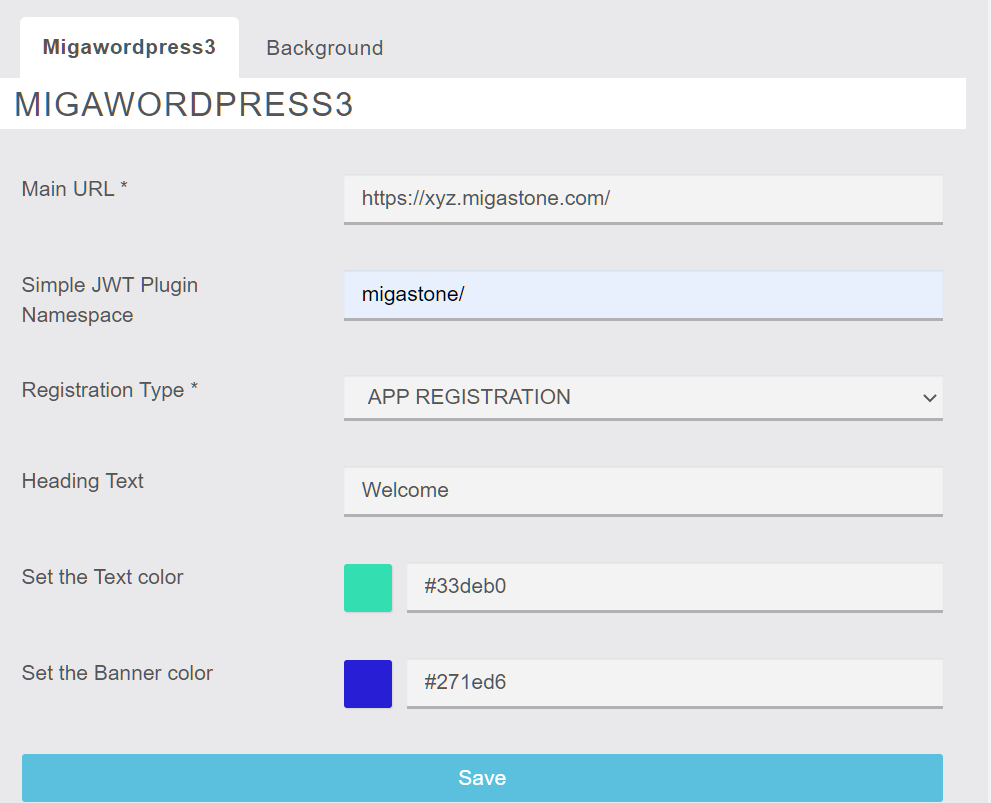
Functionality in the app
In order to access the feature from the app, the user must first register or log into the app, otherwise the message “You must be signed in to use this feature” is displayed.
The following scenarios occur the first time you access the feature.
a) The user is NOT registered on the WP site:
If the “MANDATORY REGISTRATION TO THE WEBSITE” option is selected in the module settings:
A form is displayed to enter User and Password. If not match, a popup appears with “We are sorry but the credentials are not correct or do not exist. Do you want to go to the site registration?”
If yes, the user is redirected to the WP site registration page (you need to fill in the URL of the WP site registration page in the form settings)
If the “APP REGISTRATION” option is selected in the module settings:
User fills in user and password and if it does not exist in WP a user is automatically created on WP SITE.
b) The user is ALREADY registered on the WP site:
the user has to enter e-mail and password only once.
Permalink: https://support.migastone.com/en/hrf_faq/migawordpress3/
Newswall (News Page)
This feature allows you to create a news page with a photo and comments from users. It works like a news wall, users are able to find all the posts you wrote on it.
Note: to create a news, first of all you have to upload your logo: click on modify my logo and upload one.
Click on ![]() and create your news. Keep it simple and short, users will read it on their mobile device so it must be short. Insert a picture if you want.
and create your news. Keep it simple and short, users will read it on their mobile device so it must be short. Insert a picture if you want.
You can obtain this:


Offline Mode
NB: Offline mode is disabled by default. For more info please contact Migastone Support
The Offline Mode is not really a feature, but it allows your users to download the contents of the app in their phones so that they can access it later, even if they have no connection. Let’s see how this works.When the users download the app and open it for the first time, they will be asked if they want to download the contents to access it when they are offline. If they do it, they will be able to access all the contents that are in the app even when there is no connection.

But you have to know that everything that is linked to an external website will not be downloaded, like for example Youtube videos, Instagram galleries, or Facebook pages. As you have to get the content from outside the app, you need an internet connection to access it.
Padlock Pro
This feature allows app owners to lock pages or group of pages based on different user roles.
Integrated with Profile feature, allow users to select Role on Signup. (ATTENTION: the assignment of the individual user’s access to the protected folder or page must always be set by the administrator, based on the role of the user who has registered).
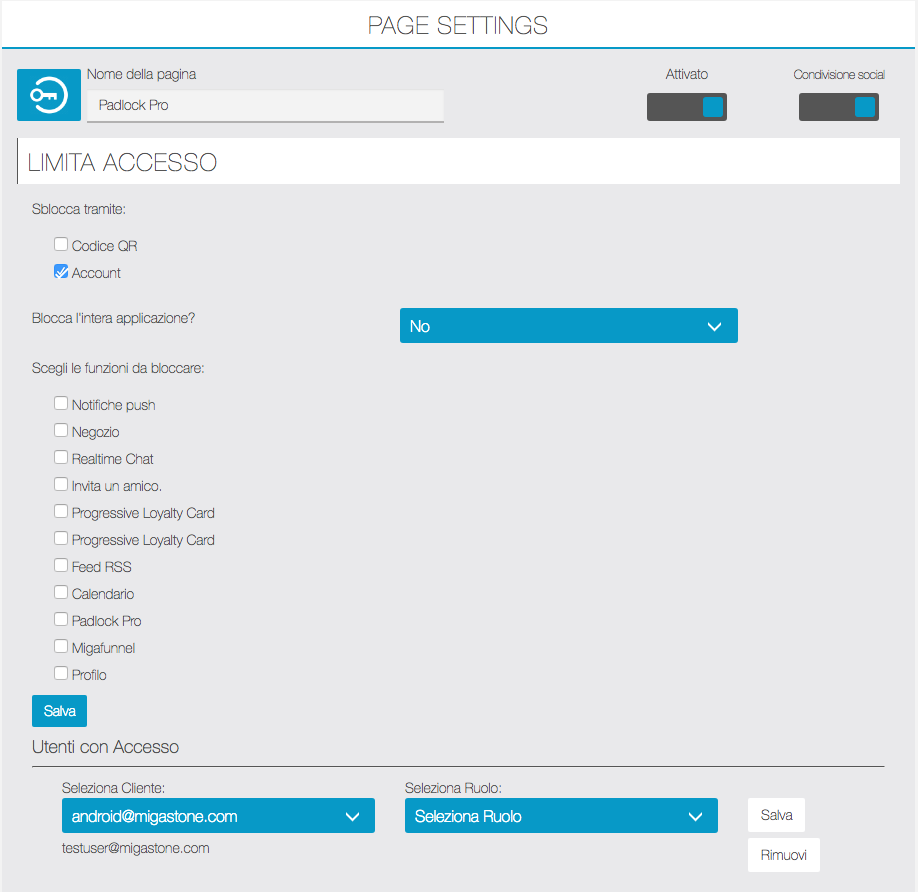
Exemple: consider an App for school and you have 3 types of users here.
- Students
- Teachers
- Parents
You create a Role for each one by creating a Folder and Assigning pages you want them to see.
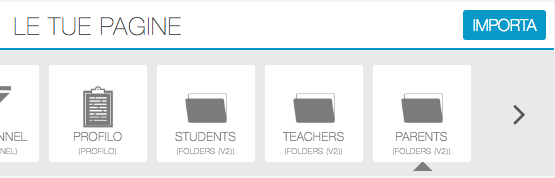
Now you have to assign each user a Role in Padlock Pro Backend Admin view by selecting one of that folder. that’s it.
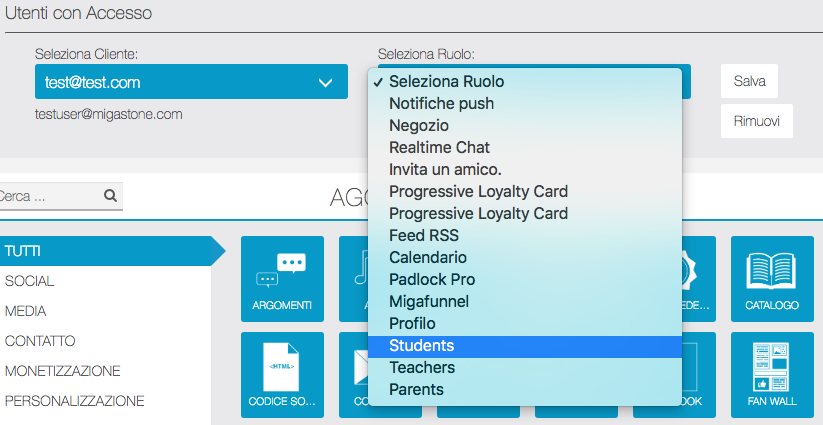
When user logs into the app using Padlock pro menu he will be automatically redirected to Folder/Role assigned to them.
Please make sure you select the Folders/Roles menus from Padlock Pro settings so that no logged users can’t see them.
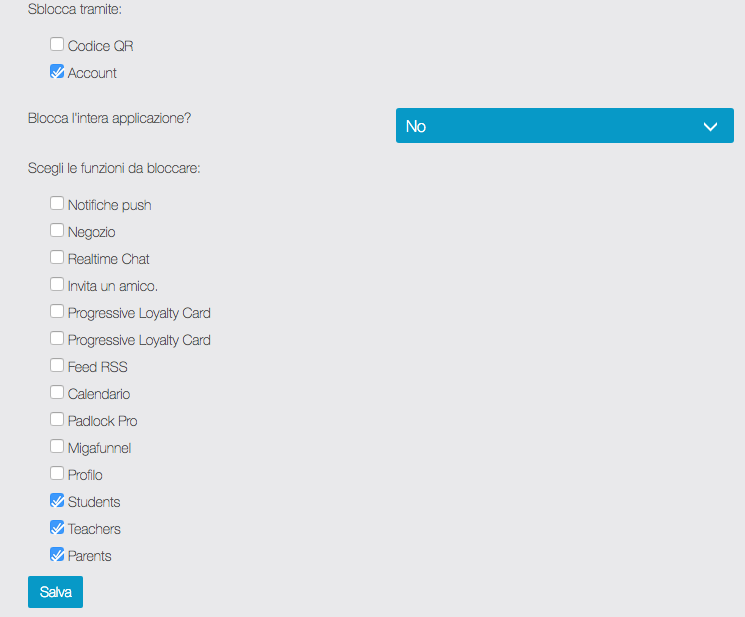
Features:
- Protect / Lock single / multiple menus / features
- Assign a Single page or Multiple pages to a User
- Enterprise level access for each departments etc.
- If you flag a user [ can access the pages locked by the “Locker” ] he becomes front end super admin who will have access to everything and other users will still have limited access based on their roles set by Padlock pro feature.
What this module can’t do :
- Users can’t be automatically assigned to any role. App admin has to assign role/page to each user you want to have access to protected pages.
- Users have to self register or be added by admin and then will be visible in Login Redirect Module for assigning a role.
Places
With this feature, you will be able to create a list of geolocated places.
It will display all the places on a map, or, if the user opens the sheet of a particular location, he will be able to get the path and directions to this location, by walking or driving. The listing of the locations is sort according to the distance between the locations and the user, from closest to farthest.
After having added the feature to your app, click on the ![]() to add a place to the list.
to add a place to the list.
For each place, you must fill the Title field. You can optionally insertt the subtitle and the images to be enabled using the desired display options. It is also possible to assign tags and categories to the place (if previously inserted by the appropriate “Categories” tab).
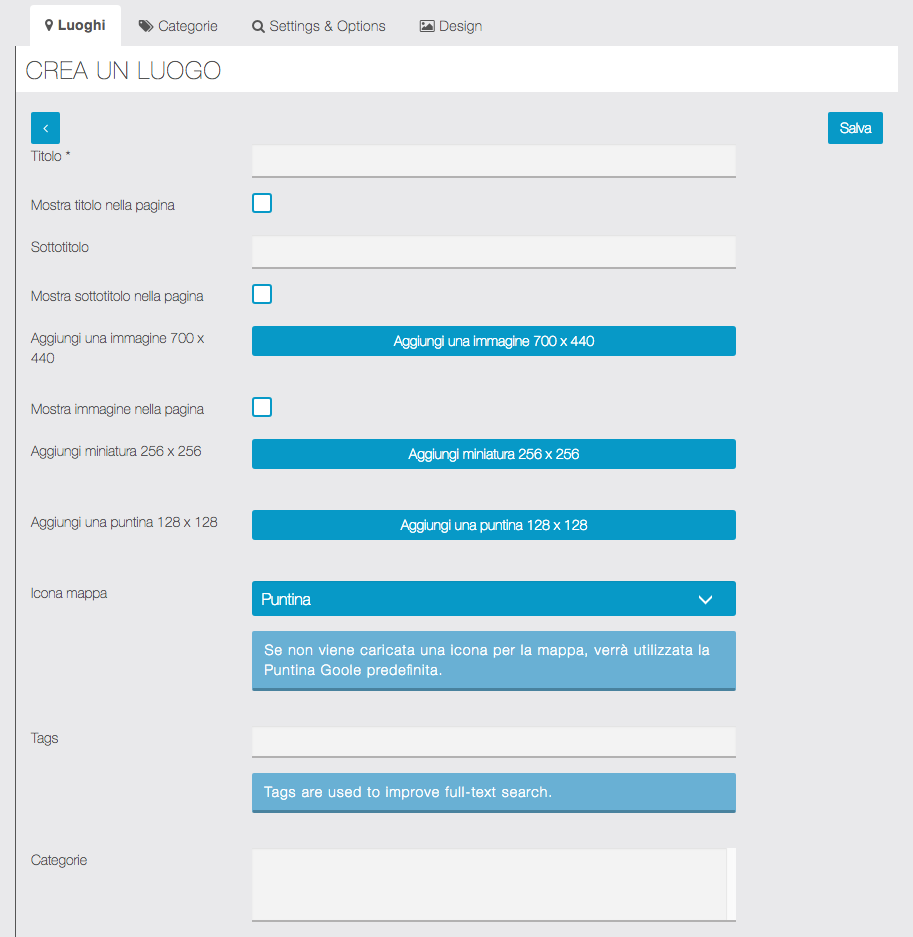
Then, you have to enter an address for this location, or its coordinates. You can add a label for this address but it’s not mandatory.
If you check the “Display address” checkbox, the address will be shown in the sheet of the location. If you check the “display location button” checkbox, it will display the button that will allow the user to see the path to this location.
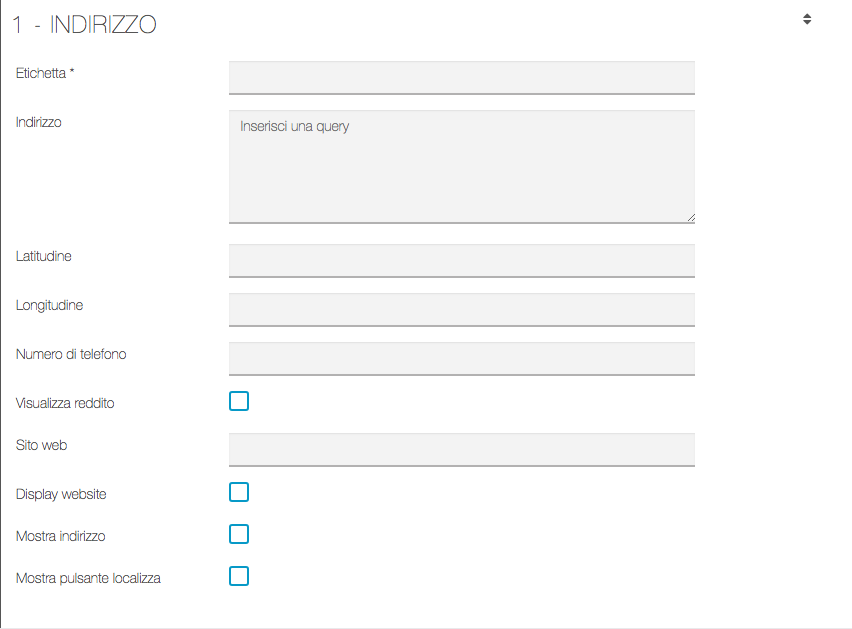
Then you can add other sections like text, images, photo gallery, videos or links.

Settings & Options
From this tab you can set some options for displaying the “Places” page in the app:
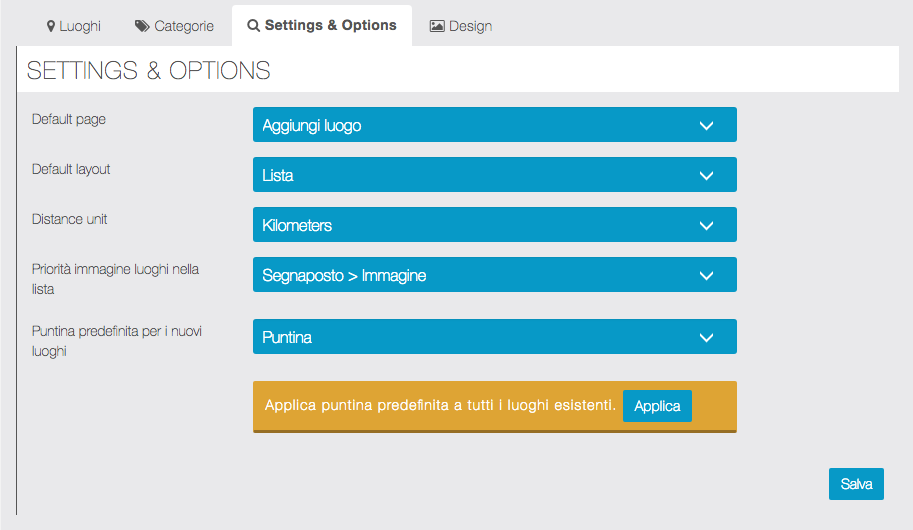
Once you have set up the list, it could look like that:
The list:

The location sheet:

Privacy Policy
The Privacy Policy is automatically available on all apps. Do not modify the privacy text if it is not necessary.
If your application have the `My Account` feature you can find it right inside under the button `Privacy policy`


If you want more flexibility for your Privacy Policies, you can also add them as a `Feature`
In the Editor > Features section you can add the `Privacy policy` and customise it to your needs, or stick with the default one we provide.
Terms and Conditions
If you want to edit the privacy policy without using the feature, you can go in Settings > Terms & Conditions and edit the privacy policy right here.
On this page you can also enter and edit the Terms and Conditions for the Discount, Loyalty Card and Scratch Card functions. If you use these functions, the inclusion of the terms and conditions is recommended. App users can see the corresponding terms directly from the feature page, using a button.

Profile
With this feature it is possible to profile users using additional custom fields such as tax code, telephone number, birthday, etc.
Once registered in the app, the user will be automatically redirected to the Profile page to fill in the required additional data.
Feature settings
After adding the Profiles feature in the app, click on  to make the configuration:
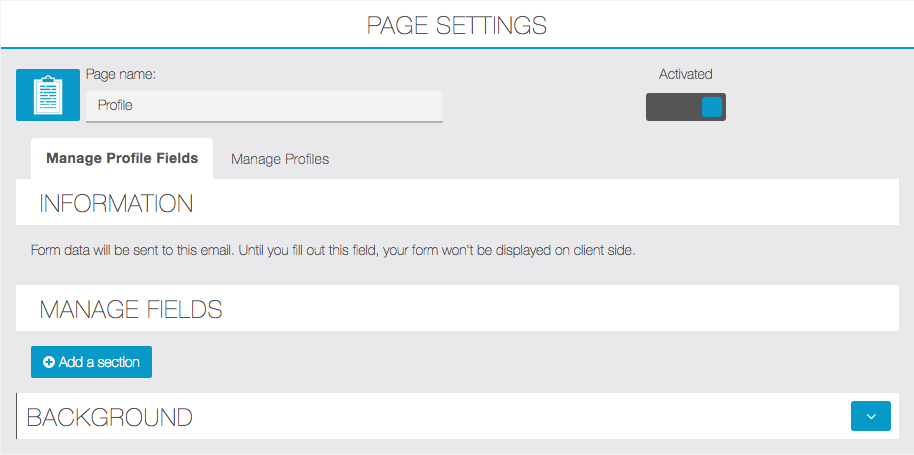
ADD SECTIONS AND ADDITIONAL FIELDS
At this point you need to create at least one section. If necessary, create more sections to divide the fields of our form (for example: personal data in a section, the choice of services in another section, etc.).
Click on ![]() , type the name and click on
, type the name and click on ![]() . In our case we have included only one to illustrate how it works.
. In our case we have included only one to illustrate how it works.
To insert another section just type name and confirm, repeat the operation to insert all the desired sections:
Within the section we will now add the fields we need. Click on to add a field ![]() . This window will appear:
. This window will appear:
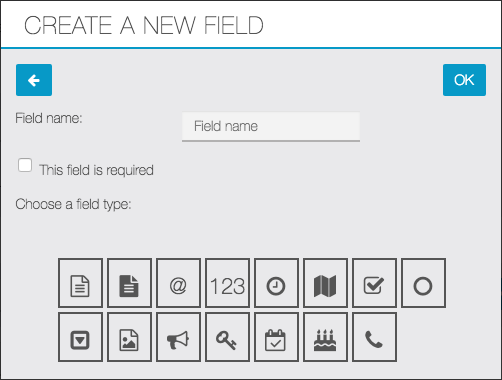
Give a name to the field that will be displayed in the form and choose whether it should be mandatory. Then select what type of field to use.
To see what are the types of fields that we can choose to position the mouse for a few seconds on the icon: a description of the type of field will appear.
NB: the type of field called “User Roles” will allow the integration of the Padlock pro feature.
In most cases it is advisable to enter all the desired fields in a single section. However, if the additional fields are numerous or have different purposes / types, the form can be divided into several sections. In this way the page will be more understandable and easy to fill in for users.
Once you have entered all the desired sections and fields, you must indicate an email address in which to receive requests received from users.
Integration with Topics feature
It is possible to integrate the Profile feature with the Topics feature, so the user during registration in the app is asked to choose the topics of his interest among those previously configured in the Topics feature.
To do this, create a new field as indicated in the previous paragraph and choose the ![]() option.
option.
NB: remember that the Topics feature must be previously configured according to requirements.
This will allow you to send selective push notifications only to users who have chosen certain topics. For more information, see the Topics feature and Push Notifications feature manual pages.
LINK: https:https://support.migastone.com/en/hrf_faq/profile/
Progressive Loyalty
The Progressive Loyalty feature will allow you to launch a loyalty program and reward your customers as they buy from you.
On the same loyalty card, you can setup several rewards and the customer will be able to redeem them as enough points are accumulated.
With a powerful reporting engine, you can easily identify your most loyal customers and how many
rewards are used. You will also get an estimate on the sales that the loyalty program is generating you.
Finally, you can track the employees who validate the points and the rewards so that fraud is under control.
Setup
Once you’ve add the feature to the app, the setup of the Progressive Loyalty feature is comprised of some steps. You’ll need to access the Loyalty Cards tab in order to begin this process.

Loyalty Card
The first step is to create a loyalty card. You’ll need to name your card – this will be used on the reporting but won’t be seen by the users -, set the number of points for the card, define whether this is a unique card or if it will be reused once completed and, finally, set the approximate amount that each point is worth in sales – this will be used in the reporting to estimate the worth of each client.

Rewards
Once you’ve created the Loyalty Card, the second step is to create the Rewards. Please note that any reward that you make active/inactive (by clicking on the ![]() or
or ![]() sign) will be immediately active/inactive on the card.
sign) will be immediately active/inactive on the card.

You can create a Reward by clicking on the ![]() sign. You’ll need to define the reward name and enter a description – both these fields will be visible to the user -, set how many points are needed to redeem this reward and you can upload specific images for it. The Inactive Reward image will appear when the user still doesn’t have enough points to redeem it. Once the user has enough points to redeem a reward, the Active Reward image will be shown. Similarly, the Redeem button on the app for this reward will change color. If you don’t place any images here, the default ones that are uploaded under the Options tab will be used.
sign. You’ll need to define the reward name and enter a description – both these fields will be visible to the user -, set how many points are needed to redeem this reward and you can upload specific images for it. The Inactive Reward image will appear when the user still doesn’t have enough points to redeem it. Once the user has enough points to redeem a reward, the Active Reward image will be shown. Similarly, the Redeem button on the app for this reward will change color. If you don’t place any images here, the default ones that are uploaded under the Options tab will be used.

Please note that, once a reward is created, you’ll need to activate it before it will be displayed on the card.
Validation
With the Progressive Loyalty feature you’ll be able to validate points remotely, you don’t need to have physical access to the mobile phone to do it. This is ideal for take-out businesses or any type of phone ordering services. You can still validate points using the customer’s mobile phone by creating employee pin-codes. Once you access the feature, an employee will be automatically created using your MAB user – please make sure you have filled out your user details (first and last names), otherwise the user will not be automatically created. This employee cannot be deleted but you’ll need to define a 4-digit pin-code in order to validate the points on the card.

The users show on the Manual Validation list are the ones who have signed up for this App. They’ll be added to the module automatically as they sign-up.

To validate the points via your MAB, you’ll need to select the user and click on stamp icon ![]() . You’ll need to set the number of points that you’d like to validate and enter the 4 digit pin-code that you’ve set.
. You’ll need to set the number of points that you’d like to validate and enter the 4 digit pin-code that you’ve set.

Design
Once the card and rewards are setup, you can decide which layout to apply to your loyalty card – these are optional but will allow you to customize your loyalty card to your design needs.

Options
The last step is to set default options – these are optional but will allow you to customize your loyalty card to your design needs.
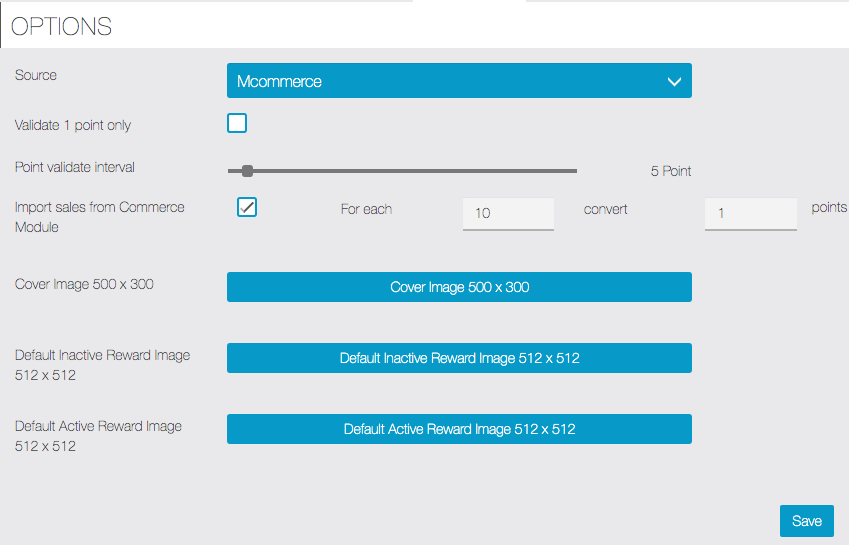
You’ll be able to control if employees are able to validate 1 or more points at a time. If “validate 1 point only” is not selected, the employee at the store will be able to validate several points through the App at once.
“Points validate interval” option: selecting with the cursor a quantity greater than 1 will activate the selection of points validation only with multiple quantities, for example by selecting 5:
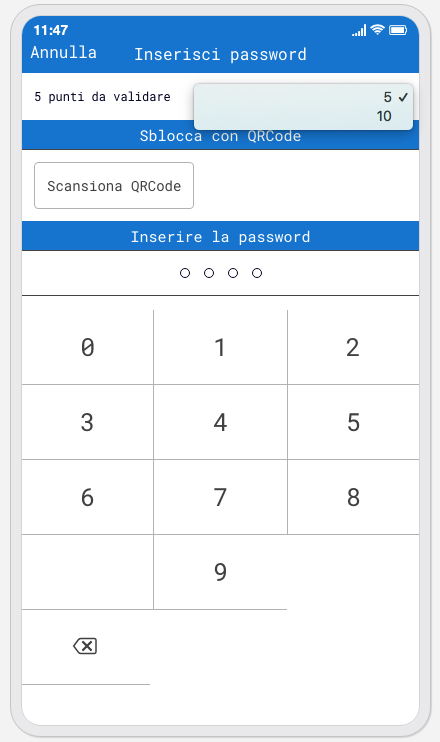
NB: leave the cursor to 1 if you want freely choose how much point to validate.
If the “import sales from Commerce module” box is selected, you’ll be able to define a conversion rule for the sales that are done. You should define a rule with the lowest amount of sales you want to convert into points. Only full integer points will be convert, not decimals are calculated for points. This means that, if the rule is to convert 1 point for each 10€ in sales, then on an order of 11€, the user will get 1 point. The same if the order if for 19€. The points conversion only occurs once an hour whenever the order status is marked to “Done”.
Reporting
The analytics of this feature have been created to help businesses identify their most loyal customer and cater to them.
On the customer data dashboard, you’ll be able to get the number of rewards used per each customer, the number of points that were validated and the number of visits that have been made by this customer to the store. Please note that we’re making an assumption that each point validated was the result of a visit to the store. However, if points are validated several times within a 2-hour period, we will only count 1 visit. The total revenue is calculated using the estimate value for 1 point when set when creating the card and multiplying it by the number of points validated.
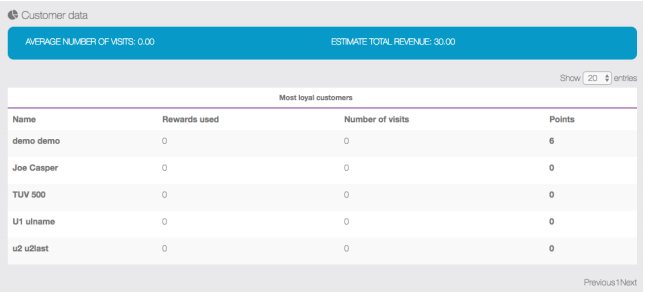
Loyalty control dashboard allows you to check how many points the employees are validating and what is the average for all employees. This will allow you to spot deviations from the average to quickly investigate suspicious cases.
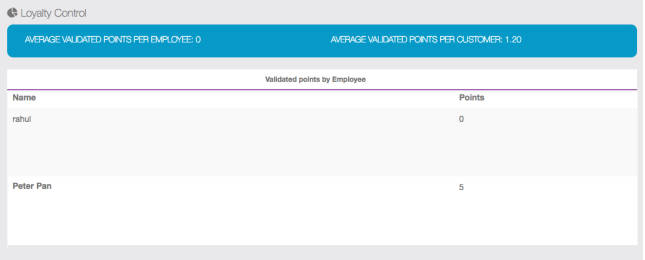
Both the Customer and Loyalty Control Dashboards (figures 3.1 and 3.2) allow you do drill down to a more detailed report to show you individual customer or employee activity. Just click on the customer or employee name to obtain more detailed information.
User Frontend Interface
Below you can find the user frontend interface screens.

LINK: //support.migastone.com/en/hrf_faq/progressive-loyalty/
Push Notifications
Once your application is featured on the App Store and Google Play, you’ll be able to send push notifications. Or your clients will, if you’re a reseller.It is quite simple. First of all, you have to click on the Push feature. This will appear:
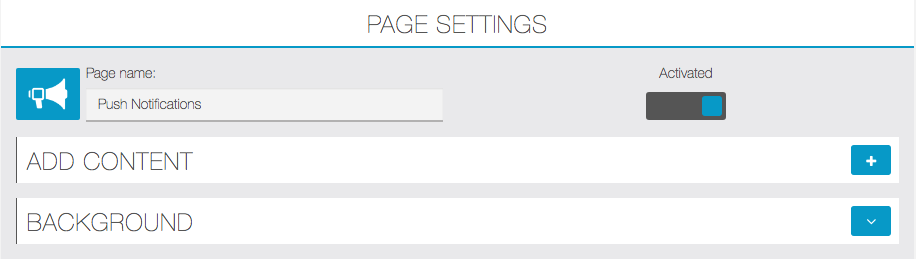
Then, you have to click on the ![]() to create a new Push message. This will appear:
to create a new Push message. This will appear:
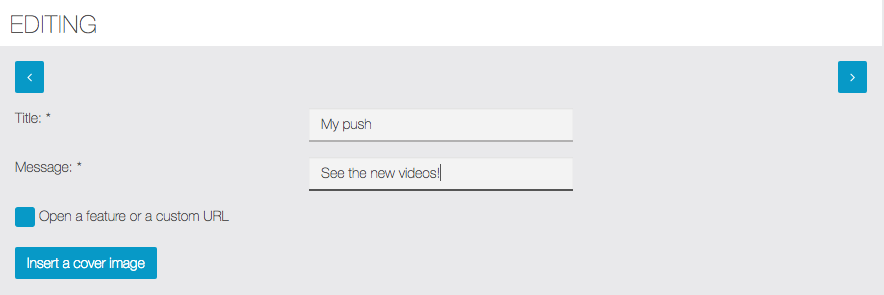
The option “Open a feature or a custom URL” allows you to redirect your users to a specific url or a specific page of your app when they open the push notification.
Now, choose your message an click on ![]() . Once you have clicked, this will appear:
. Once you have clicked, this will appear:
You can send push to users in a specific location if you choose the proper option. This will appears:
Type a location and defines an area (in km) using the specific fields.
One you have done, click again on ![]() and this will appear:
and this will appear:
This option allows you to choose if you want to send your notification to all your users, only Android r iOS users, specific users or only to those who have subscribed to specific topics.
Now click on ![]() . Once you have clicked, this will appear:
. Once you have clicked, this will appear:
It enables you to choose if you want to send your notification now or on a specific date. If you choose “now”, you only have to click on ![]() to send your notification.
to send your notification.
But if you want to send your notification on a specific date, this calendar appears:
Choose in the calendar the day and hour you want your notification to be sent. Then click on “Done” to validate your choice.
Finally click on ![]() to validate your notification. Your notification will be sent at the moment you choose.
to validate your notification. Your notification will be sent at the moment you choose.
Case 1: Send a notification to all users
If you want to send push notification to all user of your app, just click on “Send to all my users” when request and then click on ![]() to proceed to next steps and complete the process.
to proceed to next steps and complete the process.
Case 2: Send a notification to specific users
You can also send a PUSH notification to one or more specific users. This is possible ONLY if the user is registered in the app by his own device.
If the user has an account created manually in the MAB or for any reason the recording could not connect your phone to your account, the name in the user list will appear with an X and you can’t select it to send the notification to specific users.
The cases in which users can be marked with an X in the list to send the notification to specific users are:
1. The user account was created by the MAB (Management APP).
2. The user has logged out from his account.
3. The user has not given the go ahead to the notifications. This possibility is very rare if you have done a good job cashier indicating who will receive notifications of exclusive offers, usually the rate of approval notification is very high.
In cases 1 and 2 notifications sent to ALL USERS still arriving regularly, if 3 instead having not authorized the notifications the user does not receive any notification.
Case 3: Send a notification to users with specific topics
This option is active only in combination with “Topics” feature: see the specific page.
LINK: //support.migastone.com/en/hrf_faq/push-notifications/
QR Code Scan
This feature will allow your customers to use their camera to flash a QR Code and to access specific content.
To add this feature to your app, just click on  in “Add Pages”.
Basically, a QR code is data encrypted as an image. When you use your QR Code Scan, it will get you to the content it is linked to. It can be a specific url outside the app, an image, text or anything.
For those who don’t know what is a QR Code, it looks like this:

Note that each and every QR Code is related to a specific content.
QR Coupons
This feature will allow you to create discount coupons that will be unlocked by scanning a specific QR Code. Once unlocked, the customer can use the discount when he wants.
That means the coupon will not appear in the app for the user until he has scanned the QR Code (When you will add a coupon code you will not see it until you’ve scanned the QR code). As a business owner you create a QR coupon, and you obtain a QR Code. You can distribute this QR code on your website or in a newsletter, etc to reward specific actions, or just show it to premium clients so that they can flash it. Once scanned the coupon will appear in their apps.
To add it to your app, just click on  from “Add pages”. This appears:
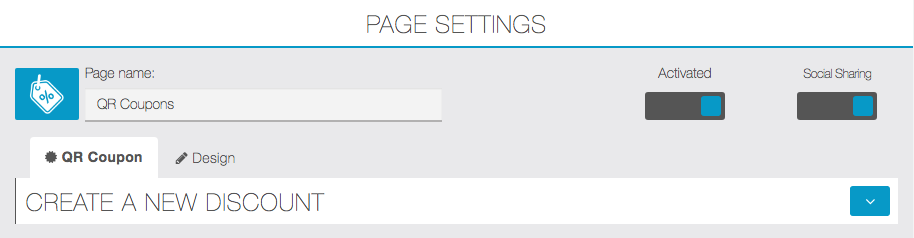
Then click on ![]() to create a QR Coupon.
to create a QR Coupon.
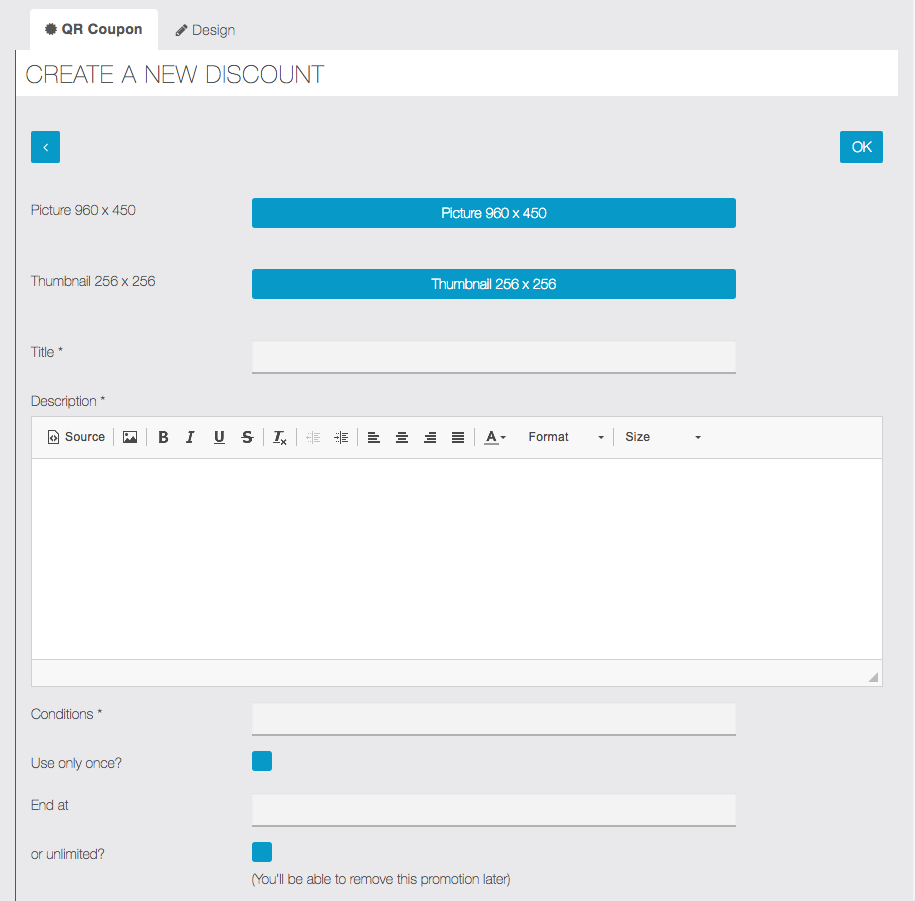
- You can add a picture and a thumbnail to illustrate your special offer
- Give a name to your coupon
- Enter a description of your special discount
- Enter the required conditions to access this discount
- You can decide if you want this discount to be available only once for each customer or unlimited
- Then you can decide if you want your discount to be limited in time and set an end date. But you can also decide to set it to “illimited” and decide later when you want to stop this special offer
Once you’ve set your coupon as you want, please print the qr code. You can display the qr code anywhere you want to allow the users of the app to scan it with their QR Code Scan and to benefit from your QR Coupon!
Click on ![]() to save your qr coupon.
to save your qr coupon.
Radio
With the “Radio” feature you can add a radio streaming inside your app.It’s very simple to set up but you need to have the good streaming URL. Here is how a good streaming URL looks like for our “Radio” feature:Example of good URLs for streaming:
- https://myradiostream.com/4/9754/
- https://89.111.189.3:6325/
Your URL mustn’t end by “listen.pls” or “listen.m3u”, etc.
Meaning that if your URL is https://89.111.189.3:6325/listen.pls, you need to just keep https://89.111.189.3:6325/.
Note that sometimes you will need to add “/;” at the end of your URL to make it work both on Android and iOS, for example you will add to add the url like this https://89.111.189.3:6325/;
Note:
Since Apple is requiring apps to use IPV6 networks, streams URL needs a domain name and not an ipV6 to work properly on iOS : https://mystream.com:8010 rather than https://91.121.22.39:8010/
For the widest possible compatibility, streaming must be in mp3 format. If streaming source format is aac, it may not be supported by devices with Android operating system.
Then fill in the fields with the appropriate info, like in this example:
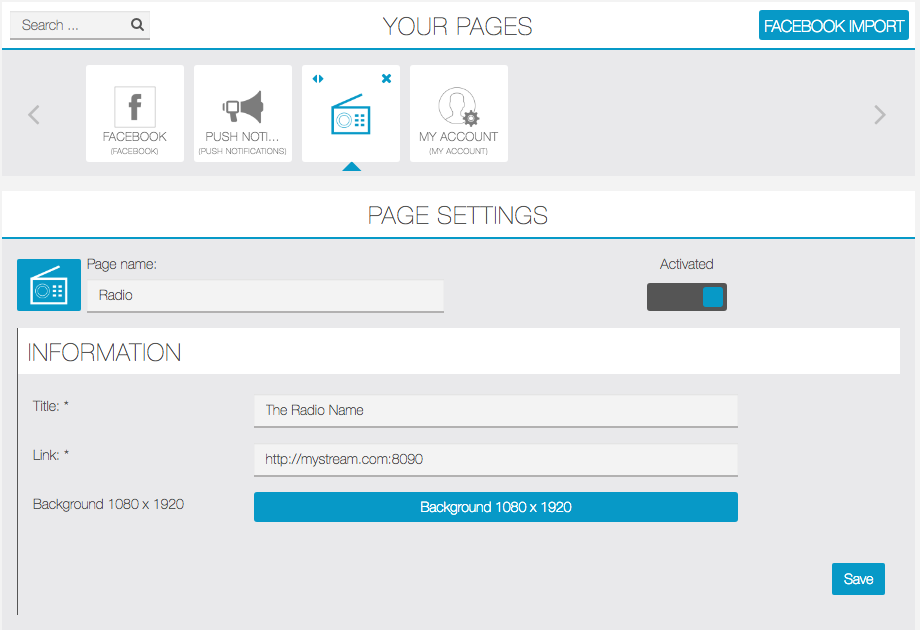
Then you just have to click on “save”, and you’ve just set up a radio streaming in your app.
Note: The AACP/AAC+ audio format is not supported by Mozilla Firefox web browser. If the Radio feature does not work, check that you are not trying to open a AAC+ stream with Firefox. It works perfectly with Chromium/Chrome.
RealTime Chat
With RealTime Chat feature you can incorporate a complete Chat system in your Migastone App. Create public chatrooms and let your users create their own private chatrooms and chat with each others.
Send Text, Image and soon videos and audio Messages.
Add friends for chatting, block/unblock users, instant messaging, one-to-one chat and group chat.
Setting chat functions from the app control panel
From the app control panel, you can enable the function by creating one or more public chatrooms. These chatrooms are visible to all app users from their smartphone. Users wishing to participate in the discussion should register and use a nickname.
Here are the main steps:
1. We can create different CHATROOMS each with its own TITLE and DESCRIPTION.
In the example below we have created two chatrooms by clicking on ![]() :
:
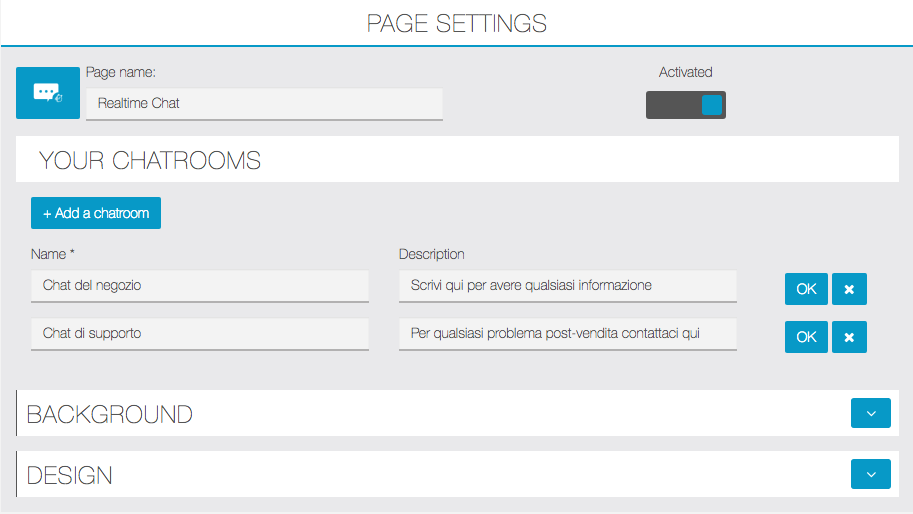
2. Now in the APP, the user can register in the REALTIME CHAT and enable notifications by clicking on the bell icon, at the right top of the screen

3. With the bell icon FULLY COLORED you will receive notification by EVERY person who writes in REALTIME CHAT.

Private chatrooms and chat with friends
In addition to being able to participate in the public discussions set by the manager through the control panel, app users will be able to create private chatrooms or one-to-one chat with their friends.
To manage these options, access the Chat function from your smartphone. On the top right corner of the main page, there is a three point vertically displayed button. By tapping this, the following menu appears:

NB: Before manage friends, you must log in at least once to a public chat. Before you can write a message you will be prompted to choose a nickname to be identified in the chats and you can also choose the notification settings.
Join Private Chatroom
All users who want to talk privately with each other will have to type the same identical name. Suppose, for example, that users have decided to use the “Private” name: to enter that chatroom all users will have to type exactly this name (Capitals Included).
After logging in, users will view this chat room from their smartphone in the “Chatrooms” list on the Chat main page.
NB: In private chatrooms you can not enable notifications (regardless of the status of the “bell” icon)
Manage Friends
With this option you can create one-to-one chat. The user who wishes to open a discussion with another user exclusively must first send a friend request, identifying the recipient by nickname or email (the email that this user used to sign in to the app). If the recipient accepts the request by accessing this same menu from his smartphone, both will display his / her name in the “Friends” list on the main page of the Chat function.
Remember to act on the “bell” icon, as explained above, if you want to enable notification:
RSS Feed
This feature allows you to integrate feeds from blogs or news websites either from the business for which you’re creating the application or other sources in relation with the business or both. You can create as many feeds as you want.
Here is how it works:
It doesn’t matter if you know or not the feed link you want to integrate.
Just enter a title for your feed and then the url of the website from which you want to extract the feed. Click ok. If there are some feeds for this website, Tiger will display them and let you choose the one you want.
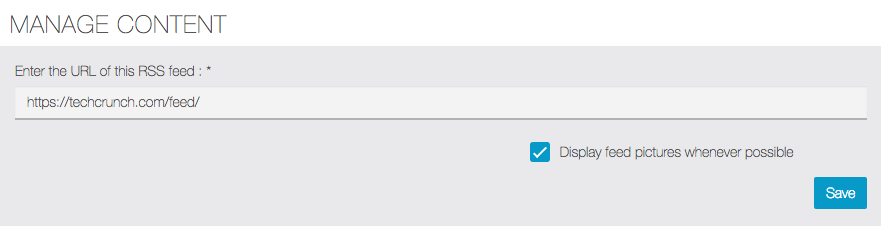
You obtain this:
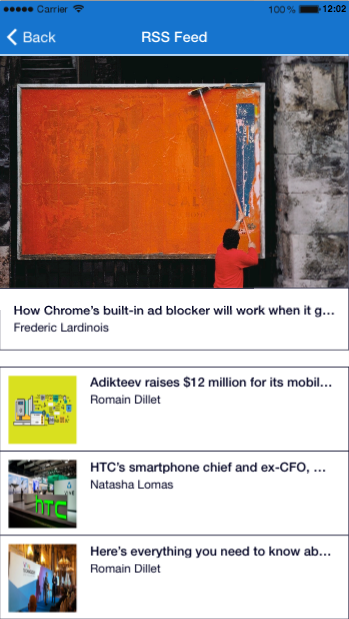
You can choose a different design for your page, from the design section at the bottom of the feature:
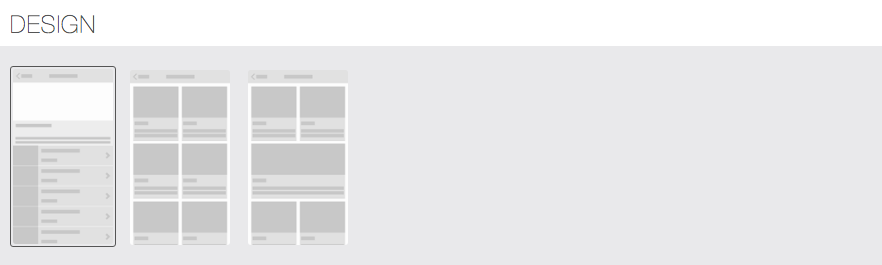
RSS Feed
This feature allows you to integrate feeds from blogs or news websites either from the business for which you’re creating the application, or other sources in relation with the business, or both. You can create as many feeds as you want.Here is how it works:It doesn’t matter if you know the feed link you want to integrate or not.Just enter a title for your feed and then the url of the website from which you want to extract the feed. Click ok. If there are some feeds for this website, Migastone will display them and let you choose the one you want.To enter a new feed, click on  and repeat the process above.In a second case, you can just enter the name of the site you want to extract the RSS feed. Migastone will automatically scan this website to find the RSS feeds on this one.
SATISPAY PAYMENT GATEWAY
Satispay is an electronic money wallet very active in Italy and o.
Satispay is a very good opportunity to acquire new customers within the thousand of hundred of merchants, restaurants, pubs etc that already using this platform.
To discover how is the presence of satispay in your city/country just download the Iphone and Android App and look on associated merchants.
you can find all the informations https://www.satispay.com/en
Here a nice interview of the Ceo regarding the international expansion
http://www.fintechdistrict.com/satispay-dalmasso/
This module allows to manage the payment with SATISPAY APP and receive money without any cost.
The license of this module is 299 € lifetime and include 1 year support and updates. Who needs to extend the support and updates after 1 year should purchase again this module.
INSTRUCTIONS
- After installed the module go to your www.yoursiberian.com/backoffice page and under menu MANAGE >> MODULES select SATISPAY and enter the license code provided to you by email (please note that we provide the license after 24h max by email during working days)
- Go to your Mobile Commerce module, select STORES, go in Create or Manage store and under PAYMENT section you will find the new option SATISPAY

- As you see in the picture until the license is not activated is impossible to configure the new module
- If the license is ok you should just add the BAREAR CODE that you should create in your Satispay Merchant Control Panel.
- To proceed to create your barear code you should create first your Online shop inside the Satispay account as the screenshot here :

- Click on CREATE SECURITY BEARER and copy it to clipboard

- enter the barear code in the Siberian Mcommerce shop under SHOP MANAGEMENT >> PAYMENT section.
- You are done, enjoy the Satispay payments
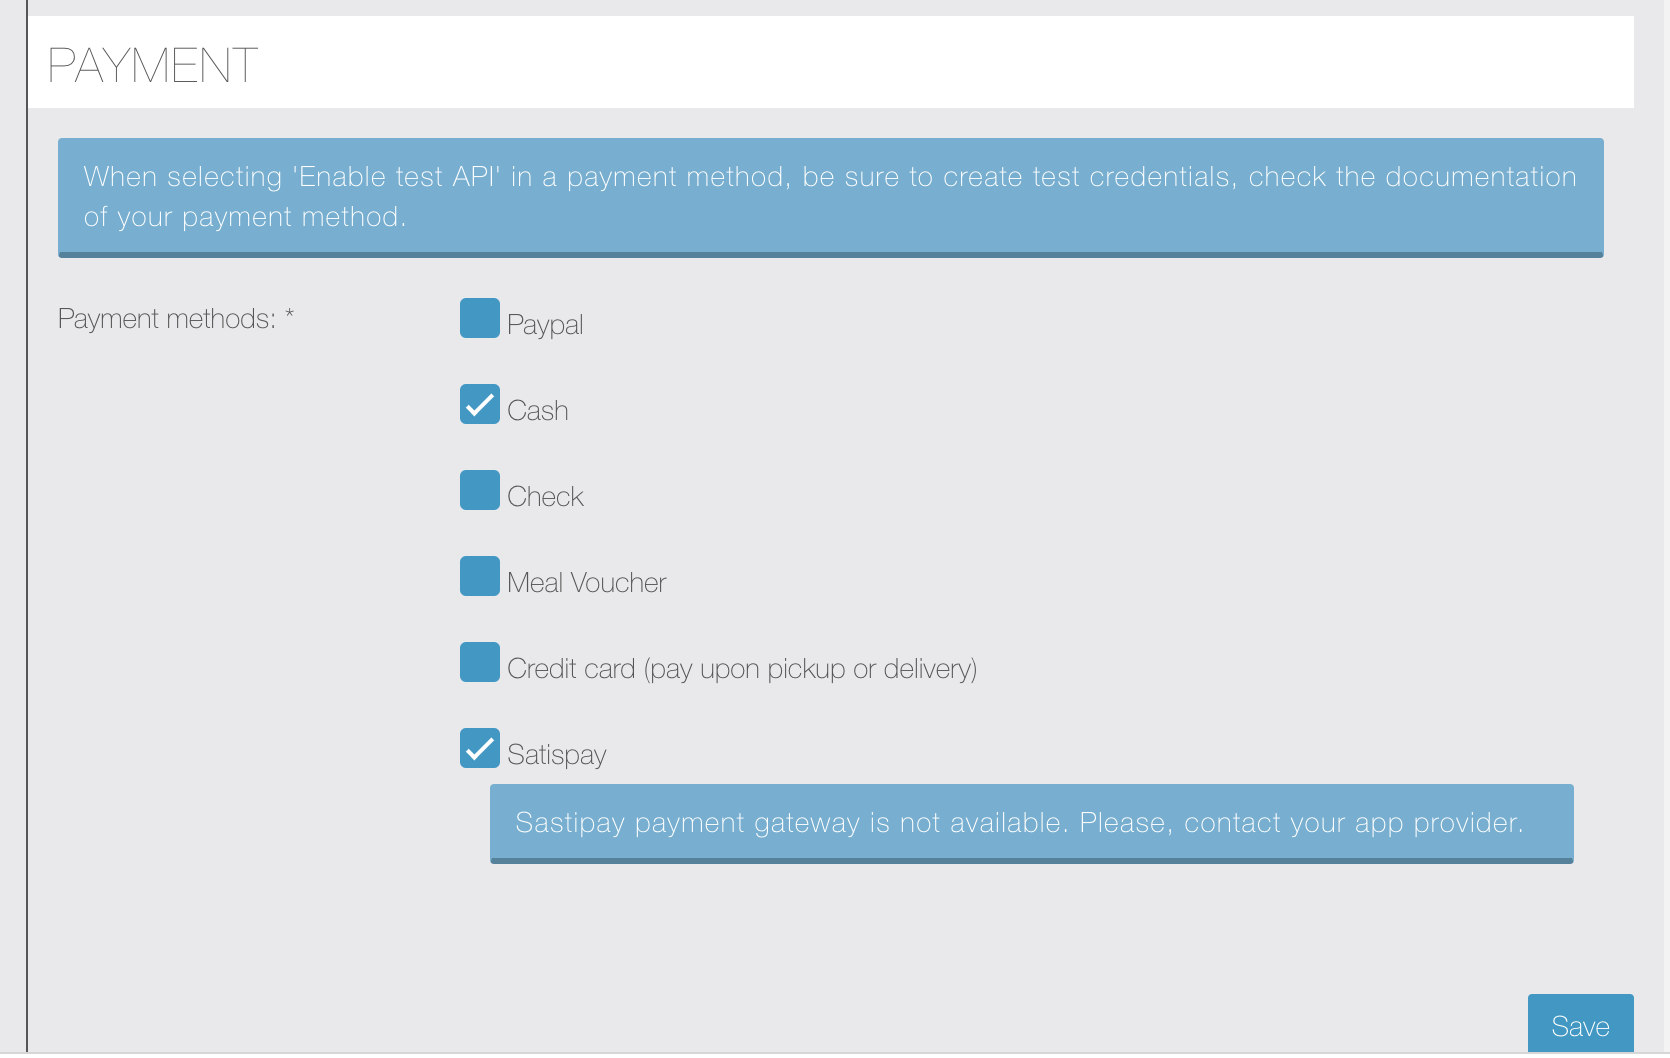
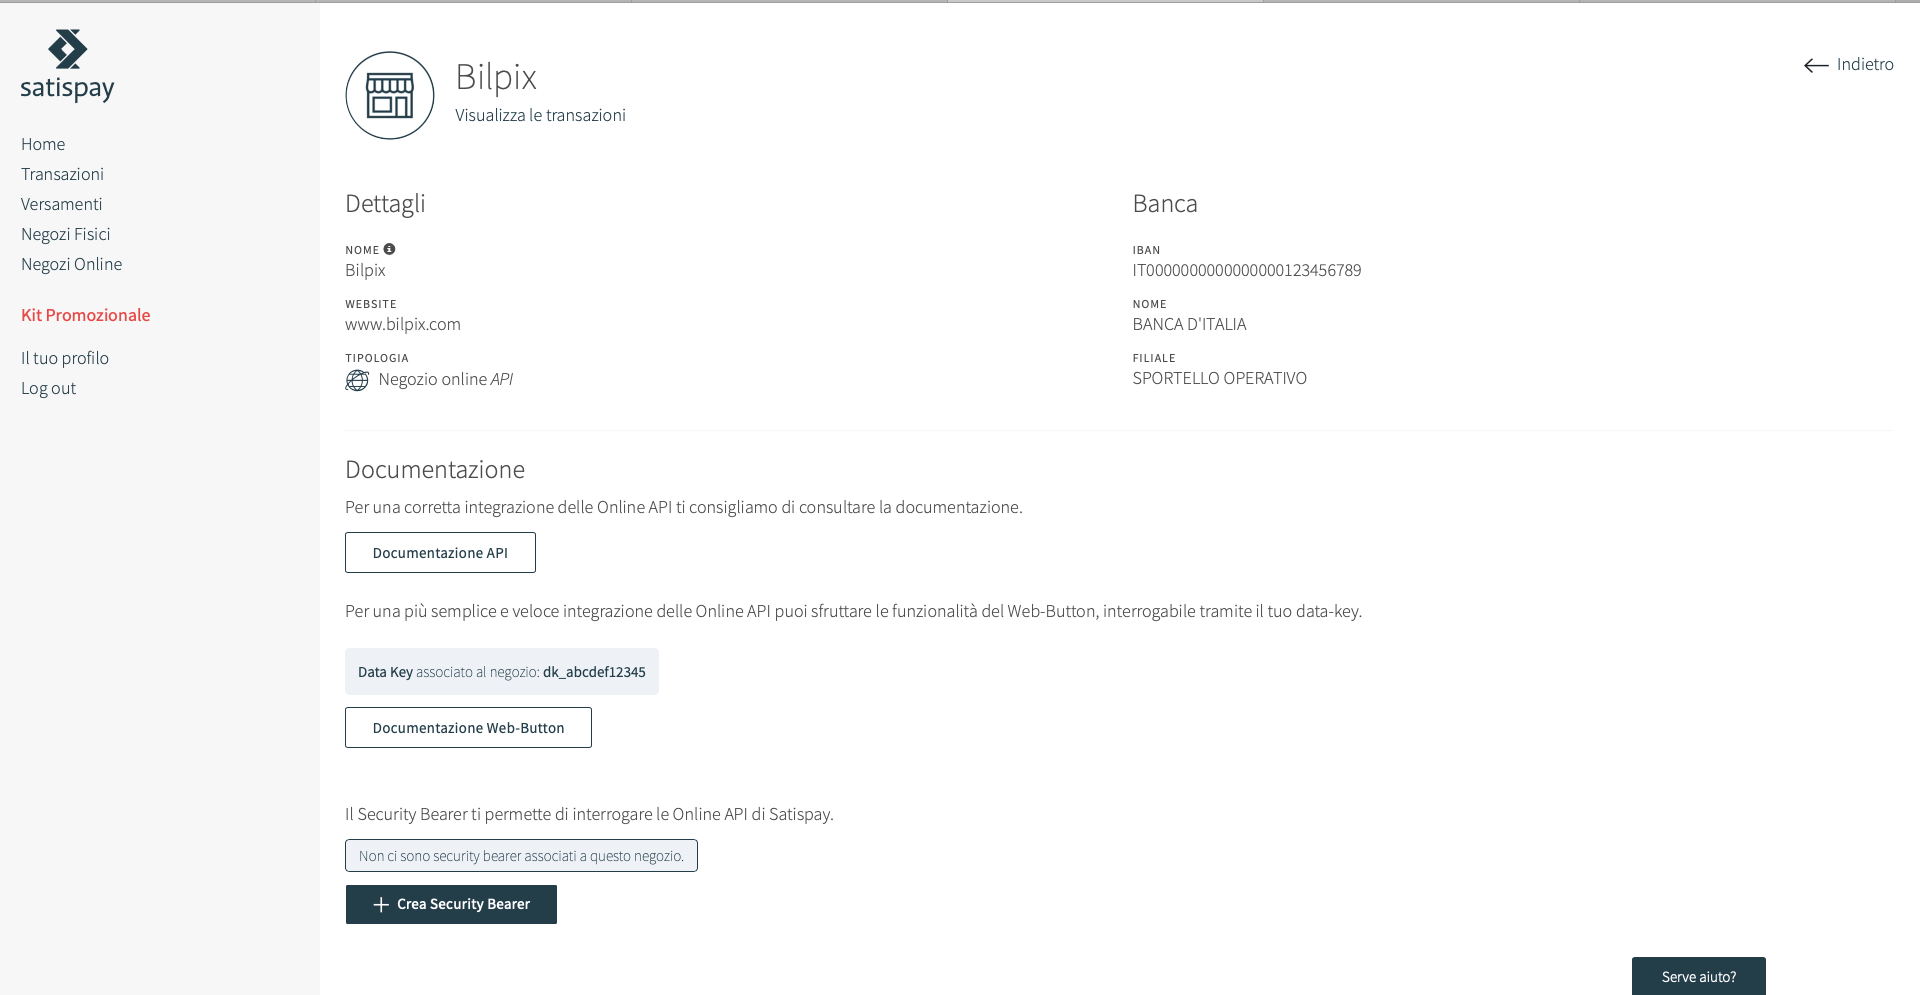
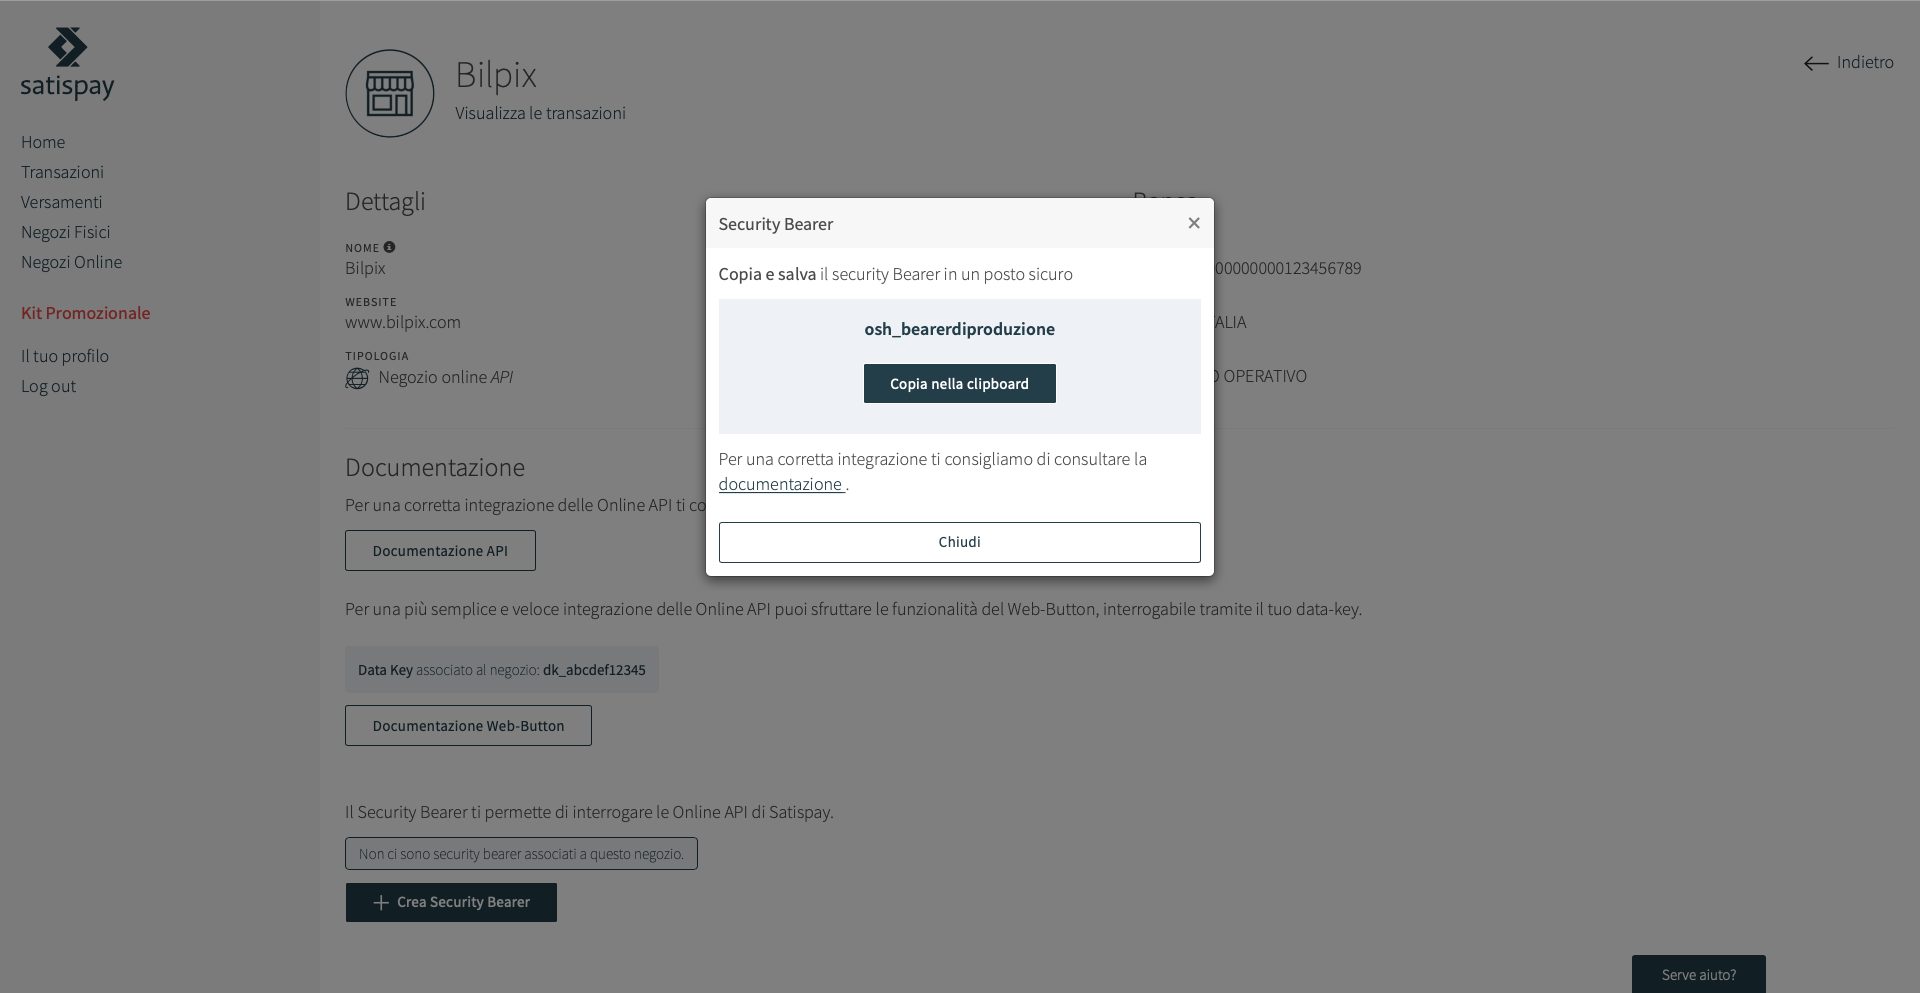
Link to this page https://support.migastone.com/en/hrf_faq/satispay-payment-gateway/
Scratch Card
With the Scratch Card feature you can offer your users a chance to win rewards and give them a fun motivation to visit your business.
You’ll be able to create as many scratch cards as you need to.
1. Scratch Card creation
Here are the things required to create a Scratch card:
- Name: enter a name for the card, to be easier to find in your Analytics.
- Description: for example : “You could win big. Try your luck!”.
- Scratch Card points? (opzional): if you enable this option each time a user wins, he can get points. You can make the number of values different.

NOTE: the user can use the points accumulated with the Shop function (mCommerce), as a discount code. From Settings > Advanced> Fidelity Points rate, you need to set the conversion value between 1 point and pages:

For example by setting 1, a point will be converted into 1 euro (in case the app is set in euros).
- Picture Winner / Picture Loser / Picture Foreground: you can add your own pictures to illustrate the card, it appears when the foreground picture is scratched, depending on whether the player wins or loses.
- End Date or unlimited: choose if you want your card to have a due date or if you want it to be unlimited and to remove it when you want.
- Email for notification: enter the email address on which you want to receive a notification when a user wins.
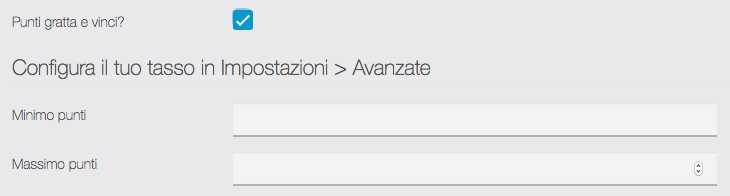

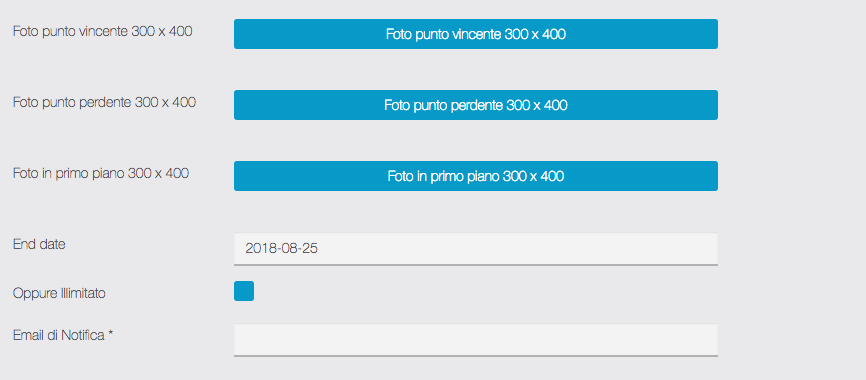
Game configuration
- Winning chance percentage (by card): choose the odds that a user has to win the reward, the higher the percentage, the more there will be winners, and vice versa.
- Maximum winner count: you can choose how many users you want to win the reward.
- A player can play again: choose if a user can play several times or not. If a user can play several times, this will affect its odds to win the reward.
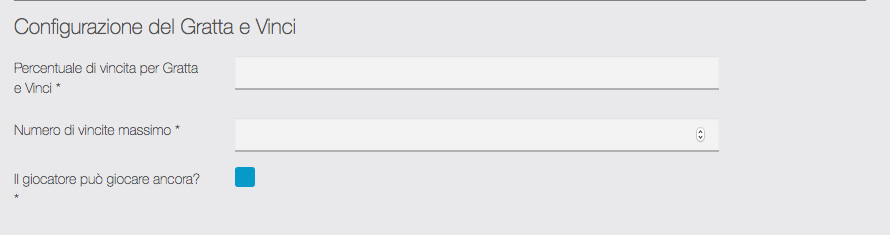
Winner pop-up / Loser pop-up
It will be displayed when the card is scratched.
- Title: for example “Great! You win!”.
- Description: for example “Better luck next time!” for Loser pop-up.
- Picture: you can add your own picture for the pop-up.

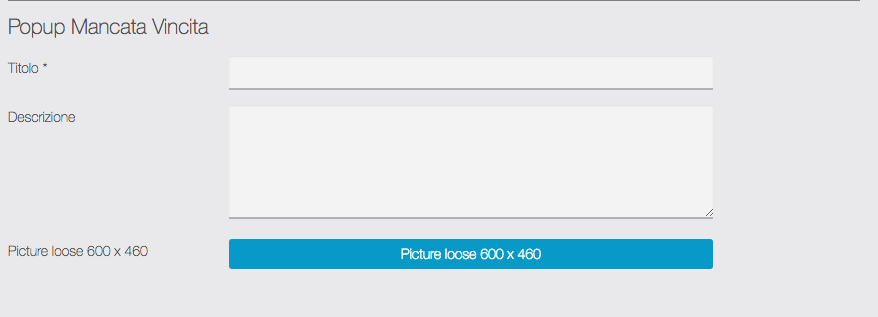
Reward
- Reward name: for example “One Burger”.
- Reward description: enter a reward description that a user will see if he wins this reward.
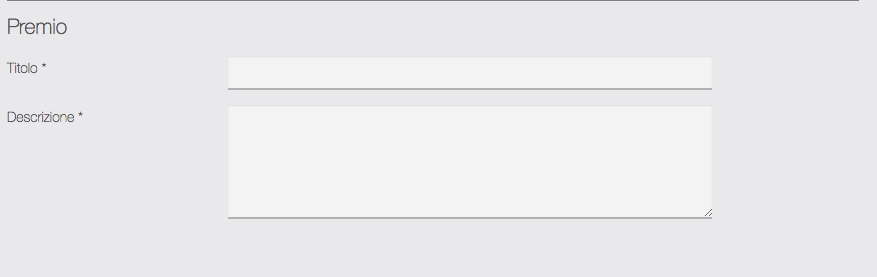
2. Four-digit passwords creation:
To validate a Reward the business owner will have to enter a four-digit password.
It is possible to create a password for each employee. Like this it will be easier to verify who validates what.
If there are already passwords for the Loyalty Card feature, it will use these passwords and vice versa.
To create a password, you just have to click on the “Password” tab:
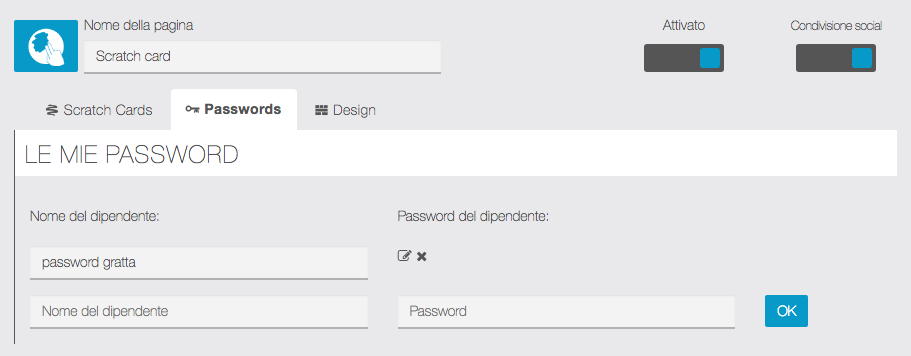
3. The Scratch card in the application:

Once logged in, the user can scratch the card.

The picture (Winner or Loser) appears during the scraping..

Once the card is entirely scratched, the pop-up is displayed.

The user discovers his reward.
To redeem his reward, the user presses “use this coupon” and shows his smartphone to the retailer.

The retailer enters his password.
Note:
It is not possible to edit a scratch card. Only one scratch card can be used at a time in the feature.
If you want to offer several scratch cards you need to add the feature for each scratch card you want to propose.
You can add “Terms and Conditions” to your Scratch card by filling the field in Settings > Terms and conditions > Scratch Card.

LINK: https://support.migastone.com/en/hrf_faq/scratch-card/
Set Meal (Menu)
Here is the feature for creating menus or bundles for a business. You’ll be able to create as many menus as you want.Necessary components:
- Menu name, for exemple: “Evening menu”, or “Family menu”
- Price: this field isn’t mandatory, as you can enter the price in the menu description
- Description: you’re going to use the text editor to create a menu, look below to see how to create a beautiful menu
- Rules: this field isn’t mandatory, you would be able to use it to specify some conditions, for example “only available on mondays”
- Picture: this field isn’t mandatory
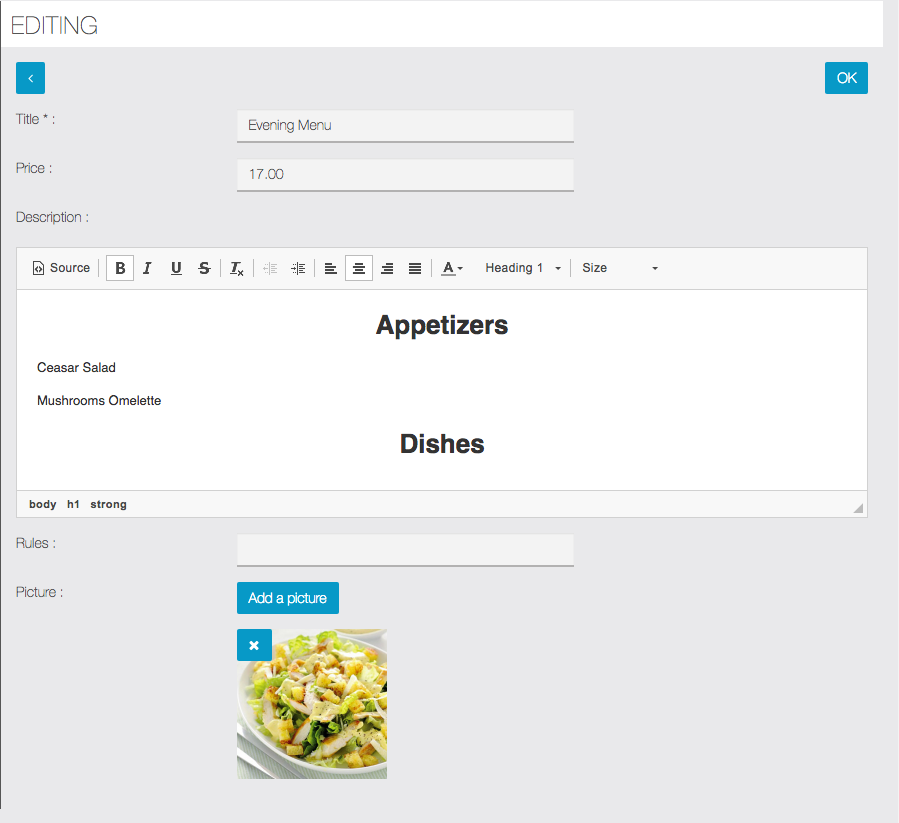
How to use the text editor
You can use the functions in the text editor menu to apply styles to your text, change the alignment and color.
To enter a new menu, click on ![]() and repeat the above process.
and repeat the above process.
You can obtain menus like this in your app:

Smart ADS
The feature Smart ADS will allow you to display targeted, full screen Ads to your App users based on time of the day, day of the week, operating system and App version.
You can use this module to notify your users of new features, promotions or, even, to force them to update the App to the latest version.
Setup
The SmartAds Module requires little configuration. The first step should be to make the feature inactive so that the icon doesn’t display on the App. Attention: Turn OFF all campaigns before sending the App for approval to the Apple and Google Play stores. This may cause the App to be rejected.
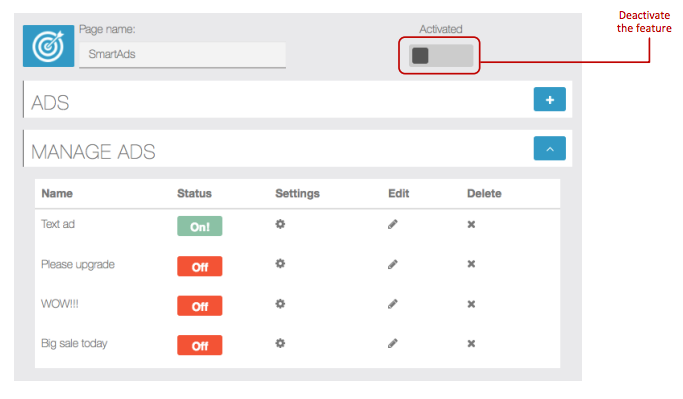
Creating a new capain
The first step is to create a new campaign. Currently, two types of ads are supported: image and text. You’ll begin by naming your campaign, this is just for your own reference and will not be shown to the users.
If you choose to create a text ad, you’ll need to fill in the text on the text box and select the background color of the Ad. Next, if you want to make this Ad clickable, you’ll need to add a URL and the label for the button – it can be “UPGRADE NOW!” or “click here”. It’s up to you to decide on the label. If you don’t insert a label, the Ad will still be clickable but no label will be displayed. You’ll be able to define the colors for the button using the color settings below. You’ll also be able to define the placement height of the button on the Ad.
If you decide to create an image Ad instead, don’t fill out the ad text box or select a background color. Simply upload the image and, should you want to make it clickable, add the URL. You can either add the button on the image or fill out the settings for the button. If you want to use an Ad to force the users to upgrade your App on the Google and Apple store, you’ll need to select Hide Close Button option. This will disable the close button and the users will have to click on the upgrade button.
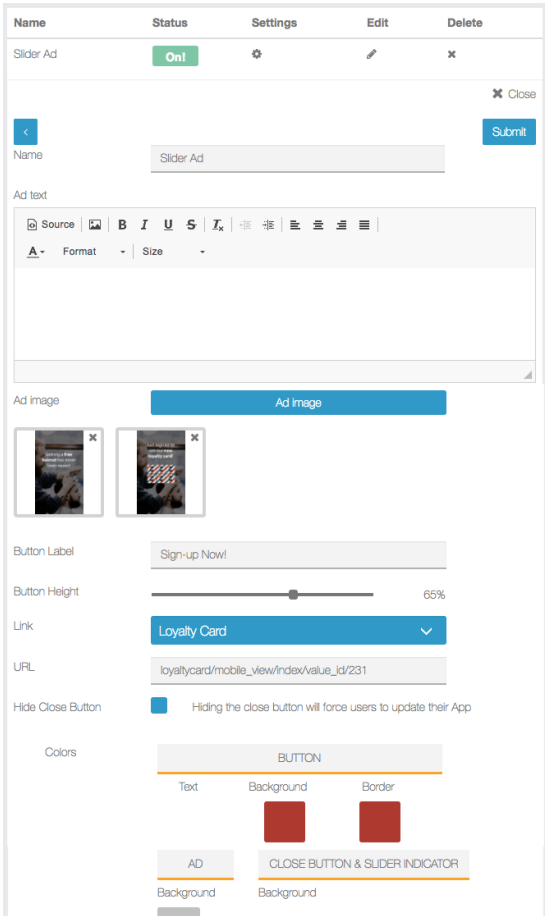
Targeting Settings
The second configuration step of the campaign is to define the targeting criteria. If you don’t complete this step, the campaign will not be displayed to anyone. This is a mandatory step in the configuration of the campaign. Here you’ll be able to select the start and end date of the campaign, the time of the day and the day of the week when it should be displayed. You’ll also need to select the device you’d like to display the campaign to. If you’re displaying an upgrade message, you’ll need to create two separate campaign, one for Android and another for iOS, with the different links to the Google and Apple store. Lastly, you can select the version of the App that you’re looking to target. When you select version 1.2, you’ll be targeting all App version before 1.2.
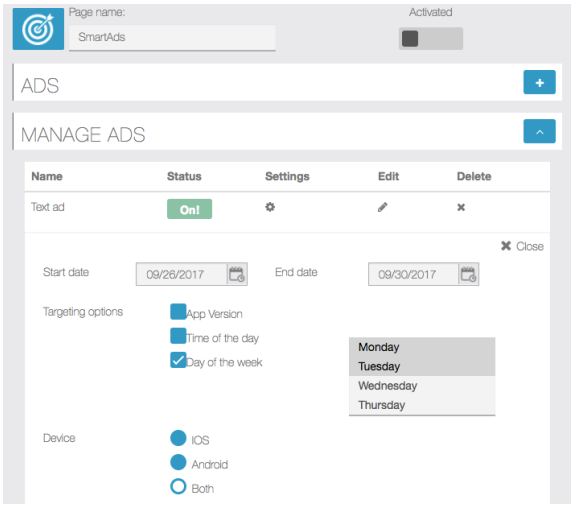
Campaign statistics
It’s possible to find out how many impressions and clicks where made on each campaign. This report is accessible from the main menu under Modules > Campaign Analytics.
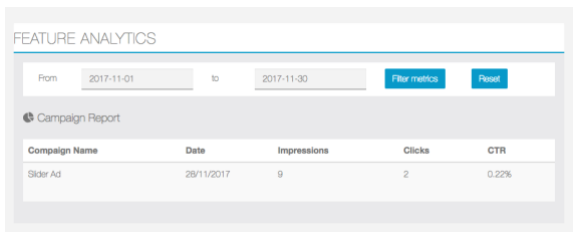
User Frontend Interface
Below you can find the user frontend interface screens.
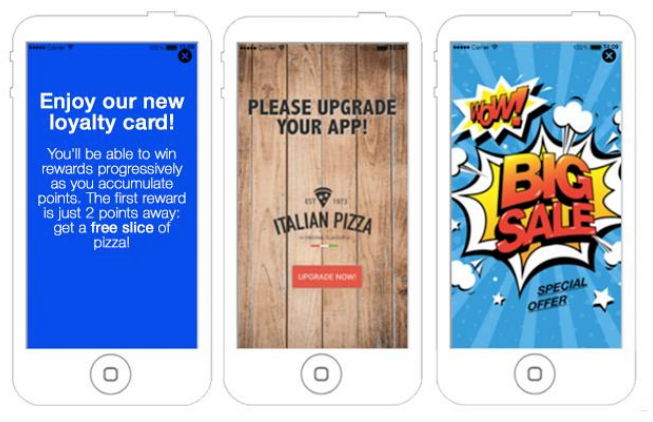
Surveys
The Surveys feature allows you to create complete surveys in order to collect information and feedbacks from users.You can create advanced question types using logical triggers, and then collect results, download and export users data.You’ll be able to create as many surveys as you need to.Let’s see how to create a survey.
Step 1:
To create surveys click on  in the “Add pages” part. This appears:
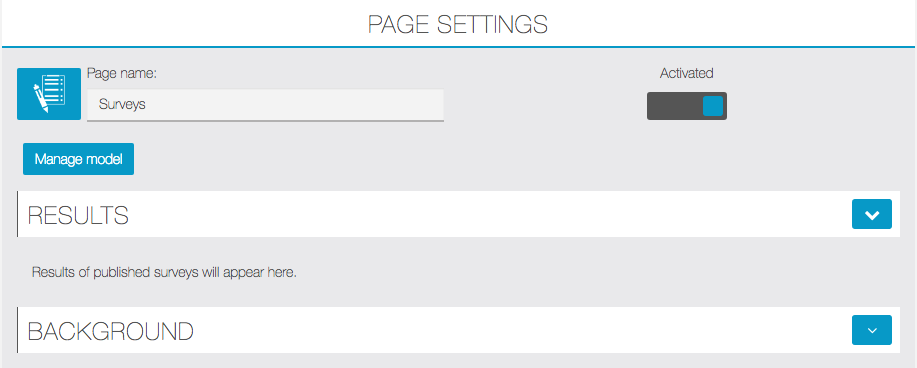
Step 2:
To create a first section click on ![]() , then
, then ![]() .
.

Give a name to this section. Here we will start by “Example” to show you what is possible to do with this feature.
To add a question click on ![]() . This window appears:
. This window appears:
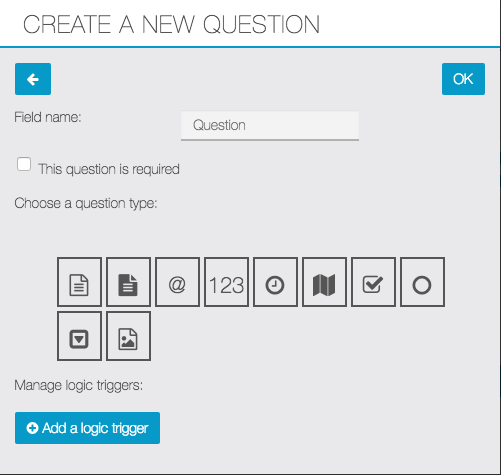
First, enter your question in “Field name”.
Let me introduce the different types of field for a question:
![]() : this field enables the user to write a short text.
: this field enables the user to write a short text.
![]() : this field enables the user to write a long text on several lines.
: this field enables the user to write a long text on several lines.
![]() : this field enables the user to write his email address to contact him.
: this field enables the user to write his email address to contact him.
![]() : this field enables the user to write a number.
: this field enables the user to write a number.
![]() : this field enables the user to write the date and hour.
: this field enables the user to write the date and hour.
![]() : this field enables the user to indicate his GPS position.
: this field enables the user to indicate his GPS position.
![]() : this field enables the user to select several options.
: this field enables the user to select several options.
![]() : this field enables the user to only select one option between the ones submitted.
: this field enables the user to only select one option between the ones submitted.![]() : this field enables the user to select the option they want.
: this field enables the user to select the option they want.
Every time you enter a new question, you have the possibility to make this field mandatory. It means that the user cannot send the survey if this field is empty. To do this click here:
![]()
For each question you can create a logic trigger by clicking on “Add a logic trigger”:
The logic triggers allow you to choose different scripts depending on the user’s answer.
Conditions:
“Always”: always do the action, whatever the answer.
“When answer is”: do the action for the selected answer.
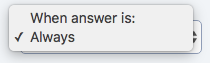
Actions:
“Skip to question”: allows to skip to another question after the answer.
“Hide question”: allows to hide a question if necessary.
“End survey”: allows to terminate the survey.
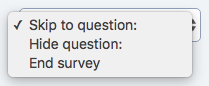
Example:
For a question like “Do you like this app?”, you enter two possible answers “Yes” or “No”.
With the logic trigger you can choose what happens if the user answers “Yes”, for our example we have chosen “end survey”.
If the user answers “No”, the question “What are the reasons?” is offered.
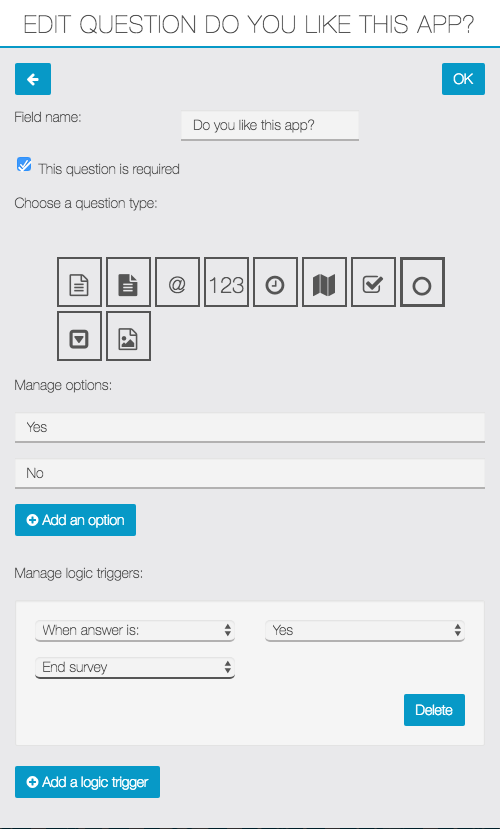
You can create as many questions as you want in a section. But we recommend you to organize your survey clearly to be easy to fill by the user.
Step 3:
Publish your survey ![]() :
:

Fill the field “Name” and “Thank you message” and click on the Publish button.
Step 4:
Once you have published your survey, you can view the results by clicking on “view results”
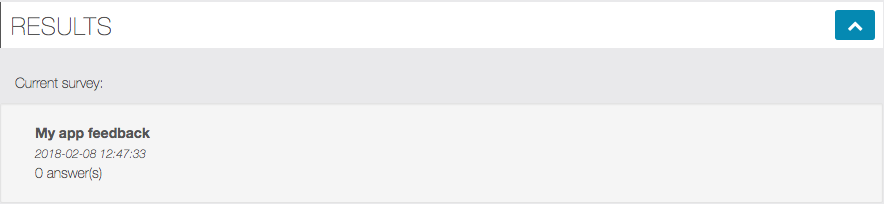
or download the results in .csv file.
Here is an example of Results:

Example in the application:
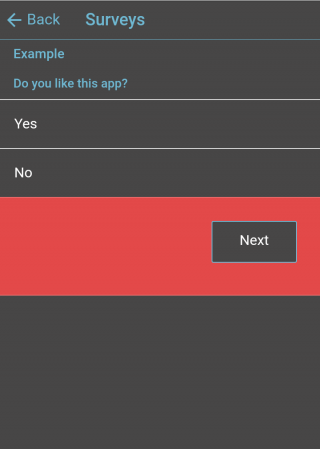
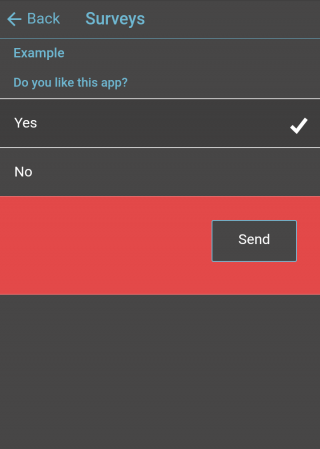


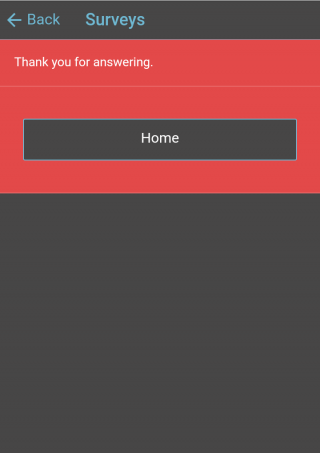
Topics
This feature allows you to create a list of TOPICS that the users of the app will be able to select, according to their interests, and then only be updated on the specific topics.
With this setting, the manager of the APP will be able to send targeted PUSH notifications only to those users who have selected a specific topic.
The TOPICS feature are powerful to create profiled lists of users that receive exactly the information they are interested in.
We recommend instructing employees to download the app and configure this feature to the clients.
To add this feature to the app, click on  .
.
In the following form you can enter a general description of the page and the list of desired topics:
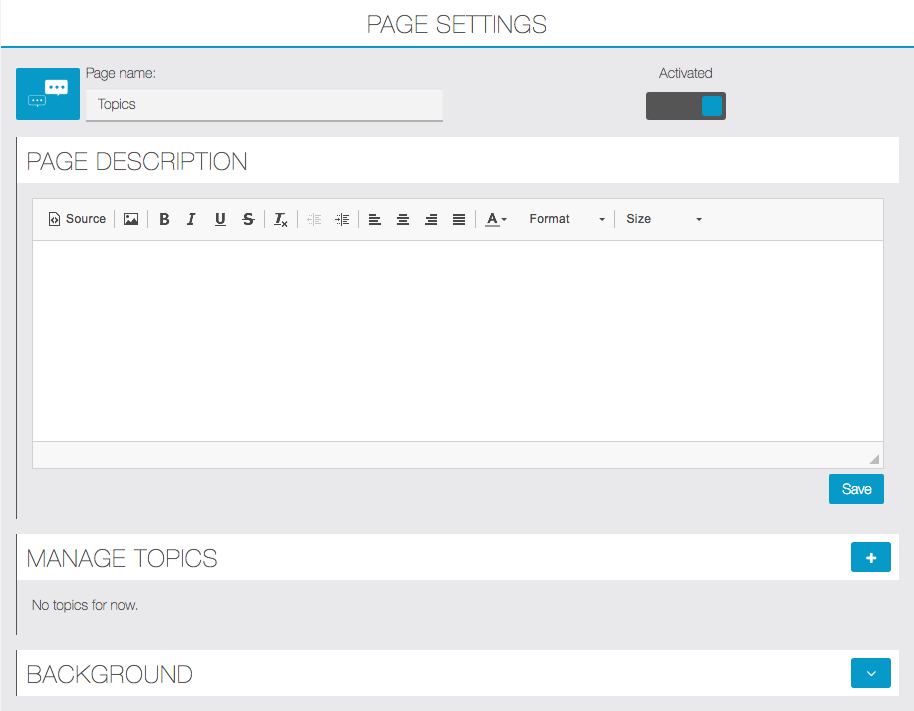
To add topics, click on ![]() and enter the required data:
and enter the required data:
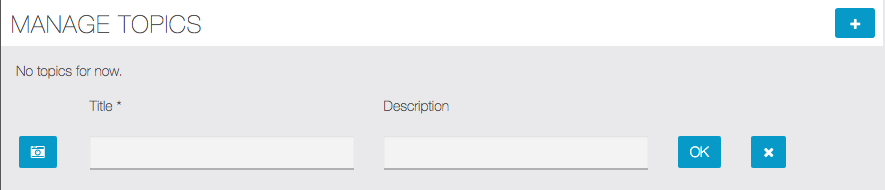
Only title is required, description and image (click on ![]() ) are optional. Here is an example of how it works:
) are optional. Here is an example of how it works:
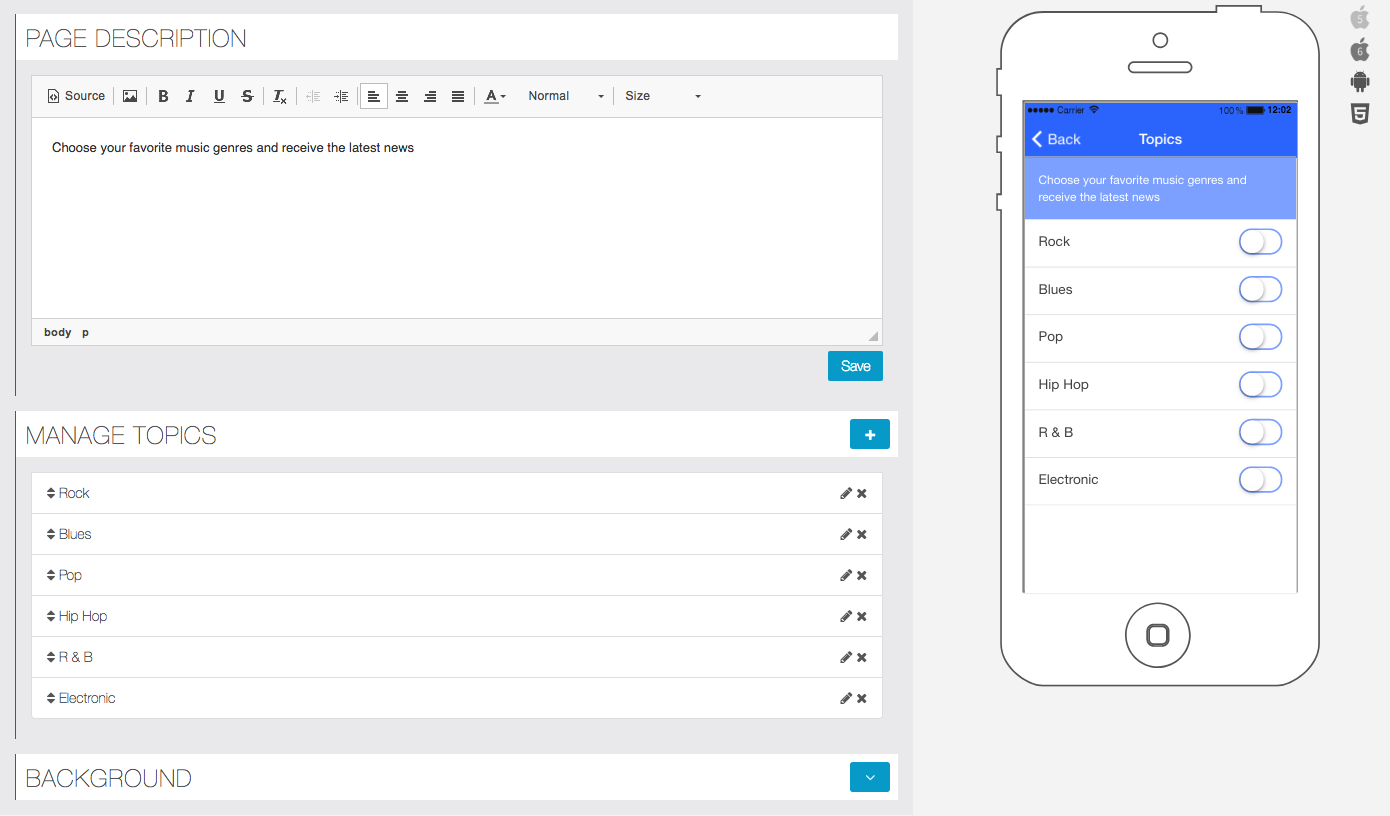
Integration with the Profile feature
The Topic feature can be integrated with the Profile feature to ensure that the user, when registering in the app, is automatically requested to select the topics of interest from those set. For further details please go to the manual page of the Profile feature.
With the Twitter feature you will be able to include your Twitter account in your application.
1. Create your Twitter API keys
To get Twitter Access keys, you need to create a Twitter Application which is mandatory to access Twitter.
- Go to https://apps.twitter.com/app/new and log in, if necessary
- Enter your Application Name, Description and your website address. You can leave the callback URL empty.
- Accept the TOS, and solve the CAPTCHA.
- Submit the form by clicking the Create your Twitter Application
- Save the consumer key (API key) and consumer secret somewhere, in order to use them later in your MAB.

After creating your Twitter Application, you have to give the access to your Twitter Account to use this Application. To do this, click the Create my Access Token.

In order to access the Twitter, that is to say get recent tweets and Twitter followers count, you need the four keys such as Consumer Key, Consumer Secret, Acess token and Access Token Secret.
To get all these keys, click the OAuth Tool tab in your Twitter Application and copy those keys and save them in order to use them later. That’s it. Now Your Twitter counter will get the followers count and display them in your widget.
2. Add the Twitter API keys
Before using the Twitter feature in your app, it is necessary to define the Twitter API keys in your editor.
So in the editor, click on the menu “Settings” then on “Twitter”:

You will have the possibility to enter all the necessary information from your Twitter account:

3. Add the feature Twitter
After adding the Twitter feature to your editor, you have to define the name and the subtitle of the page which will include your Twitter account.
You can also select if you want to use the Social Sharing function that allows you to share info about your app with your customers, contacts and friends, via your social networks or messages applications.

4. Setting your Twitter account
Once you have done the first part to add the Twitter feature into your editor, you need to set up your twitter account. In order to define your account you need to enter your twitter handle. The twitter handle is your personal id on twitter, it starts with the @ symbol.

You can check the integrity of your Twitter handle by clicking on ![]() .
.
The following error message will appear if you haven’t entered your Twitter API key.

The following error message will appear if you have entered a wrong Twitter handle.

Otherwise, you will have a confirmation message on your screen like the message below:

Then save your changes by clicking on ![]() .
.
You have now finished to set up your Twitter account in your app!
Video Galleries
With Migastone you’ll be able to integrate videos from Youtube, Podcast and Vimeo. If you want to integrate a business video gallery, the best is, if not already done, to create a Youtube or Vimeo channel in which you’ll upload all the business’s videos.
You create a thematic gallery too from other sources than the store (for example a fashion video gallery for a trendy bar).Here is how it works, it’s quite simple:
Click on ![]() button, than choose one of the option available.
button, than choose one of the option available.
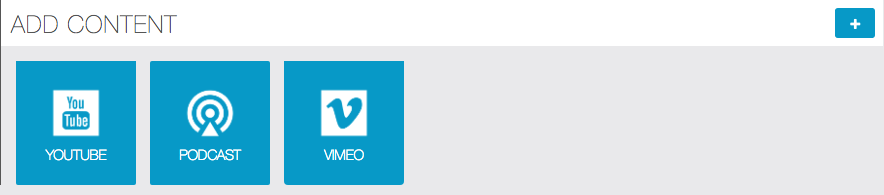
1. YouTube
Begin by clicking on  . You will see this form:

Then, in the “search” field, what you’re are going to enter depends on what type of search you’re are going to select:giving a name to your gallery, if you create several galleries, user will be able to select the one they want to watch:
Display videos from a Youtube channel:
- type the name you choose for the gallery in the “Gallery Name” field.
- in the “Search:” field you need to enter the “classic” URL of the YouYube channel, which can be found with the following steps: open YouTube by connecting to your owner account. This way your avatar will appear in the top right corner. Clicking on that icon will open the context menu, click on “View your channel”. The link will always take you to your channel page but in the address bar the URL will be shown with a different format (For example ours is https://www.youtube.com/channel/UCuWGDaNqHBdbZniZZlFq_gQ ). Copy the last part of the URL after channel/ from the address bar, and paste in the “Search:” field.
- choose “Channel” from the drop-down menu in the “Type” field.
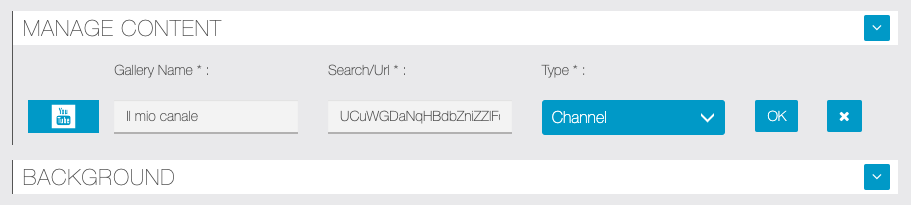
Create a thematic video gallery:
Enter the name you want for your video gallery, the keyword you want to search for in the “search” field, and choose “Search” in “Type”:

Here is the result:
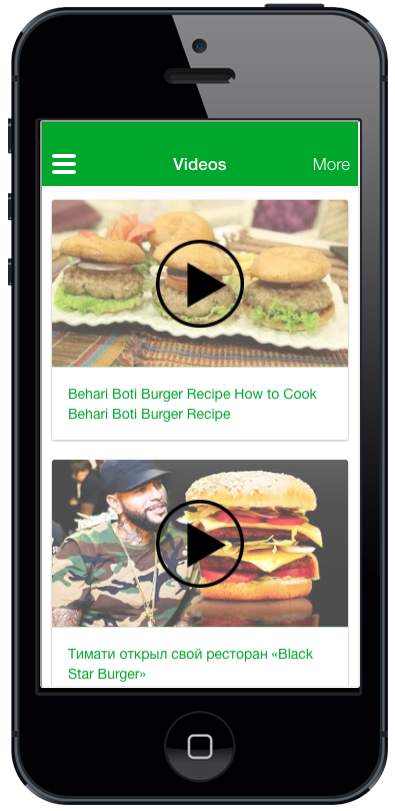
If you want to add another gallery, just click on and repeat the process above. If you create several galleries, user will be able to select the one they want to watch:
2. Podcast
You can also integrate videos from podcasts by cliking on  .You have to enter the name of your video gallery and the URL address of your video.

3. Vimeo
Begin by clicking on  . You will see this form:

If you want to add a Vimeo channel you have to enter the ID of the channel in the “search” field and select “Channel” in the “type” select box.You can find the ID of the channel at the end of the channel URL. For example, for this channel:https://vimeo.com/channels/513799 you just have to enter “513799″.
For the other types of choices (User, Group, Album), it is the same process than for Channel. Just enter the ID that reads at the end of the URL. For example to import all the videos of this user:https://vimeo.com/user1234567enter “user1234567” in the “search” field and select “user” for type.
Virtual Loyalty Card
With this feature, users can import their own loyalty card to have it always available in your app without having to carry the plastic card with it.
Enabling the function from the control panel is immediate:

Using this feature from your app is just as easy.
Click the “Scan New Card” button to read the barcode of your card.

You will be prompted to activate the camera to enable reading. At this point just frame the barcode on the card with the smartphone and that’s it!
From now on, the loyalty card is available within the app.
Once the user has registered in the app and accesses at least one time to this feature, the card is stored by the system and will also be available by using the app from another smartphone.
NB: user will need to log in to the app with the same account.
NOTA: the app can import Code39, Code128, Ean13, Ean8, UPC-A barcodes
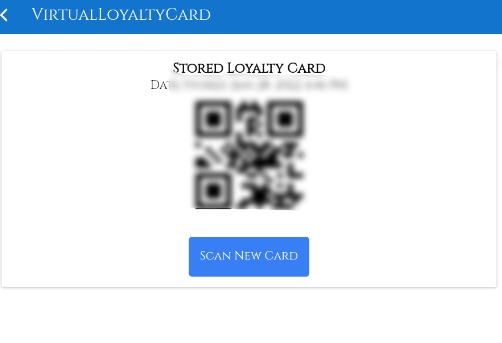
NOTA: After Update Now supporting QR CODE “QR Code Model 1 and Model 2 | QRcode.com | DENSO WAVE)”
LINK: //support.migastone.com/en/hrf_faq/virtual-loyalty-card/
Weather
This feature enables you to offer a weather widget in your app to display the forecasts for a particular city or to the users find the ones for their locations.
You just have to choose a country and a city, then save.
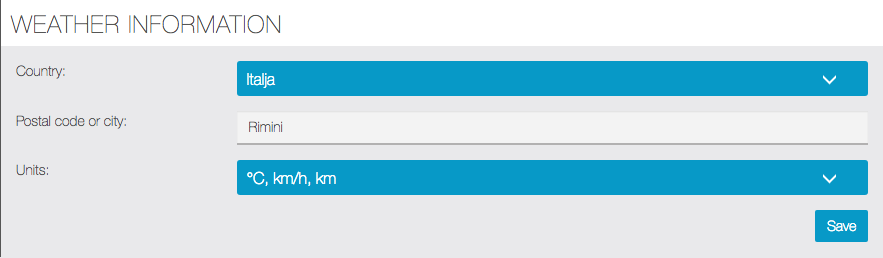
This is how it looks like in your app:
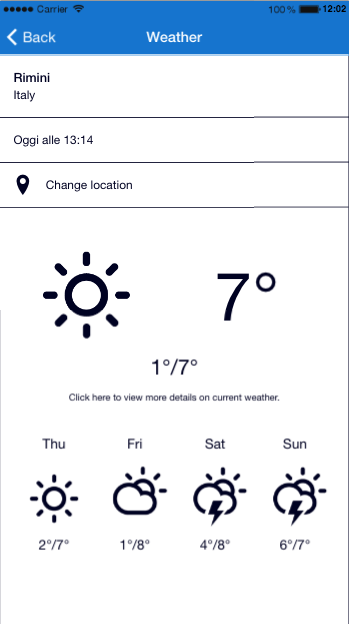
WordPress
Step 1:
. This window appears: Click on “Click here to download our WordPress plugin”. Without this plugin you cannot use this feature.Then, go in your wordpress admin interface. This window appears:Click on “Plugins” then “Add new”. This windows opens:Click on “Upload”. This appears:Step 2
Here for example, we decided to only select the “Exercices” category, but we could select others if we wanted to. You can adopt the strategy you want, either you can create an application with only one wordpress page in which you will publish all the content of the blog, or you can create an application with several wordpress pages in order to publish in each the content of one category of your blog.Once you have chosen your strategy and imported your wordpress content, don’t forget to click on “Save” .WordPress feature
WordPress feature allows you to integrate the content of a WordPress blog or website in an application.
With this feature you have two options:
- You can create an application with only one WordPress page in which you will publish all the content of the blog or some categories you would have chosen.
- You can create an application with several wordpress pages in order to publish in each of these pages the content of one category of the blog.
Now, we are going to learn how to integrate the content of a WordPress website in an application.
Step 1:
First of all you must add a WordPress page in your application.
Click on  . This window appears:

Click on “Click here to download our WordPress plugin”. Without this plugin you cannot use this feature.
Then, go in your wordpress admin interface. This window appears:

Click on “Plugins” then “Add new”. This windows opens:

Click on “Upload”. This appears:

Click on “Choose File” and select the “app-creator.zip” document (no unzip necessary). Then, when you have selected it, click on “Install Now”, and activate it.
Step 2
Go back to your app and enter the URL of your blog in “Enter your WordPress URL”.

Once you have entered the blog’s address click on OK. Siberian will automatically find all the content of the blog and sort all the categories out. Thus you will be able to publish all the content of this blog or only one category. By default Siberian selects all the categories of the blog but obviously you can unselect the ones you don’t want in the page.
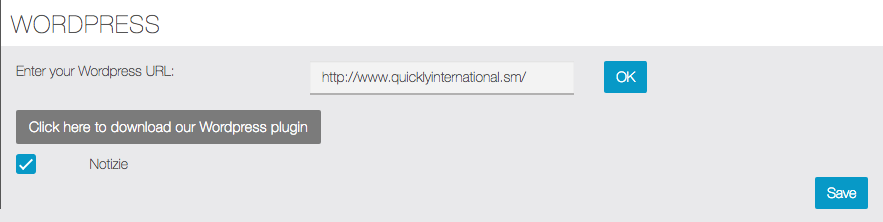
Once you have chosen your strategy and imported your wordpress content, don’t forget to click on “Save”.
You’re done!
WooCommerce
This feature will allow you to integrate natively your WooCommerce store in your application. It is different from the feature WooCommerce Link which is just a link to your store.
First of all, you have to connect to your WordPress admin panel. Then go to the WooCommerce tab > Settings.
Once in the settings, click on the “API” tab. Now enable the “REST API” just like the following picture, and save.

Now go to general Settings of WordPress > Permalinks
In the Common Settings part, you can choose whichever you want, except from “Plain” or it will not work.

Then let’s go back to WooCommerce > Settings > API. We will now create the API keys. To do this click on “Keys/Apps”. Once in the panel, click on “Add key”. Now enter a description of your API key (this is just for you to see), choose your user, and put the permissions on “Read/Write”. Once you’re done click on “Generate API Key”

You will then arrive on the following page:

Warning: you have to copy/paste the Consumer Key and the Consumer Secret somewhere now, because they won’t be available anymore when you leave this page. Otherwise you would have to revoke the key and create another one.
Now let’s go to your MAB, we’re just a few steps from launching your WooCommerce store in your app. Add the feature WooCommerce by clicking on  . This appears:
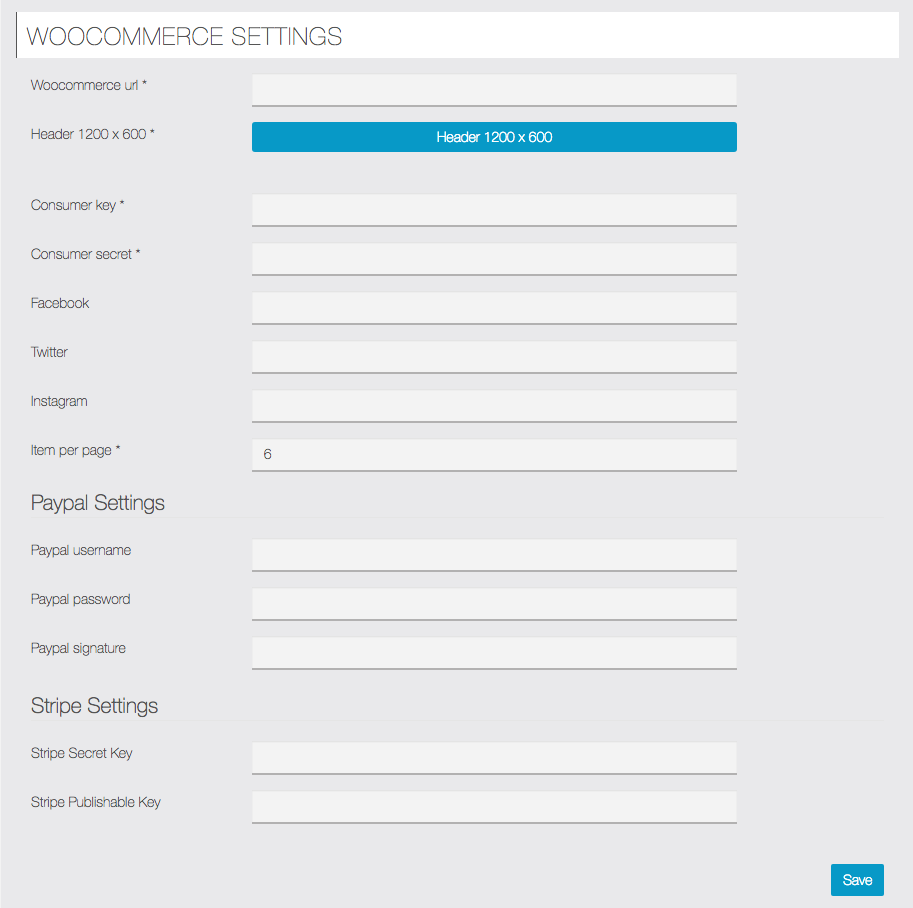
Enter the following data:
- WooCommerce url: the url of your WooCommerce store
- Header: you have to upload an image header
- Consumer Key and Consumer Secret: these are the codes you have created earlier and, obviously, copied/pasted as we have told you!
- You can also add links to your Facebook Page, Twitter account or Instagram account if you want.
- Items per page: this will set the number of items displayed in your page by default. When you scroll down, the other items will be automatically displayed.
You can also set the payment through Paypal and Stripe if you want, in order for your users to pay directly from the app. Read these articles to know how to create API keys for Paypal and Stripe:
– Paypal
– Stripe (coming soon)
If you don’t set the API keys for Paypal and Stripe, the users will be redirected to your WooCommerce store through a link and will pay on the website.
Now let’s see the result in app:
Home screen of the WooCommerce feature:

Products Page:

LINK: https://support.migastone.com/en/hrf_faq/woocommerce-store/